Installing the IRAS-24A Card
2-3
Installing the
IRAS-24A Card
After unpacking the IRAS-24A and making certain you have
all the required parts, follow these steps to install the card in
the server PC.
WARNING:
Be sure that your PC is turned off and
remains turned off until the IRAS-24A card is
installed in the server. Turning on the PC at the
wrong time may result in an electrical shock to you
and/or damage to your PC’s components.
To install the card:
1.
Turn off the PC, and remove the cover.
NOTE:
You may leave the power cord plugged in; the cord
acts as a ground for the system, protecting its
components from static electrical discharge.
2.
Choose an available PCI expansion slot in which to
install the IRAS-24A card.
3.
Unscrew and remove the slot cover panel (if present).
4.
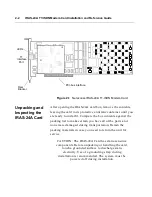
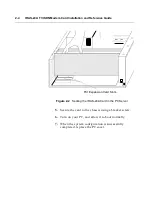
Hold the card by the edges or top corners, and gently
insert the card into the slot.
Make sure the card is seated securely, by pressing
down on the top edge as shown in Figure 2-2.
Summary of Contents for IRAS-24A w/ T1-RBS
Page 28: ...2 8 IRAS 24A T1 ISDN Modem Card Installation and Reference Guide...
Page 150: ...B 4 IRAS 24A T1 ISDN Modem Card Installation and Reference Guide...
Page 164: ...C 14 IRAS 24A T1 ISDN Modem Card Installation and Reference Guide...
Page 170: ...D 6 IRAS 24A T1 ISDN Modem Card Installation and Reference Guide...
Page 176: ...E 6 IRAS 24A T1 ISDN Modem Card Installation and Reference Guide...
Page 186: ...Index 8 IRAS 24A T1 ISDN Modem Card Installation and Reference Guide...


