background image

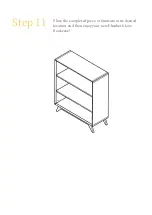
Step 11

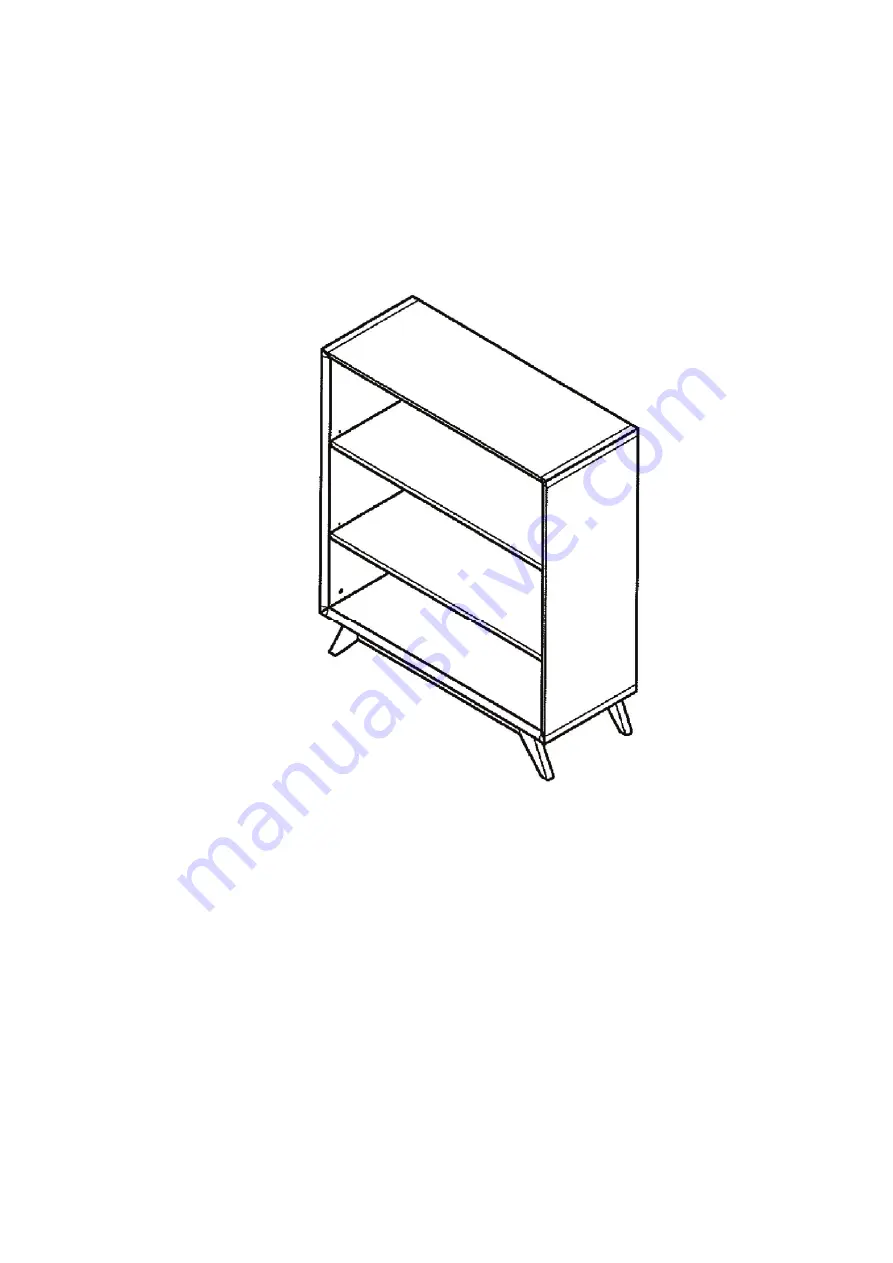
Place the completed piece of furniture in its desired 

location and then enjoy your new Elizabeth Low 

Bookcase!

Summary of Contents for Elizabeth Low Bookcase

Page 1: ...ASSEMBLY GUIDE Elizabeth Low Bookcase v2 0...

Page 2: ...hould have the separate pieces shown below Follow the steps on the next pages to assemble your new bookcase Top Panel x 1 Bottom Panel x 1 Back Panel x 1 Shelf x 2 Leg x 2 Leg x 2 Upper Support Beam x...

Page 3: ...x 2 Spec 4 x 17 K x 4 Spec 8 4 x 17 x 1 6mm L x 4 Spec 8 4 x 2 M x 4 Spec M8 x 13 N x 1 P x 26 Spec 3 5 x 15 F x 8 Spec 8 x 30 G x 8 H x 4 Spec M8 x 12 x 30 J x 4 Spec M8 x 60 D x 8 Spec 8 x 8 5 E x...

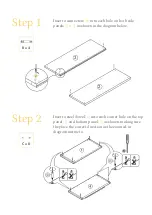
Page 4: ...both side panels 2 3 as shown in the diagram below B x 4 Step 2 C x 8 3 2 Insert a steel dowel C into each corner hole on the top panel 1 and bottom panel 4 as shown making sure they face the correct...

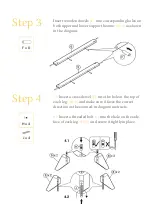
Page 5: ...shown in the diagram F x 8 Step 4 4 1 Insert a cross dowel H into the hole at the top of each leg 8 9 and make sure it faces the correct direction as the zoomed in diagram instructs 4 2 Insert a threa...

Page 6: ...ign the upper and lower support beams 5 6 with the left side panel 3 and firmly press them together Insert cam locks A into corresponding holes as shown in the diagram and tighten them with a screwdri...

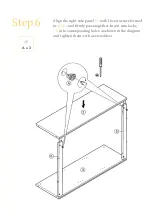
Page 7: ...6 Align the right side panel 2 with the structure formed in Step 5 and firmly press together Insert cam locks A into corresponding holes as shown in the diagram and tighten them with a screwdriver A...

Page 8: ...lign the top and bottom panel 1 4 with the structure formed in Step 6 and firmly press them together Insert grub screws D into corresponding holes on right and left side panels as shown in diagram bel...

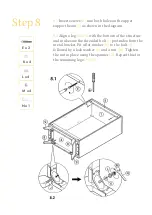
Page 9: ...n a leg 8 or 9 with the bottom of the structure and make sure the threaded bolt J protrudes from the metal bracket Fit a flat washer K to the bolt J followed by a lock washer L and a nut M Tighten the...

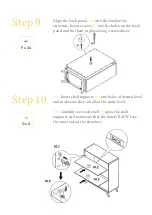
Page 10: ...ck panel and fix them in place using a screwdriver Step 10 10 1 Insert shelf supports G into holes of desired level and make sure they are all on the same level 10 2 Carefully rest each shelf 7 upon t...

Page 11: ...Step 11 Place the completed piece of furniture in its desired location and then enjoy your new Elizabeth Low Bookcase...

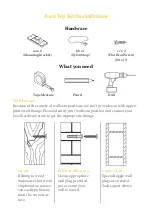
Page 12: ...Anti Tip Kit Installation Hardware aa x 2 Mounting Bracket Tape Measure Pencil Drill bb x 1 Nylon Strap cc x 2 Flat Head Screw 4 x 17 Wood If fixing to wood make sure that it isn t chipboard as screws...

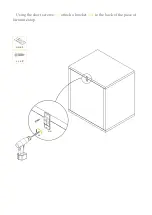
Page 13: ...1 Using the short screws cc attach a bracket aa to the back of the piece of furniture s top aa x 1 cc x 2 aa cc...

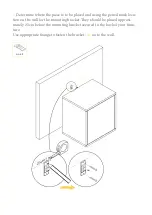
Page 14: ...g the pencil mark loca tion on the wall for the mounting bracket They should be placed approxi mately 2 5cm below the mounting bracket secured to the back of your furni ture Use appropriate fixings to...

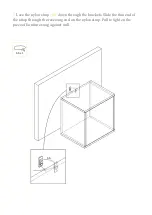
Page 15: ...3 Lace the nylon strap bb down through the brackets Slide the thin end of the strap through the receiving end on the nylon strap Pull to tighten the piece of furniture snug against wall bb x 1 bb...

Reviews: