Tip Kit Instructions
Notice: To prevent injury and property damage from unexpected tipping of furniture,
we highly recommend installation of the anti-tip kit included with this project.
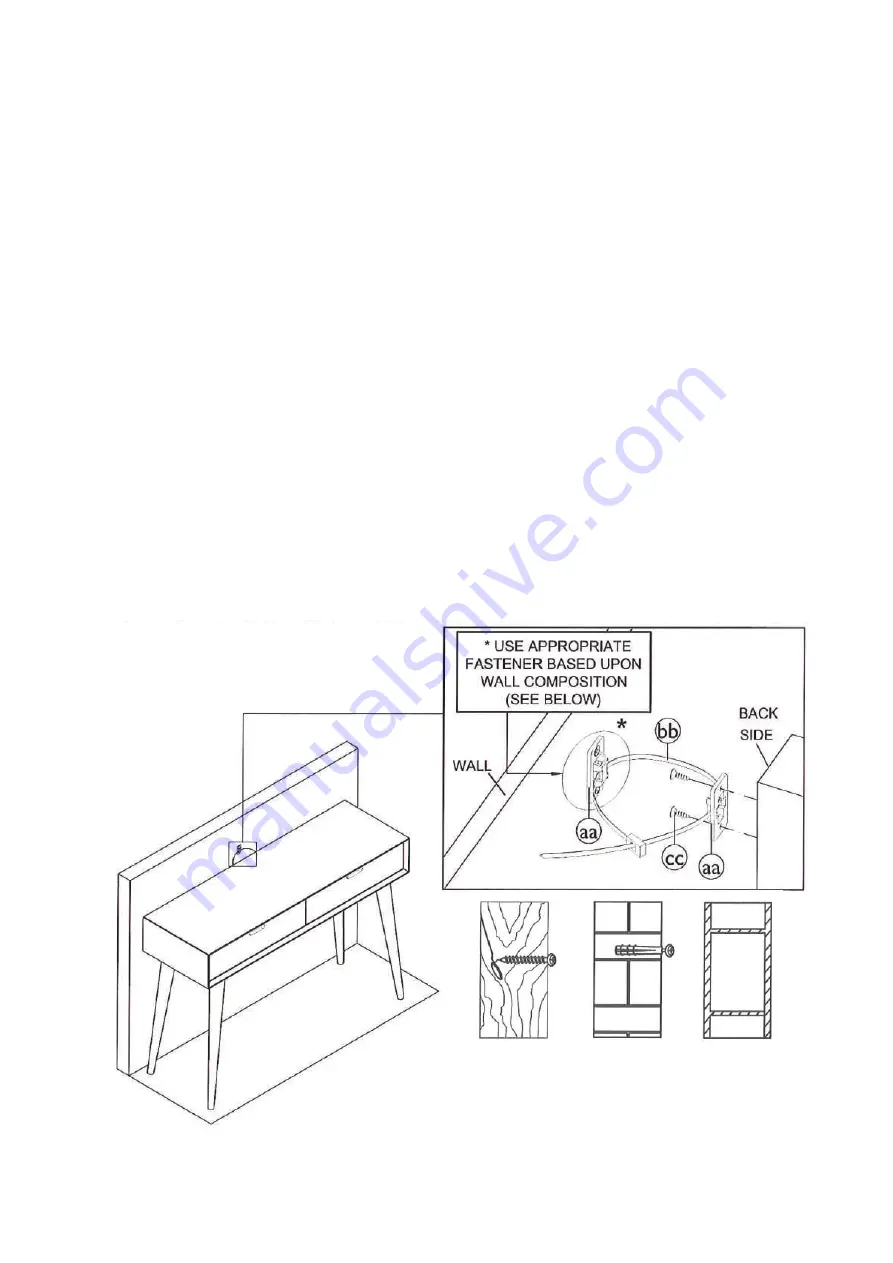
Attaching furniture to wall with anti-tip kits.
1.
2.
3.
4.
5.
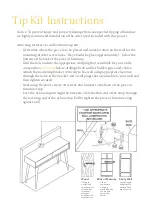
Determine where the piece is to be placed and mark location on the wall for the
mounting bracket screw holes. They should be place approximately 1” below the
bottom of the back of the piece of furniture.
Drill the hole and use the appropriate wall plug that is suitable for your walls
composition.
Warning
:
before drilling check wall for hidden pipes and cables.
Attach the mounting bracket vertically to the wall using appropriate fastener,
through the holes in the bracket and 2 wall plugs that are suitable to your wall and
then tighten securely.
Next using the short screws attach the 2nd bracket to the back of the piece of
furniture’s top.
Lace the nylon strap through the brackets. Slide the thin end of the strap through
the receiving end of the nylon strap. Pull to tighten the piece of furniture snug
against wall.
Wood
Brick or Masonry Cavity Wall
If fixing to
wood make
sure that is isn’t
chipboard as
screws can
easily pull
away from the
core structure.
Use an
appropriate
wall plug
provided when
you are sure
your wall is
sound.
Special toggle
wall plugs are
needed. Seek
expert advice.


