background image

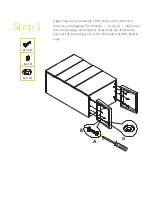
Step 1

A x 10

B x 10

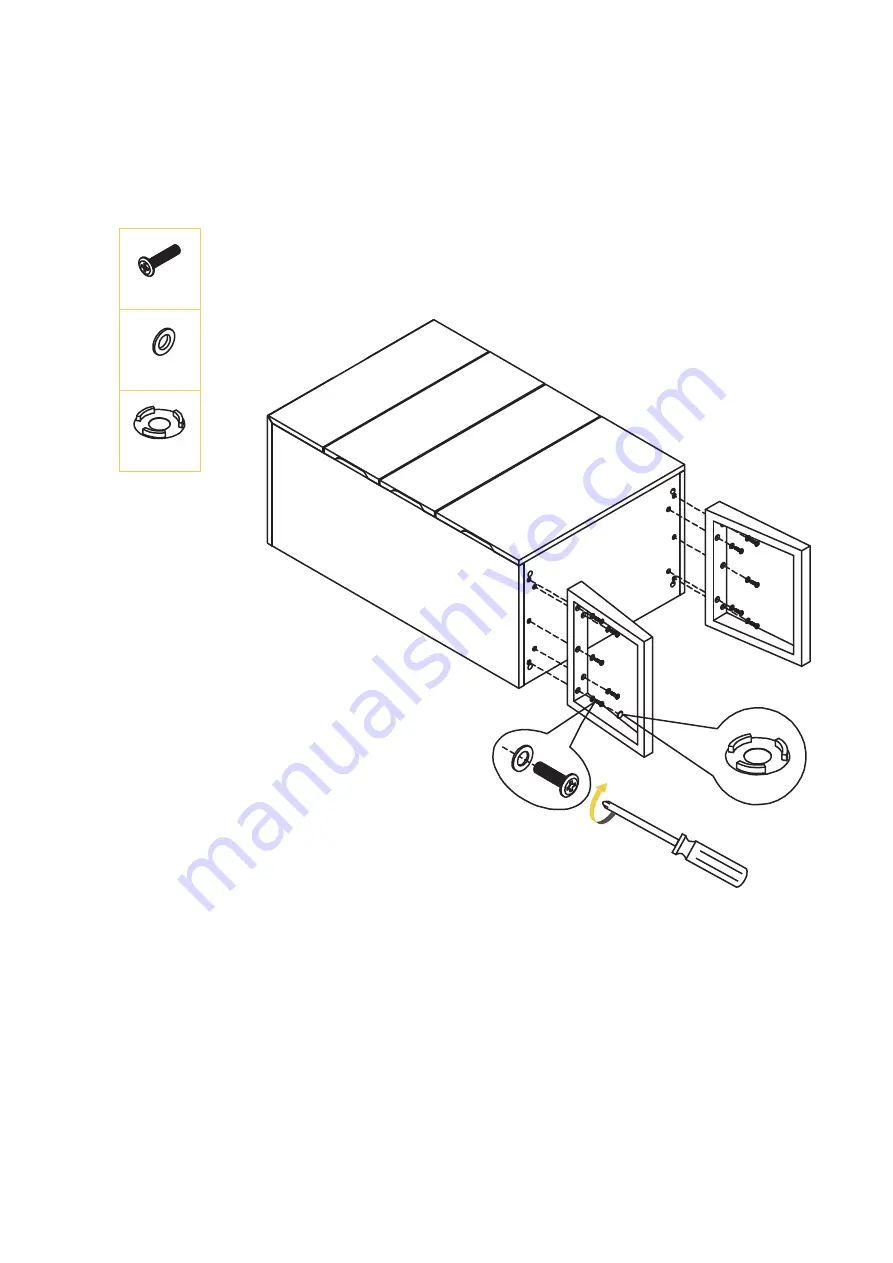
Align a leg to the underside of the body so that the screw 

holes are overlapping. Fit a washer 

(B) 

to a bolt 

(A)

 and screw 

into a hole using a screwdriver. Repeat for the other holes 

then for the second leg. Cover the bolt holes with the plastic 

caps 

(G)

.

B

A

G

G x 10

Summary of Contents for Nancy Tall Boy

Page 1: ...ASSEMBLY GUIDE Nancy Tall Boy v1 0...

Page 2: ...e pieces shown below Follow the steps on the next pages to assemble your new storage Hardware What you need Legs x 2 Body x 1 A x 10 Bolt Spec M6xL32 B x 10 Washer Spec 14x8 C x 1 Mounting Plate D x 2...

Page 3: ...underside of the body so that the screw holes are overlapping Fit a washer B to a bolt A and screw into a hole using a screwdriver Repeat for the other holes then for the second leg Cover the bolt hol...

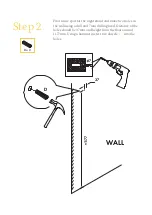
Page 4: ...or the night stand and make two holes in the wall using a drill and 7mm drilling head Distance of the holes should be 37mm and height from the floor around 1177mm Using a hammer instert two dowels D i...

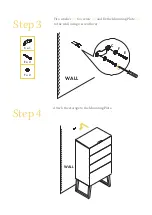
Page 5: ...Step 4 Attach the storage to the Mounting Plate C F E WALL WALL Step 3 C x 1 E x 2 F x 2 Fit a washer F to a screw E and fix the Mounting Plate C to the wall using a screwdriver...

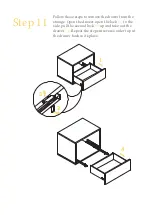
Page 6: ...Step 5 Align the drawer slides to the corresponding holes on the side walls Secure into place using small screws H H x 6 Step 6 Continue using the screws to secure the slides H x 4 H H H...

Page 7: ...Step 7 Align the end hole on the drawer with the hook on the slide and insert the drawer halfway into the cabinet Step 8 Pull the side lock out...

Page 8: ...Step 10 Pull back the side lock to fix the drawer on the slide and close the drawer Step 9 Alight the vertical knob on the slide with the hole on the drawer and lift the drawer down...

Page 9: ...steps to remove the drawer from the storage Open the drawer open the lock 2 to the side pull the second lock 3 up and take out the drawer 4 Repeat the steps in reverse order to put the drawer back in...

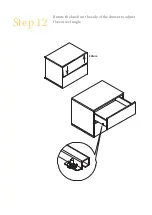
Page 10: ...Step 12 2mm Rotate the knob on the side of the drawer to adjust the correct angle...

Page 11: ...Step 12 Place the storage upright on a level surface Enjoy your new storage...

Reviews: