background image

User Recommendation

Your furniture purchase from Brosa preserves the characteristics of 
natural beauty from its original tree. For example, the ‘medullary ray’ 
(which can appear on oak furniture) is a mark of good quality timber. 
Wood veneers, as thin slices of wood, also will show distinctive 
patterns on surfaces such as table tops and drawer fronts. All timber 
and veneer surfaces will change colour and mellow over time. So, new 
furniture may initially vary in shade from items previously purchased.
With that in mind, the following tips can help prolong the life of your 
Brosa veneer furniture to help them look beautiful for years to come.

Assembly
1. Assemble furniture using our Assembly Guides. You can find them at 
support.brosa.com
2. Do not dispose of any packaging or contents of the shipping carton 
until assembly is completed to avoid accidentally discarding small 
parts or hardware.
3. Furniture can be dangerous if incorrectly assembled. Assembly 
should be carried out by competent people.

Placement 
1. This product is for indoor use only.
2. Keep furniture on flat, level ground. Placing it unevenly may cause 
deformation.
3. Do not place heavy objects on furniture.
4. When repositioning furniture always lift, don’t drag.
5. Keep sharp objects away from furniture. They can cause scratches 
and splinters to the surface.
6. Do not stack furniture.

Cleaning and Maintenance
1. Dust with a clean, damp, lint-free cloth. Frequent dusting will remove 
abrasive build-up, which can damage the finish over time.
2. Do not use a very wet cloth or allow any liquid to come into contact 
with the veneers for a long period of time, as this can permanently 
damage the surface. Wipe up spills immediately.

Summary of Contents for Olsen Entertainment Unit

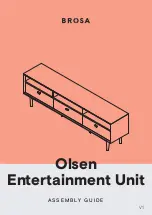
Page 1: ...Olsen Entertainment Unit A S S E M B LY G U I D E V1...

Page 2: ...duct Avoid loose screws Tighten xtures every few months Assembly requires 2 people It s always easier with a friend Contact our support online or call 1300 027 672 Check the assembly guide for require...

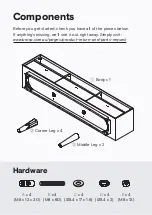
Page 3: ...ieces below If anything s missing we ll sort it out right away Simply visit www brosa com au pages product return and parts request Hardware A x 4 M8 x 12 x 30 C x 4 8 4 x 17 x 1 6 D x 4 8 4 x 2 E x 4...

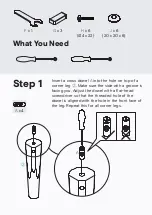
Page 4: ...Make sure the side with a groove is facing you Adjust the dowel with a at head screwdriver so that the threaded hole of the dowel is aligned with the hole in the front face of the leg Repeat this for...

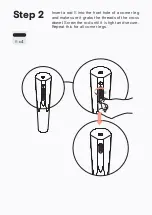
Page 5: ...Insert a rod B into the front hole of a corner leg and make sure it grabs the threads of the cross dowel Screw the rod until it is tight and secure Repeat this for all corner legs Step 2 B x 4 B...

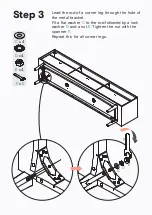
Page 6: ...ner leg through the hole of the metal bracket Fit a at washer C to the rod followed by a lock washer D and a nut E Tighten the nut with the spanner F Repeat this for all corner legs Step 3 C x 4 D x 4...

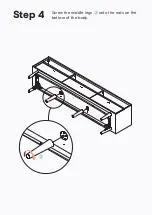
Page 7: ...Screw the middle legs onto the rods on the bottom of the body Step 4...

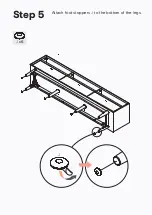
Page 8: ...Attach foot stoppers J to the bottom of the legs Step 5 J x 6 J...

Page 9: ...Slide out the drawers Attach the handles G to the drawer front panels with the bolts H and a Phillips head screwdriver Step 6 G x 3 H x 6 H G...

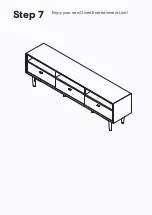
Page 10: ...Enjoy your new Olsen Entertainment Unit Step 7...

Page 11: ...not dispose of any packaging or contents of the shipping carton until assembly is completed to avoid accidentally discarding small parts or hardware 3 Furniture can be dangerous if incorrectly assemb...

Page 12: ...d placing furniture next to heat sources such as radiators or open ames Severe or sudden changes in temperature and humidity can cause warping cracking or splitting 9 Excessive exposure to sunlight ca...

Reviews: