Hotspur 5 & 9 Issue 2 December 2017
25
Lighting the Stove
Curing
On initial firing you will notice a very pungent odour, this is caused through the curing of
the paint, we recommend starting with short burning sessions (with smaller quantities of
fuel) and build up gradually to allow the components of the stove to settle. Opening
doors and windows will allow the paint curing odour to dissipate and to allow ventilation
into the room. Curing times can vary but typically should take around 8-12 hours
(operation at high output) to complete.
Please take care not to touch any hot surface
of the stove during the curing process as this will result in a permanent mark.
Kindling
Stage1
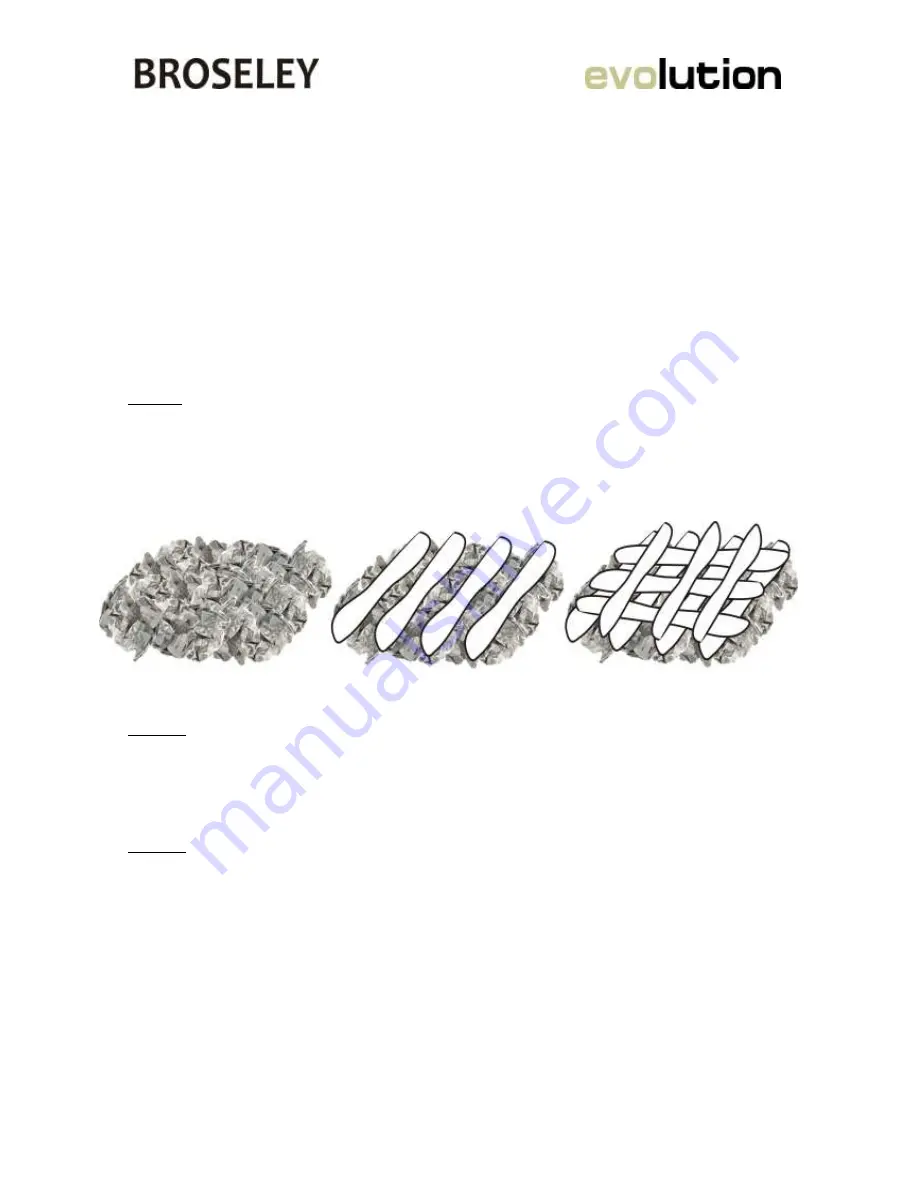
With the Primary and Secondary air controls in the maximum position and the door
open, start your fire using scrunched up balls of newspaper. Form a bed on the grate
using the newspaper, then add a generous amount of dry kindling in a criss cross
pattern (as shown below).
Stage 2
Ignite the paper underneath using a match or suitable fire-lighter. Allow the paper and
kindling to burn until it reduces down into hot embers. If the fire is dying during this
stage the door can be closed but not latched leaving a small gap for extra combustion
air.
Stage 3
Add another generous load of dry kindling and allow to burn down.
It may be necessary to repeat stage 3 if the chimney is cold or if you find you have
smoke entering the room. This stage is vital for getting heat into the chimney which will
create the draw that takes the smoke away, we would expect this stage to take between
15-20 minutes.
It is critical that you do not leave the stove during the entire lighting and kindling
stage.
See Burning wood and Burning Coal sections for the next steps in starting a new
fire.


