USERS GUIDE
Lighting the stove
1 Reach through the aperture in the rear access door and turn on the gas by
turning the switch on the regulator upwards.
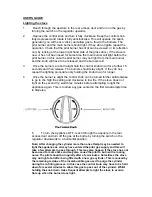
2 Depress the control knob and turn it fully clockwise. Keep the control knob
fully depressed and rotate it fully anticlockwise. This will operate the spark
generator (you will hear a ‘click’) and allow gas to flow to the burners. The
pilot burner and the main burner should light. If they do not ignite repeat the
operation. Check that the pilot burner has lit (it can be viewed, or its reflection
can, by looking at the lower right hand side of the glass door.) If the stove is
new or has not been used for some time the main burner will light before the
pilot burner. In this case the pilot burner may not light from the main burner
and the knob will have to be released and the burners relit.
3 Once the burners are both alight hold the control knob down for a further 15
seconds and then release. The burners should stay alight. If they do not,
repeat the lighting procedure only holding the knob down for longer.
4 Once the burner is alight the control knob can be turned further anticlockwise
to go to the high fire setting and clockwise to low fire. If the stove does not
light on the second try, wait three minutes before attempting to light the
appliance again. This is to allow any gas vented in the first two attempts time
to disperse.
5 To turn the appliance OFF, reach through the aperture in the rear
access door and turn off the gas at the bottle by turning the switch on the
regulator downwards to a horizontal position.
Note; After changing the cylinder more than one attempt may be needed to
light the appliance as air may have entered the pilot gas supply and this will
take a few attempts to pass through. This may also happen if the stove has not
been used for some time and may also cause the pilot to burn with a roaring
noise. The pilot should burn quietly after a few minutes. Sometimes the stove
may not light at all after being fitted with a new gas cylinder. This is caused by
the remaining residue of the incombustible gas used to purge the cylinder
during the re-filling process. In this case the control knob may have to be held
down for several minutes to allow this gas to pass out of the cylinder. Whilst
holding the knob down make frequent attempts to light the stove to avoid a
flare up when the burner does light.
Summary of Contents for THURCROFT
Page 10: ......


