E
- pusher
F - falcate knife
G - kneading attachment
H - whisking attachment
I - grater two-sides coarse
J - grater two-sided tugging – coarse / fine
K - disc two-sided slicing
L - disc for chips one-sided
M - box
III. PREPARATION FOR USE
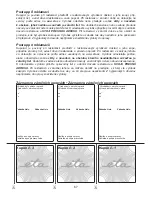
(pic. 2, 3, 4)
Remove all packaging material, remove the blender and accessory. Remove all adhesive
foils, stickers or paper from the appliance. Wash all parts which will come in touch with
food in hot water with soap, rinse them thoroughly with clean water and wipe dry or let dry
before first use. Select the amount of processed ingredients so that the maximum content
of the container does not exceed the mark. It is necessary to divide bigger amounts
of processed ingredients into several portions and check the contents of the container
continuously. We recommend interrupting work occasionally, turning off the appliance and
removing ingredients which have stuck or plugged the accessory or walls of containers,
blender and lid (see par.
I. SAFETY PRECAUTION
). There is a speed scale depicted
on the housing of the blender. for use of individual attachments follow pic. 6. Times of
preparation (processing) of ingredients are only approximate and depend on amount, type
and quality of substances used and range in seconds to minutes.
Attaching and removing the container (B)
Put the container on the propulsion shaft
A6
so that it slides all the way down, arrest it
by turning dextral till a click (the safety switch will release at the same time).
Pay special
attention to this operation
. Remove the container reversely.
Attaching and removing the lid (C)
Remove and attach the lid only when the button
A1
is in
OFF
position (the light is off). Put
the lid on the container
B
so that the protrusion on its edge fits exactly into the protruding
part on the edge of the container. The mark on the lid must be above the handle. Turn the
lid in a direction marked by an arrow till the arrest protrusion
C1
clicks into the appliance‘s
safety switch
A4
.
Pay special attention to this operation
. The lid is now secured in a
proper position and the propulsion unit A can work. Remove the container reversely.
Feeding opening (C2), pusher (E)
You can add liquids or solid substances through the feeding opening B during operation
of the propulsion unit A. Use the pusher e to push the ingredients in the feeding opening.
Close the filled opening
C2
with a pusher.
Attaching and removing the propulsion cover (A10)
Remove and attach the cover only when the button
A1
is in
OFF
position (the light is off).
Put the cover on the propulsion unit
A
and arrest it with a dextral movement till it clicks
(the safety switch
A5
will release at the same time). Pay special attention to this operation.
Remove the container reversely.
61
GB

