SEWING
Se
w
ing
B
as
ic
s
Sewing
S-5
S
1
a
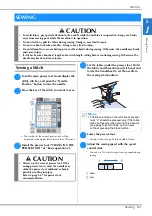
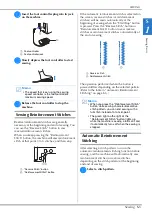
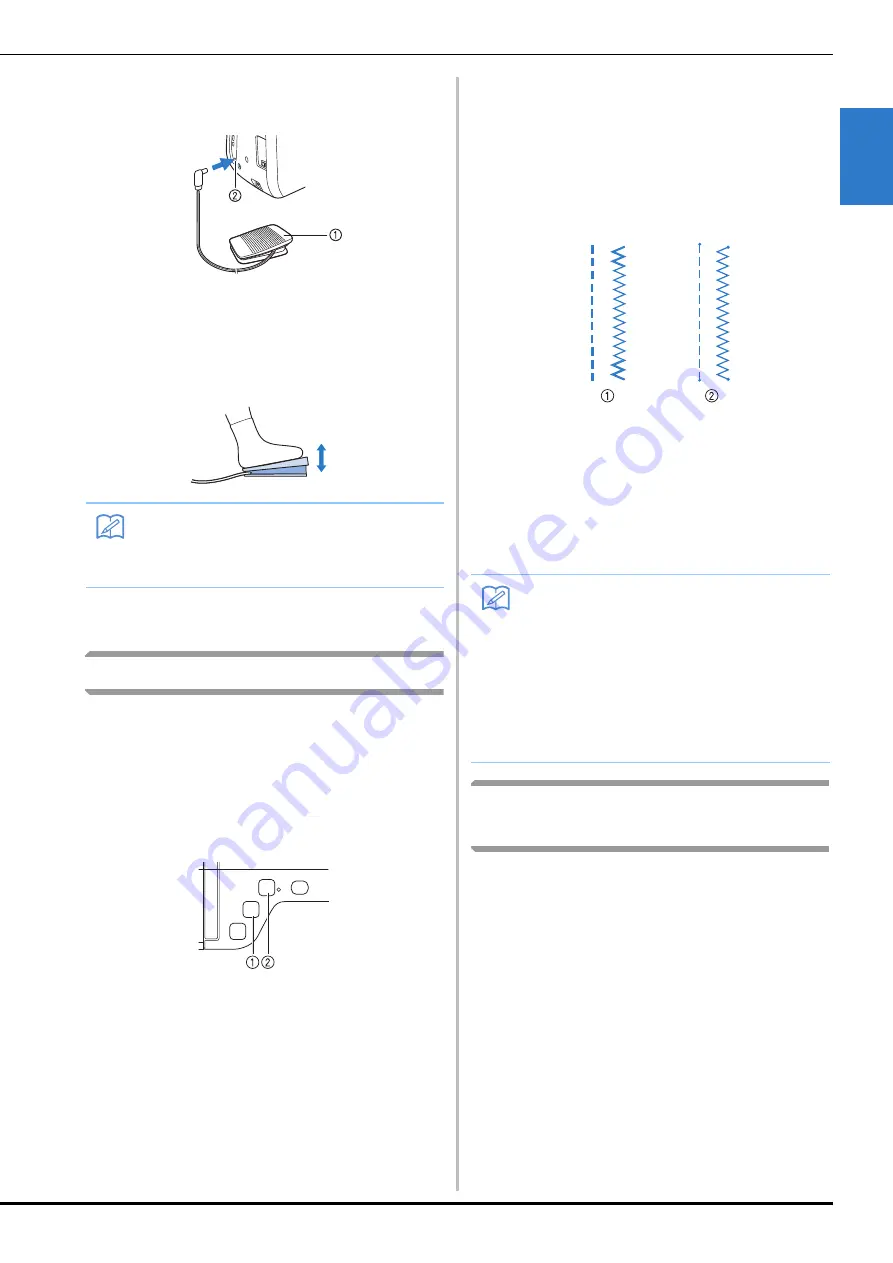
Insert the foot controller plug into its jack
on the machine.
a
Foot controller
b
Foot controller jack
b
Slowly depress the foot controller to start
sewing.
c
Release the foot controller to stop the
machine.
Sewing Reinforcement Stitches
Reverse/reinforcement stitches are generally
necessary at the beginning and end of sewing. You
can use the “Reverse Stitch” button to sew
reverse/reinforcement stitches.
When you keep pressing the “Reinforcement
Stitch” button, the machine will sew reinforcement
stitch at that point 3 to 5 stitches, and then stop.
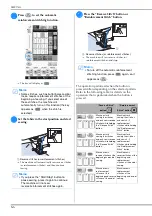
a
“Reverse Stitch” button
b
“Reinforcement Stitch” button
If the automatic reinforcement stitch is selected on
the screen, reverse stitches (or reinforcement
stitches) will be sewn automatically at the
beginning of sewing when the “Start/Stop” button
is pressed. Press the “Reverse Stitch” button or
“Reinforcement Stitch” button to sew reverse
stitches or reinforcement stitches automatically at
the end of sewing.
a
Reverse stitch
b
Reinforcement stitch
The operation performed when the button is
pressed differs depending on the selected pattern.
(Refer to the table in “Automatic Reinforcement
Stitching” on page S-5.)
Automatic Reinforcement
Stitching
After selecting a stitch pattern, turn on the
automatic reinforcement stitching function before
sewing, and the machine will automatically sew
reinforcement stitches (or reverse stitches,
depending on the stitch pattern) at the beginning
and end of sewing.
a
Select a stitch pattern.
Memo
• The speed that is set using the sewing
speed controller is the foot controller’s
maximum sewing speed.
Memo
• When you press the “Reinforcement Stitch”
button while sewing character/decorative
stitch pattern, you can end sewing with a
full stitch instead of at a mid-point.
• The green light on the right of the
“Reinforcement Stitch” button lights up
while the machine is sewing a full motif, and
it automatically turns off when the sewing is
stopped.
Summary of Contents for 882-C40
Page 107: ...USEFUL FUNCTIONS Sewing Basics Sewing S 19 S 1 ...
Page 163: ...STITCH SETTING CHART Utility Stitches Sewing S 75 S 2 ...
Page 200: ...USING STORED CUSTOM STITCHES S 112 ...
Page 218: ...ATTACHING THE EMBROIDERY FRAME E 18 b Pull the embroidery frame toward you ...
Page 255: ...EMBROIDERY APPLICATIONS Embroidery Embroidering E 55 E 1 ...
Page 286: ...USING THE MEMORY FUNCTION E 86 ...
Page 329: ......
Page 330: ......
Page 331: ......

