SEWING THE STITCHES
92
Scallop Stitches
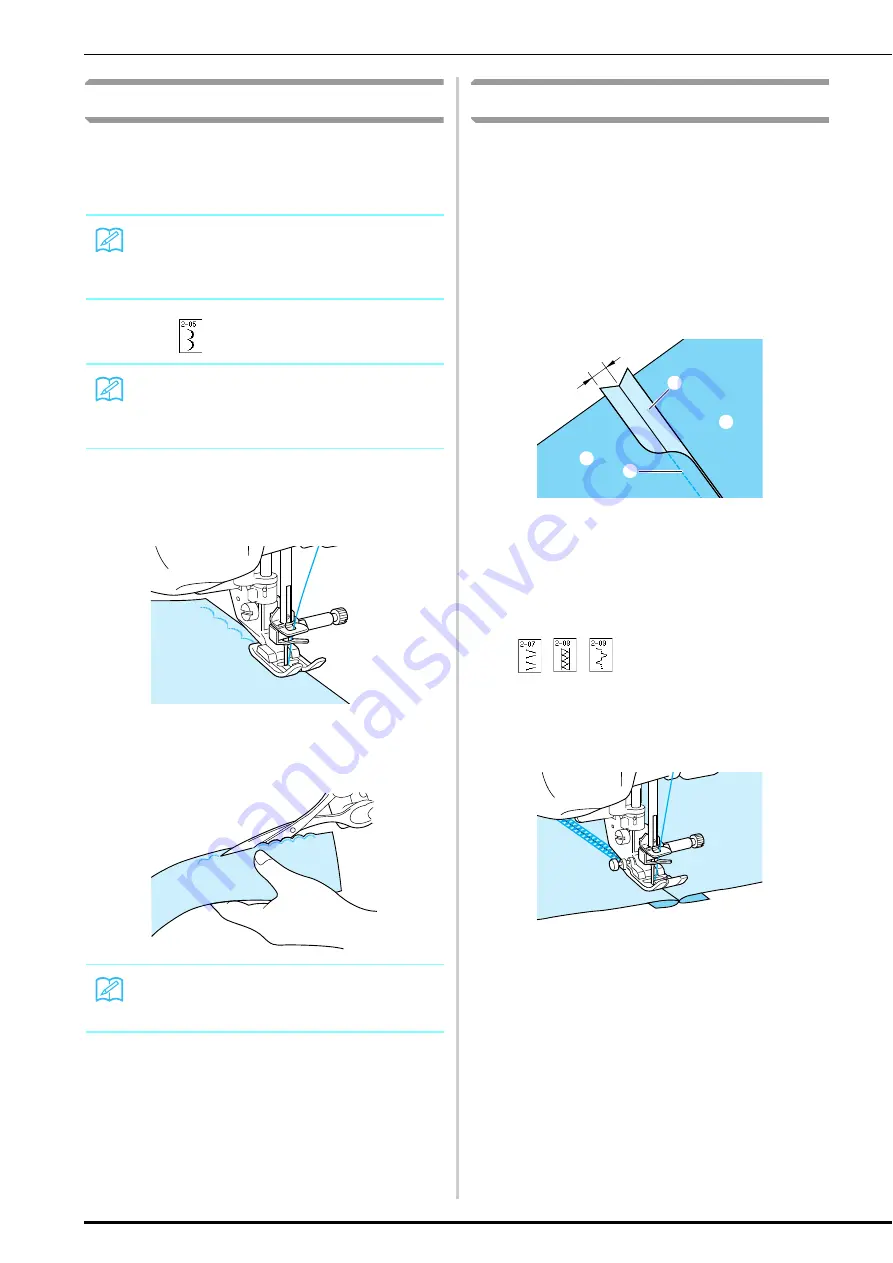
This wave-shaped satin stitch is called the scallop
stitch. Use this stitch to decorate the edges of
blouse collars and handkerchiefs or use it as a hem
accent.
a
Select .
b
Attach presser foot “N”. Sew scallop
stitches along the edge of the fabric.
*
Do not sew directly on the edge of the fabric.
c
Trim along the seam, making sure not to cut
the stitches.
Top Stitching
For a decorative look called “Crazy Quilting”, the
following stitches can be sewn on top of a pressed
seam allowance.
a
Select a straight stitch and attach presser
foot “J”.
b
With the right sides facing each other, sew
two pieces of fabric together, and then
press open the seam allowance.
a
Straight stitch
b
Seam margins
c
6.5 mm (approx. 1/4 inch)
d
Wrong side
c
Select a stitch for top stitching.
d
Place the fabric right side up in the
machine, and center the presser foot over
the seam when sewing.
a
Right side of fabric
Memo
A temporary spray adhesive may be neces-
sary for lightweight fabrics. Test sew
the fabric before sewing a project.
Memo
For details on each stitch, refer to the
“STITCH SETTING CHART” at the end of this
manual.
Memo
Use a seam sealant to secure the edges of the
scallop stitches.
c
b
a
d
d
Summary of Contents for 882-S85
Page 2: ......
Page 7: ...v ...
Page 12: ...Contents x ...
Page 20: ...NAMES OF MACHINE PARTS AND THEIR FUNCTIONS 8 ...
Page 54: ...CHANGING THE NEEDLE 42 ...
Page 68: ...USEFUL FUNCTIONS 56 ...
Page 126: ...SEWING THE STITCHES 114 ...
Page 208: ...EMBROIDERY APPLICATIONS 196 ...
Page 236: ...USING THE MEMORY FUNCTION 224 ...
Page 264: ...UPGRADING YOUR MACHINE S SOFTWARE 252 ...
Page 275: ......
Page 276: ...XF3896 001 English 882 S85 Printed in Taiwan ...


