


ATTACHING THE EMBROIDERY FRAME
162
ATTACHING THE EMBROIDERY FRAME
a
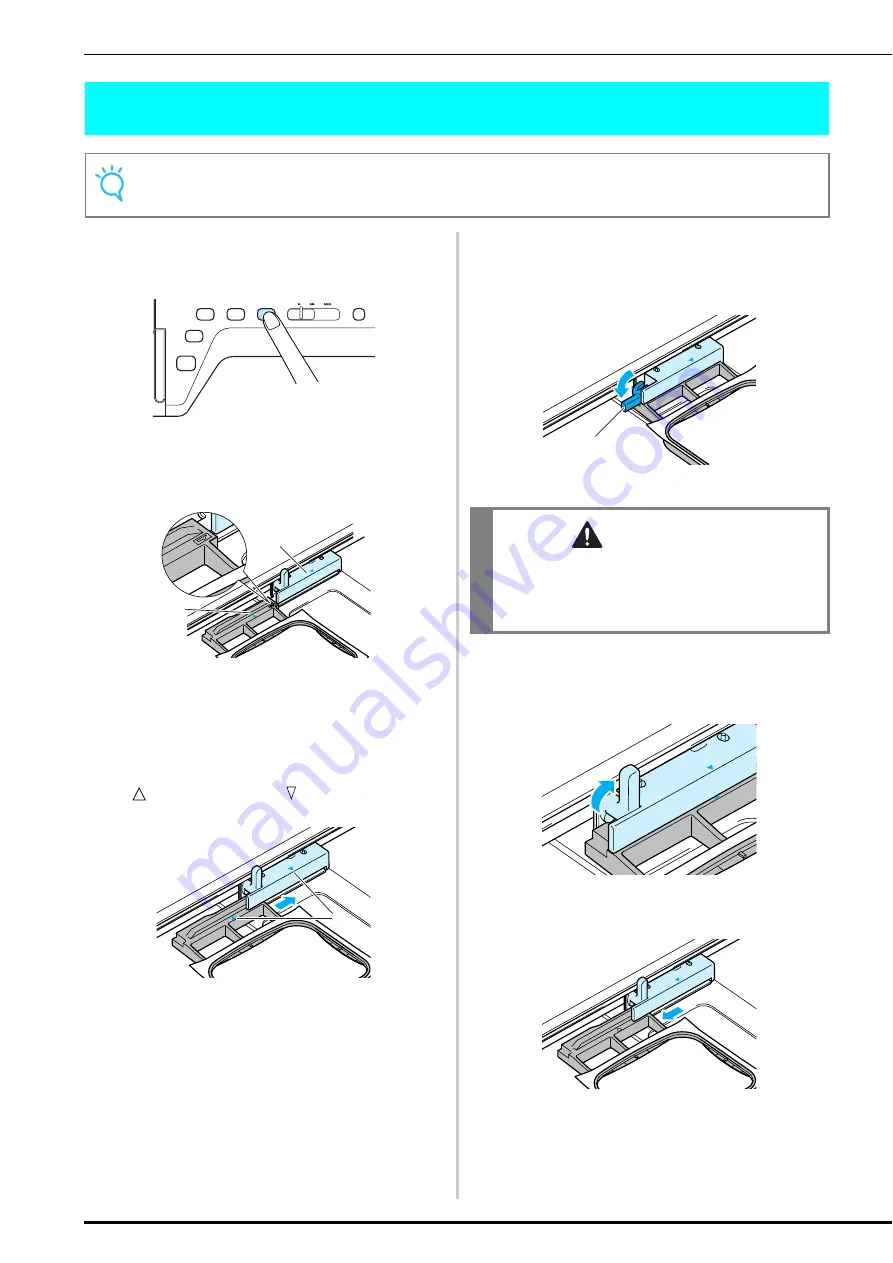
Press the “Presser Foot Lifter” button to
raise the presser foot.
b
Align the embroidery frame guide with the
right edge of the embroidery frame holder.
a
Embroidery frame holder
b
Embroidery frame guide
c
Slide the embroidery frame into the holder,
making sure to align the embroidery frame’s
with the holder’s
.
a
Arrow mark
d
Lower the frame-securing lever to be level
with the frame to secure the embroidery
frame in the embroidery frame holder.
a
Frame-securing lever
■
Removing the Embroidery Frame
a
Raise the frame-securing lever.
b
Pull the embroidery frame toward you.
Note
Wind and insert the bobbin before attaching the embroidery frame.
a
b
a
CAUTION
• If the frame-securing lever is not lowered, the
embroidery pattern may not sew out correctly
or the presser foot may strike the embroidery
frame and cause injury.
a
Summary of Contents for 882-S85
Page 2: ......
Page 7: ...v ...
Page 12: ...Contents x ...
Page 20: ...NAMES OF MACHINE PARTS AND THEIR FUNCTIONS 8 ...
Page 54: ...CHANGING THE NEEDLE 42 ...
Page 68: ...USEFUL FUNCTIONS 56 ...
Page 126: ...SEWING THE STITCHES 114 ...
Page 208: ...EMBROIDERY APPLICATIONS 196 ...
Page 236: ...USING THE MEMORY FUNCTION 224 ...
Page 264: ...UPGRADING YOUR MACHINE S SOFTWARE 252 ...
Page 275: ......
Page 276: ...XF3896 001 English 882 S85 Printed in Taiwan ...


