CHANGING THE NEEDLE
40
d
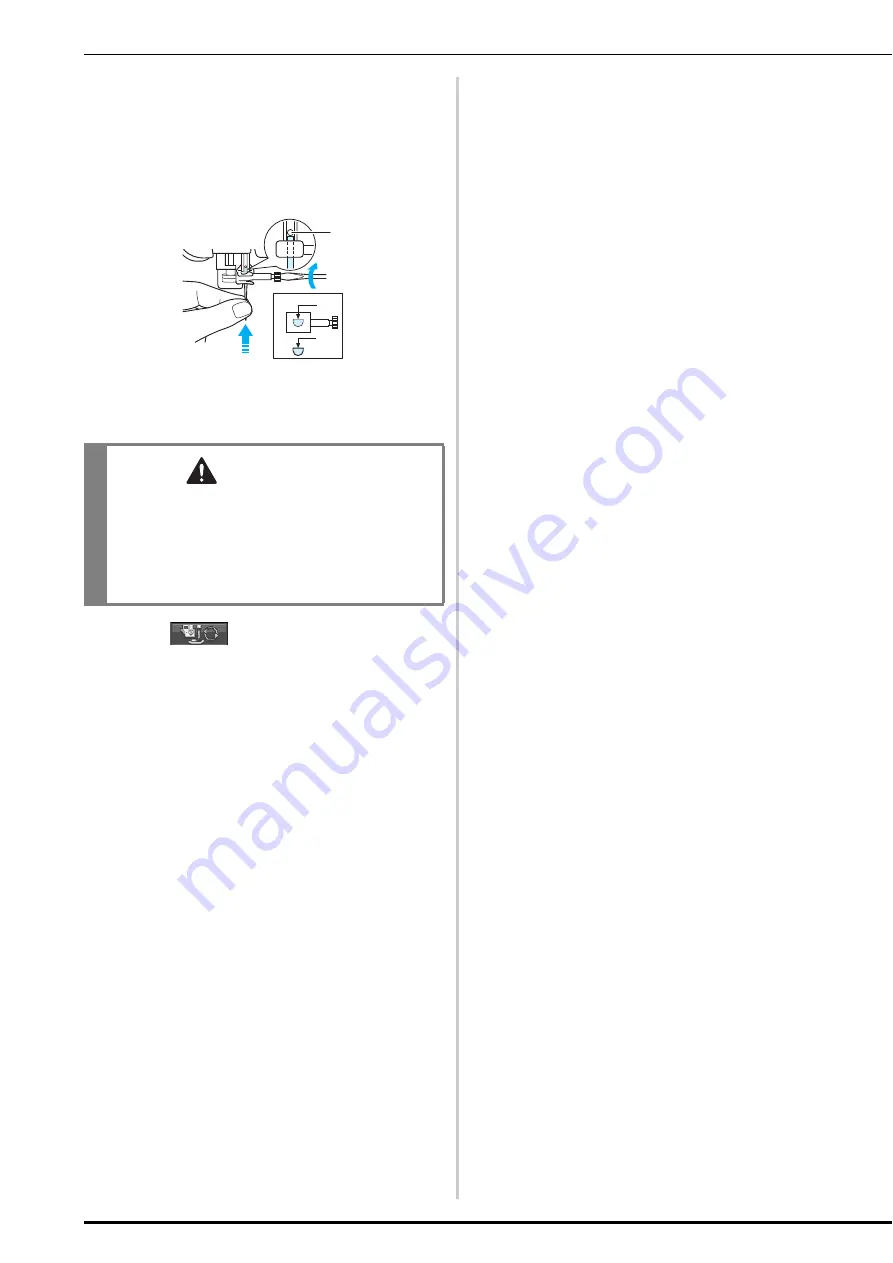
With the flat side of the needle facing the
back, insert the new needle all the way to
the top of the needle stopper (viewing
window) in the needle clamp. Use a
screwdriver to securely tighten the needle
clamp screw.
a
Needle stopper
b
Hole for setting the needle
c
Flat side of needle
e
Press
to unlock all keys and
buttons.
CAUTION
• Be sure to push in the needle until it touches
the stopper, and securely tighten the needle
clamp screw with a screwdriver. If the needle
is not completely inserted or the needle clamp
screw is loose, the needle may break or the
machine may be damaged.
a
c
b
Summary of Contents for 882-S85
Page 2: ......
Page 7: ...v ...
Page 12: ...Contents x ...
Page 20: ...NAMES OF MACHINE PARTS AND THEIR FUNCTIONS 8 ...
Page 54: ...CHANGING THE NEEDLE 42 ...
Page 68: ...USEFUL FUNCTIONS 56 ...
Page 126: ...SEWING THE STITCHES 114 ...
Page 208: ...EMBROIDERY APPLICATIONS 196 ...
Page 236: ...USING THE MEMORY FUNCTION 224 ...
Page 264: ...UPGRADING YOUR MACHINE S SOFTWARE 252 ...
Page 275: ......
Page 276: ...XF3896 001 English 882 S85 Printed in Taiwan ...


