SEWING THE STITCHES
U
tili
ty
S
tit
ch
es
77
3
d
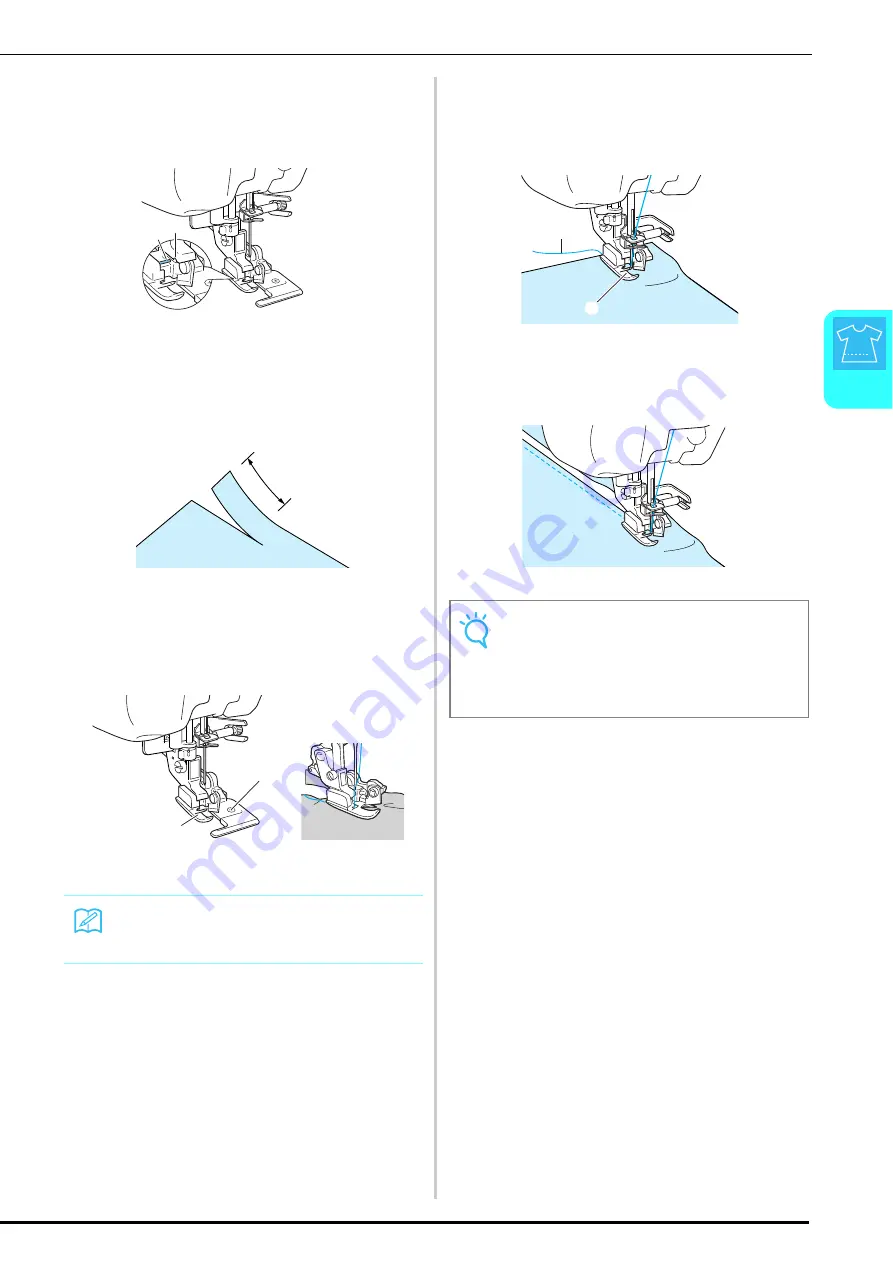
Position the side cutter so that the side
cutter pin is aligned with the notch in the
presser foot holder, and then lower the
presser foot.
a
Notch in presser foot holder
b
Pin
→
The side cutter is attached.
e
Make a cut of approximately 20 mm
(approx. 3/4 inch) in the fabric.
a
20 mm (approx. 3/4 inch)
f
Position the fabric so that the right side of
the cut is on top of the guide plate and the
left side of the cut is underneath the presser
foot.
a
Guide plate (lower knife)
b
Presser foot
g
Thread the needle manually and pull out a
long section of the upper thread. Pass it
below the presser foot and pull it out in the
fabric feed direction.
a
Presser foot
b
Upper thread
h
Start sewing.
→
A seam allowance is cut while the stitching is sewn.
Memo
If the fabric is not positioned correctly, the
fabric will not be cut.
a
b
a
a
b
Note
If the width has been adjusted, turn the hand-
wheel by hand to check that the needle does
not touch the side cutter. If the needle touches
the side cutter, it might cause the needle to
break.
b
a
Summary of Contents for 882-S85
Page 2: ......
Page 7: ...v ...
Page 12: ...Contents x ...
Page 20: ...NAMES OF MACHINE PARTS AND THEIR FUNCTIONS 8 ...
Page 54: ...CHANGING THE NEEDLE 42 ...
Page 68: ...USEFUL FUNCTIONS 56 ...
Page 126: ...SEWING THE STITCHES 114 ...
Page 208: ...EMBROIDERY APPLICATIONS 196 ...
Page 236: ...USING THE MEMORY FUNCTION 224 ...
Page 264: ...UPGRADING YOUR MACHINE S SOFTWARE 252 ...
Page 275: ......
Page 276: ...XF3896 001 English 882 S85 Printed in Taiwan ...


