144
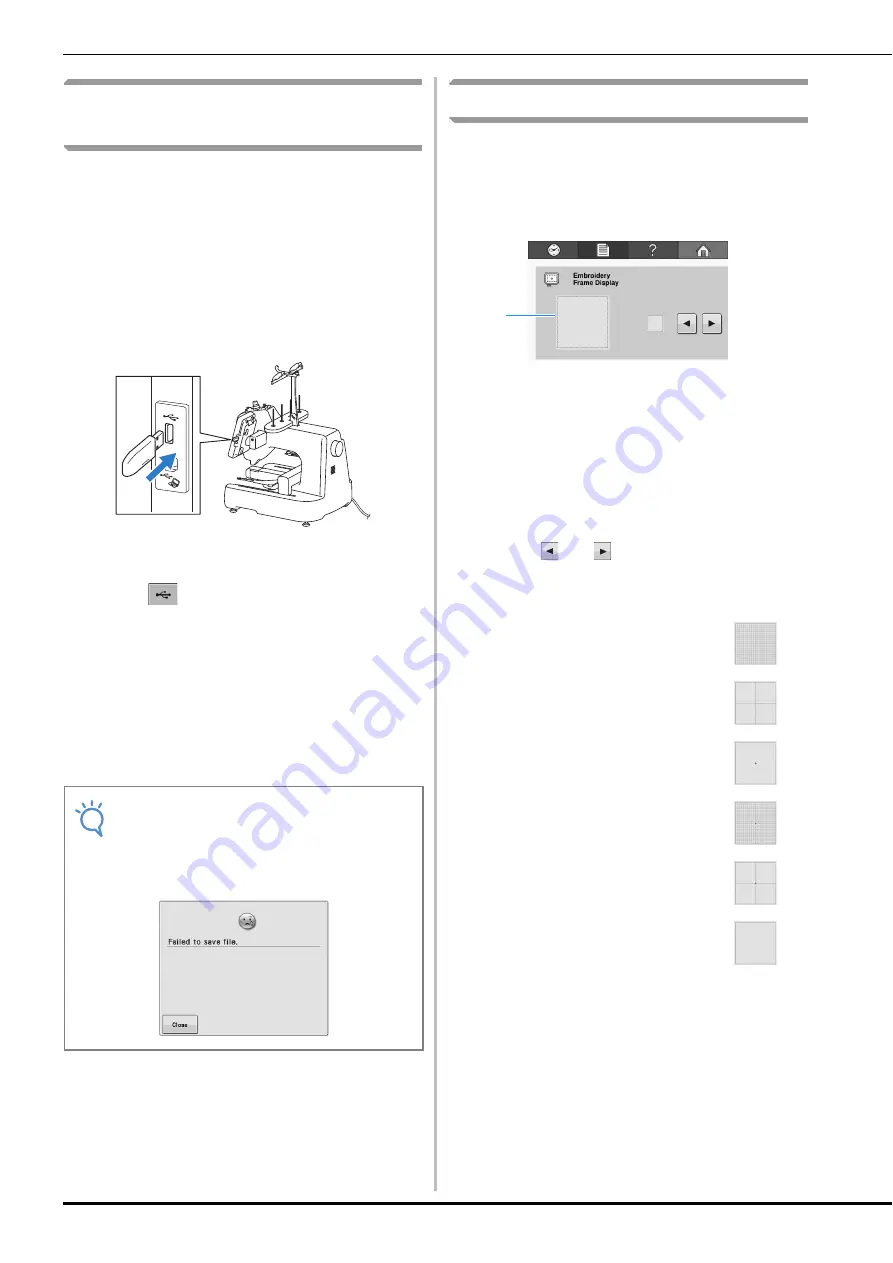
Saving a settings screen image to
USB media
An image of the settings screen can be saved as a
BMP file.
A maximum of 100 images can be saved on a
single USB media at one time.
This function is available in all pages of settings
screen.
a
Insert the USB media into the USB port on
the right side of the machine.
1
USB port
2
USB media
b
Press .
→
The image file will be saved to the USB media.
c
Remove the USB media, and then for future
reference, check the saved image using a
computer.
The files for Settings screen images are saved with the
name “S##.BMP”.
*
“##” in the name “S##.BMP” will automatically be
replaced with a number between S00 and S99.
Changing the display guides
The guides in the pattern display area can be set
for the attached embroidery frame.
The guide settings can be specified from page 1 of
the settings screen.
1
How the guides will appear with the specified
settings can be previewed here.
The centerpoint is indicated with a red plus sign
(+).
When the embroidery machine is purchased, the
centerpoint marker and grid lines are not
displayed.
a
Touch
and
to select whether or not to
display the centerpoint marker and the grid
lines.
Note
• If 100 image files have already been saved
on the USB media, the following message
appears. In this case, delete a file from the
USB media or use different USB media.
Grid lines
Cross grid lines
Centerpoint marker
Centerpoint marker and grid
lines
Centerpoint mark with cross grid
lines
No centerpoint marker or grid
lines
1
Summary of Contents for 882-T51
Page 2: ......
Page 14: ...12 ...
Page 72: ...70 ...
Page 96: ...94 ...
Page 154: ...152 ...
Page 191: ...APPENDIX 189 7 ...


