40
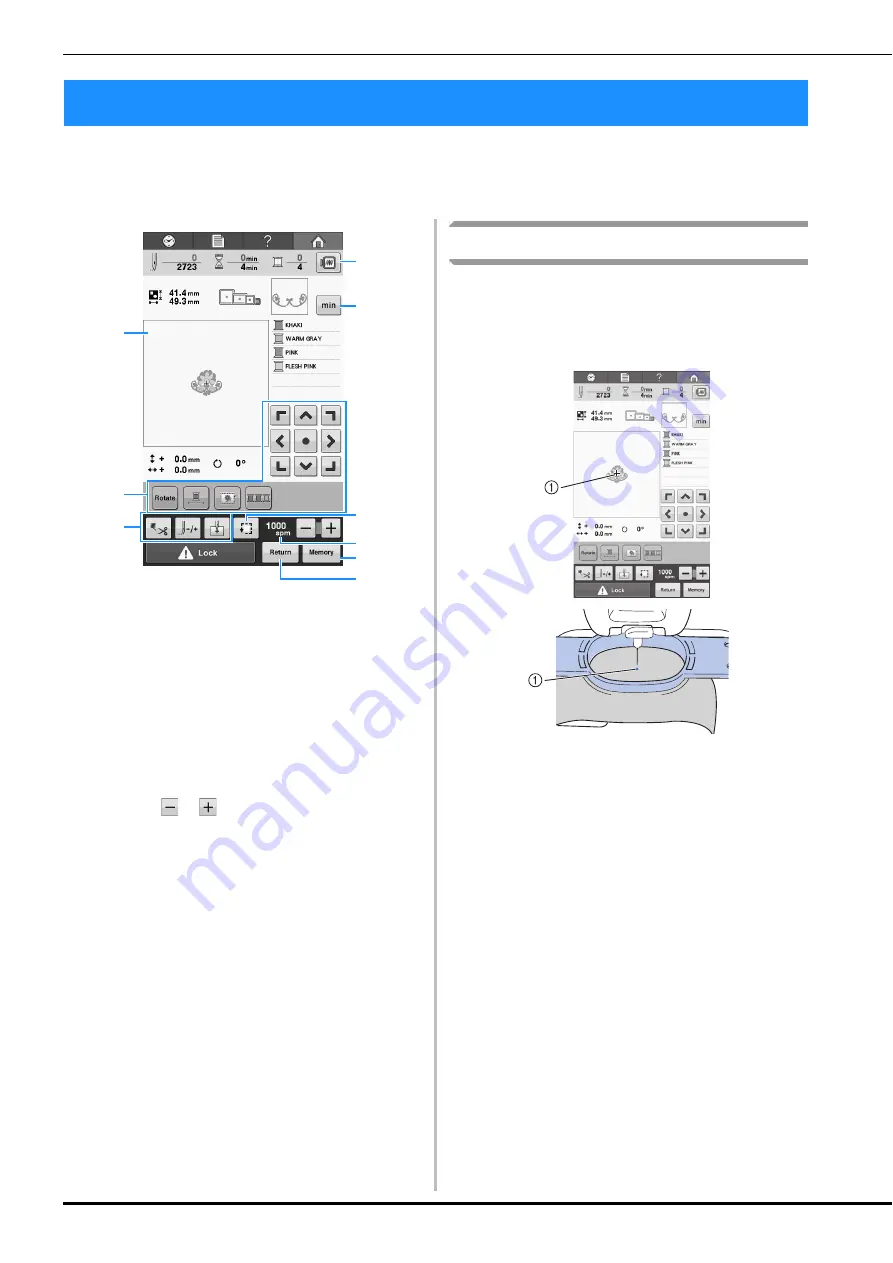
From this screen, the entire pattern can be edited and embroidering settings can be specified. In addition,
the embroidering position can be checked and a pattern can be saved for later use.
Embroidering screen
(For details on the keys and other information on the screen, refer to page 65.)
1
In the embroidering settings screen, the
embroidery frame guide in the pattern display area
indicates the size of the installed embroidery
frame.
2
Touch to edit the pattern.
3
Touch these keys to specify how the pattern will
be embroidered.
4
Displays a preview image.
5
Touch to switch the thread information between
the thread colors and embroidering time.
6
Touch to check the embroidering area.
7
Touch
or
to change the embroidery speed.
8
Touch to store the pattern in memory.
9
Returns to the pattern editing screen.
In this example, we will not specify any of the
embroidering settings. Continue with the next
operation.
Embroidery positioning marker
The needle drop position is indicated with the LED
pointer in the embroidering screen. Set the LED
pointer to off or on in the settings screen. (Refer to
“Setting the LED pointer” on page 149)
1
Needle drop position
→
The LED pointer turns off when the embroidering
starts.
5. Specifying Embroidering Setting
2
7
4
6
9
3
5
1
8
Summary of Contents for 882-T51
Page 2: ......
Page 14: ...12 ...
Page 72: ...70 ...
Page 96: ...94 ...
Page 154: ...152 ...
Page 191: ...APPENDIX 189 7 ...


