45
2
————————————————————————————————————————————————————————————————————————————————————————————————————————————————————————
■
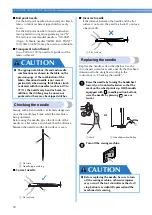
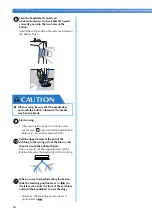
If thick seams are being sewn and the fabric does
not feed at the beginning of stitching
The fabric may not feed when thick seams are
being sewn and the presser foot is not level, as
shown below. In this case, use the presser foot
locking pin (black button on the left side of zigzag
foot “J”) so that the presser foot remains level
while sewing, allowing the fabric to be fed
smoothly.
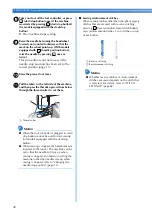
a
Sewing direction
a
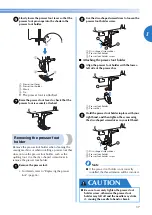
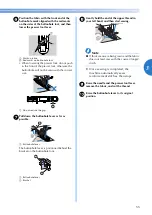
Raise the presser foot lever.
b
Align the beginning of stitching, and then
position the fabric.
c
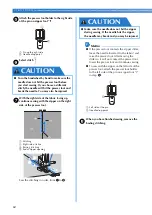
While holding zigzag foot “J” level, hold the
presser foot locking pin (black button on the
left side) pressed in, and lower the presser
foot lever.
a
Presser foot locking pin (black button)
d
Release the presser foot locking pin (black
button).
X
The presser foot remains level, allowing
the fabric to be fed.
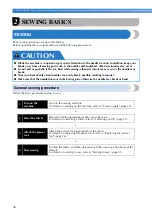
• After the seam is sewn, the presser foot will
return to its original angle.
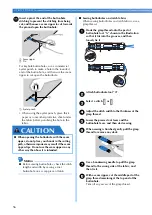
Sewing hook-and-loop
fastener tape
Note
●
Before start sewing, baste together the fabric
and the hook-and-loop fastener tape.
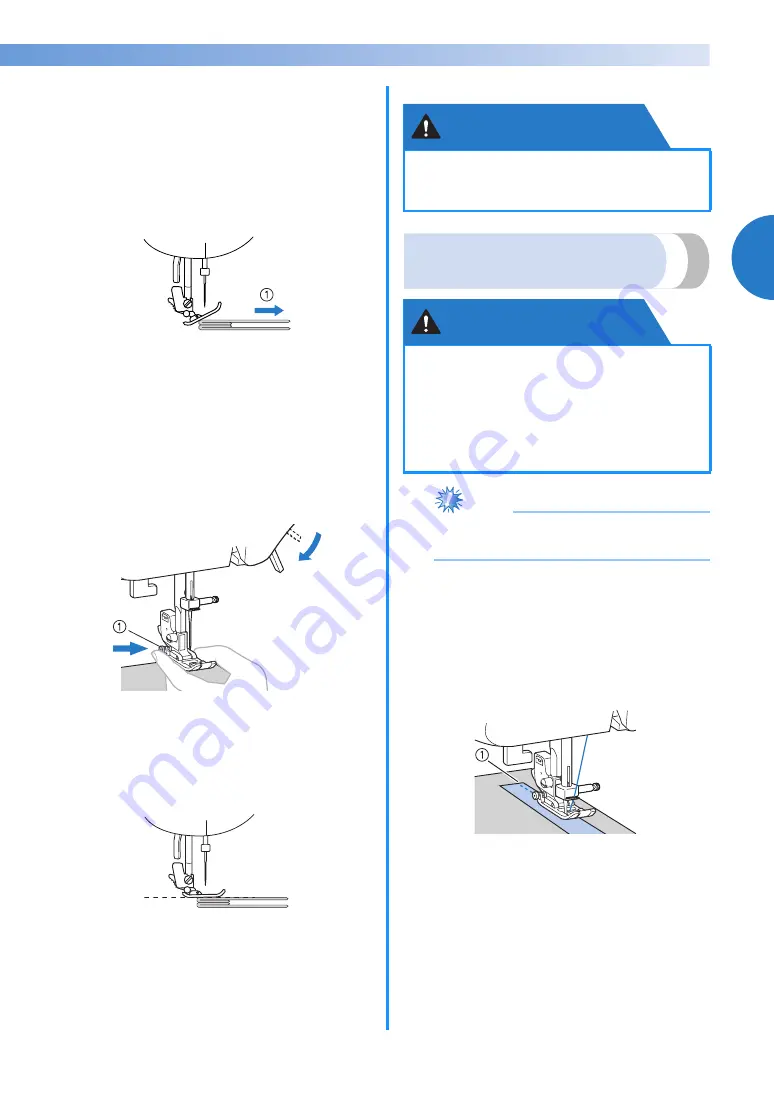
Make sure that the needle passes through the hook-
and-loop fastener tape by turning the handwheel and
lower the needle into the hook-and-loop fastener
tape before sewing. And then, sew the edge of the
hook-and-loop fastener tape at a slow speed.
If the needle does not pass through the hook-and-
loop fastener tape, replace the needle with the
needle for thick fabrics (page 31).
a
Edge of the hook-and-loop fastener tape
●
If fabric more than 6 mm (15/64 inch) thick is
sewn or if the fabric is pushed with too much
force, the needle may bend or break.
●
Use only the ungummed hook-and-loop
fastener tape which is designed for sewing.
When glue adheres to the needle or the
bobbin hook race, it may cause malfunction.
●
If the hook-and-loop fastener tape is sewn
with the thin needle (65/9 – 75/11), the
needle may bend or break.
CAUTION
CAUTION


