UTILITY STITCHES
51
3
4
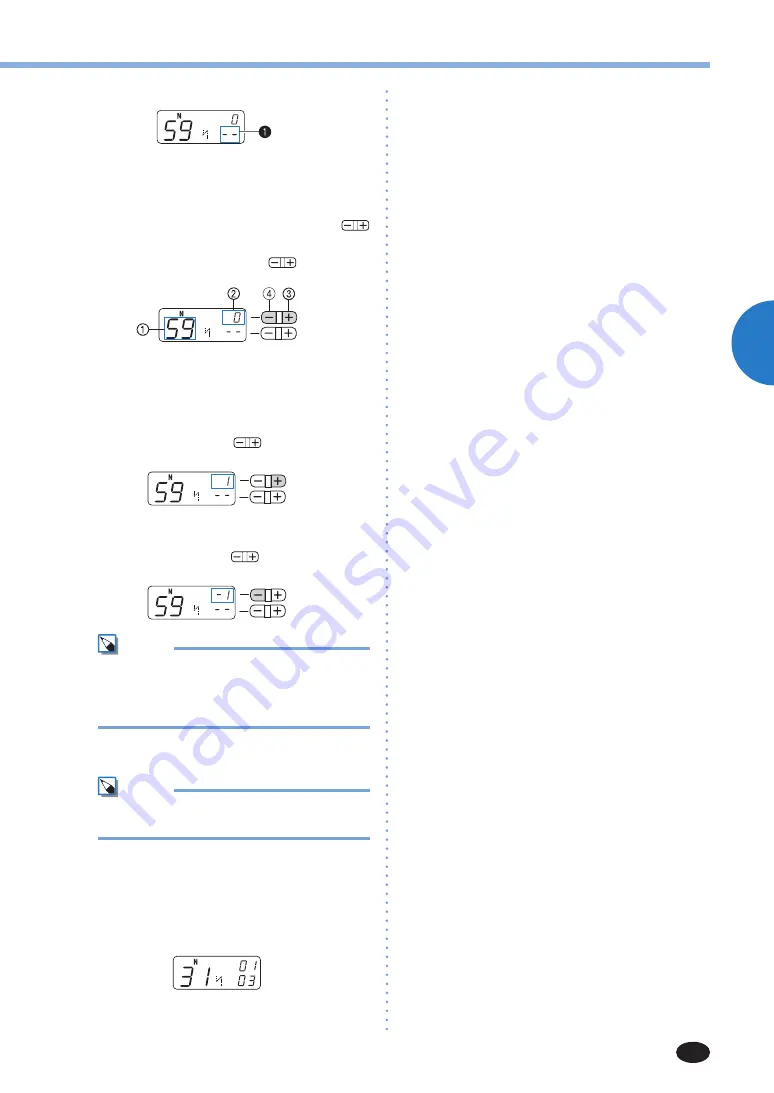
Select No. 59 (for making adjustments).
X
The LCD goes into the stitch adjustment
mode. The total number of combined
characters
1
changes to “--“.
5
Adjust the character stitches by pressing
(stitch length adjustment key).
Each press of “+” or “-” side of
(stitch length
adjustment key) widens or narrows the stitches.
1
No. for making adjustments
2
The stitch adjustment level
3
Widens the stitches
4
Narrows the stitches
If the pattern is bunched (B)
Press the “+” side of
(stitch length
adjustment key) to widen the stitch.
If the pattern is overstretched
(The stitch “0” has a gap.) (C)
Press the “-” side of
(stitch length
adjustment key) to narrow the stitch.
Memo
• The stitch adjustment level can be set
between -9 and 9.
• The setting is saved in memory even if you
turn off the machine.
6
Sew the characters “034” again.
Memo
• You can sew when you are in the stitch
adjustment mode.
If the stitch pattern still comes out poorly,
adjust the stitch again. Adjust the stitch until
the stitch pattern comes out correctly.
7
After you have finished adjusting the pattern,
press the stitch category selection key three
times.
X
The display returns to the normal character
stitching mode.

