

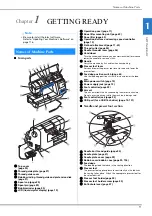

Names of Machine Parts
10
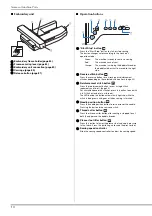
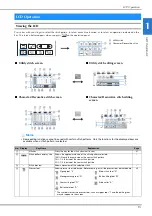
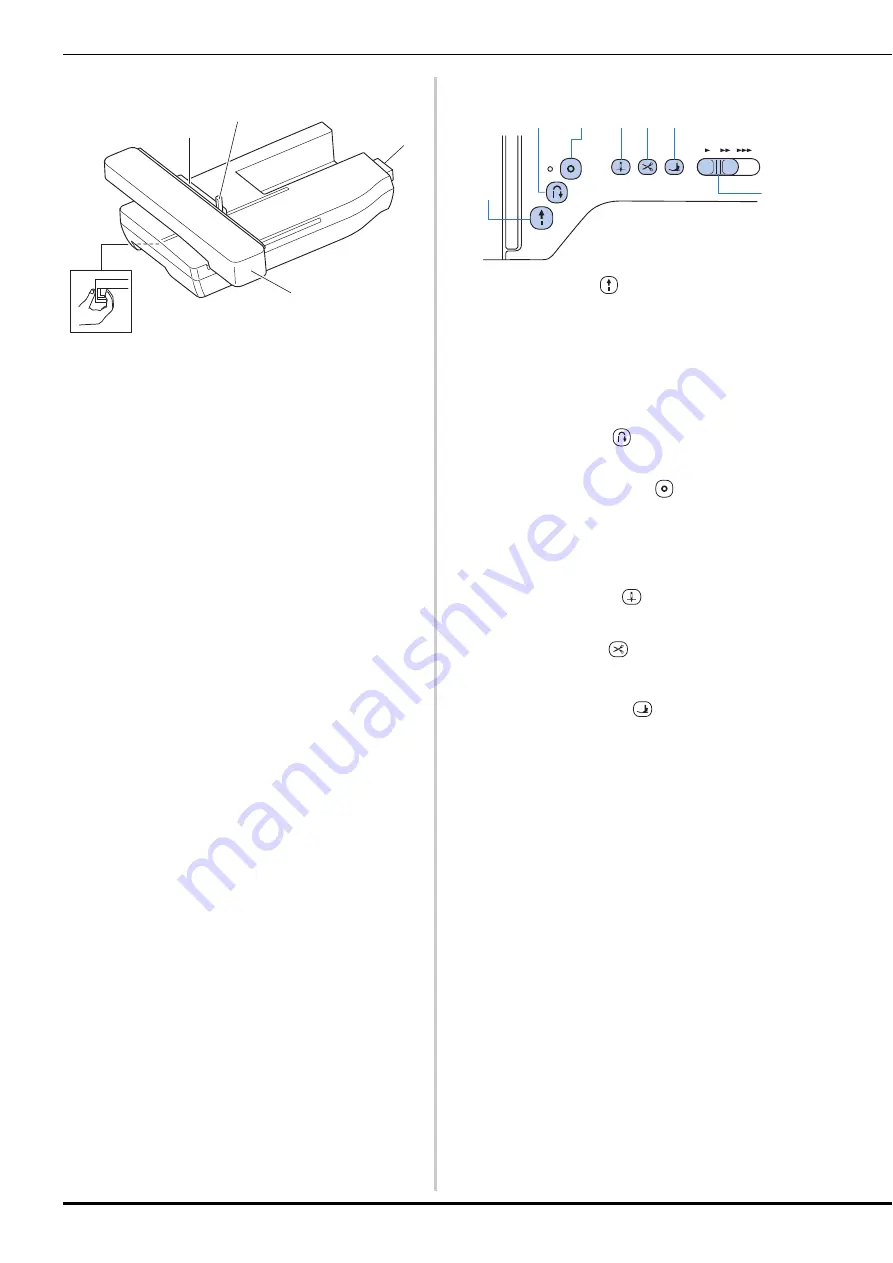
■
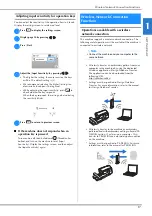
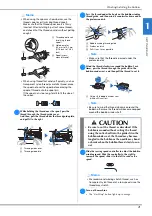
Embroidery unit
1
Embroidery frame holder (page 84)
2
Frame-securing lever (page 84)
3
Embroidery unit connection (page 80)
4
Carriage (page 80)
5
Release button (page 81)
■
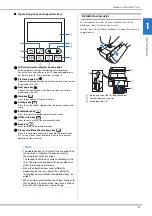
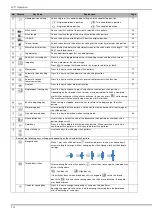
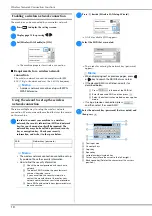
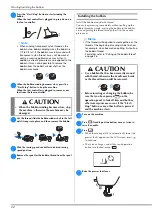
Operation buttons
1
“Start/Stop” button
Press the “Start/Stop” button to start or stop sewing.
The button changes color according to the machine’s
operation mode.
2
Reverse stitch button
Press the reverse button to sew reverse or reinforcement
stitches depending on the selected stitch pattern. (page 34)
3
Reinforcement stitch button
Press the reinforcement button to sew a single stitch
repeatedly and tie-off. (page 34)
For character/decorative stitches, press this button to end with
a full stitch instead of at a mid-point.
The LED beside the button automatically lights up while the
stitch is being sewn and goes off when sewing is finished.
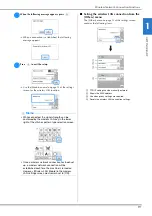
4
Needle position button
Press the needle position button to raise or lower the needle.
Pressing the button twice sews one stitch.
5
Thread cutter button
Press the thread cutter button after sewing is stopped to cut
both the upper and the bobbin threads.
6
Presser foot lifter button
Press this button to lower the presser foot and apply pressure
to the fabric. Press this button again to raise the presser foot.
7
Sewing speed controller
Slide the sewing speed controller to adjust the sewing speed.
a
b
d
e
c
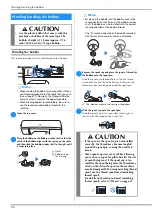
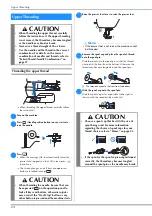
Green:
The machine is ready to sew or is sewing.
Red:
The machine cannot sew.
Orange:
The machine is winding the bobbin thread, or
the bobbin winder shaft is moved to the right
side.
b
c
d e f
a
g
Summary of Contents for 888-G30
Page 2: ......
Page 80: ...MY CUSTOM STITCH 78 ...
Page 121: ......
Page 122: ......
Page 123: ......


