


14
KNOWING YOUR SEWING MACHINE
———————————————————————————————————————————————————————————————————————————————————
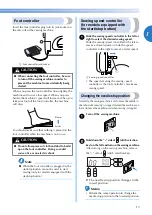
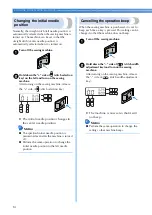
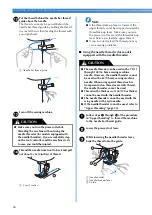
Changing the initial needle
position
Normally, the straight stitch (left needle position) is
automatically selected when the sewing machine is
turned on. The machine can be set so that the
straight stitch (center needle position) is
automatically selected when it is turned on.
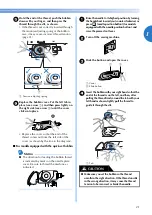
a
Turn off the sewing machine.
b
Hold down the “+” side of
(stitch selection
key) on the left and turn on the sewing
machine.
After turning on the sewing machine, release
the “+” side of
(stitch selection key).
X
The initial needle position changes to
the center needle position.
Memo
●
The specified initial needle position is
maintained even after the machine is turned
off.
●
Perform the same operation to change the
initial needle position to the left needle
position.
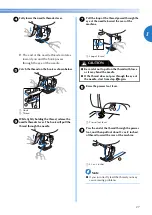
Cancelling the operation beep
When the sewing machine is purchased, it is set to
beep each time a key is pressed. This setting can be
changed so that the machine does not beep.
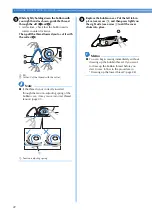
a
Turn off the sewing machine.
b
Hold down the “–” side of
(stitch width
adjustment key) and turn on the sewing
machine.
After turning on the sewing machine, release
the “-” side of
(stitch width adjustment
key).
X
The machine is now set so that it will
not beep.
Memo
●
Perform the same operation to change the
setting so that machine beeps.


