22
—
—
—
—
—
—
—
—
—
—
—
—
—
—
—
—
—
—
—
—
—
—
—
—
—
—
—
—
—
—
—
—
—
—
—
—
—
—
—
—
—
—
—
—
—
—
—
—
—
—
—
—
—
—
—
—
—
—
—
—
—
—
—
—
—
—
—
—
—
—
—
—
—
—
—
—
—
—
—
—
—
—
—
—
—
—
—
—
—
—
—
—
—
—
—
—
—
—
—
—
—
—
—
—
—
—
—
—
—
—
—
—
—
—
—
—
—
—
—
—
—
—
—
—
—
—
—
—
—
—
—
—
—
—
—
—
—
—
—
—
—
—
—
—
—
—
—
—
—
—
—
—
—
—
—
—
—
—
—
—
—
—
—
—
—
—
—
—
—
—
—
—
—
—
—
—
—
—
—
—
—
—
—
—
—
—
—
—
—
—
—
—
—
—
—
—
—
—
—
—
—
—
—
—
—
—
—
—
—
—
—
—
—
—
—
—
—
—
—
—
—
—
—
—
—
—
—
—
—
—
—
—
—
—
—
—
—
—
—
—
—
—
—
—
—
—
—
—
—
—
—
—
—
—
—
—
—
—
—
—
—
—
—
—
—
—
—
—
—
—
—
—
—
—
—
—
1
d
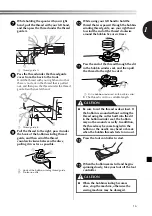
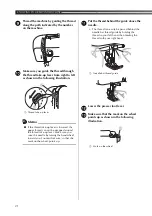
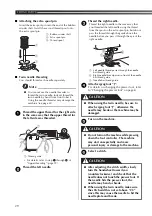
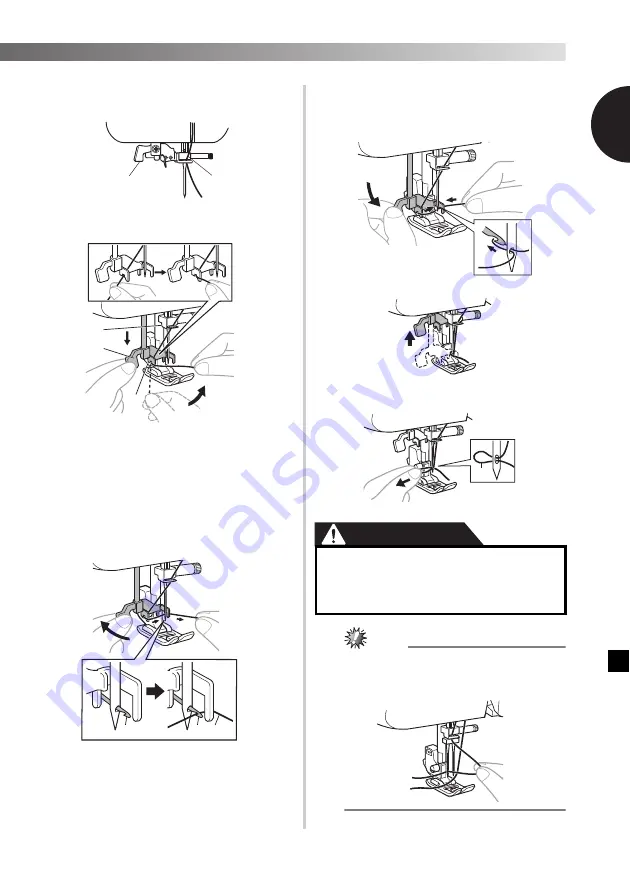
While lowering the needle threader lever,
hook the thread onto the guide.
1
Needle holder
2
Needle threader lever
1
Needle holder
2
Needle threader lever
3
Guide
e
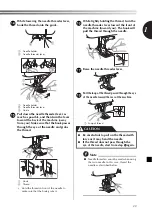
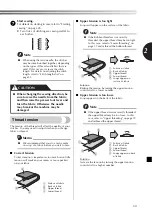
Pull down the needle threader lever as
much as possible, and then turn the lever
toward the back of the machine (away
from you). Make sure that the hook passes
through the eye of the needle and grabs
the thread.
1
Hook
2
Thread
• Hold the thread in front of the needle to
make sure that the hook grabs it.
f
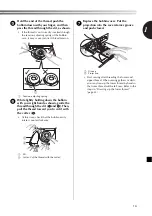
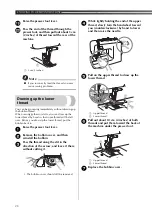
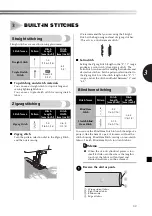
While lightly holding the thread, turn the
needle threader lever toward the front of
the machine (toward you). The hook will
pull the thread through the needle.
g
Raise the needle threader lever.
h
Pull the loop of the thread passed through the eye
of the needle toward the rear of the machine.
1
Loop of thread
CAUTION
Note
●
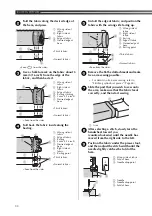
Needle threader cannot be used when using
the twin needle. In this case, thread the
needle as described below.
1
2
1
2
3
1 2
1
●
Be careful not to pull on the thread with
force or it may bend the needle.
●
If the thread does not pass through the
eye of the needle, start from step
c
again.
1
Summary of Contents for 888-X39
Page 32: ...SEWING BASICS 31 ...
Page 82: ...FUNCIONES DE COSTURA BÁSICAS 31 ...
Page 102: ......
Page 103: ......

