22
After the machine is registered with ScanNCutCanvas
(http://ScanNCutCanvas.Brother.com/), various
editing operations can be performed and data can be
transferred.
This section describes the procedure for linking a
machine with a specific number to a login ID.
If setup is not completed correctly or an error
message appears, see “ERROR MESSAGES” on
page 59.
Note
•
A computer or mobile device that can run
ScanNCutCanvas and connect to the network
is required.
•
Before continuing with this procedure, the
machine must be connected to the wireless
network. If not, see “Wireless Connection” on
page 12, and perform the setup.
: Operation performed in DesignNCut
Manager
a
Click [ScanNCutCanvas] to access to
http://ScanNCutCanvas.Brother.com to register
a new account.
Note
•
If you have a ScanNCutCanvas account for
your ScanNCut we recommend creating a new
account for DesignNCut.
b
After registering, click [Next].
* For mobile version, tap
.
c
Click [Connect].
d
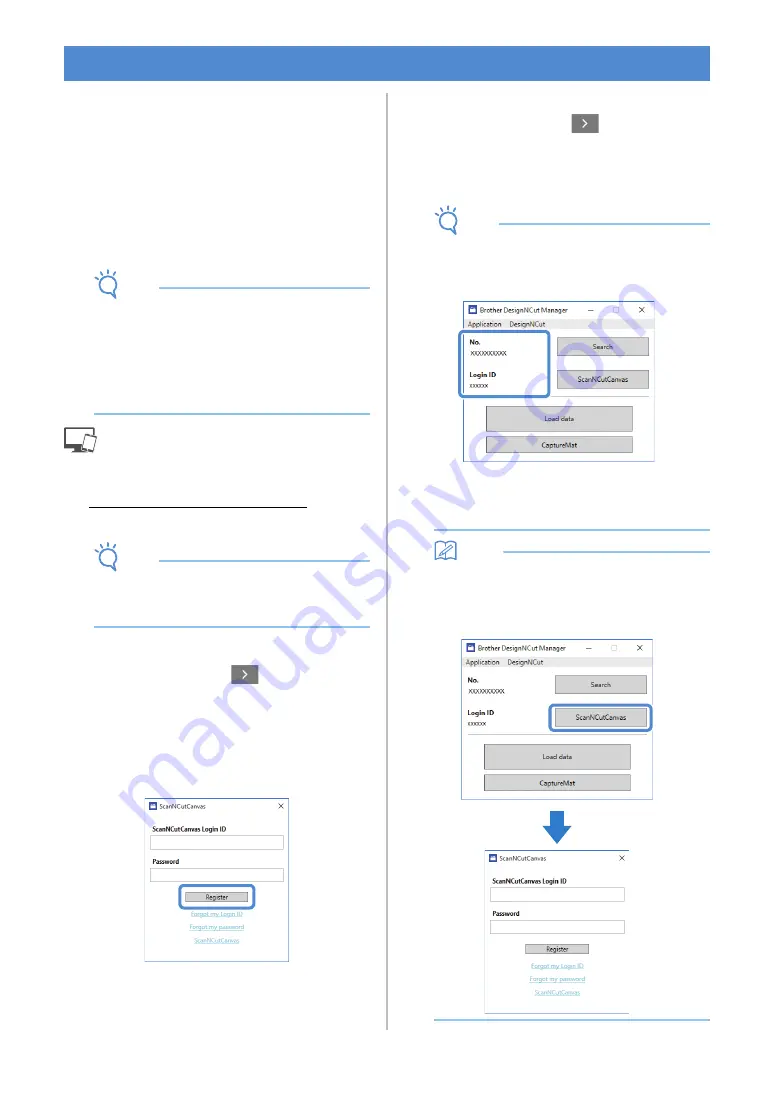
Register dialog box will appear.
Type in the login ID and password registered
with ScanNCutCanvas, and then click
[Register].
e
When the [ScanNCut Online Settings has been
completed.] dialog box appears, click [OK].
f
Click [Next].
* For mobile version, tap
.
Click [How to Use] on the DesignNCut Manager
to see tutorial for the basic usage.
g
Click [Close].
Note
• After the settings have been completed, your
machine number and your ScanNCutCanvas
login ID will be shown in the DesignNCut
Manager's main window.
• First-time users must create a
ScanNCutCanvas account.
• If an error occurs while sending or receiving
data, see “ERROR MESSAGES” on page 59.
Memo
• If you registered a new ScanNCutCanvas
account for DesignNCut, you can also click
[ScanNCutCanvas] in the main window of
DesignNCut Manager to display the register
dialog box.
REGISTER DesignNCut ON ScanNCutCanvas


