11
1
f
Select from 1/4, 2/4, 3/4 or all of the cutting
area to be used for blade adjustment.
Before cutting out a pattern, this machine
performs an automatic blade adjustment, which
adjusts the direction of the blade outside of the
adhesive area of the mat.
g
Displays the version of this machine’s software.
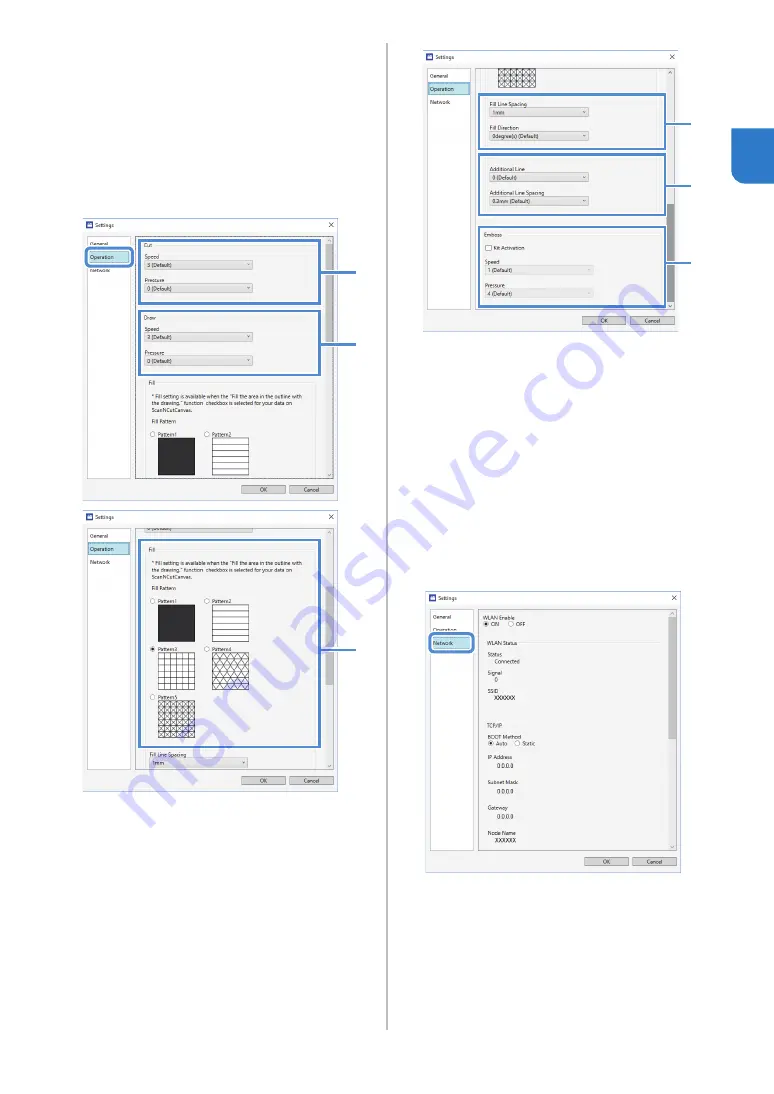
1. Settings (Operation)
Click [Settings], then [Operation].
After specifying the desired settings, click [OK] to
apply the settings.
a
Adjust the speed and pressure for cutting. For
details on the appropriate cutting pressure, see
“Cutting Settings” on page 32.
b
Adjust the speed and pressure for drawing. For
best results, adjust the drawing pressure to the
appropriate setting. Drawing with pressure that
is too strong may damage the pen tip.
c
Select the design that will be used to fill
patterns. For details, see “Using Drawing
Functions to Fill Patterns/Make Outlines
Thicker” on page 43.
d
With [Fill Line Spacing], adjust the spacing of
the lines filling the pattern. With [Fill Direction],
adjust the direction of the lines filling the
pattern.
e
With [Additional Line], specify the number of
lines to be added. With [Additional Line
Spacing], specify the spacing of the lines to be
added.
f
When a separately sold accessory kit is used,
select this check box to enable its functions.
1. Settings (Network)
Click [Settings], then [Network].
After specifying the desired settings, click [OK] to
apply the settings. For details on the network settings,
see “Setting Up Manually” on page 21.
2. Check version
Displays the status of the machine’s software.
*
This does not appear when the machine is
connected with a USB cable.
3. Network reset for DesignNCut
Initializes the wireless network settings. For details on
specifying the settings, see “Resetting the Wireless
Connection Setup” on page 20.
a
b
c
d
e
f


