53
3
Auto Layout Functions
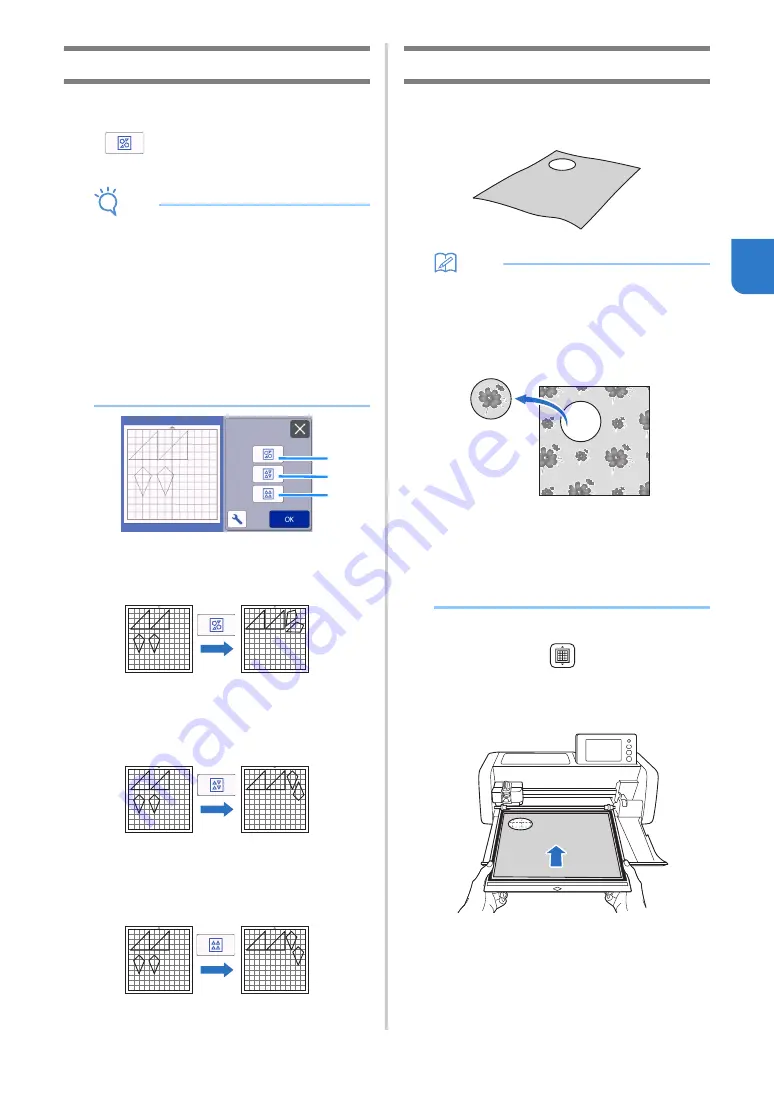
The auto layout function is useful when you do not
wish to waste the material attached to the mat.
Touch
in the mat layout screen (page 44) to
perform the auto layout function.
Note
•
Depending on the pattern and material to be
cut, the patterns may not be cleanly cut if their
spacing is too small. In that case, rearrange the
patterns to slightly separate them.
•
The spacing between arranged patterns can be
specified in the settings screen (see “Pattern
Interval” on page 10). Perform the auto layout
function after every time you adjust the spacing
between patterns so the changes are applied.
•
Set the number to “3” or higher in the “Pattern
Interval” setting when lightweight fabric is
attached to the mat with a high tack adhesive
fabric support sheet.
a
Rearranging By Rotating Patterns to Any Angle
This is useful when arranging a large number of
patterns in a limited space.
b
Rearranging By Rotating Patterns 0° or 180°
This is useful when arranging the printed design
(vertical patterns) on paper or fabric as the material for
cutting/drawing or when using the vertical grain.
c
Rearranging Without Rotating Patterns
This is useful when arranging the printed design on
paper or fabric as the material for cutting/drawing or
when using the grain.
Scanning a Background Image
In this example, we will use material with a cutout in
its upper-left corner as a background image.
Memo
• The background scanning function is also
useful when cutting out patterns from material
with a design on it. By arranging the patterns on
the screen in the desired patterned area of the
material, cutouts with a specific design can be
created.
• This function cannot be used when an optional
scanning mat is used.
• Depending on the machine model, the sizes of
mats that can be used will differ. Check the
“Maximum Scanning Area” under “Machine
Information” of the settings screen. For details,
refer to “Settings Screen” on page 10.
a
Attach the material for the background to the
mat, and then press
in the operation
panel.
For details on preparing the material and loading the
mat, see “Loading the Mat” on page 28.
a
b
c


