10
Settings Screen
From the LCD panel, touch
to select and adjust
the settings for each function.
This section contains descriptions of the machine
settings which will appear when
is selected on
the home screen.
■
Group 1
a
Touch to display the previous or next item.
* Swiping the touch pen (stylus) over the screen
will also display a different screen.
b
Touch to finish specifying settings.
Language
Select the display language. Touch this button, select
the desired display language, and then touch the
“OK” key.
Unit
Select either millimeters or inches as the displayed
measurement units.
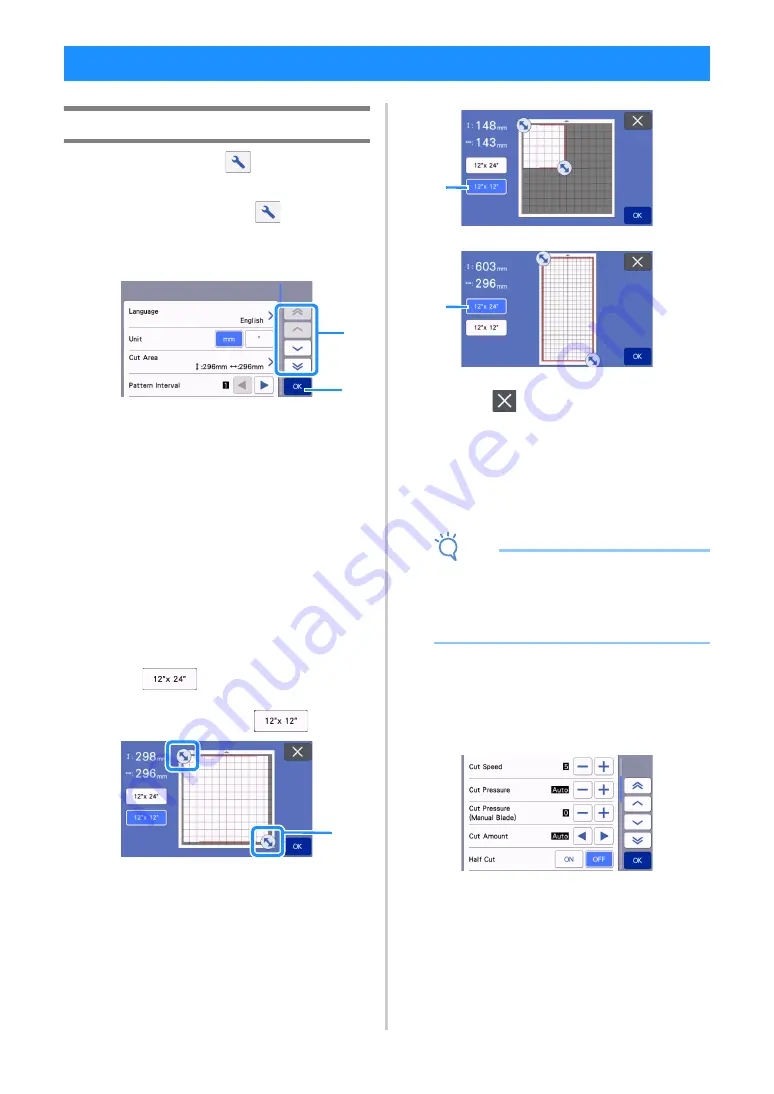
Cut Area
Specify the area for cutting/drawing according to the
size of material to be used. Touch this button, and
then touch and drag the area resizing keys to specify
the area. When using a 12" × 24" (305 mm × 610 mm)
mat, touch
to select a larger mat size, and
then specify the area size. When using a 12" × 12"
(305 mm × 305 mm) mat, touch
.
a
Area resizing key (Using the touch pen (stylus),
touch the key, and then drag it around the
screen to specify the area.)
b
Mat size key
• Touch the “OK” key to apply the settings.
Touch
to return to the previous screen
without applying the settings.
Pattern Interval
Specify the spacing between patterns as well as white
space around the edges of cutting area when patterns
on the mat layout screen are automatically arranged.
The larger the number setting, the further spacing
between patterns.
Note
• Set the pattern interval to “3” or higher when
lightweight fabric is attached to the mat with a
high tack adhesive fabric support sheet.
• Set the pattern interval to “5” or higher when
using the rotary auto blade.
Background
Adjust the contrast of a background image scanned
with the background scanning function. For details,
see “Scanning a Background Image” on page 53.
■
Group 2
Cut Speed
Adjust the cutting speed.
Cut Pressure
Adjust the cutting pressure.
Cut Pressure (Manual Blade)
Specify the cutting pressure when the optional
manual blade is used.
MACHINE SETTINGS
b
a
a
b
b


