9
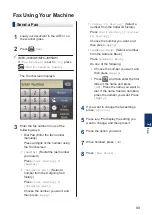
Do one of the following:
• If you are using the ADF, the machine
starts scanning and sending the
document.
• If you are using the scanner glass
and selecting
[Black]
in the
[Color Setting]
, the machine
starts scanning the first page.
Go to the next step.
• If you are using the scanner glass
and selecting
[Color]
in the
[Color Setting]
, the
Touchscreen asks if you want to send
a color fax.
Press
[Yes (Color fax)]
to
confirm. The machine starts dialing
and sending the document.
10
When the Touchscreen displays
[Next
Page?]
, do one of the following:
• Press
[No]
when finished scanning
pages.The machine starts sending
the document.
• Press
[Yes]
to scan another page.
Place the next page on the scanner
glass, and then press
[OK]
. The
machine starts scanning the page.
Repeat this step for each additional
page.
Set Fax Preview to On
Related Models:
MFC-J880DW/MFC-J885DW
Use the Fax Preview feature to view received
faxes on the LCD.
• This feature is available only for black
and white faxes.
• When Fax Preview is turned on, a
backup copy of received faxes will not be
printed for Fax Forwarding, PC-Fax
Receiving and Forward to Cloud
operations, even if you set Backup Print
to
[On]
.
• Although printed faxes show the
received date and time when Fax
Receive Stamp is turned on, the Fax
Preview screen will not display the
received date and time.
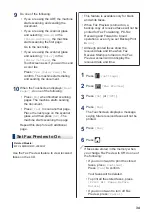
1
Press
[Settings]
.
2
Press
[Fax Preview]
.
3
Press
[On]
(or
[Off]
).
4
Press
[Yes]
.
The Touchscreen displays a message
saying future received faxes will not be
printed.
5
Press
[Yes]
.
6
Press
.
If faxes are stored in the memory when
you change Fax Preview to Off, do one of
the following:
• If you do not want to print the stored
faxes, press
[Continue]
.
Press
[Yes]
to confirm.
Your faxes will be deleted.
• To print all the stored faxes, press
[Print All Faxes Before
Delete]
.
• If you do not want to turn off Fax
Preview, press
[Cancel]
.
34


