8
1
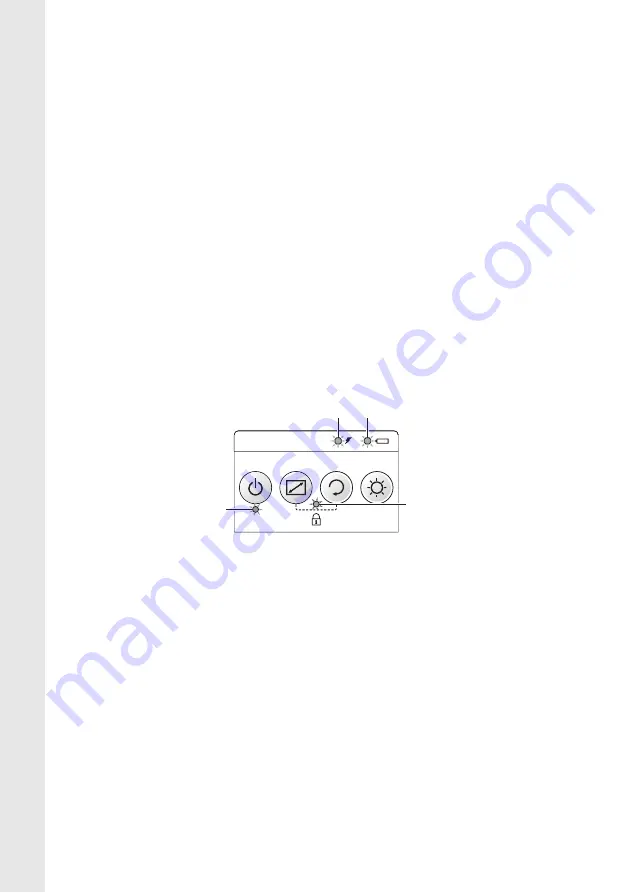
Power Button
Press this button to power on the AiRScouter, and press
and hold this button for two seconds to power off the
AiRScouter (note that the AiRScouter will automatically
power off if there is no input from a video source.)
2
Mode Button
Press this button to select the zoom mode.
3
Image Rotation Button
Press this button to rotate the image by 180°.
4
Brightness Button
Press this button to select the next brightness level; note
that the AiRScouter has five levels of brightness. To
toggle between the full-colour and monochrome display,
press and hold this button for two seconds.
Control Panel Status LEDs
1
Display LED (Green)
Lights up when the AiRScouter is on and an image is
being projected onto the display.
2
Key Lock LED (Orange)
Lights up when button operation on the control box is
disabled.
3
Internal Battery LED (Orange)
Lights up when the control box is being powered by the
internal battery.
4
External Power LED (Orange)
Lights up when the control box is being powered by the
AC adapter or by an external battery (for example, a
third-party USB battery).
a
b
c
d
Summary of Contents for AiRScouter WD-370B
Page 51: ......


