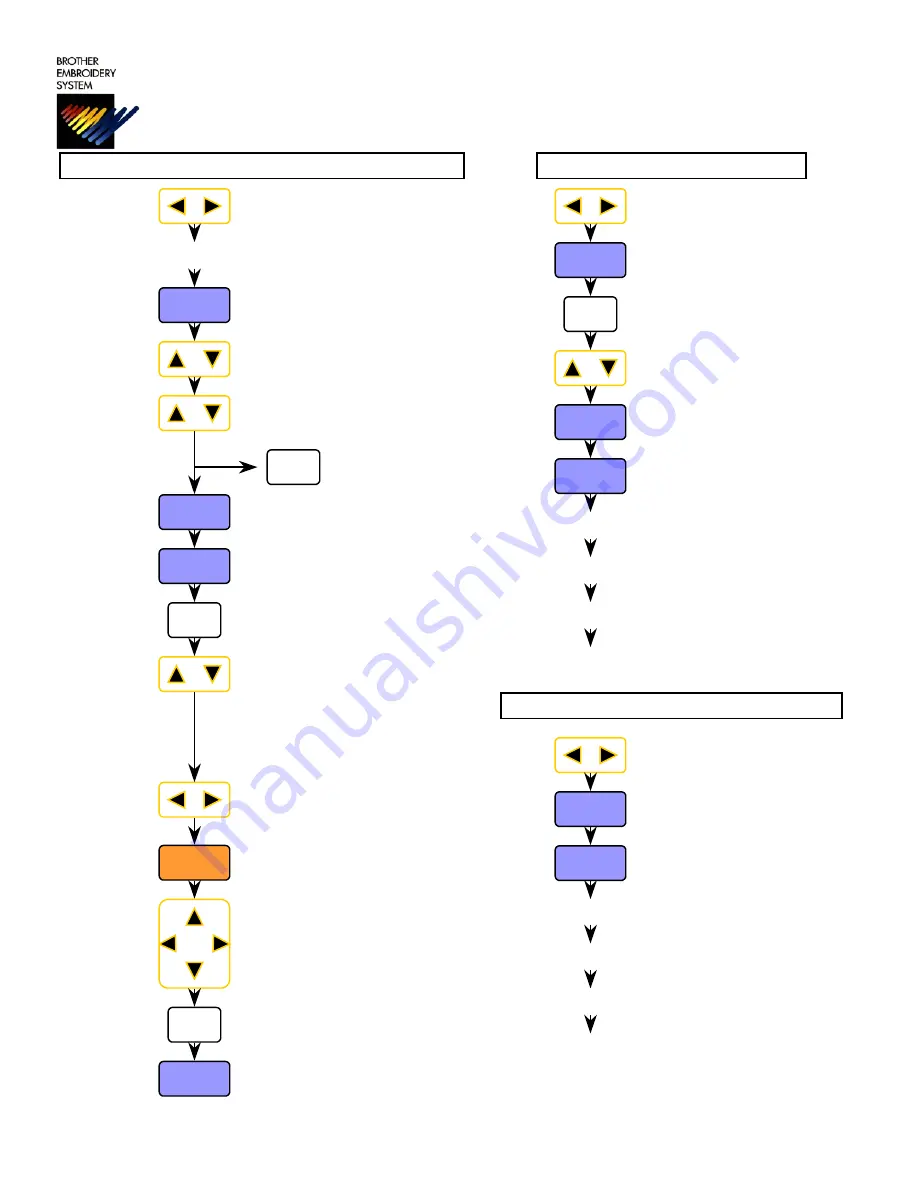
ENTERING DISK DATA & SETTING THE COLOR SEQUENCE
Insert floppy disk into disk drive
ENTER
ENTER
START
NEEDLE
SET
END
#
START
*
Press ENTER.
Press UP or DOWN arrows to scroll
the disk directory.
Press (*) key to read
the design name.
Press ENTER to copy the design to
the machine memory.
Press START to calculate design
size and number of color changes.
Press NEEDLE SET to enter
color programming mode.
Press UP or Down arrow keys to
assign needle number (Color).
Press FORWARD arrow to select
next color of design or BACK arrow
for previous color of design.
Press END to exit needle set mode.
Use ARROW keys to center your
design in the frame.
Press (#) key to trace the mask
(outside edge) of the design.
Press START to start sewing.
ENTER A DESIGN FROM EDITOR MODE
ENTER
Press ENTER.
#
Press UP or DOWN arrows to begin
reading computer directory.
ENTER
Press ENTER to copy the design to
the machine memory.
START
Press START to calculate design
size and number of color changes.
ENTER A DESIGN FROM THE MACHINE MEMORY
ENTER
START
Press START to calculate design
size and number of color changes.
Use BACK and FORWARD keys
to pick a design from memory.
Press ENTER to view design name
Press the (#) key until “EDITOR”
appears on the screen.
Program color sequence
(see Step 8)
Use ARROW keys to center your design
(see Step 12)
Press (#) key to trace the mask of the design
(see Step 13)
Press START to start sewing
(see Step 14)
Program color sequence
(see Step 8)
Use ARROW keys to center your design
(see Step 12)
Press (#) key to trace the mask of the design
(see Step 13)
Press START to start sewing
(see Step 14)
Press UP or DOWN arrow to begin
reading the disk.
Use BACK and FORWARD keys
to pick an empty memory location.
Use BACK and FORWARD keys
to pick an empty memory location.
1.
2.
3.
4.
5.
6.
7.
8.
9.
10.
11.
12.
13.
14.
BES
BES
-
-
1210AC
1210AC
-
-
Quick Reference Guide
Quick Reference Guide
A = Needle Number 10
B = Needle Number 11
C = Needle Number 12
FO/SB
For Technical Assistance Please Call 1-877-4BROTHER


