Chapter 1 Preparation of Embroidery Machine
BES-961BC
•
BES-1261BC
29
!0
o
u
y
t
!0
9.
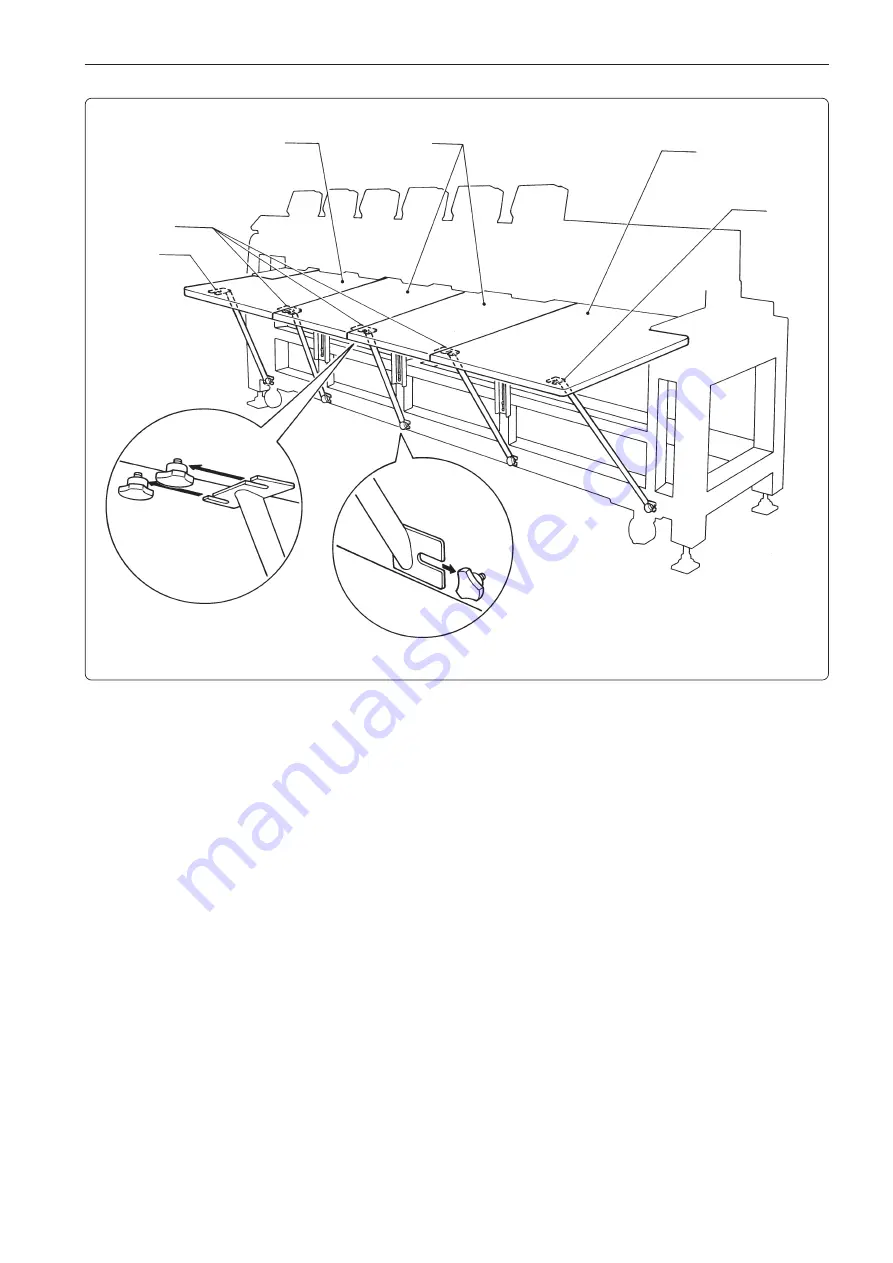
Fix the legs and the table using the F table stays A (3 pcs.)
o
and B (2 pcs.)
!0
while the F
table R
t
, M (2 pcs.)
y
, and L
u
are fixed at the upper position.
* Dismounting can be carried out in the reverse procedures.
Note) • Use two F table stays (B) with one notch at both ends of the F table R
t
and L
u
.
• When mounting the F table stays A (3 pcs.)
o
and B (2 pcs.)
!0
, fit the F table stay notch into the table,
then fix the notch to the legs using the thumb bolts.
Dismounting can be carried out in the reverse procedures.
• When the F table is at the lower position, the F table stays A and B need not be used.
Summary of Contents for BES-1261BC
Page 7: ...5 BES 961BC BES 1261BC 2 1 7 1 6 3 4 5 7 3 2 Belt cover Finger guard BES 961BC ...
Page 13: ...11 BES 961BC BES 1261BC Setting of thread breakage sensor page 93 Setting of Machine page 96 ...
Page 18: ...16 BES 961BC BES 1261BC ...
Page 19: ...Chapter 1 Preparation of Embroidery Machine ...
Page 60: ...BES 961BC BES 1261BC 58 Chapter 2 Embroidering Procedures ...
Page 78: ...BES 961BC BES 1261BC 76 Chapter 3 Selection of Data and Embroidering ...
Page 118: ...BES 961BC BES 1261BC 116 Chapter 5 Setting ...
Page 119: ...Chapter 6 Operation of Machine ...
Page 130: ...Chapter 6 Operation of Machine BES 961BC BES 1261BC 128 ...
Page 131: ...Chapter 7 Maintenance ...
Page 140: ...Chapter 7 Maintenance BES 961BC BES 1261BC 138 ...
Page 141: ...Chapter 8 Standard Adjustment ...
Page 153: ...Chapter 9 List of Error Messages ...
Page 161: ...Connection and Installation of Optional Equipment ...


