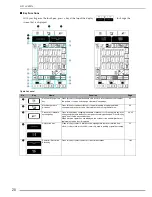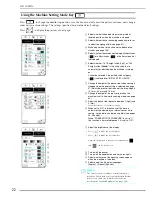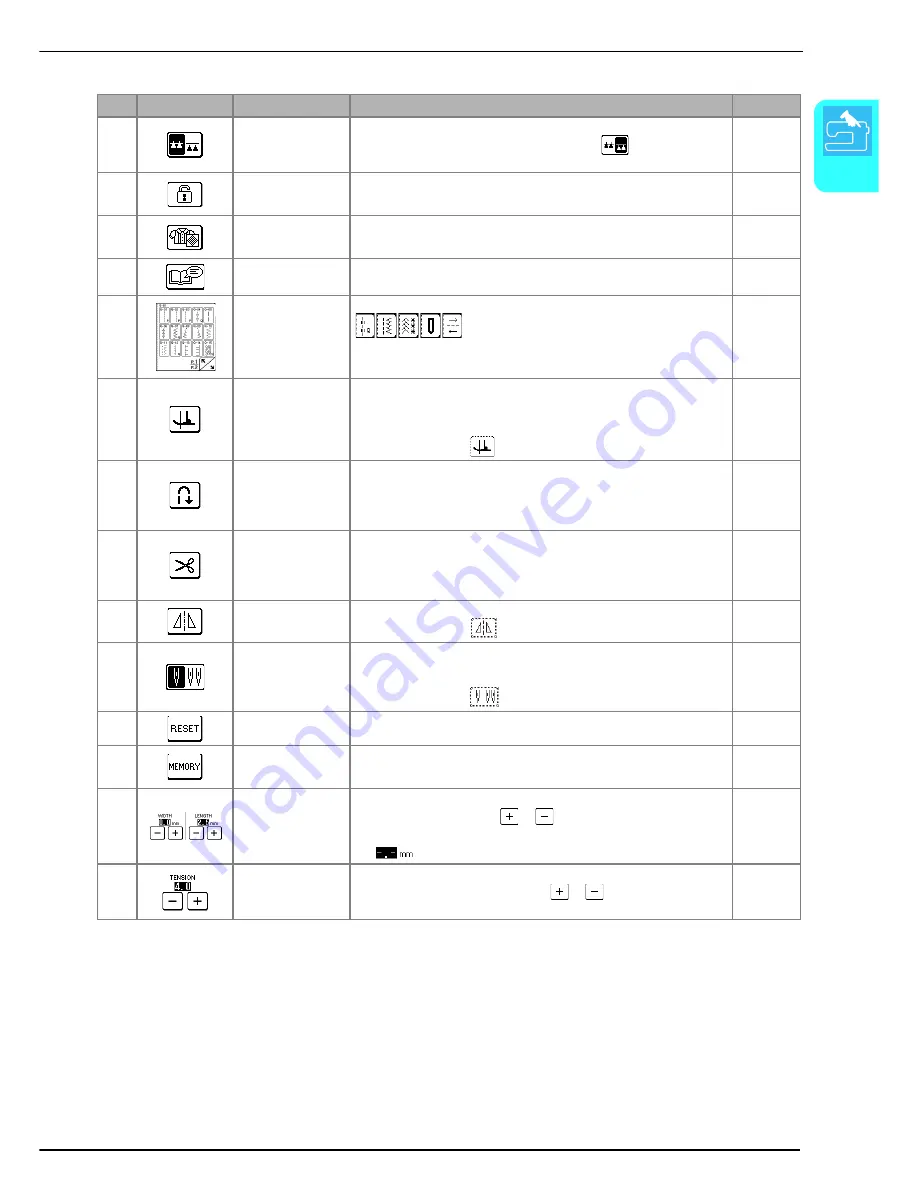
LCD SCREEN
G
etting
Re
ad
y
21
1
Screen
No.
Key
Name
Function
Page
f
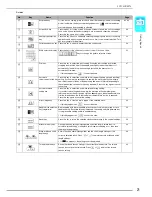
Drop feed key
For free-motion sewing, press this key to lower the feed dogs (free-motion sewing
mode). In addition, the key automatically appears as
and the feed dogs
are lowered when button sewing is selected.
62, 94
g
Screen lock key
Press this key to lock the screen. When the screen is locked, the various settings,
such as the stitch width and stitch length, are locked and cannot be changed.
Press this key again to unlock the settings.
49
h
Sewing type selection
key
Press this key when you need help selecting the appropriate stitch for a sewing
application and when you need instructions on how to sew a selected stitch. This
key is very helpful for beginners.
54
i
Pattern explanation key Press this key to see how a selected stitch can be used.
24
j
Stitch selection display
Press the key for the stitch that you want to sew. Press one of the
keys to change the pattern selection screen.
52
k
Pivot key
Press this key to select the pivot setting. When the pivot setting is selected,
stopping the machine lowers the needle and slightly raises the presser foot
automatically. In addition, when sewing is restarted, the presser foot is
automatically lowered.
• If this key appears as
, it cannot be used.
47
l
Automatic
reinforcement stitch key
Press this key to select the automatic reinforcement stitching (reverse stitching)
setting. If you select this setting before sewing, the machine will automatically
sew reinforcement stitches at the beginning and end of stitching (depending on
the selected stitch, reverse stitches may be sewn). Press this key again to cancel
the setting.
45
m
Automatic thread
cutting key
Press this key to select the automatic thread cutting setting.
If you select this setting before sewing, the machine will automatically sew
reinforcement stitches (or reverse stitches, depending on the selected stitch) and
trim the threads when the “Reverse/Reinforcement Stitch” button is pressed.
Press this key again to cancel the setting.
46
n
Mirror image key
Press this key to create a mirror image of the selected stitch.
• If this key appears as
, it cannot be used.
53
o
Needle mode selection
key (single/twin)
Before sewing with the twin needle, press this key to select the setting for twin
needle sewing. Each time this key is pressed, the setting switches between that
for single needle sewing and twin needle sewing.
• If this key appears as
, it cannot be used.
32
p
Reset key
Press this key to return the selected stitch saved settings to the original settings.
53
q
Manual memory key
Change the stitch settings (zigzag width and stitch length, thread tension,
automatic thread cutting or automatic reinforcement stitching, etc.), then save
them by pressing this key.
53
r
Stitch width and stitch
length keys
Shows the stitch width (zigzag width) and the stitch length settings of the
currently selected stitch. Press
or
to adjust the stitch width and stitch
length settings.
• If
appears, the setting cannot be adjusted.
44
s
Thread tension keys
Shows the thread tension setting of the currently selected stitch. The thread
tension is usually set automatically. Press
or
to adjust the thread
tension setting.
45
Summary of Contents for Computerized Sewing and Quilting Machine
Page 9: ...8 ...
Page 51: ...USEFUL FUNCTIONS 50 ...
Page 101: ...SEWING THE STITCHES 100 ...
Page 119: ...COMBINING STITCH PATTERNS 118 Examples of Pattern Combinations ...
Page 137: ...USING STORED CUSTOM STITCHES 136 ...
Page 162: ...English 882 U60 XE0783 001 Printed in Taiwan Operation Manual 882 U60 ...


