SEWING THE STITCHES
U
tili
ty
S
tit
ch
es
59
3
b
Use the guide on the presser foot and the
marks to sew accurate seam allowances.
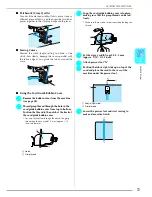
Piecing a 1/4 inch seam allowance
Sew keeping the edge of the fabrics against the guide.
a
Guide
b
1/4 inch
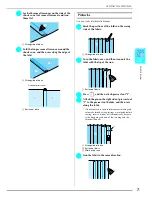
Creating an accurate seam allowance
Use the mark on the foot to begin, end, or pivot 1/4 inch
from edge of fabric.
a
Align this mark with edge of fabric to begin.
b
Beginning of stitching
c
End of stitching
d
Opposite edge of fabric to end or pivot
e
1/4 inch
Topstitching quilting, 1/8 inch
Sew with the edge of the fabric aligned with the left side
of the presser foot end.
a
Surface of fabric
b
Seam
c
1/8 inch
■
Quilting
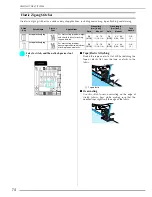
Sewing together the quilt top, batting, and backing is
called quilting. You can sew the quilt with the
walking foot to keep the quilt top, batting, and
backing from sliding. The walking foot has a set of
feed dogs that move together with the feed dogs in
the needle plate during sewing.
a
Follow the steps on page 34 to remove the
presser foot.
b
Loosen the screw of the presser foot holder to
remove the presser foot holder.
c
Set the operation lever of the walking foot so
that the needle clamp screw is set between
the fork, and position the walking foot on the
presser foot bar.
a
Operation lever
b
Needle clamp screw
c
Fork
d
Presser foot bar
Memo
For accurate fabric placement, refer to “Needle Plate
and Needle Plate Cover Marks” on page 68.
Memo
For details on pivoting, refer to “Pivoting” on page 47.
a
b
a
e
e
c
d
b
a
b
c
b
d
a c
Summary of Contents for Computerized Sewing and Quilting Machine
Page 9: ...8 ...
Page 51: ...USEFUL FUNCTIONS 50 ...
Page 101: ...SEWING THE STITCHES 100 ...
Page 119: ...COMBINING STITCH PATTERNS 118 Examples of Pattern Combinations ...
Page 137: ...USING STORED CUSTOM STITCHES 136 ...
Page 162: ...English 882 U60 XE0783 001 Printed in Taiwan Operation Manual 882 U60 ...


