background image

U S I N G   T H E   W I N D O W S

®

- B A S E D   B R O T H E R   M F L - P R O   C O N T R O L   C E N T E R   ( F O R   W I N D O W S

®

  O N L Y )      

8 - 5

YL4DCP-1000-FM5.5

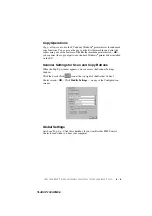
Copy Operations

Copy

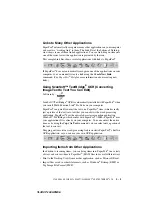
—allows you to use the PC and any Windows

®

 printer driver for enhanced 

copy functions. You can scan the page on the Brother machine and print the 
copies using any of the features of the Brother machine printer driver—

OR

you can direct the copy output to any standard Windows

®

 printer driver installed 

on the PC.

Scanner Settings for Scan and Copy Buttons

When the Pop-Up window appears, you can access the Scanner Settings 
window.

Click the Smart Click 

 icon at the top right of the Brother Control

Center screen—

OR

—Click 

Modify Settings…

 on any of the Configuration 

screens.

Global Settings

AutoLoad Pop-Up

—Click this checkbox if you want Brother MFL Control 

Center to load when you boot your computer. 

Summary of Contents for DCP-1000

Page 1: ... OWNER S MANUAL DCP 1000 version A ...

Page 2: ...ference Model Number DCP 1000 Serial Number Date of Purchase Place of Purchase The serial number is on the back of the unit Retain this Owner s Manual with your sales receipt as a permanent record of your purchase in the event of theft fire or warranty service 1996 2001 Brother Industries Ltd ...

Page 3: ...ur Digital Copier Printer needs You can download the latest software and utilities read FAQs and troubleshooting tips and go to the Solutions section to learn how to get the most from your Brother product For Customer Service Dealers Service Centers USA Only For the name of a Brother authorized dealer or service center call 1 877 BROTHER Service Centers Canada Only For service center addresses in ...

Page 4: ...ine 1 Insert the MFL Pro Suite CD ROM into your CD ROM drive 2 Click On Line Registration to register your product from the main menu IMPORTANT For technical and operational assistance you must call the country where you purchased the machine Calls must be made from within that country In USA 1 888 879 3232 voice 1 800 947 1445 fax http www brothermall com In Canada 1 877 BROTHER voice Description...

Page 5: ...T OF THE USE OR INABILITY TO USE THE SOFTWARE EVEN IF BROTHER S LICENSOR HAS BEEN ADVISED OF THE POSSIBILITY OF SUCH DAMAGES BECAUSE SOME STATES IN THE USA AND SOME PROVINCES IN CANADA DO NOT ALLOW THE EXCLUSION OR LIMITATION OF LIABILITY FOR CONSEQUENTIAL OR INCIDENTAL DAMAGES THE ABOVE LIMITATIONS MAY NOT APPLY TO YOU IN ANY EVENT BROTHER S LICENSOR S LIABILITY TO YOU FOR ACTUAL DAMAGES FROM ANY...

Page 6: ...u suspect a defect in materials or workmanship in this Product you can report it to a Brother Authorized Service Center During the Warranty Period supply Brother s representative with a copy of your dated bill of sale showing that this Product was purchased within the United States For the name of your Brother Authorized Service Center call 1 800 521 2846 After contacting the Brother Authorized Se...

Page 7: ...G IMPLIED WARRANTIES OF MERCHANTABILITY AND FITNESS FOR A PARTICULAR PURPOSE ARE HEREBY DISCLAIMED This Limited Warranty is the only warranty that Brother is giving for this Product It is the final expression and the exclusive and only statement of Brother s obligations to you It replaces all other agreements and under standings that you may have with Brother or its representatives This Limited Wa...

Page 8: ... from packing without the ink cartridges will VOID your warranty Refer to your Operation Manual for proper packaging BROTHER DISCLAIMS ALL OTHER WARRANTIES EXPRESSED OR IMPLIED INCLUDING WITHOUT LIMITATION ANY IMPLIED WARRANTIES OF MERCHANTABILITY OR FITNESS FOR A PARTICULAR PURPOSE EXCEPT TO THE EXTENT THAT ANY WARRANTIES IMPLIED BY LAW CANNOT BE VALIDLY WAIVED No oral or written information advi...

Page 9: ...1 5 Using the Scanner Glass 1 5 2 Assembly 2 1 Packing List 2 1 Choosing a Location 2 2 Assembly 2 3 Installing the Drum Unit Assembly with Toner Cartridge 2 3 Setting Up the DCP 2 5 Loading Paper 2 7 Acceptable Paper 2 7 Paper Capacity of Multi purpose Sheet Feeder 2 8 3 On Screen Programming 3 1 User Friendly Programming 3 1 Menu Selection Table 3 1 Navigation Keys 3 2 Menu Table 3 3 Key Operati...

Page 10: ...tions Key 5 6 Special Copy Options Using the ADF 5 6 Special Copy Options Using the Scanner Glass 5 6 2 in 1 5 7 4 in 1 5 7 Poster 5 7 Paper Type 5 8 Changing Default Copy Settings 5 9 Copy Mode Type of Original 5 9 Copy Contrast 5 10 Paper Type 5 10 Paper Size 5 10 6 Using Brother DCP as a Printer 6 1 Special Printing Features 6 1 Windows Printing 6 1 Bi directional Parallel Interface 6 1 Printin...

Page 11: ...Save 7 5 Print Setting For Windows 95 98 98SE Me Users Only 7 6 Duplex Printing 2 7 6 Manual Duplex 7 6 Binding Offset 7 6 Watermark 3 7 7 Print Watermark 7 7 In Background 7 7 Watermark Text 7 8 Watermark Bitmap 7 8 Position 7 8 Page Setting 4 7 9 Device Options 5 7 10 Quick Print Setup 7 11 Administrator For Windows 95 98 98SE Me Users Only 7 11 Print Date Time 7 12 Support 7 13 Brother Solution...

Page 12: ...ntrol Panel Keys 8 2 Scan Image 8 3 Scan OCR 8 3 Scan to E mail 8 3 Brother Control Center Features 8 4 Auto Configuration 8 4 Scanning Operations 8 4 Copy Operations 8 5 Scanner Settings for Scan and Copy Buttons 8 5 Global Settings 8 5 Setting Up the Scanner Configurations 8 6 To Access the Scanner Configurations Screen 8 6 Perform an Operation from the Control Center Screen 8 7 Scan to File 8 7...

Page 13: ...Text You Can Edit 9 3 Importing Items from Other Applications 9 3 Exporting Items in Other Formats 9 4 Exporting an Image File 9 4 Accessing the Scanner 9 4 Scanning an Image into Your PC 9 5 Settings in the Scanner Window 9 5 Image 9 5 Contrast 9 6 Custom 9 6 PreScanning an Image 9 7 10 Using Automatic E Mail Printing 10 1 For Windows 95 98 98SE Me Only 10 1 Main Features 10 1 To Access the On Li...

Page 14: ...For USA Only 12 2 Important 12 2 Industry Canada Compliance Statement 12 3 Important About the Interface Cable 12 3 Warranty 12 3 International ENERGY STAR Compliance Statement 12 3 Important Safety Instructions 12 4 Trademarks 12 6 13 Troubleshooting and Routine Maintenance 13 1 Troubleshooting 13 1 Error Messages 13 1 Original Jams and Paper Jams 13 4 Original is Jammed in the Top of the ADF Uni...

Page 15: ...ridge 13 15 Toner Empty Indicator 13 16 Replacing the Drum Unit 13 20 14 Glossary G 1 15 Specifications S 1 Product Description S 1 Scanner S 1 Printer S 1 Consumable Items S 2 Computer Requirements S 2 Electrical and Environment S 3 Parallel Interface S 4 USB Universal Serial Bus Interface S 4 16 Index I 1 ...

Page 16: ...xiv YL4DCP 1000 FM5 5 ...

Page 17: ... to important information warnings and actions to perform For clarification and to help you choose the correct key presses we ve added illustrations of some LCD messages boldface Bold typeface identifies a specific key on the machine control panel italics Italics typeface emphasize an important point or refer you to related topic bubble dot Bubble Dot typeface identifies the messages on the LCD of...

Page 18: ... toner cartridge is low and stays lit when toner is empty 3Reports Accesses the Reports menu so you can select a report to print Help List and User Settings 4Numeric Keys Use the numeric keys to enter the number of multiple copies 99 maximum 5Copy Keys Temporary Settings Reduce Lets you reduce copies depending upon the ratio you select Enlarge Lets you enlarge copies depending upon the ratio you s...

Page 19: ...nal OR You can change the type of media that you are using Clear Settings Resets your temporary copy settings back to the user default settings Use this key when you do not want to wait 45 seconds for the temporary settings to clear automatically Copy Makes copy 6Print Key Reset Clears data from the printer memory 7Scan Key Scan to Lets you scan the next original into your computer and select the ...

Page 20: ... ink are completely dry Originals must be from 5 8 to 8 5 inches wide and 5 8 to 14 inches long 1 Pull up the Document Extension 2 Fan the pages and stagger them at a 30 degree angle Insert the pages face up top edge first in the ADF until you feel them touch the feed roller 3 Adjust the paper guides to fit the width of your original 4 Unfold the document stopper Temperature 68 F 86 F 20 C 30 C Hu...

Page 21: ...Glass You can use the scanner glass to copy or scan one page at a time or pages of a book Originals can be letter or A4 size 8 5 inches to 11 7 inches 1 Lift the document cover 2 Using the document guidelines on the left center the original face down on the scanner glass 3 Close the document cover If the original double feeds try again by inserting a single sheet of the original in the ADF or use ...

Page 22: ... O K N O W Y O U R D I G I T A L C O P I E R P R I N T E R YL4DCP 1000 FM5 5 4 Press Copy to begin copying OR Press Scan to to begin scanning 5 Repeat Steps 1 to 4 for each page of your original Press Stop Exit to cancel ...

Page 23: ...vice at 1 877 BROTHER in USA 1 877 BROTHER in Canada or 1 514 685 6464 in Montreal See Ordering Accessories and Supplies on page ii for the correct item numbers Whenever you transport the DCP use the packing materials that came with the machine If you do not pack the machine properly you may void your warranty Power Cord Drum Unit Assembly With Free Starter Toner Cartridge Up to 1000 pages CD ROM ...

Page 24: ...UIPMENT the socket outlet should be installed near the equipment and should be easily accessible Avoid placing your machine in a high traffic area Do not place near heaters air conditioners water chemicals or refrigerators Do not expose the machine to direct sunlight excessive heat moisture or dust Do not connect your machine to electrical outlets controlled by wall switches or automatic timers Di...

Page 25: ...sembly including the toner cartridge and gently rock it from side to side five or six times to distribute the toner evenly inside the cartridge To prevent damage to the drum do NOT expose it to light for longer than a few minutes Do NOT remove the starter sheet this will be ejected while the machine is warming up Starter Sheet ...

Page 26: ... E M B L Y YL4DCP 1000 FM5 5 2 Open the scanner cover of the DCP by pulling the lever toward you and lifting the cover 3 Holding the drum unit by its handles insert it into the machine 4 Close the scanner cover ...

Page 27: ...r cord 2 Turn on the power switch WARNING This machine must be grounded using a three prong plug Lightning and power surges can damage this product We recommend that you use a quality surge protection device on the AC power line or unplug the power cord during a lightning storm Do not touch the rollers at the paper exit Power Cord ...

Page 28: ...DCP 1000 FM5 5 3 Attach the plastic paper support to the multi purpose sheet feeder 4 Pull out the paper tray and the extension 5 If your paper size is Letter or A4 unfold the paper stopper For legal paper For Letter A4 paper ...

Page 29: ...hold up to 200 sheets of paper or up to 10 envelopes Acceptable Paper The DCP can handle paper that has the following specifications Paper Type Paper Size Cut sheet Letter A4 Legal B5 A5 Executive Custom size 2 75 8 5 5 14 inches 70 216 127 356 mm Envelopes DL C5 COM 10 Monarch Post Card 2 75 8 5 5 11 inches 70 216 127 279 mm Organizer Day Timer J K L M 2 75 8 5 5 11 inches 70 216 127 279 mm Label...

Page 30: ...20 lb 75 g m2 Letter A4 paper Cut Sheet Envelopes Basis Weight 17 to 42 lb 64 to 158 g m2 20 to 24 lb 75 to 90 g m2 single thickness Caliper 0 003 to 0 008 in 0 08 to 0 2 mm 0 0033 to 0 0058 in 0 084 to 0 14 mm single thickness Moisture Content 4 to 6 by weight 4 to 6 by weight Smoothness 100 to 250 Sheffield 100 to 250 Sheffield Note Recommended Paper Types Cut Sheet Xerox 4200 or equivalent Labe...

Page 31: ...o do is follow the prompts as they guide you through the menu selections and programming options You can program settings even more quickly by pressing Menu Set and the menu number using the numeric keys Menu Selection Table You can probably perform most of these programming operations without the Owner s Manual To help you understand the menu selections and options that are found in the DCP opera...

Page 32: ... an option by pressing Menu Set when that option appears on the LCD Then the LCD shows next menu level Press to scroll to your next menu selection and then press Menu Set When you finish setting an option the LCD shows ACCEPTED Access the Menu Go to next menu level Accept an option Scroll through the current menu level Back to previous menu level Forward to next menu level Exit the Menu Note Use t...

Page 33: ... or lighter 4 2 0 LOCAL LANGUAGE Canada Only ENGLISH FRENCH Allows you to change the LCD Language to French SeeFrench Manual 2 COPY 1 COPY MODE AUTO TEXT PHOTO Selects the Copy resolution for your type of original 5 5 2 CONTRAST Adjusts the contrast 5 6 3 PAPER TYPE THIN PLAIN THICK THICKER Identify the type of paper in the multi purpose sheet feeder 5 8 4 PAPER SIZE LETTER LEGAL A4 Selects size o...

Page 34: ...he contrast 5 6 Paper Size LETTER LEGAL A4 A5 A6 B5 B6 EXECUTIVE Select the size of paper 5 5 Sort STACK SORT Sort multiple copies 5 5 Options OPT SPECIAL 2 IN 1 4 IN 1 POSTER OFF You can change the layout of copies on the print media 5 6 OPT PAPER TYPE THIN PLAIN THICK THICKER TRANSPARENCY Identify the type of paper in the multi purpose sheet feeder 5 8 Reduce 25 50 78 LGL LTR 94 A4 LTR AUTO 100 ...

Page 35: ...ing is OFF 1 Press Toner Save 2 Press to select ON or OFF and then press Menu Set Setting the Beeper Volume You can set the beeper to LOW HIGH or OFF The default setting is LOW When the beeper is set to LOW or HIGH the machine beeps every time you press a key or make an error 1 Press Menu Set 1 1 2 Press to select your option 3 When the LCD shows the option you want press Menu Set 4 Press Stop Exi...

Page 36: ...opy The default setting is 0 minutes 1 Press Menu Set 1 2 2 Use the numeric keys to enter the length of time the machine is idle before it drops into sleep mode 00 to 99 minutes and then press Menu Set 3 Press Stop Exit Setting the Print Density You can adjust print density making your printed documents darker or lighter The new setting will remain until you change it again 1 Press Menu Set 1 3 2 ...

Page 37: ...ee at a glance how to quickly program every menu selection Lists your latest default settings for GENERAL SETUP To Print a Report 1 Press Reports 2 Press to select the report you want and then press Menu Set OR Enter the number of the report you want to print For example press 1 to print the Help List 1 HELP LIST 2 USER SETTINGS or ...

Page 38: ...e the DCP as a copy machine making up to 99 copies at a time The scannable area of your machine begins at approximately one sixth inch 4mm from the edge of the paper Making a Single Copy Using the ADF 1 Place the original face up in the ADF 2 Press Copy Do NOT pull on the paper while copying is in progress Note To stop the copy process and release the original press Stop Exit Copy Keys Not Scannab...

Page 39: ...guide on the left center the original face down on the scanner glass and close the Document cover 3 Using the numeric keys enter the number of copies you want up to 99 4 Press Copy Out of Memory Message If the memory becomes full while you are making copies the LCD shows If the OUT OF MEMORY message appears while you are scanning press Stop Exit to cancel To sort the copies use Sort key See Sortin...

Page 40: ...ngs 45 seconds after it finishes copying If you want to use these temporary settings again place the next original in the ADF or on the scanner glass before the 45 seconds expire Copying Using Multiple Settings You can try different combinations of settings for the best results Note To clear your settings and start over press Clear Settings As you select multiple settings the LCD displays them Cop...

Page 41: ...r 4 Press to select the ratio you want and then press Menu Set OR For more choices select ZOOM use the numeric keys to enter any percentage between 25 and 400 and then press Menu Set 5 Press Copy When selecting an enlargement or reduction ratio you need to know the size of the paper you registered in Menu 1 1 Selecting a Fixed Ratio Press Reduce and 100 Press Enlarge and ZOOM AUTO 400 94 A4 LTR 20...

Page 42: ...ext PHOTO is used for copying photographs 1 Place the original face up in the ADF or face down on the scanner glass 2 Use the numeric keys to enter the number of copies you want up to 99 3 Press Copy Mode continuously to choose the type of original AUTO TEXT or PHOTO 4 Press Copy Paper Size Use Paper Size to temporarily identify the size of the paper in the multi purpose sheet feeder You can selec...

Page 43: ...o or four pages onto one page 1 Place the originals face up in the ADF 2 Use the dial pad to enter the number of copies you want 3 Press Options and to select OPT SPECIAL and then press Menu Set 4 Press to select 2 IN 1 4 IN 1 or OFF and then press Menu Set 5 Press Copy Special Copy Options Using the Scanner Glass You can save paper by copying either two or four pages onto one page or you can crea...

Page 44: ... copy of a photograph If you selected 2 IN 1 or 4 IN 1 in Step 4 place the next original on the scanner glass and then press Menu Set After all originals have been scanned press Copy Special Copy Options 2 in 1 4 in 1 or Poster are not available with Enlarge Reduce Poster is not available for multiple copies and requires using the scanner glass or NEXT PRESS SET END PRESS COPY ...

Page 45: ...N 17lb 18 4lb For thin paper PLAIN 18 7lb 25 3lb For ordinary plain paper THICK 25 6lb 32lb For heavy weight paper or rough paper THICKER 32 3lb 42 1lb For heavier weight paper rough paper or bond paper TRANSPARENCY For transparency OHP 1 Press Options and to select OPT PAPER TYPE and then press Menu Set 2 Press to select your type of paper and then press Menu Set 3 Press Copy or or ...

Page 46: ...ss Stop Exit OR Press to select the next setting you want to change Press Menu Set and 2 Copy Mode Type of Original You can select the Copy resolution for your type of original The default setting is AUTO which is used for originals that contain both text and photographs TEXT is used for originals containing only text PHOTO is used for copying photographs 1 Press Menu Set 2 1 2 Press to choose the...

Page 47: ... type of media that you use most often THIN 17lb 18 4lb For thin paper PLAIN 18 7lb 25 3lb For ordinary plain paper THICK 25 6lb 32lb For heavy weight paper or rough paper THICKER 32 3lb 42 1lb For heavier weight paper rough paper or bond paper 1 Press Menu Set 2 3 2 Press to select your type of paper and then press Menu Set 3 Press Stop Exit Paper Size Use Paper Size to identify the size of paper...

Page 48: ...ace The Brother DCP s parallel interface enables it to send memory and printer setup information to the computer Printing from Your PC Multi purpose Sheet Feeder The DCP s multi purpose sheet feeder can feed plain paper envelopes and organizer paper When the machine receives data from your computer it begins the print process by loading paper from the multi purpose sheet feeder Select the print co...

Page 49: ...paper straighten it well or you may get a paper jam Very thin or very thick paper is not recommended If the paper double feeds sends two sheets at once hold the stack of paper except for the front sheet while the paper is feeding When you use manual duplexing it is possible that a paper jam may occur or the printer quality might not be satisfactory Loading Envelopes in Multi purpose Sheet Feeder Y...

Page 50: ...nt of the machine When you use transparencies remove each sheet immediately after printing to prevent a paper jam or curled sheets Simultaneous Printing Copying Your DCP can print data from your computer while scanning information into the computer However when the DCP is copying on paper it pauses the PC printing operation and then resumes when copying is complete ...

Page 51: ...as vinyl coated paper Avoid using preprinted or highly textured paper For optimum printing use a recommended type of paper especially plain paper and transparencies For more information on paper specifications consult your nearest authorized sales representative or the place where you purchased your machine Use labels or transparencies that are designed for use in laser printers For the best print...

Page 52: ...lar printer using a printer command language or page description language The printer drivers are on the supplied CD ROM The latest printer driver can also be downloaded from the Brother Solutions Center at Features in the Printer Driver For Windows Users Only For more detailed information please see the on line Help in the printer driver Note The screens shown in this section are from Windows 98 ...

Page 53: ...P R I N T E R D R I V E R S E T T I N G S F O R W I N D O W S O N L Y 7 2 YL4DCP 1000 FM5 5 Basic Tab 1 Select the Paper size Multiple Page and Orientation 2 Select number of Copies and Media Type 1 2 ...

Page 54: ...t of paper or enlarging the image size for printing on page on multiple sheets of paper Border Line When printing multiple pages on one sheet with the Multiple Page feature you can select to have a solid border dash border or no border around each page on the sheet Orientation Orientation selects the position of how your document will be printed Portrait or Landscape Copies The copies selection se...

Page 55: ...be printed for all the copies selected before the next page in the document is printed Media Type You can use the following types of media in your printer For the best print quality select the type of media that you wish to use Plain Paper Thin Paper Thick Paper Thicker Paper Bond Paper Transparencies When using ordinary plain paper select Plain Paper When using heavier weight paper envelopes or r...

Page 56: ...ettings by selecting one of the following icons 1 Print Quality 2 Duplex Printing 3 Watermark 4 Page Setting 5 Device Option Print Quality 1 Resolution You can change the resolution as follows 300 dpi 600 dpi Toner Save You can save running costs by turning on the Toner Save Mode which reduces the print density 1 2 3 4 5 ...

Page 57: ...the Brightness Contrast and Graphics Quality options manually Duplex Printing 2 Choosing the Duplex Printing icon displays the Manual Duplex features available Manual Duplex Check the Manual Duplex box and there are six types of duplex directions available for each orientation In this mode the DCP prints all the even numbered pages first Then the printer driver stops and shows the instructions req...

Page 58: ...file as your source file or select one of the preset Watermarks Print Watermark The Print Watermark feature offers printing choices of On all pages On first page only From second page Custom In Background With the In background feature checked the Watermark will print behind your document on the page If this feature is not checked then the Watermark will print on top of your document ...

Page 59: ...termark click the New button and select Text or Bitmap from the Watermark Style Watermark Text Enter your Watermark text into the Text Box and select the Font Size Darkness and Style Watermark Bitmap Enter the file name and location of your bitmap image in the File box or Browse for the file location You can also set the scaling size of the image Position The position settings offer controls on wh...

Page 60: ...ment with the Scaling feature 1 Check Off if you want to print the document as it appears on your screen 2 Check Fit to Paper Size if your document has an unusual size or if you have only the standard size paper 3 Check the Free box if you want to reduce or enlarge the output You can also use the Mirror or Reverse Print feature for your page setting ...

Page 61: ...I V E R S E T T I N G S F O R W I N D O W S O N L Y 7 10 YL4DCP 1000 FM5 5 Device Options 5 Set one of the following Printer Functions Quick Print Setup Administrator For Windows 95 98 98SE Me Users Only Print Date Time ...

Page 62: ...ick your mouse button on the task tray icon This feature can be set to ON or OFF from the Device Options section Administrator For Windows 95 98 98SE Me Users Only The administrator selection permits the Copy Scaling and Watermark features to be locked and password protected Note Record your password and keep it in a safe place for future reference If you forget your password these settings can no...

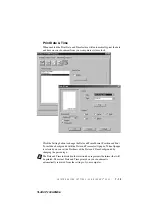
Page 63: ...ck the Setting button to change the Date and Time Format Position and Font To include a background with the Date and Time select Opaque When Opaque is selected you can set the Darkness of the Date and Time background by changing the percentage Note The Date and Time indicated in the selection box represents the format that will be printed The actual Date and Time printed on your document is automa...

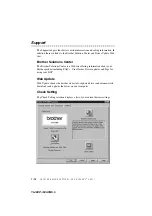
Page 64: ...d Driver Update Web sites Brother Solutions Center The Brother Solutions Center is a Web site offering information about your Brother product including FAQ s User Guides Driver updates and Tips for using your DCP Web Update Web Update checks the brother web site for updated driver and automatically downloads and updates the driver on your computer Check Setting The Check Setting selection displays...

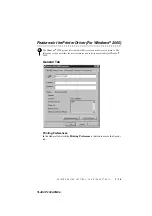
Page 65: ...nter Driver For Windows 2000 General Tab Printing Preferences In the General tab click the Printing Preferences button to access the Layout tab The Windows 2000 printer driver utilizes Microsoft s uni driver architecture The following section describes the driver features and selections available for Windows 2000 ...

Page 66: ...R I V E R S E T T I N G S F O R W I N D O W S O N L Y YL4DCP 1000 FM5 5 Layout Tab 1 Orientation Select the Orientation which is how your document will be positioned on the paper Portrait or Landscape Portrait Landscape 1 2 ...

Page 67: ...eet You can select 1 2 4 6 9 or 16 pages to be printed on one sheet of paper The image of each page will be reduced as needed to fit on the paper 2 in 1 4 in 1 Paper Quality Tab 1 Paper Source The paper source is set to Automatically Select because the FAX will select the appropriate paper source for you 1 2 ...

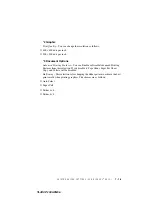
Page 68: ...gular When using heavier weight paper envelopes or rough paper select Thick Paper or Thicker Paper For OHP transparencies select Transparency Advanced Options Click the Advanced button in the Paper Quality tab to access the screen below 1 Paper Output Paper Size Select the paper size of the document you are printing This size should be the same as the paper size that is set in your application sof...

Page 69: ...er inch 3 Document Options Advanced Printing Features You can Enable or Disable Advanced Printing Features from this selection If you disable it Page Order Pages Per Sheet Copy and Collate will be disabled Halftoning This selection is for changing the dither pattern to achieve the best print results when printing graphics The choices are as follows Auto Select Super Cell Dither 6 6 Dither 8 8 ...

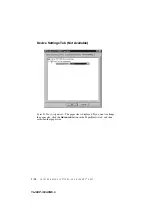
Page 70: ... R W I N D O W S O N L Y YL4DCP 1000 FM5 5 Device Settings Tab Not Available Form To Tray Assignment The paper size is displayed If you want to change the paper size click the Advanced button in the Paper Quality tab and then select another paper size ...

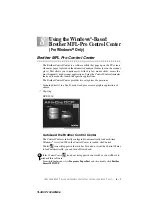
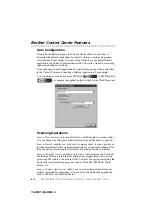
Page 71: ...ntrol Center eliminates the need to manually launch the specific applications The Brother Control Center provides two categories of operations 1 Scanning directly to a file E mail word processor or graphic application of choice 2 Copying DCP 1000 AutoLoad the Brother Control Center The Control Center is initially configured to automatically load each time Windows is started When the Control Center...

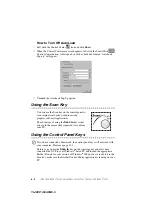
Page 72: ...e the Scan key on the control panel to scan originals into your word processing graphics or E mail applications The advantage of using the Scan to key is that you avoid the mouse clicks required to scan from your PC Using the Control Panel Keys Before you can use the Scan to key on the control panel you must have connected the DCP to your Windows based PC and loaded the appropriate Brother Drivers...

Page 73: ...ing application for further editing 1 Place the original face up in the ADF 2 Press Scan to 3 Press to select SCAN OCR and then press Menu Set The machine will scan the original perform OCR in ScanSoft TextBridge and then display the result in your word processing application for viewing and editing Scan to E mail You can scan an color original into your E mail application as a file attachment Alt...

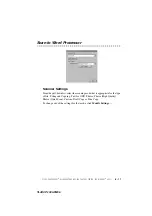
Page 74: ...the application that is listed for the Word Processor Scanning Operations Scan to File allows you to scan directly to a disk file with two mouse clicks You can change the file type destination directory and file name as needed Scan to E mail enables you with just two mouse clicks to scan a picture or text document directly into an E mail application as a standard attachment You have the option of ...

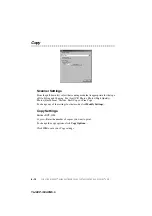
Page 75: ...he features of the Brother machine printer driver OR you can direct the copy output to any standard Windows printer driver installed on the PC Scanner Settings for Scan and Copy Buttons When the Pop Up window appears you can access the Scanner Settings window Click the Smart Click icon at the top right of the Brother Control Center screen OR Click Modify Settings on any of the Configuration screen...

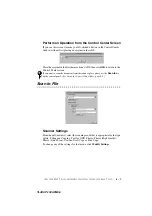
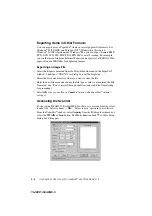
Page 76: ...olor Mode From the pull down list select Scan Size From the pull down list select Brightness Slide the adjuster from 0 to 100 Contrast Slide the adjuster from 0 to 100 Click OK to save your changes If you make a mistake or later decide to return to the original default setting just click Restore Defaults when the scanning mode is displayed To Access the Scanner Configurations Screen 1 Place the or...

Page 77: ...the original in the Brother machine s ADF then click OK to return to the Control Center screen Scan to File Scanner Settings From the pull down list select the scanning mode that is appropriate for the type of file Filing and Copying Text for OCR Photos Photos High Quality Photos Quick Scan Custom Draft Copy or Fine Copy To change any of the settings for that mode click Modify Settings If you want...

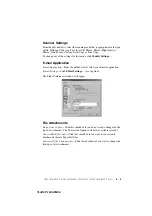
Page 78: ...r Folder from the pull down list select the type of file PaperPort Files MAX Self Viewing Files EXE PaperPort 5 0 Files MAX PaperPort 4 0 Files MAX PaperPort 3 0 Files MAX Windows Bitmap BMP PC Paintbrush PCX Multi page PCX DCX JPEG Image Files JPG TIFF Uncompressed TIF TIFF Group 4 TIF TIFF Class F TIF Multi Page TIFF Uncompressed TIF Multi Page TIFF Group 4 TIF Multi Page TIFF Class F TIF PDF Fi...

Page 79: ... mode click Modify Settings E mail Application E mail Application From the pull down list select your E mail application E mail Settings Click EMail Settings to set up links The Links Preferences window will appear File Attachments Do not convert files Click this checkbox if you do not want to change the file type of attachments The Conversion Options will not be available grayed Convert MAX files...

Page 80: ...f you want the Select QuickSend Recipient window to be displayed when you choose Scan to E mail This feature works only with MAPI type E mail applications such as Microsoft Exchange Microsoft Outlook and Eudora QuickSend List You can create a list of Email names and addresses for quick selection Click the New button to add a name s to your QuickSend list Your Email phone book listing will be displ...

Page 81: ...11 YL4DCP 1000 FM5 5 Scan to Word Processor Scanner Settings From the pull down list select the scanning mode that is appropriate for the type of file Filing and Copying Text for OCR Photos Photos High Quality Photos Quick Scan Custom Draft Copy or Fine Copy To change any of the settings for that mode click Modify Settings ...

Page 82: ...want to use the OCR package that was installed with the Brother software Click OCR Settings to choose how the OCR application will read the pages you scan into your word processor application The Preferences window will appear Select your setting and then click OK Auto Orientation Check this checkbox if you want your word processor application to read the page as it is set up Decolumnized Output C...

Page 83: ...anning mode that is appropriate for the type of file Filing and Copying Text for OCR Photos Photos High Quality Photos Quick Scan Custom Draft Copy or Fine Copy To change any of the settings for that mode click Modify Settings Target Application Application From the pull down list select the application you want to add to this Pop Up screen Click Custom Link Settings to set up links for your user ...

Page 84: ...the scanning mode that is appropriate for the type of file Filing and Copying Text for OCR Photos Photos High Quality Photos Quick Scan Custom Draft Copy or Fine Copy To change any of the settings for that mode click Modify Settings Copy Settings Brother DCP 1000 Copies Enter the number of copies you want to print To change the copy options click Copy Options Click OK to save your Copy settings ...

Page 85: ...gh the PaperPort program group See On Line Documentation for Multi Function Link Pro on the CD ROM The complete ScanSoft PaperPort Owner s Manual including ScanSoft TextBridge OCR is in the On Line Documentation on the CD ROM This chapter is only an introduction to the basic operations When you install Multi Function Link Pro Suite ScanSoft PaperPort for Brother and ScanSoft TextBridge OCR are ins...

Page 86: ...n on your computer to display it you can also double click a non PaperPort item to open it Organizing Your Items in Folders PaperPort has an easy to use filing system for organizing your items The filing system consists of folders and items that you select to view in Desktop View An item can be a PaperPort item or a non PaperPort item Folders are arranged in a tree structure in the Folder View You...

Page 87: ...PaperPort when you install Multi Function Link Pro Suite on your computer PaperPort can quickly convert the text on a PaperPort item which is really just a picture of the text into text that you can edit with a word processing application PaperPort uses the optical character recognition application ScanSoft TextBridge which comes with PaperPort OR PaperPort uses your application if it is already o...

Page 88: ...from the File pull down menu in the PaperPort window The Export XXXXX As dialog box will be displayed 2 Select the drive and directory where you want to store the file 3 Enter the new file name and choose the file type or select a name from the File Name text box You can scroll through the Directories and File Name listing for prompting 4 Select OK to save your file or Cancel to return to the Pape...

Page 89: ... Set the Color Type to Black White for text or line art Gray Scale For photographic images set the Color Type to Gray Error Diffusion or True Gray Colors Choose either 256 Color which scans up to 256 colors 24 bit color which scans up to 16 8 million colors Although using 24 bit color creates an image with the most accurate colors the image file will be approximately three times larger than a file...

Page 90: ...etter 8 1 2 11 in A4 210 297 mm Legal 8 1 2 14 in A5 148 210 mm B5 182 257 mm Executive 7 1 4 10 1 2 in Business Card 60 90 mm Custom User adjustable from 0 35 0 35 in to 8 5 14 in After you select a custom size you can adjust the scanning area further by using the left mouse button to drag the dotted outline of the scanning area This is required when you want to crop an image when scanning Busine...

Page 91: ...anned into the PC and will appear in the Scanning Area of the Scanner window 3 To crop a portion of the document to be scanned drag any side or corner of the dotted outline in the Scanning Area with the left mouse button Adjust the dotted outline until it surrounds only the portion of the original you wish to scan 4 Place the original face up in the ADF again if you used the ADF in Step 1 5 Adjust...

Page 92: ...ou can receive and print e mail data at the same time by searching for a specified character string in the mail header It allows you to see the sender subject and relevant part of the mail content To Access the On Line Documentation To Install Automatic E mail Printing Optional Application 1 Insert the MFL Pro CD ROM into your CD ROM drive 2 Click Install Software from the main CD ROM screen 3 Cli...

Page 93: ...p with Mac OS 8 5 8 51 8 6 9 0 9 0 4 9 1 The Brother Scanner Driver works only with Mac OS 8 6 9 0 9 0 4 9 1 Please check both www brother com and www solutions brother com for the OS X drivers and all driver updates Using Brother Printer Driver with Your Apple Macintosh To select the Printer 1 From the Apple menu open the Chooser 2 Click the HL 1200 MFL Pro icon On the right side of the Chooser c...

Page 94: ...perPort click File menu and select Page Setup You can change the settings for Paper Size Orientation and Scaling and then click OK 4 From application software such as PaperPort click File menu and select Print Click Print to start printing Note If you want to change Copies Pages Resolution Paper Source and Media Type select your settings before clicking Print Option Setup allows you to change Dupl...

Page 95: ...M A C I B O O K 11 3 YL4DCP 1000 FM5 5 Using Brother TWAIN Scanner Driver with Your Apple Macintosh The Brother software includes a TWAIN Scanner driver for Macintosh This Macintosh TWAIN Scanner driver can be used with applications that support the TWAIN specification You can use PaperPort for scanning ...

Page 96: ... by choosing Select Source and clicking the PaperPort icon Afterward for each original you scan choose Acquire Image by clicking the PaperPort icon The Scanner setup dialog box will appear Scanning an Image into Your Macintosh G3 G4 or iMac 1 Place the original face up in the ADF or face down on the scanner glass 2 Adjust the following settings if needed in the Scanner setup dialog box Resolution ...

Page 97: ...ray Gray Error Diffusion is used for documents that contain photographic images or graphics Error Diffusion is a method for creating simulated gray images by placing black dots in a specific matrix instead of true gray dots True Gray also is used for documents containing photographic images or graphics This mode is more exact because it uses up to 256 shades of gray It requires the most memory and...

Page 98: ...m size you can adjust the scanning area Click and hold the mouse button as you drag the mouse to crop the image Business Card Size To scan business cards select the Business Card size setting 90 60 mm and then place the business card at the center of scanner glass When scanning photographs or other images for use in a word processor or other graphics application it is a good idea to try different ...

Page 99: ...ue in the box to set the setting Click OK If the scanned image is too light set a lower Brightness value and scan the document again If the image is too dark set a higher Brightness value and scan the document again Contrast The Contrast setting is adjustable only when you have selected one of the gray scale settings but it is not available when Black White is selected as the Gray Scale Increasing...

Page 100: ... scan the image 1 Insert the original face up in the ADF or face down on the scanner glass 2 Click PreScan The entire original will be scanned into your Macintosh G3 or iMac and will appear in the Scanning Area of the Scanner dialog box 3 To scan a portion of the prescanned image click and drag the mouse to crop it 4 Insert the original face up in the ADF if you use the ADF in Step 1 5 Adjust the ...

Page 101: ...ent is certified as a Class I laser product under the U S Department of Health and Human Services DHHS Radiation Performance Standard according to the Radiation Control for Health and Safety Act of 1968 This means that the equipment does not produce hazardous laser radiation Since radiation emitted inside the equipment is completely confined within protective housings and external covers the laser...

Page 102: ...n against harmful interference in a residential installation This equipment generates uses and can radiate radio frequency energy and if not installed and used in accordance with the instructions may cause harmful interference to radio communications However there is no guarantee that interference will not occur in a particular installation If this equipment does cause harmful interference to radi...

Page 103: ...t the Interface Cable A shielded interface cable should be used in order to ensure compliance with the limits for a Class B digital device Warranty You must use the IEEE 1284 shielded parallel cable provided by Brother Industries Ltd See Ordering Accessories and Supplies page ii International ENERGY STAR Compliance Statement As an ENERGY STAR Partner Brother Industries Ltd has determined that prod...

Page 104: ...e type of power available consult your dealer or local power company 8 This product is equipped with a 3 wire grounding type plug a plug having a third grounding pin This plug will fit into only a grounding type power outlet This is a safety feature If you are unable to insert the plug into the outlet contact your electrician to replace your obsolete outlet Do not defeat the purpose of the groundi...

Page 105: ... If the product exhibits a distinct change in performance indicating a need for service 14 Do not attempt to service this product yourself as opening or removing covers may expose you to dangerous voltage points and or other risks and may void your warranty Refer all servicing to Authorized Service Personnel A list of Authorized Service Centers has been included for your convenience or you may con...

Page 106: ...n Telecom Limited Macintosh and Quick Draw are registered trademarks and iMac and iBook are trademarks of Apple Computer Inc PaperPort and TextBridge are registered trademarks of ScanSoft Inc Each company whose software title is mentioned in this manual has a Software License Agreement specific to its proprietary programs IBM IBM PC and Proprinter are registered trademarks of International Busines...

Page 107: ...ANT For technical and operational assistance you must call the country where you purchased the machine Calls must be made from within that country ERROR MESSAGE CAUSE ACTION CHANGE DRUM SOON The drum unit is near the end of its life Use the drum unit until you have a print quality problem then replace the drum unit with a new one CHECK PAPER TheDCP isoutofpaperor paper is not properly loaded in th...

Page 108: ... not inserted or fed properly or original was too long Do not pull out the jammed original until you see page 13 4 DOC COVER OPEN The document cover is open Remove any paper from the ADF and close the document cover MACHINE ERROR XX The DCP has a mechanical problem Turn off the power Then call Brother Customer Service In USA 1 800 284 4329 In Canada 1 877 BROTHER In Montreal 1 514 685 6464 OUT OF ...

Page 109: ...tomerService and tell them the Machine Error number at In USA 1 800 284 4329 In Canada 1 877 BROTHER In Montreal 1 514 685 6464 PAPER JAM The paper is jammed in the DCP Do not pull the paper out until you see pages 13 4 to 13 5 CHECK DRUM UNIT Drum unit is not installed Reinstall the drum unit TONER EMPTY Toner is used up and printing is not possible or the toner cartridge is not installed into th...

Page 110: ...nstructions to remove it Original is Jammed in the Top of the ADF Unit 1 Remove any paper from the ADF that is not jammed 2 Lift the ADF cover 3 Pull the jammed original out to the right 4 Close the ADF cover 5 Press Stop Exit Original is Jammed Inside the ADF Unit 1 Remove any paper from the ADF that is not jammed 2 Lift the document cover 3 Pull the jammed original out to the right 4 Press Stop ...

Page 111: ...ause you may damage the DCP and cause toner to scatter on the next printed pages After you have used the DCP some internal parts of the machine are extremely HOT When you open the scanner cover of the machine never touch the internal parts shown in the following picture Paper is Jammed in the Multi purpose Sheet Feeder 1 Push down the paper lever and then pull the jammed paper upward and out of th...

Page 112: ...T I N E M A I N T E N A N C E YL4DCP 1000 FM5 5 Paper is Jammed near the Drum Unit 1 Open the scanner cover 2 Remove the drum unit 3 Gently pull out the jammed paper 4 Reinstall the drum unit 5 Close the scanner cover Paper is jammed near drum unit ...

Page 113: ...xt missing Your computer is not recognizing the printer input buffer s full signal Please make sure to connect the printer cable correctly The DCP cannot print full pages of a document OUT OF MEMORY error message occurs Reduce the printer resolution Reduce the complexity of your document and try again Reduce the graphic quality or the number of font sizes within your application software My header...

Page 114: ...n press Copy If there is paper in the multi purpose sheet feeder make sure it is straight If the paper is curled you should straighten it Sometimes it is helpful to remove the paper turn the stack over and place it back into the multi purpose sheet feeder Reduce the amount of paper in the multi purpose sheet feeder and then try again How can I load envelopes You can load envelopes from the multi p...

Page 115: ...ges and the LCD shows CHANGE DRUM SOON replace the drum unit with a new one Printed pages are stained with toner or have vertical stripes Dark Stripes or Toner Stains Clean the machine s interior and the primary corona wire of the toner cartridge See Routine Maintenance page 13 13 and Cleaning the Drum Unit page 13 15 Make sure that the tab of the corona wire is at the Home position If after clean...

Page 116: ...e the drum unit with a new one If the Marks do not disappear it may be that the drum was marked or damaged by excessive exposure to light In this case replace the drum unit with a new one Printed pages are blurred at the center or at either edge Blurred Page Certain environmental conditions such as humidity high temperatures etc may cause this condition to occur Make sure the machine is placed on ...

Page 117: ... machine from the AC outlet WARNING Do not unplug the DCP after a print job until you hear the final click 2 Open the scanner cover 3 Remove the drum unit Caution Remove the drum unit and toner cartridge assembly Leave the toner cartridge installed in the drum unit 4 Place the drum unit and toner cartridge assembly into the plastic bag and seal the bag completely 5 Close the scanner cover Remove t...

Page 118: ...it in the original carton with the original packing material 7 Pack the drum unit and toner cartridge assembly in the original carton as shown below 8 Close the carton and tape it shut Note If you are returning the machine to Brother as part of the Exchange Service pack only the machine Keep all separate parts to use with your Exchange machine ...

Page 119: ...leaning the Scanner Turn the machine power switch OFF and lift the document cover Clean the scanner glass and the white film with isopropyl alcohol on a lint free cloth Lift the ADF unit Clean the white bar and the glass strip with isopropyl alcohol on a lint free cloth Document Cover White Film White Bar Glass Strip ...

Page 120: ...nds or clothes get dirty immediately wipe or wash it off with cold water 1 Open the scanner cover 2 Remove the drum unit assembly WARNING Just after you have used the DCP some internal parts of the machine are extremely HOT When you open the scanner cover never touch the internal part shown in the following picture 3 Wipe the electric terminals with isopropyl alcohol on a cotton swab 4 Wipe the ge...

Page 121: ...ver Replacing the Toner Cartridge The DCP can print approximately 2 200 pages with one toner cartridge When the toner cartridge is running low the LCD showsTONER LOW The machine is supplied with a starter toner cartridge that must be replaced after 1 000 pages Actual page count will vary depending on your average document type i e standard letter detailed graphics It is a good idea to keep a new t...

Page 122: ...control panel flashes on and off to indicate the toner is low The Toner Empty LED light stays on and the LCD shows TONER EMPTY to indicate that the toner is empty Once this indication appears the DCP will not resume printing until you have installed a new toner cartridge WARNING Just after you have used the DCP some internal parts of the machine will be extremely HOT So please be careful Display T...

Page 123: ...e drum unit by holding each side of the drum by its handles and gently lifting the drum forward toward you 4 Gently turn the lever on the toner cartridge counterclockwise until it stops The used toner cartridge cannot be removed unless the shutter is closed by turning the lever completely to the front Note Place the drum unit on a drop cloth or large piece of disposable paper to avoid spilling and...

Page 124: ...oner cartridge is left unpacked for a long period of time the toner life is shortened You can use only a genuine Brother toner cartridge TN 250 series which is specially formulated to ensure top print quality Using another brand of toner cartridge may void your DCP s warranty Note Handle the toner cartridge carefully If toner scatters on your hands or clothes immediately wipe it off or wash it wit...

Page 125: ...artridge into the opening on the right side of the drum unit To ensure that the toner cartridge and the drum unit fit together correctly make sure that the toner cartridge guide arrow is exactly aligned with the guide arrow on the drum unit 9 Gently turn the lever on the toner cartridge clockwise until it stops 10 Reinstall the drum unit in the DCP and close the scanner cover NewToner Cartridge Dr...

Page 126: ...m light the unit may be damaged Handle the toner cartridge and the drum unit carefully because they contain toner If toner scatters and your hands or clothes get dirty immediately wipe or wash with cold water For best performance use only a genuine Brother toner cartridge The product should be used only in a clean dust free environment with adequate ventilation WARNING Just after you have used the...

Page 127: ...r 2 Remove the used drum unit Place the drum unit on a drop cloth or large piece of disposable paper to avoid spilling and scattering the toner 3 Remove the toner cartridge from the used drum unit and keep it in a safe place For more information see Replacing the Toner Cartridge page 13 15 Used Drum Unit Toner Cartridge ...

Page 128: ...ution Do NOT remove the clear plastic starter sheet Note Discard the used drum unit according to local regulations If you are not sure of them call your local Sanitation Department Be sure to seal the drum unit tightly so toner powder does not spill out of the unit When discarding used drums keep them separate from domestic garbage Aluminum Bag New Drum Unit Used Drum Unit Starter Sheet ...

Page 129: ...g the new drum unit by its handles install it Close the scanner cover 7 The DCP will eject the clear plastic starter sheet automatically Caution Do not touch the scanner window with your finger Handle the toner cartridge and drum unit carefully because they contain toner If toner scatters and your hands or clothes get dirty immediately wipe or wash it off with cold water Toner Cartridge Drum Unit ...

Page 130: ...or copying photographs LCD liquid crystal display The display screen on the machine that shows interactive messages during On Screen Programming Menu mode The programming mode for changing the settings of your machine Multi Function Link Pro Suite Software application Turns your machine into a printer and a scanner Photo mode A resolution setting that uses varying shades of gray for the best repre...

Page 131: ... Feeder ADF Up to 30 sheets 20 lbs Printer Driver Windows 95 98 98SE Me 2000 Professional and Windows NT Workstation Version 4 0 driver supporting Brother Native Compression mode and bi directional capability Apple Macintosh QuickDraw Driver for OS 8 5 8 51 8 6 9 0 9 0 4 9 1 Interface Bi directional parallel IEEE 1284 USB Universal Serial Bus Interface Memory Capacity 8 MB Print Method Electrophot...

Page 132: ...u use and number of pages per print job True Type Fonts on CD ROM TrueType compatible soft fonts for Windows on the on bundled CD ROM Processor Minimum Speed Minimum RAM Recommended RAM Available Hard Disk Space Minimum System Requirements Computer Platform Operating System Version 95 98 98SE Me NT Workstation 4 0 2000 Professional XP OS 8 5 8 51 Printing Only OS 8 6 9 2 Printing and Scanning Mac ...

Page 133: ...r in multi purpose sheet feeder Power Source 120V AC 50 60Hz USA Canadian Version Only Power Consumption Average Operating Copying 260 W 25 C Peak 940 W Sleep Mode 15 W or less Stand by 75 W or less 25 C Noise Operating 52 dB A or less Stand by 39 dB A or less Humidity Operating 20 to 80 without condensation Storage 10 to 90 without condensation Dimensions 18 1 18 13 9 inches 459 458 354 mm Weight...

Page 134: ... 2 DATA 1 Input 20 0V S G 3 DATA 2 Input 21 0V S G 4 DATA 3 Input 22 0V S G 5 DATA 4 Input 23 0V S G 6 DATA 5 Input 24 0V S G 7 DATA 6 Input 25 0V S G 8 DATA 7 Input 26 0V S G 9 DATA 8 Input 27 0V S G 10 ACKNLG Output 28 0V S G 11 BUSY Output 29 0V S G 12 PE Output 30 0V S G 13 SLCT Output 31 INPUT PRIME Input 14 AUTO FEED Input 32 FAULT Output 15 N C 33 N C 16 0V S G 34 N C 17 0V S G 35 N C 18 5V...

Page 135: ...ng 8 1 to 8 7 C cleaning drum unit 13 15 printer 13 14 scanner 13 13 control panel 1 2 copying contrast 5 10 default setting 5 9 enlarging 5 4 multiple 5 2 photographs 5 5 5 9 quality 13 8 reducing 5 4 resolution 1 2 scannable area 5 1 single 5 1 temporary settings 5 3 using ADF 1 4 5 1 using scanner glass 1 5 5 2 Customer Service i D drivers Macintosh 11 1 Windows 6 1 7 1 drum unit cleaning 13 15...

Page 136: ... 1 specifications S 1 speed S 1 two sided 6 2 programming your DCP 3 1 R Redial Pause 1 2 reducing copies 5 4 reports 4 3 resolution printing S 1 scanning 9 5 S safety instructions 12 4 Scaning 8 1 scanning Macintosh 11 4 Windows 8 1 9 4 shipping the DCP 13 11 Sleep mode 4 2 software Automatic E mail Printing 10 1 Brother Control Center 8 1 ScanSoft PaperPort and TextBridge OCR 9 1 Speed Dial 1 2 ...

Page 137: ...I N D E X I 3 YL4DCP 1000 FM5 5 W warranties Canada vi disclaimer iii USA iv World Wide Web i ...

Page 138: ...I 4 I N D E X YL4DCP 1000 FM5 5 ...

Page 139: ...the power available in foreign countries Using USA or CANADA models overseas is at your own risk and will void your warranty Brother International Corporation 100 Somerset Corporate Boulevard P O Box 6911 Bridgewater NJ 08807 0911 USA Brother International Corporation Canada Ltd 1 rue Hôtel de Ville Dollard des Ormeaux QC CANADA H9B 3H6 Visit us on the World Wide Web http www brother com ...

Reviews: