6 - 4 8
Confidential
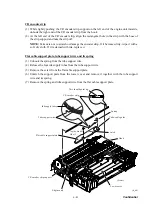
NOTE:
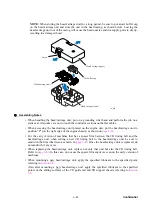
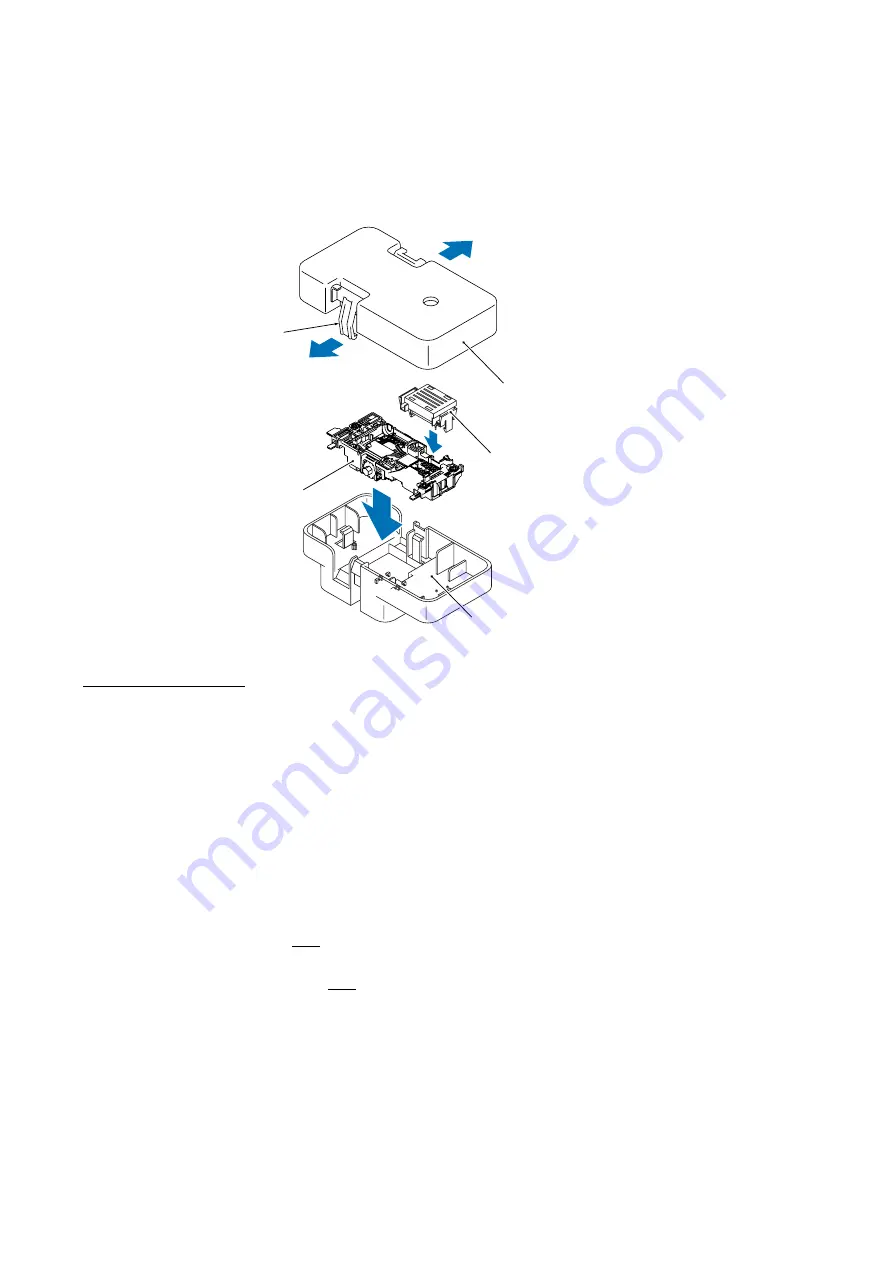
When storing the head/carriage unit for a long period, be sure to put an air buffer cap
on the head/carriage unit and store the unit in the head casing, as shown below. Leaving the
head/carriage unit out of the casing will cause the head nozzles and ink supply ports to dry up,
resulting in a damaged head.
Latch
Head casing (upper)
Air buffer cap
Head casing (lower)
Head/carriage unit
(6_49)
Assembling Notes
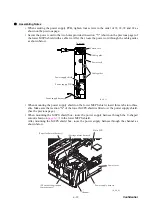
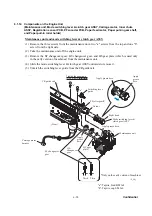
• When handling the head/carriage unit, put on a grounding wrist band and perform the job on a
static mat. Also take care not to touch the conductor sections on the flat cables.
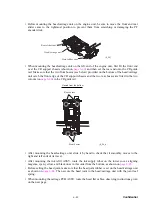
• When accessing the head/carriage unit placed on the engine unit, put the head/carriage unit in
position "P" (on the right edge of the engine chassis) as shown on
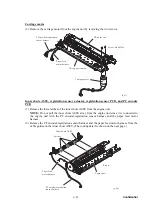
• For the early version of machines that has a spacer film between the CR timing belt and the
head/carriage unit, when setting a new CR timing belt to the head/carriage unit, be sure to
sandwich the film inbetween as shown on
. Once the head/carriage unit is replaced, do
not sandwich it any more.
• When replacing the head/carriage unit, replace not only that unit but also the CR timing belt.
. In this case, do not use the spacer film any more even on the early version of
machines.
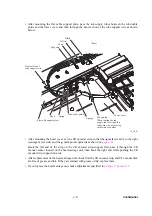
• When mounting a new head/carriage unit, apply the specified lubricant to the specified point,
Also, after mounting a new head/carriage unit, apply the specified lubricant to the specified
points on the sliding surfaces of the CR guide rail and CR support chassis, referring to
Summary of Contents for DCP 330C - Color Inkjet - All-in-One
Page 1: ...Confidential MULTIFUNCTION EQUIPMENT SERVICE MANUAL MODELS DCP750CW DCP540CN DCP330C DCP130C ...
Page 9: ...vii Confidential Legal limitations for copying ...
Page 10: ...Confidential CHAPTER 1 PARTS NAMES AND FUNCTIONS ...
Page 16: ...1 5 Confidential 1 2 CONTROL PANEL Models with color LCD 1 2 3 4 5 10 9 8 7 6 Color Black ...
Page 17: ...1 6 Confidential Ink ...
Page 18: ...1 7 Confidential Models with monochrome LCD 1 2 3 4 5 10 9 8 7 6 ...
Page 19: ...1 8 Confidential ...
Page 21: ...Confidential CHAPTER 2 SPECIFICATIONS ...
Page 39: ...Confidential CHAPTER 3 THEORY OF OPERATION ...
Page 88: ...Confidential CHAPTER 4 ERROR INDICATION AND TROUBLESHOOTING ...
Page 131: ...Confidential CHAPTER 6 DISASSEMBLY REASSEMBLY AND LUBRICATION ...
Page 209: ...Confidential CHAPTER 7 ADJUSTMENTS AND UPDATING OF SETTINGS REQUIRED AFTER PARTS REPLACEMENT ...
Page 222: ...7 11 Confidential Head Positioning Test Pattern ...
Page 226: ...7 15 Confidential Paper Feeding Check Pattern for the Paper Feed Roller ...
Page 227: ...7 16 Confidential Paper Feeding Check Pattern for the Paper Ejection Roller ...
Page 229: ...7 18 Confidential Vertical Alignment Check Patterns 600DPI 1200DPI ...
Page 232: ...7 21 Confidential Margin Check Pattern ...
Page 241: ...Confidential CHAPTER 8 CLEANING ...
Page 245: ...Confidential CHAPTER 9 MAINTENANCE MODE ...
Page 253: ...9 6 Confidential Scanning Compensation Data List a b c d e f i ...
Page 256: ...9 9 Confidential Test Pattern ...
Page 261: ...9 14 Confidential Configuration List ...
Page 269: ...9 22 Confidential Paper Feeding Check Pattern for the Paper Feed Roller ...
Page 270: ...9 23 Confidential Paper Feeding Check Pattern for the Paper Ejection Roller ...
Page 275: ...9 28 Confidential Vertical Alignment Check Patterns 600DPI 1200DPI ...
Page 278: ...9 31 Confidential Margin Check Pattern ...
Page 381: ...Confidential Power supply PCB U S A and Canadian models ...
Page 382: ...Confidential Power supply PCB European Asian and Oceanian models ...
Page 383: ...Confidential January 07 SM FAX054 8CAA01 2 Printed in Japan ...


