background image

6

6 - 1

6

Network printing from Macintosh

®

Overview

This chapter explains how to print from Macintosh

®

 on a Network using the Simple Network Configuration 

capabilities on Mac OS

®

 X 10.2.4 or greater. For more information on how to configure the Brother ink driver 

on a Network for Mac OS

®

 9.1 to 9.2, see the Quick Setup Guide included with the machine.

For updated information on printing from a Macintosh

®

, visit the Brother Solutions Center at: 

http://solutions.brother.com.

Printing from a Macintosh

®

 using the Simple Network 

Configuration capabilities of Mac OS

®

 X

With the release of Mac OS

®

 X 10.2, Apple

®

 introduced Simple Network Configuration capabilities.

The Simple Network Configuration capabilities of Mac OS

®

 X lets you create an instant network of computers 

and smart devices by connecting them to each other. The smart devices automatically configure themselves 
to be compatible with your network.

You do not need to manually configure any IP address or network strings within the printer as the printer will 
automatically configure itself.

Please note that you need to use Mac OS

®

 X 10.2.4 or later version.

How to select the print driver (Mac OS

®

 X


10.2.4 or greater)

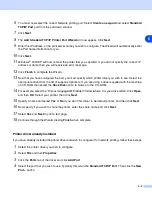
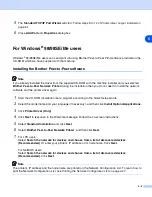
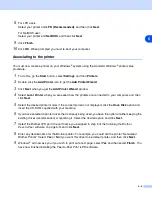
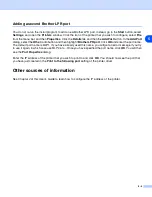
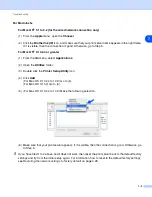
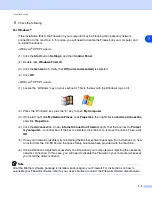
1

Turn the power of the machine ON.

2

From the 

Go

 menu, select 

Applications

.

3

Open the 

Utilities

 folder.

4

Double click the 

Printer Setup Utility 

Icon. (Mac OS

®

 X 10.2.x users, click the 

Print Center

 icon.)

5

Click 

Add

.

(For Mac OS

®

 X 10.2.4 to 10.3) Go to Step 6.

(For Mac OS

®

 X 10.4) Go to Step 7.

Summary of Contents for DCP-340CW

Page 1: ...using this machine on your network You can print or view this manual from the CD ROM at any time please keep the CD ROM in a conven ient place for quick and easy reference at all times The Brother Solutions Center http solutions brother com is your one stop resource for all your printing needs Download the latest drivers and utilities for your machine read FAQs and troubleshooting tips or learn ab...

Page 2: ...registered trademarks or trademarks of their respective companies Compilation and publication notice Under the supervision of Brother Industries Ltd this manual has been compiled and published covering the latest product s descriptions and specifications The contents of this manual and the specifications of this product are subject to change without notice Brother reserves the right to make change...

Page 3: ...tion on Windows XP Professional x64 Edition support IMPORTANT NOTE For technical and operational assistance you must call the country where you purchased the machine Calls must be made from within that country In Europe Visit http www brother com for contact information on your local Brother office If you have any comments or suggestions please write to us at In Europe European Technical Services ...

Page 4: ...in the network but the computer is not wireless capable 1 6 Protocols 1 7 TCP IP protocols and functions 1 7 DHCP BOOTP RARP 1 7 APIPA 1 7 DNS client 1 7 LPR LPD 1 7 Port9100 1 7 mDNS 1 8 TELNET 1 8 SNMP 1 8 2 Configuring your machine for a network with an Ethernet cable connection Overview 2 1 IP addresses subnet masks and gateways 2 1 IP address 2 1 How the IP address is assigned to your print s...

Page 5: ...c installer application in the CD ROM to configure your machine for a wireless network 3 13 Changing the print server settings 3 13 Using the BRAdmin Professional utility to change the print server settings for Windows only 3 13 Using the Remote Setup to change the print server settings for Windows and Mac OS X 10 2 4 or greater not available for DCP 340CW 3 15 Remote Setup for Windows 3 15 MFC Re...

Page 6: ...ng the Remote Setup 6 2 Changing the configuration using the BRAdmin Light utility 6 2 Other sources of information 6 3 7 Troubleshooting Overview 7 1 General problems 7 1 CD ROM is inserted but does not start automatically 7 1 How to reset the Brother print server to factory default 7 1 My computer cannot find the machine print server My machine print server does not appear in the window of Remot...

Page 7: ... a wired computer in Infrastructure mode for Mac OS X 10 2 4 or greater 9 14 Installation using a wireless computer in Ad hoc Mode for Mac OS X 10 2 4 or greater 9 25 A Appendix A Other ways to set the IP address for advanced users and administrators A 1 Using DHCP to configure the IP address A 1 Using BOOTP to configure the IP address A 1 Using RARP to configure the IP address A 2 Using APIPA to ...

Page 8: ... with normal every day document printing place the Brother machine as close to the network access point router as possible with minimal obstructions Large objects and walls between the two devices as well as interference from other electronic devices can affect the data transfer speed of your documents Due to these factors wireless may not be the best method of connection for all types of document...

Page 9: ...Network PC FAX not available for DCP 340CW You can directly send a PC file as a PC FAX on your network See Chapter 6 for Windows and Chapter 8 for Macintosh of the Software User s Guide on the CD ROM for complete description Windows users can also PC FAX receive See Chapter 6 of the Software User s Guide Network PhotoCapture CenterTM You can view retrieve and save data from a media card inserted i...

Page 10: ... computer running Mac OS X 10 2 4 or greater This utility is available as a download from http solutions brother com Remote Setup for Windows Remote Setup for Macintosh The Remote Setup software allows you to configure network settings from a Windows or Macintosh Types of network connections Wired network connection example Peer to Peer printing using TCP IP In a Peer to Peer environment each comp...

Page 11: ...hine The Brother machine can also communicate with Macintosh TCP IP compatible operating systems devices Network Shared printing In a Network Shared environment each computer sends and receives data to and from the Brother machine via a centrally controlled computer This type of computer is often called a server or a print server Its job is to control the printing of all print jobs In a larger net...

Page 12: ...stems devices Wireless network connection example Connected to wireless capable computer with an access point in the network Infrastructure mode This type of network has a central access point at the heart of the network The access point can also act as a bridge or a gateway to a wired network When the Brother wireless machine your machine is part of this network it receives all print jobs via an ...

Page 13: ...ne is part of this network it receives all print jobs directly from the computer sending the print data An access point is in the network but the computer is not wireless capable This type of network has a central access point at the heart of the network The access point is connected to a computer which is not wireless capable with the Ethenet cable When the Brother wireless machine your machine i...

Page 14: ...Brother product DHCP BOOTP RARP By using the DHCP BOOTP RARP protocols the IP address can be automatically configured Note To use the DHCP BOOTP RARP protocols please contact your network administrator APIPA If you do not assign an IP address manually using the BRAdmin software or automatically using a DHCP BOOTP RARP server the Automatic Private IP Addressing APIPA protocol will automatically ass...

Page 15: ...in a Mac OS X Simple Network Configured system Mac OS X 10 2 4 or greater TELNET The Brother print server supports TELNET server for command line configuration SNMP The Simple Network Management Protocol SNMP is used to manage network devices including computers routers and Brother network ready machines ...

Page 16: ... on the network Please follow the instructions in the supplied Quick Setup Guide If you want to configure your machine without using the automatic installer application please read this chapter and learn how to configure the TCP IP settings Then in Chapter 5 for Windows and Chapter 6 for Macintosh you will learn how to install the network software and the printer driver into the operating system r...

Page 17: ...protocol will automatically assign an IP address from the range 169 254 1 0 to 169 254 254 255 For more information on APIPA see Using APIPA to configure the IP address on page A 3 If the APIPA protocol is disabled the default IP address of a Brother print server is 192 0 0 192 However you can easily change this IP address number to match with the IP address details of your network For information...

Page 18: ...environment How to configure your machine using the BRAdmin Professional utility Note Please use the BRAdmin Professional utility version that was supplied on the CD ROM with your Brother product You can also download the latest Brother BRAdmin Professional utility version from http solutions brother com This utility is only available for Windows users If you are using Personal Firewall software e...

Page 19: ... the Network Configuration List on your print server 4 Double click the unconfigured device 5 Enter the IP address Subnet Mask and Gateway if needed of your print server 6 Click OK 7 With the correctly programmed IP address you will see the Brother print server in the device list Using the control panel to configure your machine for a network You can configure your machine for a network using the ...

Page 20: ...he print server which you want to configure in the right frame of the main BRAdmin window 4 Select Configure Print Server from the Control menu 5 Enter a password if you have set it Note By default no password is required to change the print server settings You can set a password to change the print server settings Double click the device you want to set a password Click Control tab and then click...

Page 21: ...button All Programs Brother MFL Pro Suite MFC XXXX Remote Setup then MFC XXXX LAN where XXXX is your model name 2 Click TCP IP Wired or Setup Misc 3 You can now change the print server settings Remote Setup for Macintosh The MFC Remote Setup application allows you to configure many MFC settings from a Macintosh application When you access this application the settings on your machine will be downl...

Page 22: ...erms and concepts of these settings which may be helpful when you configure the wireless network machine SSID Service Set Identifier and channels You need to configure the SSID and a channel to specify the wireless network you want to connect to SSID Each wireless network has its own unique network name and it is technically referred to as SSID or ESSID Extended Service Set Identifier The SSID is ...

Page 23: ...is shared by all devices that will access the wireless network The Brother machine uses the WEP keys as the pre determined key WPA PSK Enables a Wi Fi Protected Access Pre shared key WPA PSK which enables the Brother wireless machine to associate with access points using TKIP encryption WPA Personal See Connected to wireless capable computer with an access point in the network Infrastructure mode ...

Page 24: ...re are three methods to configure your wireless network machine by using the machine control panel recommended using the SecureEasySetupTM software and using the automatic installer application on the CD ROM Using the Setup Wizard from the control panel LAN menu for a wireless network You can configure your print server by using the Setup Wizard function This is located in the LAN menu on the mach...

Page 25: ... is displayed and you have selected it go to Step 11 If you want to add a new SSID go to Step 7 7 Select New SSID using or Press Set 8 Enter a new SSID using or You can use Enlarge Reduce key or Number of copies key to scroll left or right Press Set 9 Using or select Infrastructure when instructed Press Set If you select Ad hoc go to Step 11 Setup WLAN 1 Setup Wizard Searching SSID Select SSID Set...

Page 26: ...h shows go to Step 14 If you select a blank key go to Step 15 13 Enter a new WPA key Press Set Go to Step 17 14 If you want to change the key you selected in Step 12 select Change using or Press Set Go to Step 15 If you want to keep the key you selected in Step 12 select Keep using or Press Set Go to Step 16 15 Enter a new WEP key using or You can use Enlarge Reduce key or Number of copies key to ...

Page 27: ...ecified z 19 If you wireless network is connected successfully the display shows Connected for 2 seconds and configuration is completed z 20 If the connection failed the display shows Connection Error for 2 seconds See Wireless network troubleshooting on page 7 8 For MFC 640CW 1 Press Menu Set 5 3 1 2 The machine will search for a wireless network name SSID around the machine KEY1 selected with no...

Page 28: ...0 Press Set 6 Using or select Infrastructure when instructed Press Set If you select Ad hoc go to Step 8 7 Select the Authentication method using or and press Set If you select Open System go to Step 8 If you select Shared Key go to Step 9 If you select WPA PSK go to Step 10 8 Select the Encryption type None or WEP using or and press Set If you select None go to Step 14 If you select WEP go to Ste...

Page 29: ...want to keep the key you selected in Step 9 select 2 Keep Press Set Go to Step 13 12 Enter a new WEP key Press Set Go to Step 14 13 The following will be displayed z 14 To apply the settings use or to select 1 Yes and press Set To cancel select 2 No If you select 1 Yes go to Step 15 If you select 2 No go back to Step 2 z 15 The machine will connect to the wireless device you specified z Set WEP KE...

Page 30: ...for a wireless network name SSID around the machine 6 After a few seconds you can select the SSID from the list using or Press OK to select the SSID If you select the SSID displayed go to Step 11 If you want to add a new SSID go to Step 7 7 Select New SSID using or Press OK 8 Enter the SSID For further information on entering text see Entering Text for MFC 640CW and MFC 820CW on page B 10 Press OK...

Page 31: ...ess OK Go to Step 15 If you want to keep the key you selected in Step 12 press or to select Keep Press OK Go to Step 16 15 Enter a new WEP key Press OK Go to Step 17 16 The following will be displayed 17 To apply the settings press 1 to select Yes To cancel press 2 to select No If you select 1 for Yes go to Step 18 If you select 2 for No go back to Step 5 18 The machine will connect to the wireles...

Page 32: ...Note Routers or access points that support SecureEasySetupTM will have the following logo displayed on the product For DCP 340CW 1 Temporarily place the machine with 50 cm 20 in range of the access point 2 Push the SecureEasySetupTM button on your wireless router or access point 3 Press Menu on the control panel of the Brother machine 4 Press or to select 3 LAN Press Set 5 Press or to select 3 Set...

Page 33: ...The wireless network connection status will be displayed and will show either Connecting WLAN Connected or Connection Error Connecting WLAN is displayed when the print server is trying to make a connection to your router or access point Connected is displayed when the print server is successfully connected to your router or access point You can now use your machine in a wireless network Connection...

Page 34: ...y settings Page 4 28 and try again Using the Brother automatic installer application in the CD ROM to configure your machine for a wireless network See Chapter 8 for Windows and Chapter 9 for Macintosh for information on how to use the Brother automatic installer application in the CD ROM we have provided with the machine Changing the print server settings Once you have configured your machine for...

Page 35: ...ver the device will appear as APIPA in the BRAdmin Professional utility screen You can find the node name and Ethernet address Node Address above by printing out the Network Configuration List See Printing the Network Configuration List on page 4 27 for information on how to print the Network Configuration List on your print server 2 Select TCP IP in the left frame of the main BRAdmin window 3 Sel...

Page 36: ...Remote Setup application allows you to configure many MFC settings from a Macintosh application When you access this application the settings on your machine will be downloaded automatically to your Macintosh and displayed on your Macintosh screen If you change the settings you can upload them directly to the machine 1 Double click the Macintosh HD icon on your desktop Library Printers Brother the...

Page 37: ...ows software and Remote Setup applications for Windows and Macintosh which also can be used to configure many aspects of the network See Changing the print server settings on page 2 5 for wired connection or Changing the print server settings on page 3 13 for wireless connection 1 TCP IP Wired 2 TCP IP WLAN If you connect the machine with the Ethernet cable to your network use the TCP IP Wired men...

Page 38: ...ne will scan the network for a DHCP server if it can find one and if the DHCP server is configured to allocate an IP address to the machine then the IP address supplied by the DHCP server will be used If no DHCP server is available then the machine will scan for a BOOTP server If a BOOTP server is available and it is configured correctly the machine will take its IP address from the BOOTP server I...

Page 39: ...n BOOTP mode BOOTP is an alternative to rarp that has the advantage of allowing configuration of the subnet mask and gateway In order to use BOOTP to configure the IP address make sure that BOOTP is installed and running on your host computer it should appear in the etc services file on your host as a real service type man bootpd or refer to your system documentation for information BOOTP is usual...

Page 40: ...If you do not want your print server configured via DHCP BOOTP or RARP you must set the BOOT METHOD to static this will prevent the print server from trying to obtain an IP address from any of these systems To change the BOOT METHOD use the machine s control panel or the BRAdmin Professional utility 2 IP Address This field displays the current IP address of the machine If you have selected a BOOT ...

Page 41: ... address Note Each number can also be increased decreased by holding down or 7 Press Stop Exit For MFC 640CW 1 For Wired Press Menu Set 5 1 2 For Wireless Press Menu Set 5 2 2 2 Select 1 to change Enter the IP address 3 Press Menu Set 4 Press Stop Exit For MFC 820CW 1 Press Menu 2 Press or to select LAN Press OK 3 For Wired Press or to select TCP IP Wired For Wireless Press or to select TCP IP WLA...

Page 42: ...1 Press Menu 2 Press or to select 3 LAN Press Set 3 For Wired Press or to select 1 TCP IP Wired For Wireless Press or to select 2 TCP IP WLAN Press Set 4 Press or to select 3 Subnet Mask Press Set 5 Press or to select 1 to change Press Set 6 Press repeatedly to enter the first three digit number for the Subnet Mask address Press Set Repeat this step until you have entered the fourth three digit nu...

Page 43: ...IP WLAN Press OK 4 Press or to select Subnet Mask Press OK 5 Press or to select Change Press OK 6 Enter the Subnet Mask address Press OK 7 Press Stop Exit 4 Gateway This field displays the current gateway or router address used by the machine If you are not using DHCP or BOOTP to obtain the gateway or router address enter the address you wish to assign If you do not have a gateway or router leave ...

Page 44: ...l you have entered the fourth three digit number to complete the Gateway address Note Each number can also be increased decreased by holding down or 7 Press Stop Exit For MFC 640CW 1 For Wired Press Menu Set 5 1 4 For Wireless Press Menu Set 5 2 4 2 Select 1 to change Enter the Gateway address 3 Press Menu Set 4 Press Stop Exit For MFC 820CW 1 Press Menu 2 Press or to select LAN Press OK 3 For Wir...

Page 45: ...last six digits of the Ethernet address up to 15 characters For DCP 340CW 1 Press Menu 2 Press or to select 3 LAN Press Set 3 For Wired Press or to select 1 TCP IP Wired For Wireless Press or to select 2 TCP IP WLAN Press Set 4 Press or to select 5 Node Name Press Set 5 Press or to select 1 to change Press Set 6 The Node Name will be displayed 7 Press Stop Exit Note DCP 340CW cannot change the Nod...

Page 46: ...Press or to select LAN Press OK 3 For Wired Press or to select TCP IP Wired For Wireless Press or to select TCP IP WLAN Press OK 4 Press or to select Node Name Press OK 5 Press or to select Change Press OK 6 Enter the Node Name Press OK 7 Press Stop Exit 6 WINS Config This selection controls how the machine obtains the IP address of the WINS server For DCP 340CW 1 Press Menu 2 Press or to select 3...

Page 47: ...ss Stop Exit For MFC 640CW 1 For Wired Press Menu Set 5 1 6 For Wireless Press Menu Set 5 2 6 2 Press or to select Auto or Static 3 Press Menu Set 4 Press Stop Exit For MFC 820CW 1 Press Menu 2 Press or to select LAN Press OK 3 For Wired Press or to select TCP IP Wired For Wireless Press or to select TCP IP WLAN Press OK 4 Press or to select WINS Config Press OK 5 Press or to select Auto or Static...

Page 48: ...elect 1 TCP IP Wired For Wireless Press or to select 2 TCP IP WLAN Press Set 4 Press or to select 7 WINS Server Press Set 5 Press or to select Primary or Secondary Press Set 6 Press repeatedly to enter the first three digit number for the WINS Server address Press Set Repeat this step until you have entered the fourth three digit number to complete the WINS Server address Note Each number can also...

Page 49: ...P WLAN Press OK 4 Press or to select WINS Server Press OK 5 Press or to select Primary or Secondary Press OK 6 Press or to select Change Press OK 7 Enter the WINS Server address Press OK 8 Press Stop Exit Primary WINS Server IP Address This field specifies the IP address of the primary WINS Windows Internet Naming Service server If set to a non zero value the machine will contact this server to re...

Page 50: ...ld blank 8 DNS Server For DCP 340CW 1 Press Menu 2 Press or to select 3 LAN Press Set 3 For Wired Press or to select 1 TCP IP Wired For Wireless Press or to select 2 TCP IP WLAN Press Set 4 Press or to select 8 DNS Server Press Set 5 Press or to select Primary or Secondary Press Set 6 Press repeatedly to enter the first three digit number for the DNS Server address Press Set Repeat this step until...

Page 51: ...ess OK 5 Press or to select Primary or Secondary Press OK 6 Press or to select Change Press OK 7 Enter the DNS Server address Press OK 8 Press Stop Exit Primary DNS Server IP Address This field specifies the IP address of the primary DNS Domain Name Service server Secondary DNS Server IP Address This field specifies the IP address of the secondary DNS server It is used as a backup to the Primary D...

Page 52: ...print server cannot obtain an IP address through the BOOT Method you have set For DCP 340CW 1 Press Menu 2 Press or to select 3 LAN Press Set 3 For Wired Press or to select 1 TCP IP Wired For Wireless Press or to select 2 TCP IP WLAN Press Set 4 Press or to select 9 APIPA Press Set 5 Press or to select On or Off Press Set 6 Press Stop Exit For MFC 640CW 1 For Wired Press Menu Set 5 1 9 For Wireles...

Page 53: ...on page 3 3 2 SecureEasySetup The SecureEasySetupTM software allows you to configure the wireless network easier than configuring it manually By pushing a button on the wireless router or access point you can complete setup and secure the wireless network Your router or access point must also support SecureEasySetupTM See Using the SecureEasySetupTM software to configure your machine in a wireless...

Page 54: ...it For MFC 640CW 1 Press Menu Set 5 4 1 2 The current wireless network status will be displayed Active 802 11b Active 802 11g Searching SSID or Disabled 3 Press Stop Exit For MFC 820CW 1 Press Menu 2 Press or to select LAN Press OK 3 Press or to select WLAN Status Press OK 4 Press or to select Status Press OK 5 The current wireless network status will be displayed Active 802 11b Active 802 11g Dis...

Page 55: ... current wireless network signal strength will be displayed Strong Medium Weak or None 6 Press Stop Exit For MFC 640CW 1 Press Menu Set 5 4 2 2 The current wireless network signal strength will be displayed Strong Medium Weak or None 3 Press Stop Exit For MFC 820CW 1 Press Menu 2 Press or to select LAN Press OK 3 Press or to select WLAN Status Press OK 4 Press or to select Signal Press OK 5 The cu...

Page 56: ...ss or to select 3 LAN Press Set 3 Press or to select 4 WLAN Status Press Set 4 Press or to select 3 SSID Press Set 5 The current wireless network SSID will be displayed 6 Press Stop Exit For MFC 640CW 1 Press Menu Set 5 4 3 2 The current wireless network SSID will be displayed 3 Press Stop Exit For MFC 820CW 1 Press Menu 2 Press or to select LAN Press OK 3 Press or to select WLAN Status Press OK ...

Page 57: ... Press Menu 2 Press or to select 3 LAN Press Set 3 Press or to select 4 WLAN Status Press Set 4 Press or to select 4 Comm Mode Press Set 5 The current wireless network communication mode will be displayed Ad hoc or Infrastructure 6 Press Stop Exit For MFC 640CW 1 Press Menu Set 5 4 4 2 The current wireless network communication mode will be displayed Ad hoc or Infrastructure 3 Press Stop Exit For ...

Page 58: ...network security settings authentication method and encryption mode settings For DCP 340CW 1 Press Menu 2 Press or to select 3 LAN Press Set 3 Press or to select 4 WLAN Status Press Set 4 Press or to select 5 Security Mode Press Set 5 The current wireless network security settings will be displayed WEP WPA PSK or None 6 Press Stop Exit For MFC 640CW 1 Press Menu Set 5 4 5 2 The current wireless ne...

Page 59: ... server to operate in 100BaseTX full or half duplex or in 10BaseT full or half duplex mode by auto negotiation 100BASE TX Full Duplex 100B FD or Half Duplex 100B HD and 10BASE T Full Duplex 10B FD or Half Duplex 10B HD fix the print server link mode This change is valid after the print server has been reset default is Auto Note If you incorrectly set this value you may not be able to communicate w...

Page 60: ...ct LAN Press OK 3 Press or to select Setup Misc Press OK 4 Press or to select Wired LAN Press OK 5 Press or to select Auto 100B FD 100B HD 10B FD 10B HD 6 Press Stop Exit 2 Time Zone not available for DCP 340CW This field displays your country time zone The time shown is the time difference between your country and Greenwich Mean Time For example the Time Zone for Eastern Time in the USA and Canad...

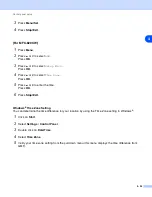
Page 61: ...one Press OK 5 Press or to enter the time Press OK 6 Press Stop Exit Windows Time Zone Setting You can determine the time difference for your location by using the Time Zone setting in Windows 1 Click on Start 2 Select Settings Control Panel 3 Double click on Date Time 4 Select Time Zone 5 Verify your time zone setting from the pull down menu this menu displays the time difference from GMT ...

Page 62: ...o select 6 Network I F Press Set 4 Press or to select Wired LAN or WLAN Press Set 5 If you change the current setting press or to select 1 Yes to reboot the machine If you do not change the current setting press or to select 2 No to exit the menu For MFC 640CW 1 Press Menu Set 5 6 2 Press or to select Wired LAN or WLAN 3 If you change the current setting select 1 Yes to reboot the machine If you d...

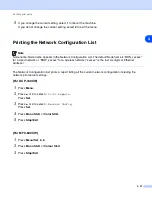
Page 63: ...for a wired network or BRW_xxxxxx for a wireless network xxxxxx is the last six digits of Ethernet address The Network Configuration List prints a report listing all the current network configuration including the network print server settings For DCP 340CW 1 Press Menu 2 Press or to select 4 Print Reports Press Set 3 Press or to select 3 Network Config Press Set 4 Press Mono Start or Color Start ...

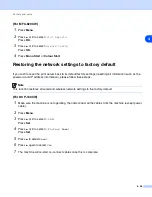
Page 64: ...l information such as the password and IP address information please follow these steps Note This function restores all wired and wireless network settings to the factory default For DCP 340CW 1 Make sure the machine is not operating then disconnect all the cables from the machine except power cable 2 Press Menu 3 Press or to select 3 LAN Press Set 4 Press or to select 0 Factory Reset Press Set 5 ...

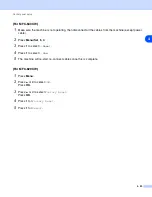
Page 65: ...machine except power cable 2 Press Menu Set 5 0 3 Press 1 to select 1 Reset 4 Press 1 to select 1 Yes 5 The machine will re start re connect cables once this is complete For MFC 820CW 1 Press Menu 2 Press or to select LAN Press OK 3 Press or to select Factory Reset Press OK 4 Press 1 for Factory Reset 5 Press 1 for Reboot ...

Page 66: ...irewall software If you are connecting to a Network Print Queue or Share printing only see Installation when using a Network Print Queue or Share printer driver only on page A 8 for installation details For Windows 2000 XP users By default Windows 2000 XP systems install the necessary print software to enable you to print This section describes the most commonly used configuration Standard TCP IP ...

Page 67: ...u are using a driver supplied with the machine on CD ROM then select the Have Disk option to browse to the CD ROM 14 For example select the X your language W2K Addprt folder where X is your drive letter Click Open and then OK Select your printer then click Next 15 Specify a name and select Yes or No if you want this driver to be default printer and then click Next 16 Now specify if you wish to sha...

Page 68: ... menu program according to the Quick Setup Guide 2 Select the model name and your language if necessary and then click Install Optional Applications 3 Click Printer Driver Only 4 Click Next in response to the Welcome message Follow the on screen instructions 5 Select Standard Installation and click Next 6 Select Brother Peer to Peer Network Printer and then click Next 7 For LPR users Select Search...

Page 69: ... 5 Select the desired printer model If the correct model is not displayed click the Have Disk option and insert the CD ROM supplied with your machine 6 If you have selected a printer driver that is already being used you have the option of either keeping the existing driver recommended or replacing it Select the desired option and click Next 7 Select the Brother LPR port the port name you assigned...

Page 70: ...ight Brother LPR port Click OK and enter the port name The default port name is BLP1 If you have already used this name you will get an error message if you try to use it again in which case use BLP2 etc Once you have specified the port name click OK You will then see the Port Properties dialog Enter the IP address of the printer that you wish to print to and click OK You should now see the port t...

Page 71: ... Configuration capabilities The Simple Network Configuration capabilities of Mac OS X lets you create an instant network of computers and smart devices by connecting them to each other The smart devices automatically configure themselves to be compatible with your network You do not need to manually configure any IP address or network strings within the printer as the printer will automatically co...

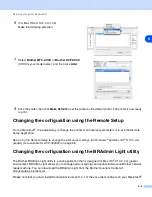
Page 72: ...emote Setup application See Using the Remote Setup to change the print server settings for Windows and Mac OS X 10 2 4 or greater not available for DCP 340CW on page 2 6 Changing the configuration using the BRAdmin Light utility The Brother BRAdmin Light utility is a Java application that is designed for Mac OS X 10 2 4 or greater environment BRAdmin Light allows you to change network settings and...

Page 73: ...from Macintosh 6 3 6 Other sources of information 1 See Chapter 2 of this User s Guide to learn how to configure the IP address of the printer 2 Visit http solutions brother com for more information on network printing ...

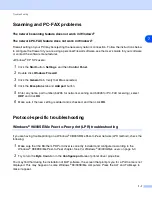
Page 74: ...matically after inserting the CD ROM In this case execute setup exe in the root directory of the CD ROM How to reset the Brother print server to factory default You can reset the print server back to its default factory settings resetting all information such as the password and IP address information See Restoring the network settings to factory default on page 4 28 My computer cannot find the ma...

Page 75: ...ine and ready to print 2 Check to see if the LCD displays LAN Active after being connected to the network The LCD displays LAN Active The print server is connected to the network The LCD does not display LAN Active The print server is not connected to the network 3 Print the Network Configuration List and check if the settings such as IP address settings are correct for your network The problem ma...

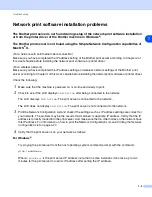
Page 76: ...ilities folder 3 Double click the Printer Setup Utility icon 4 Click Add For Mac OS X 10 2 4 to 10 3 Go to 5 For Mac OS X 10 4 Go to 6 5 For Mac OS X 10 2 4 to 10 3 Make the following selection 6 Make sure that your print server appears If it is visible then the connection is good Otherwise go to Step 5 5 If you have tried 1 to 4 above and it does not work then reset the print server back to the d...

Page 77: ...s then right click Local Area Connection and click Properties 4 Click the Advanced tab Under Internet Connection Firewall verify that the box next to Protect my computer is unchecked If the box is selected click the box to remove the check Then click OK 5 Once your firewall is disabled try reinstalling the Brother software package For instructions on how to install from the CD ROM use the Quick Se...

Page 78: ... to print 2 Print the Network Configuration List of the machine and check if the settings such as IP address settings are correct for your network The problem may be the result of mismatched or duplicate IP address Verify that the IP address is correctly loaded into the print server And make sure that no other nodes on the network have this IP address 3 Verify that the print server is on your netw...

Page 79: ...at your print server appears If it is visible then the connection is good Otherwise go to Step 5 4 Reset the print server back to the default factory settings and try from the initial setup again For information how to reset to the default factory settings see Restoring the network settings to factory default on page 4 28 Error during printing If you try to print while other users are printing lar...

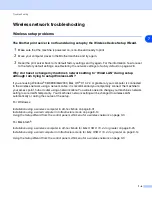
Page 80: ...r 54295 for network scanning and 54926 for PC FAX receiving select UDP and click OK 6 Make sure if the new setting is added and is checked and then click OK Protocol specific troubleshooting Windows 98 98SE Me Peer to Peer print LPR troubleshooting If you are having trouble printing on a Windows 98 98SE Me Peer to Peer network LPR method check the following 1 Make sure that the Brother LPR Port dr...

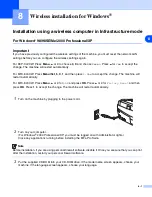
Page 81: ...uter is connected to the wireless network using a network cable it is recommended you temporarily connect the machine to your access point hub or router using a network cable You will also need to change your machine s network setting to wired LAN temporarily Your machine s network setting will be changed to wireless LAN automatically or during the course of the setup For Windows Installation usin...

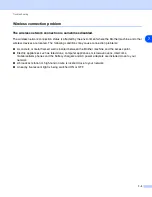
Page 82: ... conditions may cause connection problems A concrete or metal framed wall is located between the Brother machine and the access point Electric appliances such as televisions computer appliances microwave ovens intercoms mobile cellular phones and the battery chargers and AC power adapters are installed close to your network A broadcast station or high tension wire is located close to your network ...

Page 83: ...will restart automatically For MFC 820CW Press Menu or for LAN and press OK Press or for Factory Reset and then press OK Press 1 to accept the change The machine will restart automatically 1 Turn on the machine by plugging in the power cord 2 Turn on your computer For Windows 2000 Professional XP you must be logged on with Administrator rights Close any applications running before installing the M...

Page 84: ...s 2000 update first The Windows 2000 update is included with the MFL Pro Suite installer To install the update follow the steps below 1 Click OK to start installation of the Windows update 2 When instructed click OK to restart your computer 3 After the computer restarts the installation of MFL Pro Suite will automatically continue If the installation does not continue automatically open the main m...

Page 85: ...ee port on your access point hub or router using a network cable If you can temporarily connect with a network cable Choose I m able to temporarily connect my device to my access point with a network cable and then click Next Go to step 9 If you do not have a network cable or cannot temporarily connect the Brother wireless device to your access point Choose I m not able to connect my device to my ...

Page 86: ...ess OK Press or for Network I F and press OK Press or for Wired LAN and press OK If Reboot OK is displayed press 1 for Yes The wireless network interface will become inactive with this setting The machine will restart automatically After it restarts check the box on the screen and click Next If Accepted is displayed press Stop Exit Check the box and click Next Note It will take approximately one m...

Page 87: ... will need to configure the wireless settings from the control panel Follow the onscreen instruction to complete the setup When the setup is finished go to step 22 for driver installation 10 Continued from Step 8 If you choose This PC has wireless capability check I am using an access point in infrastructure mode and then click Next ...

Page 88: ...ox on the screen and click Next For MFC 640CW Press Menu Set 5 6 and then press or to choose WLAN Press Menu Set If Reboot OK is displayed press 1 Yes The wired network interface will become inactive with this setting The machine will restart automatically After it restarts check the box on the screen and click Next For MFC 820CW Press Menu on the control panel Press or for LAN and press OK Press ...

Page 89: ...o return your PC back to its original wireless settings 12 To communicate with the un configured wireless machine temporarily change the wireless settings on your PC to match machine s default settings shown on this screen Click Next Item Record the current wireless computer settings Communication mode Infrastructure Ad hoc Channel 1 14 Network name SSID ESSID Authentication method Open system Sha...

Page 90: ...zard will search for wireless networks available from your machine If more than one wireless network is available the following list appears Choose the access point you wish to associate the machine with and then click Next Note If your target access point does not appear on the list you can manually add it by clicking the Add button Follow the on screen instructions for entering the Name SSID and...

Page 91: ...e pull downs in each setting box Then enter the Network key and click Next Note If you want to set more than one WEP key click Advanced If you do not know the Authentication or Encryption settings for network contact your network administrator 17 Click Next The settings will be sent to your machine The settings will remain unchanged if you click Cancel Note If you want to manually enter the IP add...

Page 92: ...chine will restart automatically After the machine is restarted check Checked and confirmed and then click Next Wait until the restart is completed Go to step 22 21 Using the information you recorded in Step 11 return the wireless settings of your computer back to their original settings Click Next You have completed the wireless setup A four level indicator of your machine s LCD represents the wi...

Page 93: ...ro Suite Software License Agreement window appears click Yes if you agree to the Software License Agreement 25 The installation of the Brother drivers will automatically start The installation screens appear one after another Please wait for a while Improper Setup DO NOT try to cancel any of the screens during this installation If your wireless settings fail and error message will appear during th...

Page 94: ...ne is not yet configured for use on your network the following screen appears Click OK The Configure IP Address windows will appear Enter the proper IP address information for your network by following the on screen instructions 28 When the Brother and ScanSoft on line Registration screen is displayed make your selection and follow the on screen instructions 29 Click Finish to restart your compute...

Page 95: ...ults window will be shown If the Diagnostics shows a failure please follow the on screen instructions or read on line help and FAQ s in Start All Programs Brother MFL Pro Suite MFC 820CW or DCP 340CW or MFC 640CW The MFL Pro Suite including Brother Network Printer driver Network Scanner driver and Network PhotoCapture CenterTM have been installed and the installation is now complete ...

Page 96: ...ll restart automatically For MFC 820CW Press Menu or for LAN and press OK Press or for Factory Reset and then press OK Press 1 to accept the change The machine will restart automatically 1 Turn on the machine by plugging in the power cord 2 Turn on your computer For Windows 2000 Professional XP you must be logged on with Administrator rights Close any applications running before installing the MFL...

Page 97: ...s 2000 update first The Windows 2000 update is included with the MFL Pro Suite installer To install the update follow the steps below 1 Click OK to start installation of the Windows update 2 When instructed click OK to restart your computer 3 After the computer restarts the installation of MFL Pro Suite will automatically continue If the installation does not continue automatically open the main m...

Page 98: ...ree port on your access point hub or router using a network cable If you can temporarily connect with a network cable Choose I m able to temporarily connect my device to my access point with a network cable and then click Next Go to step 9 If you do not have a network cable or cannot temporarily connect the Brother wireless device to your access point Choose I m not able to connect my device to my...

Page 99: ...ress OK Press or for Network I F and press OK Press or for Wired LAN and press OK If Reboot OK is displayed press 1 for Yes The wireless network interface will become inactive with this setting The machine will restart automatically After it restarts check the box on the screen and click Next If Accepted is displayed press Stop Exit Check the box and click Next Note It will take approximately one ...

Page 100: ...on to complete the setup When the setup is finished go to step 19 for driver installation 10 Continued from Step 8 Choose This PC has a network cable to connect to the wireless network and then click Next 11 Follow the on screen instructions to complete the setup by the control panel See Using the Setup Wizard from the control panel LAN menu for a wireless network on page 3 3 When finished go to t...

Page 101: ...izard will search for wireless networks available from your machine If more than one wireless network is available the following list appears Choose the access point you wish to associate the machine with and then click Next Note If your target access point does not appear on the list you can manually add it by clicking the Add button Follow the on screen instructions for entering the Name SSID an...

Page 102: ...e pull downs in each setting box Then enter the Network key and click Next Note If you want to set more than one WEP key click Advanced If you do not know the Authentication or Encryption settings for network contact your network administrator 16 Click Next The settings will be sent to your machine The settings will remain unchanged if you click Cancel Note If you want to manually enter the IP add...

Page 103: ... is completed 19 The driver installation starts After reading and accepting the ScanSoft PaperPort 9 0SE License Agreement click Yes Not available if you chose Driver Install Only in Step 6 20 The installation of PaperPort 9 0SE will automatically start and is followed by the installation of MFL Pro Suite You have completed the wireless setup A four level indicator of your machine s LCD represents...

Page 104: ... machine is configured for your network choose the machine from the list and then click Next Note This window will not appear if there is only one machine connected on the network as it will be chosen automatically Improper Setup DO NOT try to cancel any of the screens during this installation If your wireless settings fail and error message will appear during the installation of MFL Pro Suite and...

Page 105: ...to restart your computer For Windows 2000 Professional XP you must be logged on with Administrator rights Note After restarting the computer the Installation Diagnostics will run automatically If the installation is unsuccessful the installation results window will be shown If the Diagnostics shows a failure please follow the on screen instructions or read on line help and FAQ s in Start All Progr...

Page 106: ...e will restart automatically For MFC 820CW Press Menu or for LAN and press OK Press or for Factory Reset and then press OK Press 1 to accept the change The machine will restart automatically 1 Turn on the machine by plugging in the power cord 2 Turn on your computer For Windows 2000 Professional XP you must be logged on with Administrator rights Close any applications running before installing the...

Page 107: ...s 2000 update first The Windows 2000 update is included with the MFL Pro Suite installer To install the update follow the steps below 1 Click OK to start installation of the Windows update 2 When instructed click OK to restart your computer 3 After the computer restarts the installation of MFL Pro Suite will automatically continue If the installation does not continue automatically open the main m...

Page 108: ... Install and then click Next 7 Choose I d like to use the SecureEasySetupTM function of my access point to configure my wireless device and click Next 8 Ensure the on screen message and click Next 9 Temporary place the machine within a 50 cm 20 inch range from the access point ...

Page 109: ...r Setup WLAN and then press OK Press or for SecureEasySetup and press OK Note It will take approximately one minute for the LAN menu on the LCD to become available after the machine restarts or is turned on 12 Press Menu Set Note If the LCD shows Connection Error please try again 13 Click Next 14 The configuration is finished Relocate the machine to a location that is within range of your access p...

Page 110: ...ro Suite Software License Agreement window appears click Yes if you agree to the Software License Agreement 18 The installation of the Brother drivers will automatically start The installation screens appear one after another Please wait for a while Improper Setup DO NOT try to cancel any of the screens during this installation If your wireless settings fail and error message will appear during th...

Page 111: ...ne is not yet configured for use on your network the following screen appears Click OK The Configure IP Address windows will appear Enter the proper IP address information for your network by following the on screen instructions 21 When the Brother and ScanSoft on line Registration screen is displayed make your selection and follow the on screen instructions 22 Click Finish to restart your compute...

Page 112: ...ults window will be shown If the Diagnostics shows a failure please follow the on screen instructions or read on line help and FAQ s in Start All Programs Brother MFL Pro Suite MFC 820CW or DCP 340CW or MFC 640CW The MFL Pro Suite including Brother Network Printer driver Network Scanner driver and Network PhotoCapture CenterTM have been installed and the installation is now complete ...

Page 113: ...restart automatically For MFC 820CW Press Menu or for LAN and press OK Press or for Factory Reset and then press OK Press 1 to accept the change The machine will restart automatically 1 Turn on the machine by plugging in the power cord 2 Turn on your computer For Windows 2000 Professional XP you must be logged on with Administrator rights Close any applications running before installing the MFL Pr...

Page 114: ...s 2000 update first The Windows 2000 update is included with the MFL Pro Suite installer To install the update follow the steps below 1 Click OK to start installation of the Windows update 2 When instructed click OK to restart your computer 3 After the computer restarts the installation of MFL Pro Suite will automatically continue If the installation does not continue automatically open the main m...

Page 115: ...hoose Automatic Recommended and then click Next 8 Choose I m not able to connect my device to my access point with a network cable Click Next 9 If you are using a wireless computer choose This PC has wireless capability and make sure I am using an access point in infrastructure mode is not checked Click Next ...

Page 116: ...tarts check the box on the screen and click Next For MFC 640CW Press Menu Set 5 6 and then press or to choose WLAN Press Menu Set If Reboot OK is displayed press 1 Yes The wired network interface will become inactive with this setting The machine will restart automatically After it restarts check the box on the screen and click Next For MFC 820CW On the cotrol panel press Menu Press or for LAN and...

Page 117: ... when if you want to restore the current settings in future 11 To communicate with the un configured wireless machine change the wireless settings on this PC to the machine s default settings which are shown on the screen Click Next Item Record the current wireless computer settings Communication mode Infrastructure Ad hoc Channel 1 14 Network name SSID ESSID Authentication method Open system Shar...

Page 118: ...d will search for wireless networks available from your machine If more than one wireless network is available the following list appears Choose the Ad hoc network you wish to associate the machine with and then click Next If no Ad hoc wireless network are available you need to create a new wireless network Go to step 16 Note If your target Ad hoc network does not appear on the list you can manual...

Page 119: ...ion settings of your existing wireless network Choose the Authentication Method and Encryption Mode from the pull downs in each setting box Then enter the Network key and click Next Note If you want to set more than one WEP key click Advanced If you do not know the Authentication or Encryption settings for network contact your network administrator 16 Enter a new SSID and choose the Authentication...

Page 120: ...ed wireless device you must configure your PC to use same wireless settings Manually change the wireless settings on your PC to match the machine s wireless settings shown on this screen Click Next The settings shown on this screen are for example only Your settings will not be the same 19 The driver installation starts After reading and accepting the ScanSoft PaperPort 9 0SE License Agreement cli...

Page 121: ... appear one after another Please wait for a while 23 If the machine is configured for your network choose the machine from the list and then click Next Note This window will not appear if there is only one machine connected on the network as it will be chosen automatically Improper Setup DO NOT try to cancel any of the screens during this installation If your wireless settings fail and error messa...

Page 122: ...to restart your computer For Windows 2000 Professional XP you must be logged on with Administrator rights Note After restarting the computer the Installation Diagnostics will run automatically If the installation is unsuccessful the installation results window will be shown If the Diagnostics shows a failure please follow the on screen instructions or read on line help and FAQ s in Start All Progr...

Page 123: ...accept the change The machine will restart automatically For MFC 640CW Press Menu Set 5 0 1 and then press 1 Yes to accept the change The machine will restart automatically For MFC 820CW Press Menu or for LAN and press OK Press or for Factory Reset and then press OK Press 1 to accept the change The machine will restart automatically 1 Turn on the machine by plugging in the power cord 2 Turn on you...

Page 124: ...for Macintosh 9 2 9 5 Click MFL Pro Suite to install 6 Choose Wireless Network Connection and then click Next 7 Choose Wireless Setup and Driver Install and then click Next 8 Choose Automatic Recommended and then click Next ...

Page 125: ...will become inactive with this setting The machine will restart automatically After it restarts check the box on the screen and click Next For MFC 640CW Press Menu Set 5 6 and then press or to choose Wired LAN Press Menu Set If Reboot OK is displayed press 1 Yes The wireless network interface will become inactive with this setting The machine will restart automatically After it restarts check the ...

Page 126: ...ge slots as shown Click Next and go to step 14 Note If you do not have a network cable check I don t have a network cable and click Next You will need to configure the wireless settings from the control panel Follow the onscreen instruction to complete the setup When the setup is finished go to step 23 for driver installation 11 Continued from step 9 If you choose This PC has wireless capability c...

Page 127: ...CW Press Menu Set 5 6 and then press or to choose WLAN Press Menu Set If Reboot OK is displayed press 1 Yes The wired network interface will become inactive with this setting The machine will restart automatically After it restarts check the box on the screen and click Next For MFC 820CW Press Menu on the control panel Press or for LAN and press OK Press or for Network I F and press OK Press or fo...

Page 128: ... You will need them before you finish your setup 13 To communicate with the un configured wireless machine temporarily change the wireless settings on your Macintosh to match machine s default settings shown on this screen Click Next Item Record the current wireless computer settings Communication mode Infrastructure Ad hoc Channel 1 14 Network name SSID ESSID Authentication method Open system Sha...

Page 129: ...wizard will search for wireless networks available from your machine If more than one wireless network is available the following list appears Choose the access point you wish to associate the machine with and then click Next Note If your target access point does not appear on the list you can manually add it by clicking the Add button Follow the on screen instructions for entering the Name SSID a...

Page 130: ... click Next Note If you want to set more than one WEP key click Advanced If you do not know the Authentication or Encryption settings for network contact your network administrator 18 Click Next The settings will be sent to your machine The settings will remain unchanged if you click Cancel Note If you want to manually enter the IP address settings of your machine click Change IP Address and enter...

Page 131: ... completed Go to step 23 22 Using the information you recorded in step 12 return the wireless settings of your computer back to their original settings Click Exit 23 The driver installation starts Follow the on screen instructions and restart your Macintosh Not available if you chose Driver Install Only in step 7 You have completed wireless setup A four level indicator of your machine s LCD repres...

Page 132: ...your Brother machine from the Model pop up menu in the main screen of ControlCenter2 For details see Chapter 10 in the Software User s Guide on the CD ROM 25 If you want to use the machine s Scan key to scan over the network you must check the Register your computer with the Scan To functions at the machine box You must also enter a name for your Macintosh in Display Name The name you enter will a...

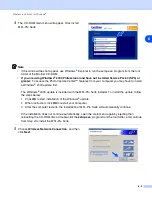
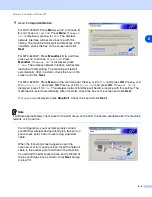
Page 133: ...ons 29 Double click the Utilities folder 30 Mac OS X 10 3 or greater users Double click the Printer Setup Utility icon For Mac OS X 10 2 x users Double click the Print Center icon 31 Click Add Mac OS X 10 2 4 to 10 3 users go to step 32 Mac OS X 10 4 users go to step 33 ...

Page 134: ...Add 34 Mac OS X 10 3 or greater users Click Printer Setup Utility then Quit Printer Setup Utility For Mac OS X 10 2 x users Click Print Center then Quit Print Center Note For more information about connecting the machine to a Macintosh network see Network printing from Macintosh on page 6 1 The MFL Pro Suite Printer driver Scanner driver and Control Center2 have been installed ...

Page 135: ...r icon and follow the on screen instructions Note When Presto PageManager is installed OCR capability is added to the Brother ControlCenter2 You can also easily scan share and organize photos and documents using Presto PageManager Presto PageManager has been installed and the installation is now complete ...

Page 136: ...cept the change The machine will restart automatically For MFC 640CW Press Menu Set 5 0 1 and then press 1 Yes to accept the change The machine will restart automatically For MFC 820CW Press Menu or for LAN and press OK Press or for Factory Reset and then press OK Press 1 to accept the change The machine will restart automatically 1 Turn on the machine by plugging in the power cord 2 Turn on your ...

Page 137: ...for Macintosh 9 15 9 5 Click MFL Pro Suite to install 6 Choose Wireless Network Connection and then click Next 7 Choose Wireless Setup and Driver Install and then click Next 8 Choose Automatic Recommended and then click Next ...

Page 138: ... will become inactive with this setting The machine will restart automatically After it restarts check the box on the screen and click Next For MFC 640CW Press Menu Set 5 6 and then press or to choose Wired LAN Press Menu Set If Reboot OK is displayed press 1 Yes The wireless network interface will become inactive with this setting The machine will restart automatically After it restarts check the...

Page 139: ...f the ink cartridge slots as shown Click Next and go to step 13 Note If you do not have a network cable check I don t have a network cable and click Next You will need to configure the wireless settings from the control panel Follow the onscreen instruction to complete the setup When the setup is finished go to step 20 for driver installation 11 Continued from step 9 Choose This PC has a network c...

Page 140: ... appears If the list is blank check that the access point and the machine are powered on and then click Refresh Choose the machine you wish to configure and click Next Note The Default Node name of the NC xxxx where xxxx is your model name is BRW_xxxxxx or BRN_xxxxxx where xxxxxx is the last six digits of Ethernet address 14 The wizard will search for wireless networks available from your machine ...

Page 141: ...onfigured for Authentication and Encryption the following screen will appear To continue installation click OK and go to step 17 16 If your network is configured for Authentication and Encryption the following screen will appear When configuring your Brother wireless machine you must ensure that it is configured to match the Authentication and Encryption settings of your existing wireless network ...

Page 142: ...vailable wireless networks The control panel settings will be automatically changed to WLAN when the wireless settings are sent to your machine 18 Disconnect the network cable between your access point hub or router and the machine and click Next 19 The machine will restart automatically After the machine is restarted check Checked and confirmed and then click Next Wait until the restart is comple...

Page 143: ...2 through 24 After the software installation is completed you should choose your Brother machine from the Model pop up menu in the main screen of ControlCenter2 For details see Chapter 10 in the Software User s Guide on the CD ROM 22 If you want to use the machine s Scan key to scan over the network you must check the Register your computer with the Scan To functions at the machine box You must al...

Page 144: ...ons 26 Double click the Utilities folder 27 Mac OS X 10 3 or greater users Double click the Printer Setup Utility icon For Mac OS X 10 2 x users Double click the Print Center icon 28 Click Add Mac OS X 10 2 4 to 10 3 users go to step 29 Mac OS X 10 4 users go to step 30 ...

Page 145: ...Add 31 Mac OS X 10 3 or greater users Click Printer Setup Utility then Quit Printer Setup Utility For Mac OS X 10 2 x users Click Print Center then Quit Print Center Note For more information about connecting the machine to a Macintosh network see Network printing from Macintosh on page 6 1 The MFL Pro Suite Printer driver Scanner driver and Control Center2 have been installed ...

Page 146: ...r icon and follow the on screen instructions Note When Presto PageManager is installed OCR capability is added to the Brother ControlCenter2 You can also easily scan share and organize photos and documents using Presto PageManager Presto PageManager has been installed and the installation is now complete ...

Page 147: ...pt the change The machine will restart automatically For MFC 640CW Press Menu Set 5 0 1 and then press 1 Yes to accept the change The machine will restart automatically For MFC 820CW Press Menu or for LAN and press OK Press or for Factory Reset and then press OK Press 1 to accept the change The machine will restart automatically 1 Turn on the machine by plugging in the power cord 2 Turn on your Ma...

Page 148: ...for Macintosh 9 26 9 5 Click MFL Pro Suite to install 6 Choose Wireless Network Connection and then click Next 7 Choose Wireless Setup and Driver Install and then click Next 8 Choose Automatic Recommended and then click Next ...

Page 149: ...ss point in infrastructure mode is not checked Click Next If you are using a wired computer choose This PC uses a network cable to connect to the wireless network and you must configure the wireless settings from the control panel Click Next and follow the on screen instructions to complete the setup See Using the Setup Wizard from the control panel LAN menu for a wireless network on page 3 3 When...

Page 150: ...20CW Press Menu on the control panel Press or for LAN and press OK Press or for Network I F and press OK Press or for WLAN and press OK If Reboot OK is displayed press 1 for Yes The wired network interface will become inactive with this setting The machine will restart automatically After it restarts check the box on the screen and click Next If Accepted is displayed press Stop Exit Check the box ...

Page 151: ...list appears If the list is blank check if the machine is powered on and then click Refresh Choose the machine you wish to configure and click Next Note The Default Node name of the NC xxxx where xxxx is your model name is BRW_xxxxxx where xxxxxx is the last six digits of Ethernet address Item Record the current wireless computer settings Communication mode Infrastructure Ad hoc Channel 1 14 Netwo...

Page 152: ...tions for entering the Name SSID and the Channel number If the list is blank check if the machine is within range for wireless communication Then click Refresh 15 If your network is not configured for Authentication and Encryption the following screen will appear To continue installation click OK and go to step 18 16 If your network is configured for Authentication and Encryption the following scr...

Page 153: ...x Then enter the Network Key and click Next Note If you do not know the Authentication or Encryption settings for network contact your network administrator 18 Click Next The settings will be sent to your machine The settings will remain unchanged if you click Cancel Note If you want to manually enter the IP address settings of your machine click Change IP Address and enter the necessary IP addres...

Page 154: ...previously installed version of the Brother Software If you encounter this problem continue but skip step 22 through 24 After the software installation is completed you should choose your Brother machine from the Model pop up menu in the main screen of ControlCenter2 For details see Chapter 10 in the Software User s Guide on the CD ROM 22 If you want to use the machine s Scan key to scan over the ...

Page 155: ...Wireless installation for Macintosh 9 33 9 23 Click Browse 24 Choose your model name and then click OK 25 Click Go then Applications 26 Double click the Utilities folder ...

Page 156: ...tup Utility icon For Mac OS X 10 2 x users Double click the Print Center icon 28 Click Add Mac OS X 10 2 4 to 10 3 users go to step 29 Mac OS X 10 4 users go to step 30 29 Make the selection shown For Mac OS X 10 2 4 to 10 3 users 30 Choose Brother MFC XXXX where XXXX is your model name and then click Add ...

Page 157: ...ork printing from Macintosh on page 6 1 32 To install Presto PageManager click the Presto PageManager icon and follow the on screen instructions Note When Presto PageManager is installed OCR capability is added to the Brother ControlCenter2 You can also easily scan share and organize photos and documents using Presto PageManager The MFL Pro Suite Printer driver Scanner driver and Control Center2 h...

Page 158: ...rint server has a static IP address This will prevent the print server from trying to obtain an IP address from any of these systems To change the BOOT METHOD use the BRAdmin Professional utility Using BOOTP to configure the IP address BOOTP is an alternative to rarp that has the advantage of allowing configuration of the subnet mask and gateway In order to use BOOTP to configure the IP address ma...

Page 159: ... this file and its path in the configuration file As with rarp the print server will load its IP address from the BOOTP server when the printer is powered on Using RARP to configure the IP address The Brother print server s IP address can be configured using the Reverse ARP RARP facility on your host computer This is done by editing the etc ethers file if this file does not exist you can create it...

Page 160: ...192 0 0 192 However you can easily change this IP address number to match with the IP address details of your network Using ARP to configure the IP address If you are unable to use the BRAdmin application and your network does not use a DHCP server you can also use the ARP command The ARP command is available on Windows systems that have TCP IP installed as well as UNIX systems To use arp enter th...

Page 161: ...paddress is the IP address of the print server For example ping 192 189 207 2 Using the TELNET console to configure the IP address You can also use the TELNET command to change the IP address TELNET is an effective method to change the machine s IP address But a valid IP address must already be programmed into print server Type TELNET ipaddress at the command prompt of the system prompt where ipad...

Page 162: ... or Ctrl D i e hold down the control key and type D to end the remote console session Using the Brother Web BRAdmin server software for IIS to configure the IP address The Web BRAdmin server software is designed to manage all LAN WAN Brother network connected devices By installing the Web BRAdmin server software on a computer running IIS Administrators with a web browser can connect to the Web BRA...

Page 163: ...e in the BRAdmin main window and right clicking it you will be presented with an extra option Import Auto Dial Note If the import Auto Dial option does not appear open the Brother PC FAX address book by selecting Start Programs Brother MFL Pro Suite PC FAX Address Book It is necessary to run the address book utility to create an address book file Group Dial settings cannot be configured using BRAd...

Page 164: ...Windows Temp Folder and can be used to update a single or multiple machines on the network Highlight an individual or multiple networked Brother machines in the main BRAdmin window by highlighting and pressing the shift key on your keyboard Right click the highlighted machine and press Send Auto Dial The new data is then sent to all highlighted machines A dialog box is displayed showing the upload...

Page 165: ...ion Firewall available in Windows XP disable it Once you are sure that you can print re start your Personal Firewall software 1 Start the CD ROM installation menu program according to the Quick Setup Guide 2 Select the model name and your language if necessary and then click Install Optional Applications 3 Click Printer Driver Only 4 Click Next in response to the Welcome message Follow the on scre...

Page 166: ...c OS 10 2 4 or greater Send only Network scanning Windows 98 98SE Me 2000 XP Mac OS 10 2 4 or greater Network PhotoCapture CenterTM Windows 98 98SE Me 2000 XP Mac OS 9 1 9 2 and Mac OS 10 2 4 or greater Computer requirements for drivers BRAdmin Professional Peer to Peer software etc Processor Minimum Speed Pentium II or equivalent for Windows 98 98SE Me 2000 Professional XP Minimum RAM 24MB for Wi...

Page 167: ...02 11b g wireless Frequency 2412 2472 MHz RF channels US Canada 1 11 Europe Oceania 1 13 Japan 1 14 Communication mode Infrastructure Ad hoc 802 11 Data rates 802 11b 11 5 5 2 1 Mbps 802 11g 54 48 36 24 18 12 9 6 Mbps Link distance 70 m 233 ft at lowest data rate The distance rate will vary upon environment and other equipment location Network security SSID ESSID 128 104 64 40 bit WEP WPA Personal...

Page 168: ...l 64MB for Windows XP Recommended RAM 32MB for Windows 98 98SE Me 64MB for Windows 2000 Professional 128MB for Windows XP Macintosh connection Computer Wireless AirPort ready Power Macintosh Processor Minimum Speed All base models meet minimum requirements Minimum RAM 128MB for Mac OS X 10 2 4 or greater Recommended RAM 160MB for Mac OS X 10 2 4 or greater Management utilities BRAdmin Professional...

Page 169: ...7 WINS Server Primary Secondary 000 255 000 255 000 255 000 255 000 000 000 000 8 DNS Server Primary Secondary 000 255 000 255 000 255 000 255 000 000 000 000 9 APIPA On Off On 2 TCP IP WLAN 1 BOOT Method Auto Static RARP BOOTP DHCP Auto 2 IP Address 1 Change 000 255 000 255 000 255 000 255 169 254 001 254 000 255 1 2 Exit 3 Subnet Mask 1 Change 000 255 000 255 000 255 000 255 255 255 0 0 2 2 Exit...

Page 170: ...atus Active 802 11b Active 802 11g Disabled Searching SSID 2 Signal Strong Medium Weak None 3 SSID Shows SSID with less than 33 digits 4 Comm Mode Ad hoc Infrastructure 5 Security Mode WEP WPA PSK None KEY1 KEY2 KEY3 KEY4 when WEP is selected 5 Setup Misc 1 Wired LAN Auto 100B FD 100B HD 10B FD 10B HD Auto 6 Network I F Wired LAN Reboot OK 1 Yes Wired LAN Reboot OK 2 No Exit with no change WLAN Re...

Page 171: ...condary 000 255 000 255 000 255 000 255 000 000 000 000 9 APIPA On Off On 2 TCP IP WLAN 1 BOOT Method Auto Static RARP BOOTP DHCP Auto 2 IP Address 1 Change 000 255 000 255 000 255 000 255 169 254 001 254 000 255 1 2 Exit 3 Subnet Mask 1 Change 000 255 000 255 000 255 000 255 255 255 0 0 2 2 Exit 4 Gateway 1 Change 000 255 000 255 000 255 000 255 000 000 000 000 2 Exit 5 Node Name 1 Change BRW_XXX...

Page 172: ...ows SSID with less than 33 digits 4 Comm Mode Ad hoc Infrastructure 5 Security Mode WEP WPA PSK None KEY1 KEY2 KEY3 KEY4 when WEP is selected 5 Setup Misc 1 Wired LAN Auto 100B FD 100B HD 10B FD 10B HD Auto 2 Time Zone GMTXXX XX GMT 00 00 6 Network I F Wired LAN Reboot OK 1 Yes Wired LAN Reboot OK 2 No Exit with no change WLAN Reboot OK 1 Yes Reboot OK 2 No Exit with no change 0 Factory Reset 1 Re...

Page 173: ...rimary Secondary 000 255 000 255 000 255 000 255 000 000 000 000 APIPA On Off On TCP IP WLAN BOOT Method Auto Static RARP BOOTP DHCP Auto IP Address Change 000 255 000 255 000 255 000 255 169 254 001 254 000 255 1 Exit Subnet Mask Change 000 255 000 255 000 255 000 255 255 255 0 0 2 Exit Gateway Change 000 255 000 255 000 255 000 255 000 000 000 000 Exit Node Name Change BRW_XXXXXX last 6 figures ...

Page 174: ...Signal Strong Medium Weak None SSID Shows SSID with less than 32 digits Comm Mode Ad hoc Infrastructure Security Mode WEP WPA PSK None KEY1 KEY2 KEY3 KEY4 when WEP is selected Setup Misc Wired LAN Auto 100B FD 100B HD 10B FD 10B HD Auto Time Zone GMTXXX XX GMT 00 00 Network I F Wired LAN Reboot OK 1 Yes 2 No Wired LAN WLAN Reboot OK 1 Yes 2 No Factory Reset 1 Yes 2 No Level one Level two Level thr...

Page 175: ...ss W to move the cursor under the incorrect letter Then press Stop Exit for MFC 640CW or press Clear for MFC 820CW All letters above and to the right of the cursor will be deleted Re enter the correct letter You can also back up and type over incorrect letters Repeating letters If you need to enter a letter that is on the same key as the letter before press X to move the cursor to the right before...

Page 176: ...Appendix B B 11 B Press for space Press for _ Press 0 for Ä Ë Ö Ü À Ç È É 0 ...

Page 177: ...S A 5 Infrastructure mode 1 5 IP Address 2 1 4 4 L LPR LPD 1 7 M Macintosh Printing 6 1 mDNS 1 8 N Network Configuration List 4 27 Network key 3 3 Network Printing 5 1 Node Name 4 9 O Open system 3 2 P Peer to Peer 1 3 Ping 7 2 7 5 Port9100 1 7 Print Server Setting 2 5 3 14 Protocol 1 7 Q Quick Setup Guide 3 1 R RARP 1 7 4 3 A 2 Remote Setup 2 6 3 16 Restoring the network settings 4 28 RFC 1001 A ...

Page 178: ...ary Key Integrity Protocol 3 2 Trademarks i W Web BRAdmin A 5 WEP Wired Equivalent Privacy 3 2 Windows 2000 5 1 Windows 2000 XP Printing 5 1 Windows 98 98SE Me 7 7 Windows 98 98SE Me Printing 5 3 Windows XP 5 1 WINS Config 4 10 WINS Server 4 12 Wireless network 3 1 WPA PSK 3 2 ...

Reviews: