Control panel setup
22
3
DNS Server
3
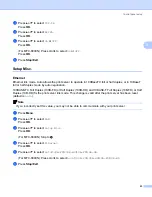
a
Press
Menu
.
b
Press
a
or
b
to select
LAN
.
Press
OK
.
c
Press
a
or
b
to select
TCP/IP
.
Press
OK
.
d
Press
a
or
b
to select
DNS Server
.
Press
OK
.
e
Press
a
or
b
to select
Primary
or
Secondary
.
Press
OK
.
f
Press
a
or
b
to select
Change
.
Press
OK
.
g
Enter the DNS Server address.
Press
OK
.
Note
For DCP models, press
a
or
b
repeatedly to enter the first three-digit number for the DNS Server address.
Press
c
to enter the second three-digit number. Repeat this step until you have entered the fourth three-
digit number to complete the DNS Server address. Press
OK
.
h
Press
Stop/Exit
.
Primary DNS Server IP Address
3
This field specifies the IP address of the primary DNS (Domain Name Service) server.
Secondary DNS Server IP Address
3
This field specifies the IP address of the secondary DNS server. It is used as a backup to the Primary DNS
server address. If the Primary server is unavailable, the machine will contact the Secondary DNS server.
APIPA
3
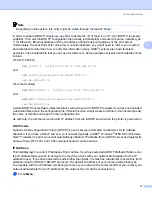
The setting of On will cause the print server to automatically allocate a Link-Local IP address in the range
(169.254.1.0 - 169.254.254.255) when the print server cannot obtain an IP address through the BOOT
Method you have set (see
on page 15). Selecting Off means the IP address doesn’t change,
when the print server cannot obtain an IP address through the BOOT Method you have set.
a
Press
Menu
.
b
Press
a
or
b
to select
LAN
.
Press
OK
.


