Network Scanning
208
13
Scan to Image
13
When you choose Scan to Image, your document will be scanned and sent directly to the computer you
designated on your network. ControlCenter4 or ControlCenter2 will activate the default graphics application
on the designated computer.
a
Load your document.
b
Press (
SCAN
).
c
Press
a
or
b
to choose
Scan to PC
.
Press
OK
.
d
Press
a
or
b
to choose
Image
.
Press
OK
.
e
Press
a
or
b
to choose the destination computer you want to send to.
Press
OK
.
If the LCD prompts you to enter a PIN number, enter the 4-digit PIN number for the destination computer
on the control panel.
Press
OK
.
f
Press
Start
.
The machine starts the scanning process.
Note
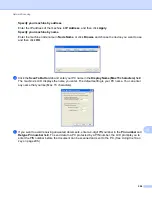
• Scan type depends on the settings of the
Device Scan Settings
screen of ControlCenter4 or
Device
Button
tab of the ControlCenter2 configuration screen.
• If you want to change between colour and black and white scanning, choose colour or black and white in
the scan type option on the
Device Scan Settings
screen of ControlCenter4 or
Device Button
tab of the
ControlCenter2 configuration screen. (For Windows
®
, see
Configuring Scan button settings
for
Home Mode
or
Configuring Scan button settings
on page 88 for
Advanced Mode
. For Macintosh, see
• If you want to change the default file size, choose your preferred size by moving the scroll bar on the
Device Scan Settings
screen of ControlCenter4 or
Device Button
tab of the ControlCenter2
configuration screen.

