background image

NETWORK SCANNING   

12 - 9

Scan to File

When you select Scan to File you can scan a black and white or color 
document and send it directly to a PC you designate on your 
network. The file will be saved in the folder and file format that you 
have configured in the Brother SmartUI on the designated PC. You 
can change the 

Scan

 configuration.

(For Windows

®

 98/Me/2000: See 

Scan to File

 on page 9-8 to 9-9.

(For Windows

®

 XP: See 

Hardware Section: Changing the Scan to 

button configuration

 on page 10-5 to 10-11.)

1

Place the document face up in the ADF, or face down on the 
scanner glass.

2

Press 

Scan

.

3

Press 

 or 

 to select 

Scan 

to File

.

Press 

Set

.

4

Press 

 or 

 to select a 

destination you want to send.

Press 

Set

.

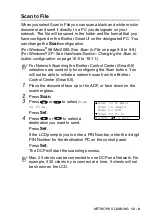
If the LCD prompts you to enter a PIN Number, enter the 4-digit 
PIN Number for the destination PC on the control panel.

Press 

Set

.

The DCP will start the scanning process.

For Network Scanning the Brother Control Center (SmartUI) 
selections are used only for configuring the Scan button. You 
will not be able to initiate a network scan from the Brother 
Control Center (SmartUI).

Max. 25 clients can be connected to one DCP on a Network. For 
example, if 30 clients try to connect at a time, 5 clients will not 
be shown on the LCD.

Scan to E-Mail

Scan to Image
Scan to OCR

Scan to File

Select 

▲▼

 & Set

Summary of Contents for DCP-8040

Page 1: ...DCP 8040 DCP 8045D USER S GUIDE ...

Page 2: ...i ...

Page 3: ...t Example for U K Do not handle the plug with wet hands Doing this might cause an electrical shock Example for U K After you use the DCP some internal parts are extremely HOT To prevent injuries be careful not to put your fingers in the area shown in the illustration To prevent injuries be careful not to put your hands on the edge of the DCP under the document cover To prevent injuries be careful ...

Page 4: ...use this product near appliances that use water in a wet basement or near a swimming pool There may be a remote risk of electric shock from lightning Caution Lightning and power surges can damage this product We recommend that you use a quality surge protection device on the AC power line or unplug the line during a lightning storm To prevent injuries be careful not to put your fingers in the area...

Page 5: ...onditioners water chemicals or refrigerators Do not expose the DCP to direct sunlight excessive heat moisture or dust Do not connect your DCP to electrical outlets controlled by wall switches or automatic timers Disruption of power can wipe out information in the DCP s memory Do not connect your DCP to electrical outlets on the same circuit as large appliances or other Equipment that might disrupt...

Page 6: ...r trays 2 3 Paper specifications for each paper tray 2 4 How to load paper 2 5 To load paper or other media in the paper tray 2 5 To load paper or other media in the manual feed tray For DCP 8040 2 7 To load paper or other media in the multi purpose tray MP tray For DCP 8045D 2 9 To use Automatic Duplexing for copy and print operations For DCP 8045D 2 11 3 On screen programming 3 1 User friendly p...

Page 7: ...t 5 10 Tray Select 5 11 Duplex N in 1 5 12 Duplex N in 1 copy 5 14 N in 1 copy 5 14 Duplex 1 in 1 For DCP 8045D 5 17 Duplex 2 in 1 and Duplex 4 in 1 For DCP 8045D 5 19 Changing the default copy settings 5 20 Quality 5 20 Contrast 5 20 6 Using the DCP as a printer 6 1 Using the Brother DCP 8040 DCP 8045D printer driver 6 1 How to print your document 6 2 Simultaneous printing and scanning 6 3 Two si...

Page 8: ...Brother Native Driver 7 2 Basic tab 7 2 Paper Size 7 3 Multiple Page 7 3 Orientation 7 3 Copies 7 3 Media Type 7 4 Advanced tab 7 5 Print Quality 7 5 Duplex Printing 7 6 Watermark 7 8 Page Setting 7 10 Device Options 7 11 Secure Print 7 11 Accessories tab 7 14 Support tab 7 16 Features in the PS printer driver For Windows 7 17 To install the PS driver 7 17 Ports tab 7 18 Device Settings tab 7 19 L...

Page 9: ...Parallel interface cable users 8 16 Scan to E mail 8 17 Scan to Image 8 17 Scan to OCR 8 18 Scan to File 8 18 Using ScanSoft PaperPort and OmniPage OCR 8 19 Viewing items 8 20 Organizing your items in folders 8 21 Quick links to other applications 8 21 ScanSoft OmniPage OCR lets you convert image text into text you can edit 8 22 You can Import items from other applications 8 23 You can Export item...

Page 10: ...n 9 12 Scanner settings 9 12 Word Processor 9 13 Scan to Image 9 14 To access Scan to Image Configurations screen 9 14 Scanner Settings 9 15 Target Application 9 15 Copy 9 16 To access the Copy Configurations screen 9 16 Scanner settings 9 17 Number of copies 9 17 10 Using the Windows Based Brother SmartUI Control Center 10 1 Brother SmartUI Control Center 10 1 AutoLoad the Brother Control Center ...

Page 11: ...river with your Apple Macintosh Mac OS 8 6 9 2 11 2 Using the Brother Printer Driver with Your Apple Macintosh Mac OS X 11 4 Choosing page setup options 11 4 Specific settings 11 5 Using the PS driver with your Apple Macintosh 11 7 For Mac OS 8 6 to 9 2 Users 11 7 For Mac OS X users 11 12 Using the Brother TWAIN scanner driver with your Macintosh 11 15 Accessing the scanner 11 15 Scanning an image...

Page 12: ...y instructions 13 4 Trademarks 13 6 14 Troubleshooting and routine maintenance 14 1 Troubleshooting 14 1 Error messages 14 1 Document jams 14 4 Document is jammed in the top of the ADF unit 14 4 Document is jammed inside the ADF unit 14 4 Paper jams 14 5 Paper is jammed in the duplex tray For DCP 8045D 14 9 If you are having difficulty with your DCP 14 11 Improving the print quality 14 14 Packing ...

Page 13: ...9100h to an Unshielded Twisted Pair 10BASE T or 100BASE TX Ethernet Network 15 9 LED 15 9 TEST SWITCH 15 10 Paper Tray 2 15 11 G Glossary G 1 S Specifications S 1 Product description S 1 General S 1 Print media S 2 Copy S 2 Scanner S 3 Printer S 4 Interfaces S 4 Computer requirements S 5 Consumable items S 6 Network LAN board NC 9100h S 7 Optional External Wireless Print Scan Server NC 2200w S 8 1...

Page 14: ...and actions To make things clearer and to help you press the correct keys we have used special fonts and added some of the messages that will appear in the LCD Introduction Bold Bold typeface identifies specific keys on the DCP control panel Italics Italicized typeface emphasizes an important point or refers you to a related topic Courier New Courier New typeface identifies the messages on the LCD...

Page 15: ...ed paper from sliding off the DCP 4 Automatic Document Feeder ADF Use the ADF unit for multiple page documents 5 ADF Document Support Extension Place the document here to use the ADF unit 6 ADF Document Output Support Flap 7 Document Cover 5 ADF Document Support Extension 4 Automatic Document Feeder ADF 11 Paper Tray Tray 1 3 Face down Output Tray Support Flap with Extension 1 DCP 8040 Manual Feed...

Page 16: ...iding off the DCP 7 Document Cover Open to place the document on the scanner glass 8 Control Panel Use the keys and display to control the DCP 9 Power Switch Switch it on or off 10 Front Cover Open to install a toner cartridge or drum unit 11 Paper Tray Tray 1 Load paper here No Name Description ...

Page 17: ... Output Tray Back Output Tray Open it when thicker paper is placed in the MP tray or Manual feed tray 16 ADF Cover Open to remove paper jammed inside the ADF unit 17 USB Interface Connector Connect the USB Cable here 18 Parallel Interface Connector Connect the Parallel Cable here 15 Face up OutputTray Back Output Tray 14 AC Power Connector 13 Duplex Tray DCP 8045D 16 ADF Cover 12 Paper Adjustment ...

Page 18: ... when using the ADF 21 Scanner Lock Lever Use to lock unlock the scanner when relocating the DCP 22 Document Cover Open to place the document on the scanner glass 23 White Film Clean it for good quality copying and scanning 24 Scanner Glass Place the document to be scanned here 23 White Film 22 Document Cover 19 Document Guidelines 20 Glass Strip 24 Scanner Glass 21 Scanner Lock Lever ...

Page 19: ...ing Diode The LED will flash and change color depending on the DCP status 3 5 Line Liquid Crystal Display LCD Displays messages on the screen to help you to set up and use your DCP 4 Navigation keys Menu Lets you access the Menu to program Set Lets you store your settings in the DCP Clear Back Deletes entered data or lets you exit the menu by pressing repeatedly or Press to scroll forward or backw...

Page 20: ... you would like to use for the next copy Sort Lets you sort multiple copies using the ADF N in 1 For DCP 8040 N in 1 lets you copy 2 or 4 pages onto one page Duplex N in 1 For DCP 8045D You can choose Duplex to copy on both sides of the paper or N in 1 to copy 2 or 4 pages onto one page 6 Numeric keys Use the numeric keys to enter the number of multiple copies 99 maximum 7 Stop Exit Stops a copy a...

Page 21: ...off Green Yellow Red LED is on Green Yellow Red LED is blinking LED DCP status Description Sleep Mode The power switch is off or the DCP is in Sleep mode or Power save mode Green Warming Up The DCP is warming up for printing Green Ready The DCP is ready to print Yellow Receiving Data The DCP is either receiving data from the computer processing data in memory or printing data Yellow Data Remaining...

Page 22: ...ose the cover See Error messages on page 14 1 Toner empty Replace the toner cartridge with a new one See Replacing the toner cartridge on page 14 24 Paper error Put paper in the tray or clear the paper jam Check the LCDmessage See Troubleshooting and routine maintenance on page 14 1 Scan lock Check that the scanner lock lever is released See Scanner Lock Lever on page 1 5 Others Check the LCDmessa...

Page 23: ...30 C Humidity 50 70 Make sure originals written with ink are completely dry 1 Pull out the ADF document support extension 2 Unfold the ADF document output support flap 3 Fan the pages well and stagger them at an angle Make sure you put the documents face up top edge first in the ADF until you feel them touch the feed roller DO NOT use curled wrinkled folded or ripped paper or paper with staples pa...

Page 24: ...INTRODUCTION 1 11 4 Adjust the paper guides to fit the width of your documents 5 Press Start The DCP starts scanning the first page ADF Document Output Support Flap The documents are Face Up in the ADF ...

Page 25: ...t use the ADF 1 Lift the Document Cover 2 Using the document guidelines on the left center the original face down on the scanner glass and close the document cover 3 Using the numeric keys enter the number of copies you want up to 99 4 Press Start The DCP will start scanning the original If the original is a book or is thick do not slam the cover or press on it or you may damage the DCP Originals ...

Page 26: ...t is 75 to 90 g m2 Use neutral paper Do not use acidic or alkaline paper Use long grain paper Use paper with a moisture content of approximately 5 Paper Tray Type Model name Paper tray Tray 1 DCP 8040 and DCP 8045D Manual feed tray DCP 8040 Multi purpose tray MP tray DCP 8045D Optional lower tray Tray 2 Option for DCP 8040 and DCP 8045D Plain Paper Xerox Premier 80 g m2 Xerox Business 80 g m2 Mode...

Page 27: ...er especially for plain paper and transparencies For more information on paper specifications call your nearest authorized sales representative or the place where you purchased your DCP Use label or transparencies that are designed for use in laser printers For the best print quality we recommend using long grained paper If you are using special paper and the paper has problems feeding from the pa...

Page 28: ... to 406 4 mm 50 sheets 80 g m2 Manual feed tray DCP 8040 Width 69 8 to 220 mm Height 116 to 406 4 mm Single sheet Paper tray Tray 1 A4 Letter Legal B5 ISO B5 JIS Executive A5 A6 B6 ISO 250 sheets 80 g m2 Optional lower tray Tray 2 A4 Letter Legal B5 ISO B5 JIS Executive A5 B6 ISO 250 sheets 80 g m2 Duplex printing DCP 8045D A4 Letter Legal ...

Page 29: ...l Lower tray Plain paper Recycled paper and Transparency 2 Paper weights Multi purpose tray N A 60 to 161 g m2 Manual feed tray 60 to 161 g m2 N A Paper tray 60 to 105 g m2 Optional Lower tray 60 to 105 g m2 Paper sizes Multi purpose tray N A Width 69 8 to 220 mm Height 116 to 406 4 mm Manual feed tray Width 69 8 to 220 mm Height 116 to 406 4 mm N A Paper tray A4 Letter Legal B5 ISO B5 JIS Executi...

Page 30: ...ay completely out of the DCP 2 While pressing the paper guide release lever slide the adjusters to fit the paper size Check that the guides are firmly in the slots For Legal size paper press the universal guide release button and pull out the back of the paper tray Universal Guide Release Button ...

Page 31: ...flush against the paper stack 5 Put the paper tray firmly back in the DCP and unfold the support flap before you use the DCP When you put paper in the paper tray please remember the following The side to be printed on must be face down Put the leading edge top of the paper in first and push it gently into the tray To copy Legal size paper unfold the secondary support flap too Up to here Support Fl...

Page 32: ...the paper size 2 Using both hands put paper in the manual feed tray until the front edge of the paper touches the paper feed roller Hold the paper in this position until the DCP automatically feeds the paper in for a short distance and then let go of the paper When printing envelopes and labels you should only use the manual feed tray ...

Page 33: ...f the paper in first and push it gently into the tray Make sure that the paper is straight and in the proper position on the manual feed tray If it is not the paper may not be fed properly resulting in a skewed printout or a paper jam Do not put more than one sheet of paper or envelope in the manual feed tray at any one time or it may cause a jam ...

Page 34: ...dia in the multi purpose tray MP tray For DCP 8045D 1 Open the MP tray and lower it gently 2 Pull out and unfold the MP tray support flap When printing envelopes and labels you should only use the multi purpose tray MP tray support flap ...

Page 35: ...n on the MP tray If it is not the paper may not be fed properly resulting in a skewed printout or a paper jam You can place up to 3 envelopes or up to 50 sheets of 80 g m2 paper in the MP tray When you put paper in the MP tray please remember the following The side to be printed on must be face up During printing the inside tray rises to feed paper into the DCP Put the leading edge top of the pape...

Page 36: ...djustment Lever to the size of paper you are using This feature is available for A4 Letter or Legal size paper See Duplex N in 1 on page 5 12 and Two sided printing Duplex Printing on page 6 3 1 Load paper in the Paper Tray or Multi purpose Tray 2 Set the Paper Adjustment Lever for Duplex Printing in the back of the DCP to match your paper size 3 Your DCP is now ready to print two sided pages LTR ...

Page 37: ...instructions to help you program your DCP All you need to do is follow the instructions as they guide you through the menu selections and programming options Menu table You can probably program your DCP without the User s Guide But to help you understand the menu selections and options that are found in the DCP programs use the Menu table on page 3 4 You can program your DCP by pressing Menu follo...

Page 38: ...alled OR You can scroll more quickly through each menu level by pressing the arrow for the direction you want or Then set an option by pressing Set when that option appears on the LCD Access the menu Go to the next menu level Accept an option Exit the menu by pressing repeatedly Go back to the previous menu level Scroll through the current menu level Go back to the previous menu level Go forward t...

Page 39: ... next menu level Press or to scroll to your next menu selection Press Set When you finish setting an option the LCD shows Accepted Use to scroll backward if you passed your choices or want to save keystrokes The current setting is always the option with ...

Page 40: ...cy Sets thetypeof paper in paper tray 1 4 1 3 Tray 2 option Thin Plain Thick Thicker Transparency Sets thetypeof paper in paper tray 2 4 1 2 Paper Size 1 Tray 1 This menu only appears if you have the optional tray 2 A4 Letter Legal Executive A5 A6 B5 B6 Sets the size of paper in paper tray 1 4 3 2 Tray 2 option A4 Letter Legal Executive A5 B5 B6 Sets the size of paper in paper tray 2 4 3 The defau...

Page 41: ... does not appear If you have the optionaltray 2 see page 3 10 Tray 1 Only MP Only Auto Selects the tray that will be used for Copy mode 4 7 5 LCD Contrast For DCP 8040 6 LCD Contrast For DCP 8045D If you have the optionaltray 2 see page 3 10 Adjusts the contrast of the LCD 4 8 6 Drum Life For DCP 8040 7 Drum Life For DCP 8045D If you have the optionaltray 2 see page 3 10 You can check the percenta...

Page 42: ...8045D If you have the optionaltray 2 see page 3 10 You can print lists 4 8 0 Local Language For Czech and Hungarian Czech Hungarian English Allows you to change the LCD Language for your country See Quick Setup Guide 0 Local Language For Norwegian Swedish Danish and Finnish Norwegian Swedish Danish Finnish English Allows you to change the LCD Language for your country The default settings are show...

Page 43: ... 5 10 3 Printer 1 Emulation Auto HP LaserJet BR Script 3 Selects the Emulation mode 6 18 2 Print Options 1 Internal Font Prints a list of the DCP s internal fonts or current printer settings 6 19 2 Configuration 6 19 3 Reset Printer Returns the DCP to the factory default settings 6 19 The default settings are shown in Bold with to accept to exit Press the Menu numbers ex Press 1 1 for Paper Type O...

Page 44: ...5 000 255 000 255 Enter the IP address 3 Subnet Mask 000 255 000 255 000 255 000 255 Enter the Subnet mask 4 Gateway 000 255 000 255 000 255 000 255 Enter the Gateway address 5 Host Name BRN_XXXXXX Enter the Host name 6 WINS Config Auto Static You can choose the WINS configuration mode 7 WINS Server Primary Secondary Specifies the IP address of the primary or secondary server 8 DNS Server Primary ...

Page 45: ... Off Select On to use the DCP on a Netware network 2 Net Frame Auto 8023 ENET 8022 SNAP Lets you specify the frame type 3 AppleTalk On Off Select On to use the DCP on a Macintosh network 4 DLC LLC On Off Select On to use the DCP on a DLC LLC network 5 Net BIOS IP On Off Select On to use the DCP on a Net BIOS IP network 6 Ethernet Auto 100B FD 100B HD 10B FD 10B HD Selects Ethernet link mode The de...

Page 46: ...ns available 14 32 8 Page Counter Total Copy Print List Lets you check the number of total pages the DCP has printed so far 14 32 9 System Setup You can print lists 4 8 Main Menu Submenu Menu Selections Options Descriptions Page 1 General Setup 5 Tray Use Copy Tray 1 Only Tray 2 Only MP Only Auto Select the tray that will be used for copying 4 7 6 LCD Contrast Adjusts the contrast of the LCD 4 8 7...

Page 47: ...diting 8 17 Scan to OCR Scan a text document so ScanSoft will perform OCR in OmniPage to convert it to editable text and display it in your word processing application 8 18 Scan to File Scan a black white or a color original into your computer and save it as a file in the folder you choose 8 18 Enlarge Reduce 104 141 200 AUTO Custom 50 70 78 83 85 91 Full Page 94 97 Enlarge or reduce the size of c...

Page 48: ...0 1 Press Menu 1 1 OR If you have the optional paper tray press Menu 1 1 1 to set the paper type for Tray 1 or Menu 1 1 2 to set the paper type for Tray 2 2 Press or to select Thin Plain Thick Thicker or Transparency 3 Press Set 4 Press Stop Exit Getting started 11 Paper Type Plain Thick Thicker Select Set 11 Paper Type 1 Tray 1 2 Tray 2 Select Set ...

Page 49: ...tional paper tray press Menu 1 1 3 to set the paper type for Tray 2 2 Press or to select Thin Plain Thick Thicker or Transparency 3 Press Set 4 Press Stop Exit You can select Transparency for Tray 1 and Tray 2 only when A4 Letter or Legal is selected in Menu 1 2 11 Paper Type 1 MP Tray 2 Tray 1 3 Tray 2 Select Set 11 Paper Type 1 MP Tray Plain Thick Select Set ...

Page 50: ...elect A4 Letter Legal Executive A5 A6 B5 or B6 Press Set 3 Press Stop Exit With optional paper tray 1 Press Menu 1 2 1 to set the paper size for Tray 1 OR Press Menu 1 2 2 to set the paper size for Tray 2 2 Press or to select A4 Letter Legal Executive A5 A6 B5 and B6 Press Set 3 Press Stop Exit If you are using the optional paper tray paper size A6 is not available If you select Transparency in Me...

Page 51: ...ress Menu 1 3 2 Press or to select your option Low Med High or Off Press Set 3 Press Stop Exit Toner Save You can conserve toner using this feature When you set Toner Save to On print appears somewhat lighter The default setting is Off 1 Press Menu 1 4 1 2 Press or to select On or Off 3 Press Set 4 Press Stop Exit 13 Beeper Med High Off Select Set 14 Ecology 1 Toner Save On Off Select Set ...

Page 52: ... Set 4 Press Stop Exit Turning off the Scanner Lamp The scanner lamp stays on for 16 hours before automatically switching off to preserve the life of the lamp You can turn off the scanner lamp manually if you wish by pressing the and keys simultaneously The scanner lamp will remain turned off until the next time you use the scanning feature Turning off the scanner lamp will also reduce the power c...

Page 53: ...e is switched On when the DCP is idle and the scanner lamp is turned off it drops into power save mode in approx 10 minutes automatically 1 Press Menu 1 4 3 2 Press or to select On or Off 3 Press Set when the screen displays your selection 4 Press Stop Exit 14 Ecology 3 Power Save On Off Select Set ...

Page 54: ... Menu 1 5 2 Press or to select Tray 1 Only MP Only or Auto OR If you have the optional paper tray Press or to select Tray 1 Only Tray 2 Only MP Only or Auto 3 Press Set 4 Press Stop Exit If your DCP is a DCP 8040 without the optional tray 2 you can skip this setting 1 Copies will automatically be printed from Tray 2 only if the Paper Size setting for Tray 2 is the same as Tray 1 2 When using the A...

Page 55: ... 6 OR If you have the optional tray 2 press Menu 1 6 2 Press to increase the contrast OR Press to decrease the contrast Press Set 3 Press Stop Exit Printing the System Setup List You can print a list of various settings 1 DCP 8040 Press Menu 1 8 DCP 8045D Press Menu 1 9 OR If you have the optional Tray 2 press Menu 1 9 2 Press Start 16 LCD Contrast Select Set ...

Page 56: ...use your DCP as a copier making up to 99 copies at a time Printable area The printable area of your DCP begins at approximately 2 mm from both ends and 3 mm from the top or bottom of the paper Making copies Unprintable area 3mm 2mm Ex A4 Document A4 Paper ...

Page 57: ...ality Tray Select Sort and N in 1 For DCP 8040 or Duplex N in 1 For DCP 8045D These settings are temporary and the DCP returns to its default settings 1 minute after it finishes copying If you want to use these temporary settings again place the next document in the ADF or on the scanner glass within that time Temporary Copy Keys ...

Page 58: ... NOT pull on the document while copying is in progress Making multiple copies from the ADF 1 Insert the document face up in the ADF 2 Use the numeric keys to enter the number of copies you want up to 99 3 Press Start To stop copying and eject the document press Stop Exit To sort the copies press the Sort key ...

Page 59: ...ettings on page 5 6 1 Lift the Document Cover 2 Using the document guidelines on the left center the document face down on the scanner glass and close the document cover 3 Using the numeric keys enter the number of copies you want up to 99 For example press 3 8 for 38 copies 4 Press Start The DCP will start scanning the document If you want to sort multiple copies use the ADF See Making a single c...

Page 60: ...py scanned pages You will need to clear some jobs from the memory before you can continue Then if this error message appears more than once you may wish to consider increasing the memory size For more information on how to increase the memory size see Memory board on page 15 1 Out of Memory Copy Press Start Quit Press Stop ...

Page 61: ...ange the settings only for the next copy use the Temporary Copy keys You can use different combinations The large LCD shows your current Copy mode settings Temporary Copy keys Duplex N in 1 Example of Copy mode LCD Enlg Red 100 Quality Auto Contrast Tray 1 A4 Press or Start 01 ...

Page 62: ...the document face up in the ADF or face down on the scanner glass 2 Use the numeric keys to enter the number of copies you want up to 99 3 Press Enlarge Reduce 4 Press Enlarge Reduce or Press Enlarge Reduce 100 104 EXE LTR 141 A5 A4 200 Auto Custom 25 400 50 70 A4 A5 78 LGL LTR 83 LGL A4 85 LTR EXE 91 Full Page 94 A4 LTR 97 LTR A4 Auto appears only when you place the document in the ADF Enlg Red 1...

Page 63: ...0 and press Set Use the dial pad to enter an enlargement or reduction ratio from 25 to 400 Press Set For example press 5 3 to enter 53 6 Press Start OR Press other temporary copy keys for more settings Special Copy Options 2in1 4in1 or Poster are not available with Enlarge Reduce Auto is not available with the scanner glass ...

Page 64: ...s 2 Use the numeric keys to enter the number of copies you want up to 99 3 Press Quality 4 Press or to choose the type of document Auto Text or Photo Press Set 5 Press Start OR Press other Temporary Copy keys for more settings Sorting copies using the ADF If you want to sort multiple copies use the ADF Pages will be printed in the order 123 123 123 and so on 1 Place the document face up in the ADF...

Page 65: ...document face up in the ADF or face down on the scanner glass 2 Use the numeric keys to enter the number of copies you want up to 99 3 Press Contrast 4 Press to make a copy lighter OR Press to make a copy darker Press Set 5 Press Start OR Press other Temporary Copy keys for more settings Press Contrast ...

Page 66: ...s Tray Select 4 Press or to select the tray usage Press Set 5 Press Start OR Press other Temporary Copy keys for more settings For DCP 8040 with the optional paper tray 2 For DCP 8045D with the optional paper tray 2 XXX is the paper size you set in Menu 1 2 Press Tray Select Auto 1 XXX 2 XXX Press Tray Select Auto 1 XXX 2 XXX MP Tray For DCP 8040 the LCD displays the tray use selections only if th...

Page 67: ...ument Finished Layout Press Duplex N in 1 DCP 8045D N in 1 DCP 8040 N in 1 2 in 1 P 2 in 1 L 4 in 1 P 4 in 1 L Duplex 1 in 1 DCP 8045D Portrait1 Portrait2 Single Sided Double Sided Landscape1 Single Sided Double Sided Landscape2 2 1 1 2 2 1 1 2 2 1 1 2 3 4 2 1 1 2 3 4 2 1 1 2 2 1 1 2 1 2 1 2 2 1 1 2 1 2 1 2 2 1 1 2 ...

Page 68: ...out Press Duplex N in 1 DCP 8045D N in 1 DCP 8040 Duplex 2 in 1 DCP 8045D Portrait1 Portrait2 Landscape1 Landscape2 Duplex 4 in 1 DCP 8045D Portrait1 Portrait2 Landscape1 Landscape2 Poster Off 1 2 3 2 1 2 1 2 1 3 1 3 2 1 2 1 1 3 1 3 2 5 2 1 2 4 1 5 2 1 1 3 2 5 2 1 3 1 4 5 2 1 1 ...

Page 69: ...9 3 Press Duplex N in 1 Press Set to select N in 1 4 Press or to select 2 in 1 P 2 in 1 L 4 in 1 P or 4 in 1 L Press Set 5 If your are ready to copy go to Step7 OR Press or to select Quality Contrast or Tray Press Set 6 Press or to select a new setting Press Set 7 Press Start If you are using the ADF the DCP scans the originals and prints the copies OR If you are using the scanner glass the DCP sc...

Page 70: ...document have been scanned select 2 and press Set or press 2 to print P means Portrait and L means Landscape You can also combine the N in 1 and Duplex operations See Duplex 2 in 1 and Duplex 4 in 1 For DCP 8045D on page 5 19 For 2 in 1 P 2 in 1 L 4 in 1 P or 4 in 1 L you can not use the Enlarge Reduce setting Flatbed Copy Next Page 1 Yes 2 No Select Set ...

Page 71: ...scanner glass 1 Place the document face down on the scanner glass 2 Press Duplex N in 1 and or to select Poster Press Set 3 Press Start The DCP starts scans the original and prints the pages for the poster For poster copies you cannot make more than one copy or use the Enlarge Reduce setting ...

Page 72: ...ct Portrait1 or Landscape2 and then go to Step 6 5 Press or to select Single Sided for the document If you are using the scanner glass or changed the number of copies at Step 2 this option will not appear Press Set 6 Press Start to scan the document If you placed the document in the ADF the DCP starts printing OR If you placed the document on the scanner glass go to Step 7 7 Place the next documen...

Page 73: ...ss Set 3 Press or to select Portrait2 or Landscape1 Press Set 4 Press or to select Double Sided for the document Press Set 5 Press Start 6 Make sure that you have put the documents in the ADF as shown on the LCD and press Start 7 After all the pages of the document have been scanned on one side turn the other side of the document face up in the ADF Press Start 1 2 1 2 ...

Page 74: ...1 or Duplex 4 in 1 Press Set 4 Press or to select Portrait1 Portrait2 Landscape1 or Landscape2 Press Set 5 Press Start to scan the document If you placed the document in the ADF the DCP starts printing OR If you placed the document on the scanner glass go to Step 6 6 Place the next document on the scanner glass Select 1 and press Set or press 1 to copy next page 7 After all the pages of the docume...

Page 75: ... 1 2 Press or to select Text Photo or Auto Press Set 3 Press Stop Exit Contrast You can change the contrast to help an image look lighter or darker 1 Press Menu 2 2 2 Press to make lighter OR Press to make darker Press Set 3 Press Stop Exit Submenu Menu Selections Options Factory Settings 1 Quality Text Auto Photo Auto 2 Contrast 21 Quality Auto Text Photo Select Set 22 Contrast Select Set ...

Page 76: ...patible fonts for Microsoft Windows 98 98SE Me 2000 Professional XP and Windows NT workstation 4 0 are available on the CD ROM supplied with your DCP You can install them easily into your Windows system using our installer program The driver supports our unique compression mode to enhance printing speed in Windows applications and allows you to set various printer settings including economy printi...

Page 77: ...8040 or DCP 8045D USB Printer as your printer driver from the Print or Print Settings menu in your software application and then click on OK to begin printing 2 Your computer sends a print command and data to the DCP 3 The LED blinks in yellow and the DCP starts to print If your application software does not support your custom paper size select the next largest paper size Then adjust the print ar...

Page 78: ...P prints on both sides of the A4 Letter or Legal paper automatically 1 Open the Properties dialog box in the printer driver 2 Select Duplex Printing mode in the Advanced tab make sure that Use Duplex Unit has been selected and then click the OK button See Duplex Printing on page 7 6 The printer will print on both sides of the paper automatically When you select Use Duplex Unit HQ1200 is not availa...

Page 79: ...numbered pages on one side of the paper first Then the Windows driver instructs you with a pop up message to reinsert the paper Before reinserting the paper straighten it well or you may get a paper jam Very thin or very thick paper is not recommended We recommend 75 to 90 g m2 paper ...

Page 80: ...P 8040 1 Select the Paper Size Media Type Paper Source and other settings in the printer driver Media Type Plain Paper Paper Source Manual 2 Send the print data to the DCP 3 Open the manual feed tray Slide the paper guides to fit the paper size When printing transparencies remove each one from the support flap after it exits the DCP The DCP automatically turns on the Manual Feed mode when you put ...

Page 81: ... The MP tray For DCP 8045D 1 Select the Paper Size Media Type Paper Source and other settings in the printer driver Media Type Plain Paper Paper Source MP Tray 2 Open the MP tray and lower it gently 3 Pull out the MP tray support flap Make sure that the paper is straight and in the proper position on the manual feed tray If it is not the paper may not be fed properly resulting in a skewed printout...

Page 82: ...re that the paper is straight and in the proper position on the MP tray If it is not the paper may not be fed properly resulting in a skewed printout or a paper jam When you put paper in the MP tray please remember the following The side to be printed on must be face up During printing the inside tray rises to feed paper into the DCP Put the leading edge top of the paper in first and push it gentl...

Page 83: ...back of the DCP Use this paper feed and output method when you want to print on thicker 106 161 g m2 paper or card stock The manual feed tray For DCP 8040 1 Select the Paper Size Media Type Paper Source and other settings in the printer driver Media Type Thick paper or Thicker paper Paper Source Manual 2 Open the back output tray 3 Open the manual feed tray Slide the paper guides to fit the paper ...

Page 84: ... Repeat for each page that you want to print 7 When you have finished the print job close the back output tray Caution Remove each sheet immediately after printing Stacking the sheets may cause a paper jam or the paper to curl Make sure that the paper is straight and in the proper position in the manual feed tray If it is not the paper may not be fed properly resulting in a skewed printout or a pa...

Page 85: ...MP Tray 2 Open the back output tray and then unfold the face up output tray support if necessary 3 Open the MP tray and lower it gently 4 Pull out the MP tray support flap 5 When putting paper in the MP tray make sure it touches the back of the tray Make sure that the paper is straight and in the proper position in the MP tray If it is not the paper may not be fed properly resulting in a skewed pr...

Page 86: ...b close the back output tray Caution Remove each sheet immediately after printing Stacking the sheets may cause a paper jam or the paper to curl When you put paper in the MP tray please remember the following During printing the inside tray rises to feed paper into the DCP The side to be printed on must be face up Put the leading edge top of the paper in first and push it gently into the tray ...

Page 87: ... purpose tray 1 Select the Paper Size Media Type Paper Source and other settings in the printer driver Media Type Envelope Env thin or Env thick The DCP automatically turns on the Manual Feed mode when you put paper in the manual feed tray All sides should be properly folded without any wrinkles or creases ...

Page 88: ...e size If envelopes are creased after they have been printed At the back of the DCP open the back output tray and push down the blue tabs at the left and right hand sides as shown in the figure on the next page When you have finished printing your envelopes close the back output tray to reset the two blue tabs back to their original position ...

Page 89: ... Step 4 for each envelope you want to print 6 Send the print data to the DCP 7 After you finish the print job close the back output tray Make sure the envelope is straight as you insert it in the manual feed tray If it is not the envelope may not be fed properly resulting in a skewed printout or a jam Do not put more than one envelope in the manual feed tray at any one time or it may cause a jam P...

Page 90: ...ly 4 Pull out the MP tray support flap If envelopes are creased after they have been printed At the back of the DCP open the back output tray and push down the blue tabs at the left and right hand sides as shown in the figure on the next page When you have finished printing your envelopes close the back output tray to reset the two blue tabs back to their original position ...

Page 91: ...r you finish the print job close the back output tray Make sure that the envelopes are neatly stacked and in the proper position in the MP tray If they are not the envelopes may not be fed properly resulting in a skewed printout or a jam When you put envelopes in the MP tray please remember the following During printing the inside tray rises to feed envelopes into the DCP The side to be printed on...

Page 92: ...ill be cleared from the memory To use this function you need to set your password in the printer driver dialog box See Device Options on page 7 11 1 Press Secure OR The LCD displays No Data if there is no secured data in the memory 2 Press or to select the user name Press Set The LCD displays job selections 3 Press or to select the job Press Set The LCD prompts you to enter your four digit passwor...

Page 93: ...ou can change the default emulation mode manually by using the control panel 1 Press Menu 3 1 2 Press or to select Auto HP LaserJet or BR Script 3 Press Set 3 Press Stop Exit If you turn the power switch off the secured data saved in memory will be cleared After you print the secured data it will be cleared from memory Try this function with your application software or network server If the funct...

Page 94: ...ings 1 Press Menu 3 2 2 2 Press Start The DCP prints the settings 3 Press Stop Exit Restoring default settings You can return the DCP to the default settings Fonts and macros in the temporary settings are cleared 1 Press Menu 3 3 2 Press 1 to restore the factory settings OR Press 2 to exit without making a change 3 Press Stop Exit Only the printer settings will be returned to the default settings ...

Page 95: ...enu in your application software 2 Select Brother DCP 8040 or DCP 8045D USB Printer as your printer and click Preferences for Windows 2000 XP Properties for Windows 98 98 SE and Me Document Defeaults for Windows NT The Printing Preferences 3 dialog box will appear Printer driver settings Windows Only The way you access the printer driver settings depends on your operating system and software appli...

Page 96: ...asic tab 1 Select the Paper Size Multiple Page Border Line if any and Orientation 2 Select number of Copies and Media Type 3 Select Paper Source First Page and Other Pages Auto Select allows the printer driver to select a suitable tray for Paper Size automatically You can set the paper size for each tray in the Accessories tab See Accessories tab on page 7 14 4 To return to the default settings cl...

Page 97: ... size for printing one page on multiple sheets of paper Border Line When printing multiple pages on one sheet with the Multiple Page feature you can select to have a solid border dash border or no border around each page on the sheet Orientation Orientation selects the position of how your document will be printed Portrait or Landscape Copies The copies selection sets the number of copies that wil...

Page 98: ...ck Paper Thicker Paper Bond Paper Transparencies Envelopes Env Thick Env Thin When using ordinary plain paper 70 to 95 g m2 select Plain Paper When using heavier weight paper or rough paper select Thick Paper or Thicker Paper For bond paper select Bond Paper and for OHP transparencies select Transparencies When using ordinary envelops select Envelopes When using heavier weight paper or rough paper...

Page 99: ...owing icons 1 Print Quality 2 Duplex 3 Watermark 4 Page Setting 5 Device Options Print Quality Resolution You can change the resolution as follows HQ 1200 600 dpi 300 dpi To return to the default settings click the Default button When you select Use Duplex Unit HQ1200 is not available 1 2 3 4 5 ...

Page 100: ...ended the printer automatically prints with the most suitable print settings With the Print Setting set to Manual you can change the Brightness Contrast and Graphics Quality options manually For Windows 2000 XP NT WS 4 0 Check Use Printer Halftone to print using Halftone Check Use System Halftone to print using Halftone of the system To change the setting press Setting If the halftone cannot be pr...

Page 101: ...nter driver stops and shows the instructions required to re install the paper When you click OK the odd numbered pages are printed Duplex Type You can select Duplex Type There are six types of duplex directions available for each orientation Flip on Left Edge Flip on Right Edge Flip on Top Edge Flip on Bottom Edge Flip on Top Edge No Reverse Flip on Bottom Edge No Reverse Binding Offset Check the ...

Page 102: ...kground to print the watermark image in the background of your document If this feature is not checked then the Watermark will be printed on top of your document In Outline Text Windows 2000 Professional XP NT WS 4 0 Only Check In Outline Text if you only want to print an outline of the watermark Print Watermark The Print Watermark feature offers the following print choices On all pages On first p...

Page 103: ... You can select CONFIDENTIAL COPY or DRAFT as the standard title or enter a little you like in the field Watermark Text Enter your Watermark text into the Text Box and then select the Font Size Darkness and Style Watermark Bitmap Enter the file name and location of your bitmap image in the File box or Browse for the file location You can also set the scaling size of the image Position This setting...

Page 104: ...ff if you want to print the document as it appears on your screen Check Fit to Paper Size if your document has an unusual size or if you have only the standard size paper Check the Free box if you want to manually reduce or enlarge the output You can also use the Mirror Print or Reverse Print feature for your page setting ...

Page 105: ...se the control panel of the DCP with the password to print them To send a secured document 1 Select Secure Print from Printer Function and check Secure Print 2 Enter your password user name and job name and click OK 3 You must print the secured documents from the control panel of the DCP See Secure key on page 6 17 To delete a secured document 1 You need to use the control panel of the DCP to dele...

Page 106: ...n This feature can be set to ON or OFF from the Device Options section Administrator For Windows 98 98SE Me Users Only The administrator selection permits the Copy Scaling and Watermark features to be locked and password protected The factory setting is OFF Record your password and keep it in a safe place for future reference If you forget your password these settings can not be accessed ...

Page 107: ...t You can change the Font by clicking the Font button or the Position To include a background with the Date and Time select Opaque When Opaque is selected you can set the Darkness of the Date and Time background by changing the percentage The Date and Time indicated in the selection box represents the format that will be printed The actual Date and Time printed on your document is automatically re...

Page 108: ...ource in the Paper Source Setting list Select the Paper Size from the pull down box and click Update When Auto Select default Paper Source is set in the Basic tab of the printer driver See Basic tab on page 7 2 the printer driver will automatically use the Paper Source Setting to select a tray which matches the Paper Size setting in the printer driver Default Source The Default Source allows you t...

Page 109: ...ional 2nd paper tray the option must be installed in the driver Highlight the model number from the Available Options list and click Add The optional tray will then be listed in the Installed box Paper Source Setting list and the screen illustration will display the 2nd tray ...

Page 110: ...n Brother Solutions Center The Brother Solutions Center is a Web site offering information about your Brother product including FAQs Frequently Asked Questions User Guides Driver Updates and Tips for using your DCP Web Update Web Update checks the Brother web site for updated drivers and automatically downloads and updates the printer driver on your computer Check Setting The Check Setting selecti...

Page 111: ... the Select Components screen appears check PS Printer Driver and then continue following the on screen instructions If you have not previously installed the driver and software insert the CD ROM into the CO ROM drive on your PC and click Install Software Choose MFL Pro Suite and follow the on screen instructions When the Setup Type screen appears select Custom and check the PS Printer Driver Then...

Page 112: ...PRINTER DRIVER SETTINGS 7 18 Ports tab Select the port where your printer is connected or the path to the network printer you are using ...

Page 113: ...7 19 PRINTER DRIVER SETTINGS Device Settings tab Select the options you installed ...

Page 114: ...Order and Pages Per Sheet Booklet For DCP 8045D For Windows 2000 XP You can print a booklet by selecting Booklet from Pages Per Sheet list If you are using Windows NT 4 0 Windows 2000 or XP you can access the Layout tab by clicking Printing Preferences in the General tab of the Brother DCP 8045D BR Script3 Properties screen ...

Page 115: ...GS Paper Quality tab Select the Paper Source If you are using Windows NT 4 0 Windows 2000 or XP you can access the Paper Quality tab by clicking Printing Preferences in the General tab of the Brother BR Script3 Properties screen ...

Page 116: ...ing and TrueType Font setting 3 You can change settings by selecting the setting in the Printer Features list Media Type Toner Save BR Script Level If you are using Windows NT 4 0 Windows 2000 or XP you can access the Advanced Options tab by clicking Advanced button in the Layout tab or the Paper Quality tab 1 2 3 ...

Page 117: ...scanning These applications include popular programs like Adobe Photoshop Adobe PageMaker CorelDraw and many more How to scan using Windows The scanning operations and drivers will be different depending on your operating system For Windows 98 98SE Me 2000 Professional and Windows NT Workstation 4 0 The DCP uses a TWAIN Compliant driver for scanning documents from your applications See Scanning a ...

Page 118: ... 8045D Brother DCP 8045D USB or Brother DCP 8045D LAN from the Scanner drop down list box 4 Click Scan The Brother DCP 8045D Brother DCP 8045D USB or Brother DCP 8045D LAN Scanner Setup dialog box will appear The instructions for scanning in this Guide are for when you use ScanSoft PaperPort 8 0SE If the DCP is connected via Parallel use Brother DCP 8045D USB use Brother DCP 8045D USB LAN use Brot...

Page 119: ...st the following settings if required in the Scanner window Image Type Resolution Scan Type Brightness Contrast Document Size See Settings in the Scanner window on page 8 6 3 Click the Start button in the scanner window When scanning is completed click Cancel to return to the PaperPort window After you select a document size you can adjust the scanning area further by clicking the left mouse butto...

Page 120: ...the scanner window to scan the image 1 Place the document face up in the ADF or face down on the scanner glass 2 Select the settings for Image Type Resolution Scan Type Brightness and Contrast as needed 3 In the Brother DCP 8045D Brother DCP 8045D USB or Brother DCP 8045D LAN Scanner Setup dialog box click the PreScan button The entire document will be scanned into the PC and will appear in the Sc...

Page 121: ... document face up in the ADF again 6 Click Start This time only the selected area of the document will appear in the PaperPort window or your software application window 7 In the PaperPort window use the options available to refine the image You can enlarge the portion you selected by pressing to check it If you want to select the different portion use to undo the image ...

Page 122: ...can choose and the available colors Image Type Resolution Scan Type Photo Select for scanning photo images 300 x 300 dpi 24 bit color Web Select for attaching the scanned image to web pages 100 x 100 dpi 24 bit color Text Select for scanning text documents 200 x 200 dpi Black White Resolution Black White Gray Error Diffusion 256 color True Gray 24 bit color 24 bit color Fast 100 x 100 dpi Yes Yes ...

Page 123: ...Color settings are selected as the Scan Type You can increase or decrease the contrast level by moving the slide bar to the left or right An increase emphasizes dark and light areas of the Image while a decrease reveals more detail in gray areas You can also type a value in the box for the setting Black White Set the Scan Type to Black White for text or line art Gray Scale Set the Scan Type to Gra...

Page 124: ...3 x 18 cm APS C 4 x 6 in 10 x 15 cm Custom User adjustable from 0 35 x 0 35 in to 8 5 x 14 in or 8 9 x 8 9 mm to 215 9 x 355 6 mm To scan photographs or business cards select the document size and then place the document face down at the center of scanner glass When scanning photographs or other images for use in a word processor or other graphics application You should try different settings for ...

Page 125: ... the document You can choose mm or inch as the unit for Width and Height Width shows the width of scanning area Height shows the height of scanning area Data Size shows the approximate data size calculated in a Bitmap format The size will be different for other file formats such as JPEG You can see the actual paper size you selected on the screen ...

Page 126: ... directly into any other software application that supports WIA or TWAIN scanning How to access the scanner 1 Open your software application to scan a document 2 Select Scan from the File drop down menu or select the Scan button 3 Select your DCP model from the Scanner drop down list box The Scan dialog box will appear 4 Click Scan The instructions for scanning in this Guide are for when you use S...

Page 127: ...ike to scan and then crop a portion of the page after pre scanning the document you will need to use the scanner glass Flatbed Scanning a document using the ADF 1 Place the document face up in the ADF automatic document feeder 2 Select the Document Feeder from the Paper source drop down list box A 3 Select the picture type B 4 Select the Paper size from the drop down list box D A B C D ...

Page 128: ...st Resolution and Picture Type from the Advanced Properties Click the OK button after you choose your settings 6 To start scanning your document click the Scan button in the Scan dialog box The scanner resolution you can select is up to 1200 1200 dpi For resolutions greater than 1200dpi use the Brother Scanner Utility See Brother Scanner Utility on page 8 15 ...

Page 129: ...en you are satisfied with the preview click the Scan button from the scanner window to scan the image 1 Place the document face down on the scanner glass 2 Make sure you selected Flatbed in the Paper source pull down box A 3 Select the picture type B 4 In the Scan dialog box click the Preview button The entire document will be scanned into the PC and will appear in the scanning area Scanning area ...

Page 130: ...ft mouse button and dragging it over the area 6 If you require advanced settings click Picture Type from the Adjust the quality of the scanned picture C You can select Brightness Contrast Resolution and Advanced Properties Click the OK button after you choose your settings Scanning area C ...

Page 131: ...u want to set Legal size as the default size change the setting using this utility You must restart your PC for the new settings to take effect To run the utility You can run the utility by selecting the Scanner Utility located in the Start All Programs Brother MFL Pro Suite DCP 8045D menu If you scan the original at resolution of greater than 1200dpi the file size maybe very large Please make sur...

Page 132: ...ndows based computer and loaded the appropriate Brother Drivers for your version of Windows When you are ready to use Scan make sure the Brother Control Center application is running on your computer For details about how to configure the Brother Control Center buttons to launch the application of your choice using Scan go to the appropriate chapter For Windows 98 98SE Me 2000 Professional and Win...

Page 133: ...ocument create a file attachment and launch your E mail application displaying the new message waiting to be addressed Scan to Image You can scan a color picture into your graphics application for viewing and editing You can change the Scan configuration See Scan to Image on page 9 14 For Windows XP See Hardware Section Changing the Scan to button configuration on page 10 5 to 10 11 1 Place the do...

Page 134: ... Set The DCP will start the scanning process Scan to File You can scan a black and white or a color document into your computer and save it as a file in the folder you choose The file type and specific folder are based on the settings you have chosen in the Scan to File screen of the Brother MFL Pro Control Center See Scan to File on page 9 8 to 9 9 For Windows XP See Hardware Section Changing the...

Page 135: ...inting or filing ScanSoft PaperPort can be accessed through the ScanSoft PaperPort program group See Documentation for ScanSoft PaperPort on the CD ROM The complete ScanSoft PaperPort Users Guide including ScanSoft OmniPage OCR is in the documentation on the CD ROM This chapter is only an introduction to the basic operations When you install MFL Pro Suite ScanSoft PaperPort for Brother and ScanSof...

Page 136: ...g other applications Non PaperPort items include an icon that indicates the application that was used to create the item a non PaperPort item is represented by a small rectangular thumbnail and not an actual image Page View displays a close up of a single page and you can open a PaperPort item by double clicking on it As long as you have the appropriate application on your computer to display it y...

Page 137: ...its items both PaperPort MAX files and non paperport files appear on the Desktop You can also use Windows Explorer to manage the folders and items shown in Desktop View Quick links to other applications ScanSoft PaperPort automatically recognizes many other applications on your computer and creates a working link to them The Send To Bar at the bottom of the Desktop view shows icons of those linked...

Page 138: ... the text into text that you can edit with a word processing application PaperPort uses the optical character recognition application ScanSoft OmniPage which comes with PaperPort OR PaperPort can use your prefered OCR application if it is already on your computer You can convert the entire item or by using the Copy Text command you can select only a portion of the text to convert Dragging an item ...

Page 139: ...everal popular file formats such as BMP JPEG TIFF or self viewing For example to create a file for an Internet Web site export it as a JPEG file Web pages often use JPEG files for displaying images Exporting an image file 1 Select the Save As command from the File pull down menu in the PaperPort window The Save XXXXX as dialog box will be displayed 2 Select the drive and directory where you want t...

Page 140: ...Add Remove button Select PaperPort 8 0 SE from the list and click the Add Remove button For Windows 2000 Professional Select Start Settings Control Panel and Add Remove Programs Select Brother Extensions for Paperport and click the Change Remove button Select PaperPort 8 0 SE from the list and click the Change button For Windows XP Select Start Control Panel Add or Remove Programs and the Change o...

Page 141: ...used scanning applications Using the Control Center stops the need to manually startup any specific applications The Brother Control Center provides two operations Scan and Copy Scan directly to a file E mail word processor or graphic application of your choice Copy Using the Brother Control Center For Windows 98 98SE Me 2000 Professional and Windows NT WS 4 0 If you are using Windows 2000 Profess...

Page 142: ...ff AutoLoad How to turn off AutoLoad 1 Left click the Control Center icon and click Show 2 When the Control Center window appears left click the Configuration Control Center button A dialog box will appear 3 Uncheck the AutoLoad Pop Up check box If the Control Center icon does not appear on your task bar you will have to launch the software Double click the Control Center icon on the desktop or fr...

Page 143: ...example if you are using Outlook as your default E mail application the Control Center will create a link and a scanning application button for Outlook You can change a default application Right click the appropriate Control Center button to display Configurations and then click it Select a different application For example you can change a scan button from MS Word Pad to MS Word by changing the a...

Page 144: ...canSoft OmniPage OCR and insert the text document not a graphic image into a word processing file You can choose the word processing application such as Word Pad MS Word and so on Scan to Image Allows you to scan an image directly into any graphic viewer editor application You can choose the graphics application such as Microsoft Paint Copy operations Copy Allows you use the PC and any Windows pri...

Page 145: ...the Scanner Settings window Click the Configuration Control Center icon at the top right of the Brother Control Center screen OR Click the Modify Settings button on any of the Configuration screens Global settings AutoLoad Pop Up Select this checkbox if you want Brother MFL Control Center to load when you turn on your computer ...

Page 146: ...ep the default settings or change them at any time Resolution From the pull down list select the scanning resolution you most often use Color Mode From the pull down list select the color settings you most often use Scan Size From the pull down list select the scan size you most often use Brightness Slide the adjuster from 0 to 100 Contrast Slide the adjuster from 0 to 100 Click OK to save your ch...

Page 147: ...screen it means you left clicked a button in the Control Center window without first placing a document in the ADF Place the document in the DCP s ADF and then click OK to go to the Control Center screen If you want to scan the document from the scanner glass please use Scan on the control panel of the DCP ...

Page 148: ... screen of the Control Center 3 To save your settings click OK OR To go back to the default settings click the Restore Defaults button Scanner settings From the pull down list select the scanning mode that is appropriate for the type of file Faxing Filing and Copying Text for OCR Photos Photos High Quality Photos Quick Scan Custom Draft Copy or Fine Copy To change any of the settings for the mode ...

Page 149: ...ile PaperPort Image Item max PaperPort Self Viewing exe PaperPort Browser Viewable htm PaperPort 5 0 Image Item max PaperPort 4 0 Image Item max PaperPort 3 0 Image Item max Windows Bitmap bmp PC Paintbrush pcx PCX Multi page dcx JPEG jpg TIFF Uncompressed tif TIFF Group 4 tif TIFF Class F tif TIFF Multi page Uncompressed tif TIFF Multi page Group 4 tif TIFF Multi page Class F tif Portable Network...

Page 150: ...figuration screen of the Control Center 3 To save your settings click OK OR To go back to the default settings click the Restore Defaults button Scanner settings From the pull down list select the scanning mode that is appropriate for the type of file Faxing Filing and Copying Text for OCR Photos Photos High Quality Photos Quick Scan Custom Draft Copy or Fine Copy To change any of the settings for...

Page 151: ...images in the jpg format All documents and image items Converts all items regardless of the program in which the item was created for example converts all Word doc files and JPEG jpg files to the file type PaperPort image items MAX only Converts only PaperPort image items max files PaperPort does not convert other file types such as JPEG images and Word documents File type Identifies the format in...

Page 152: ...w the configuration screen of the Control Center 3 To save your settings click OK OR To go back to the default settings click the Restore Defaults button Scanner settings From the pull down list select the scanning mode that is appropriate for the type of file Faxing Filing and Copying Text for OCR Photos Photos High Quality Photos Quick Scan Custom Draft Copy or Fine Copy To change any of the set...

Page 153: ...e documents This option is available only when you have an OCR program other than the one provided with PaperPort PaperPort 8 0 SE uses the same OCR engine that is in ScanSoft s OmniPage Pro Millennium product Click the Settings button to choose how the OCR application will read the pages that you scan into your word processor application The OCR Settings window will appear Select your setting and...

Page 154: ... up in the ADF The Brother Control Center screen will pop up 2 Right click the graphic application button and click on Configuration Click the Modify Settings button to view the configuration screen of the Control Center 3 To save your settings click OK OR To go back to the default settings click the Restore Defaults button ...

Page 155: ...h Quality Photos Quick Scan Custom Draft Copy or Fine Copy To change any of the settings for this mode click Modify Settings Target Application Application From the pull down list select the application you want to add to this Pop Up screen Click the Custom Link Settings button to set up links for your user defined application Faxing is only possible if you have a fax modem attached to your comput...

Page 156: ...face up in the ADF The Brother Control Center screen will pop up 2 Right click the Copy and click on Configuration Click the Modify Settings button to view the configuration screen of the Control Center 3 To save your settings click OK OR To go back to the default settings click the Restore Defaults button ...

Page 157: ...g mode that is appropriate for the type of file Draft Copy or Fine Copy To change any of the settings for this mode click Modify Settings Number of copies Copies Enter the number of copies you want to print To change the copy options click the Copy Options button Click OK to save your Copy settings ...

Page 158: ...o scan a document directly to a folder on your computer The Brother Control Center provides 3 categories of operations 1 Scan directly to a file E mail word processor or graphics application of your choice 2 Enhanced copy functions such as Four Two or One on One Copying 3 Custom buttons allow you to configure a button to meet your own application requirements In the Task Tray right click on the Co...

Page 159: ...will appear in the task bar If you don t want the Control Center to load automatically you can turn AutoLoad off How to turn off Auto Load 1 Click the Control Center icon in the Task Tray and select Show 2 The main SmartUI Control Center window appears Please look at the bottom of the window for a check box labelled AutoLoad Pop up 3 Uncheck the AutoLoad Pop Up option to prevent the SmartUI from a...

Page 160: ... you the ability to configure the hardware Scan key on your DCP such as Scan to File The Scan to File feature allows you to scan a document directly to your hard disk and choose the file format and destination folder without having to run any other applications Select which section you want by clicking on the appropriate tab ...

Page 161: ...default E mail application the Control Center automatically will create a link and a scanning application button for Outlook You can change the default application by right clicking on any of the scan buttons in the Control Center and then clicking Configuration Select the Configuration tab and from the Application pull down menu select a different application For example you can change the E mail...

Page 162: ...configuration When the SmartUI Control Center is displayed you can access the Hardware Section window to reconfigure the Scan button on your DCP Click the Hardware Section tab at the top left of the SmartUI Control Center screen See Using the scan key For USB or Parallel interface cable users on page 8 16 ...

Page 163: ...e ability to change the configuration that includes the destination E mail application attachment file and the scanner settings To change the destination E mail application you use the Application pull down list to select the compatible E mail application which is installed on your system If you wish to change the attachment file type click on the Link Preferences button to display a list of file ...

Page 164: ...t click on the Scan to File button and the following screen will appear Select the file type for the saved image by selecting from the Format pull down list You can save the file to the default PaperPort folder so the file appears in PaperPort or you can select another folder directory by clicking the Browse button ...

Page 165: ... CONTROL CENTER Scan to Image To configure the Scan to Image feature left click on the Scan to Image button and the following screen will appear You can change the configuration which includes the destination image format or document application ...

Page 166: ...s of the scan click on the Scan Settings tab You can set the Color Mode to Black White 8 bit Gray or 24 bit Color The resolution can be changed from 100 to 1200 dpi You can define the size of the paper you re using and you can adjust the brightness and contrast of the image before scanning ...

Page 167: ... BROTHER SMARTUI CONTROL CENTER Scan to OCR To configure the Scan to OCR feature left click on the Scan to OCR button and the following screen will appear You can change the configuration which includes the destination applications ...

Page 168: ...CENTER 10 11 You have the option to send your scan as a different file type You can select the application from the File Type window according to your needs You have the option to choose your OCR setting from Single column output to Auto orient page ...

Page 169: ...er of different buttons which are predefined for the most frequently used applications The Scan section contains four buttons for Scan to File Scan to E mail Scan to Word Processor and Scan to Image applications The Copy section contains three buttons for N to 1 copying The Custom section contains three buttons with which you can assign your own function 1 2 3 4 ...

Page 170: ...ad MS Word Word Perfect or whichever word processing program is installed on your computer 4 Scan to Graphic Application Default MS Paint enables you to scan a page directly into any graphic viewer editor application You can select the destination application such as MS Paint Corel PhotoPaint Adobe PhotoShop or any kind of image editor application you already have installed on your computer Copy C...

Page 171: ...CENTER Custom Scan to File These buttons have been pre programmed for the Scan to File feature You can change the configuration of each of these buttons to meet your specific requirements by right clicking on a button and following the configuration menus ...

Page 172: ... scan an image and save it in a specific file type to any directory on your hard disk This allows you to easily archive your paper documents To configure the file type and save to directory right click on the Scan to File button and click Configuration The Scan Action tab is set to File and should not be changed ...

Page 173: ...by selecting from the Format pull down list You can save the file to the default PaperPort folder so the file appears in PaperPort or you can select another folder directory by clicking the Browse button You can change the default setting by selecting the Other Folder button and then clicking Browse and selecting the folder in which you wish to save your files ...

Page 174: ...mail application To change the default E mail application or attachment file type right click on the E mail button and select Configuration The Scan Action tab is set to E mail and should not be changed To change the E mail application click on the Configuration tab From the Application pull down list select your preferred E mail application ...

Page 175: ... SMARTUI CONTROL CENTER To change the file type of the attachment click the Link Preferences button to set up links Check the Convert attachments to specified file type box and then select the appropriate file type from the pull down list ...

Page 176: ...achments that are PaperPort MAX files Combine items into single file if possible Click this check box if you want to combine all the attachments into one file With this box unchecked each scanned page will be saved in its own individual file File type Select from the pull down list the type of file you want the scanned images to be saved in PaperPort Image Item max PaperPort Browser Viewable htm P...

Page 177: ... WINDOWS BASED BROTHER SMARTUI CONTROL CENTER Scanner settings You have the ability to change the scanner settings used to create the file attachments Click on the Scan Settings tab and select the appropriate settings ...

Page 178: ...mple Word Pad instead of Word and file type You can also choose another OCR software package besides the OmniPage OCR which is built into PaperPort To configure Scan to OCR right click on the WordPad button and select Configuration The Scan Action tab is set to OCR and should not be changed To change the word processing application click on the Configuration Tab You can select the destination word...

Page 179: ...MARTUI CONTROL CENTER To change the program link preferences click the Link Preferences button File Type From the pull down list select the file format you want to use for documents OCR Select the OCR application from the OCR pull down list ...

Page 180: ... Graphics Application allows you to scan an image so you can edit the image To change the default graphics application right click on the button and select Configuration The Scan Action tab is set to Application and should not be changed To change the configuration of the destination application click on the Configuration Tab ...

Page 181: ...ropriate application from the Application pull down list To change the other configuration options click the Link Preferences button These options enable you to reduce the image to a screen resolution of 96dpi show a warning if the item has any annotations and update the original item if the sent item is modified ...

Page 182: ... as the default printer including non Brother printers Before you can use the Copy buttons you must first configure the printer driver by right clicking on a Copy button and selecting Configuration In the Scan Settings window you can select the color mode resolution paper size brightness and contrast settings to be used To finish the Copy button configuration you must set the printer driver Click ...

Page 183: ... CONTROL CENTER Select the number of Pages Per Sheet from the Scaling selections As an example to configure the section Copy button to copy two pages to one you must select 2 in 1 You must configure each of the copy buttons before they can be used ...

Page 184: ...This setting allows you to save a scanned image to any directory on local or network hard disk You can also select the file format to be used OCR Scanned documents will be converted to editable text files If you have a third party OCR software package installed on your PC you can select it The default OCR software is OmniPage which is built into PaperPort 8 0 SE You can also select the destination...

Page 185: ...lick on the Configuration Tab Depending upon which Scan Type button you selected you will see a different Configuration Tab list of settings Application Select the destination application program from the pull down list Click on Link Preferences to set the Send to options You can select the application from the scroll menu on the left ...

Page 186: ...R 10 29 File Select the file format from the Format pull down list You can either send the file to the default PaperPort directory or select your own destination directory by selecting Other Folder Use the Browse button to select the destination directory ...

Page 187: ... list Click on Link Preferences and select the destination Application from the scroll menu on the left Select the File Type from the File Type pull down list You can also choose another OCR application from the OCR pull down list if another is installed on you system Scansoft OmniPage is installed as part of the PaperPort 8 0 SE application ...

Page 188: ...CONTROL CENTER 10 31 E mail Select the destination E mail application program from the pull down list Click on the Link Preferences button to configure the Send To E mail options You can select the File type and Quick Send E mail address list ...

Page 189: ...SMARTUI CONTROL CENTER 3 Select Scan Settings You can select the scanner settings from each of the Scan Type options for the Custom buttons You have the option to select Color Mode Resolution Paper Size and Brightness and Contrast settings ...

Page 190: ...t information for Mac OS X please visit at http solutions brother com Using your DCP with a Macintosh Before you can connect the DCP to your Macintosh you must buy a USB cable that is not longer than 1 8 metres Do not connect the DCP to a USB port on a key board or a non powered USB hub Some descriptions in this chapter are based on the DCP 8045D These descriptions also apply to the DCP 8040 Featu...

Page 191: ... from the Apple menu 2 Click the Brother Laser icon On the right side of the Chooser window click the printer you want to print to Close the Chooser To print a document 1 From the application software such as Presto PageManager click File menu and select Page Setup You can change the settings for Paper Size Orientation and Scaling and then click OK ...

Page 192: ...eManager click File menu and select Print Click Print to start printing If you want to change Copies Pages Resolution Paper Source and Media Type select your settings before clicking Print Device Options allows you to select Duplex Automatic Duplex is only available with the DCP 8045D ...

Page 193: ...n software such as Presto PageManager click the File menu and select Page Setup Make sure DCP 8040 or DCP 8045D is selected in the Format for pop up menu You can change the settings for Paper Size Orientation and Scaling then click OK 2 From application software such as Presto PageManager click File menu and select Print Click Print to start printing ...

Page 194: ... DCP WITH A MACINTOSH 11 5 Specific settings Set the Media Type Resolution and other settings Press Copies Pages to select settings you want to change Duplex Automatic Duplex is only available with the DCP 8045D ...

Page 195: ...11 6 USING YOUR DCP WITH A MACINTOSH Print settings ...

Page 196: ...Users Open the Applications Mac OS 9 folder Open the Utilities folder The screens are based on Mac OS 9 04 To use the PS driver on a Network see the NC 9100h Network User s Guide on CD ROM To use the PS driver with a USB cable you need to set the Emulation to BR Script 3 Menu 3 1 before connecting the USB cable See Setting the Emulation Selection on page 6 18 The PS driver does not support the fol...

Page 197: ...11 8 USING YOUR DCP WITH A MACINTOSH 2 Open the Desktop Printer Utility icon 3 Select Printer USB and then click OK ...

Page 198: ...WITH A MACINTOSH 11 9 4 Click Change in the PostScript Printer Description PPD file Select Brother DCP 8045D and then click Select 5 Click Change in the USB Printer Selection Select Brother DCP 8045D and then click OK ...

Page 199: ...11 10 USING YOUR DCP WITH A MACINTOSH 6 Click Create 7 Enter your DCP name DCP 8045D and then click Save ...

Page 200: ...USING YOUR DCP WITH A MACINTOSH 11 11 8 Select Quit from the File menu 9 Click the DCP 8045D icon on the Desktop 10 Select Set Default Printer from the Printing menu ...

Page 201: ...able and your Macintosh is Mac OS X only one printer driver for an DCP can be registered in Print Center If a Brother Native Driver DCP 8040 8045D is already listed in Printer list you will need to delete it and then install the PS driver To use the PS driver with a USB cable you need to set the Emulation to BR Script 3 Menu 3 1 before connecting the USB cable See Setting the Emulation Selection o...

Page 202: ...USING YOUR DCP WITH A MACINTOSH 11 13 3 Open the Print Center icon 4 Click Add Printer 5 Select USB ...

Page 203: ...11 14 USING YOUR DCP WITH A MACINTOSH 6 Select DCP 8045D and then click Add 7 Select Quit Printer Center from the Print Center menu ...

Page 204: ... time you use the Brother TWAIN driver MFL Pro P2500 set it as the default by choosing Select Source or the other menu name to select the device Afterwards for each document you scan choose Acquire Image or Scan The scanner setup dialog box will appear Mac OS X Scanning is supported in Mac OS X 10 2 1 or greater The screen shown in this section are from Mac OS 9 The screen on your Macintosh may va...

Page 205: ...ning the document Scanning a whole page 1 Place the document face up in the ADF or face down on the scanner glass 2 Adjust the following settings if needed in the Scanner Setup dialog box Resolution Color Type Scanning Area Brightness Contrast 3 Click Start When scanning has finished the image will appear in your graphics application ...

Page 206: ...document face up in the ADF or face down on the scanner glass 2 Click PreScan The whole image will be scanned into your Macintosh and will appear in the Scanning Area of the Scanner dialog box 3 To scan a portion of the prescanned image click and drag the mouse to crop it 4 Insert document in the ADF if you are using ADF 5 Make your adjustments to the settings for Resolution Color Type Gray Scale ...

Page 207: ...DCP WITH A MACINTOSH Settings in the Scanner window Image Resolution From the Resolution pop up menu choose the scanning resolution Higher resolutions use more memory and transfer time but produce a finer scanned image ...

Page 208: ...ck dots instead of the true gray dots in a specific matrix instead of true gray dots True Gray is used for documents with photographic images or graphics This mode is more exact because it uses up to 256 shades of gray It requires the most memory and takes the longest transfer time Colors Choose either 8 bit Color which scans up to 8 bit Color or 24 bit color which scans up to 16 8 million colors ...

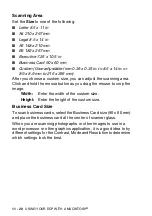
Page 209: ... adjust the scanning area Click and hold the mouse button as you drag the mouse to crop the image Width Enter the width of the custom size Height Enter the height of the custom size Business Card Size To scan business cards select the Business Card size 90 x 60 mm and place the business card at the center of scanner glass When you are scanning photographs or other images to use in a word processor...

Page 210: ... image is too light set a lower Brightness level and scan the image again If the image is too dark set a higher Brightness level and scan the image again Contrast You can only adjust the Contrast level when you have selected one of the Gray Scale settings it is not available when you have selected Black White as the selected Color Type Increasing the Contrast level by dragging the slide bar to the...

Page 211: ...that you install Presto PageManager To install Presto PageManager see the Quick Setup Guide Highlights OCR In one step scan an image recognize the text and edit it with a word processor Scan Buttons Scan documents and open them with a designated program in one step Image Editing Enhance crop and rotate images or open them with an image editing program of your choice Annotation Add removable notes ...

Page 212: ...e Postal Address Regus Center Fleethof Stadthausbrucke 3 20355 Hamburg Germany Telephone 49 40 37644530 Fax 49 40 37644500 E mail Address contact newsoft eu com URL http de newsoft eu com Company name SoftBay GmbH Postal Address Carlstrase 50 D 52531 Ubach Palenberg Telephone 49 0 2451 9112647 Fax 49 0 2451 409642 E mail Address newsoft softbay de URL http de newsoft eu com Company name Guildsoft ...

Page 213: ...o Clare Ireland Telephone 0800 917171 E mail Address Newsoft pie ie Company name V I P Postal Address Not Open Telephone 166821700 Fax 532786999 E mail Address supporto gensoftonline com Company name Atlantic Devices Postal Address Caputxins 58 08700 Igualada Telephone 938040702 33 Fax 938054057 E mail Address support atlanticdevices com E mail Address tech newsoft eu com ...

Page 214: ...nt to use more than 5 PCs with ScanSoft PaperPort installed please purchase NL 5 which is a multiple PC license agreement pack for up to an additional 5 Users To purchase NL 5 please contact your Brother Sales Office Registering your PC with the DCP If you need to change the DCP that was registered to your PC during the installation of Brother MFL Pro Suite see Quick Setup Guide follow the steps b...

Page 215: ...ight click Scanner Device icon and select properties to view the Network Scanner Properties dialog box 2 Click the Network Setting tab in the dialog box and select a method to specify the DCP as a Network scanner for your PC ...

Page 216: ...e DCP in the IP Address field Click Apply and then OK Specify your machine by Name Enter the DCP Node name in the Node Name field Click Apply and then OK Search from a list of available device Click Browse and select the appropriate device you want to use Click OK Click Apply and then OK ...

Page 217: ...is your PC Name You can enter a name if you like 4 You can avoid receiving unwanted documents by setting a 4 digit PIN Number Enter your PIN Number in the PIN Number and Retype PIN Number field To send data to a PC protected by a PIN Number the LCD prompts to enter the PIN Number before the document can be scanned and sent to the DCP See Using the Scan key on page 12 5 to 12 9 ...

Page 218: ...hment You can change the Scan configuration For Windows 98 98SE Me 2000 See Scan to E mail on page 9 10 to 9 11 For Windows XP See Hardware Section Changing the Scan to button configuration on page 10 5 to 10 9 1 Place the document face up in the ADF or face down on the scanner glass 2 Press Scan 3 Press or to select Scan to E Mail Press Set For Network Scanning the Brother Control Center SmartUI ...

Page 219: ...t the destination PC you want to use for E mailing your document Press Set If the LCD prompts you to enter a PIN Number enter the 4 digit PIN Number for the destination PC on the control panel Press Set The DCP will start the scanning process ...

Page 220: ...0 10 1 Place the document face up in the ADF or face down on the scanner glass 2 Press Scan 3 Press or to select Scan to Image Press Set 4 Press or to select a destination you want to send Press Set If the LCD prompts you to enter a PIN Number enter the 4 digit PIN Number for the destination PC on the control panel Press Set The DCP will start the scanning process For Network Scanning the Brother ...

Page 221: ...he Scan to button configuration on page 10 5 to 10 11 1 Place the document face up in the ADF or face down on the scanner glass 2 Press Scan 3 Press or to select Scan to OCR Press Set 4 Press or to select a destination you want to send Press Set If the LCD prompts you to enter a PIN Number enter the 4 digit PIN Number for the destination PC on the control panel Press Set The DCP will start the sca...

Page 222: ...or face down on the scanner glass 2 Press Scan 3 Press or to select Scan to File Press Set 4 Press or to select a destination you want to send Press Set If the LCD prompts you to enter a PIN Number enter the 4 digit PIN Number for the destination PC on the control panel Press Set The DCP will start the scanning process For Network Scanning the Brother Control Center SmartUI selections are used onl...

Page 223: ...which emits invisible laser radiation in the Scanner Unit The Scanner Unit should not be opened under any circumstances Laser Diode Wave length 760 810 nm Output 5 mW max Laser Class Class 3B Caution Use of controls adjustments or performance of procedures other than those specified in this manual may result in hazardous radiation exposure Important information CLASS 1 LASER PRODUCT APPAREIL À LAS...

Page 224: ...lled near a socket outlet that is easily accessible In case of emergencies you must disconnect the power cord from the socket outlet in order to shut off power completely IT power system For Norway only This product is also designed for IT power system with phase to phase voltage 230V LAN connection Caution Connect this product to the LAN connection which is not subjected to overvoltages Internati...

Page 225: ...cation 22 Class B Before this product is used ensure that you use the following interface cables 1 A shielded parallel interface cable with twisted pair conductors and that it is marked IEEE 1284 compliant The cable must not exceed 1 8 meters in length 2 A USB cable The cable must not exceed 2 0 meters in length ...

Page 226: ... by placing the product on a bed sofa rug or other similar surface This product should never be placed near or over a radiator or heater This product should never be placed in a built in installation unless proper ventilation is provided 8 This product should be operated from the type of power source indicated on the label If you are not sure of the type of power available call your dealer or loca...

Page 227: ...oper adjustment of other controls may result in damage and will often require extensive work by a qualified technician to restore the product to normal operation If the product has been dropped or the cabinet has been damaged If the product exhibits a distinct change in performance indicating a need for service 13 To protect your product against power surges we recommend the use of a power protect...

Page 228: ...untries Macintosh QuickDraw iMac and iBook are trademarks or registered trademarks of Apple Computer Inc Postscript and Postscript Level 3 are registered trademarks or trademarks of Adobe Systems Incorporated PaperPort and OmniPage are registered trademarks of ScanSoft Inc Presto PageManager is a registered trademark of NewSoft Technology Corporation Each company whose software title is mentioned ...

Page 229: ...riginal The documents were not inserted or fed properly or document scanned from ADF was longer than about 90cm See Document jams on page 14 4 Check Paper Check Paper 1 Check Paper 2 The DCP is out of paper or paper is not properly loaded in the paper tray Refill the paper in the paper tray or MP tray OR Remove the paper and load it again Check Paper MP Paper in the MP tray runs out Reload paper S...

Page 230: ... on page 2 11 Face Up Open The face up output tray is open Please close the face up output tray Fuser Open The fuser cover is open Please close the jam clear cover See Paper jams on page 14 5 Machine Error XX DCP has a mechanical problem Call Brother or your dealer for service No DX Tray You tried to make duplex printing with duplex cover open Install the duplex tray correctly See Paper is jammed ...

Page 231: ... close the front cover again If the DCP cannot reset itself and return to the date and time prompt it will display Machine Error XX Then contact your Brother dealer for service Toner Empty Toner cartridge is not installed OR Toner is used up and printing is not possible Reinstall the toner cartridge OR Replace the toner cartridge with a new one See Replacing the toner cartridge on page 14 24 Toner...

Page 232: ...hat is not jammed 2 Lift the ADF cover 3 Pull the jammed document out to the right 4 Close the ADF cover 5 Press Stop Exit Document is jammed inside the ADF unit 1 Take out any paper from the ADF that is not jammed 2 Lift the document cover 3 Pull the jammed document out to the right 4 Close the document cover 5 Press Stop Exit OR 1 Take the ADF support out of the ADF unit 2 Pull the jammed docume...

Page 233: ...ows If the jammed paper is removed completely by using the information in the following steps you can install the paper tray first and then close the front cover and the DCP will resume printing automatically If a paper jam occurs when using the optional lower tray unit check for correct installation of the upper paper tray Always remove all paper from the paper tray and straighten the stack when ...

Page 234: ...per up and out of the DCP 3 Press the cover release button and then open the front cover 4 Pull out the drum unit assembly Pull the jammed paper up and out of the DCP If you cannot remove the drum unit assembly easily at this time do not use extra force Instead pull the edge of the jammed paper from the paper tray ...

Page 235: ...the following diagram 5 Open the back output tray Pull the jammed paper out of the fuser unit If the paper jam can be cleared go to Step 7 If you have to pull the paper toward the back of the DCP the fuser may get dirty with toner powder and it may scatter on the next printouts Print a few copies of the test page until the scattering of toner stops ...

Page 236: ...rnal parts of the DCP are extremely HOT Wait for the DCP to cool down before you touch the internal parts of the DCP 6 Open the jam clear cover fuser cover Pull the jammed paper out of the fuser unit 7 Close the jam clear cover Close the back output tray HOT Back view Jam Clear Cover Fuser Cover ...

Page 237: ...ed paper if there is any inside the drum unit Then put the toner cartridge back in the drum unit 9 Put the drum unit assembly back in the DCP 10 Put the paper tray in the DCP 11 Close the front cover Paper is jammed in the duplex tray For DCP 8045D 1 Pull the duplex tray and paper tray out of the DCP 2 Pull the jammed paper out of the DCP ...

Page 238: ...he DCP The Jam Duplex message appears if you remove a sheet of paper from the Face Down Output Tray after only one side has printed If the Paper Adjustment Lever for Duplex Printing is not set correctly for the paper size paper jams may occur and the printing will be out of position on the page ...

Page 239: ...Setup Guide The toner cartridge and drum unit are installed properly See Replacing the drum unit on page 14 29 The interface cable is securely connected between the DCP and computer See the Quick Setup Guide Check to see if LCD is showing an error message See Error messages on page 14 1 The DCP prints unexpectedly or it prints garbage Reset the DCP or turn it off and then on again Check the primar...

Page 240: ...ch on and that it is connected directly to the computer using the bundled IEEE 1284 bi directional parallel cable The cable must not go through another peripheral device such as a Zip Drive External CD ROM Drive or Switch box 2 Make sure the DCP is not displaying an error message on the LCD Display 3 Make sure no other device drivers which also communicate through the parallel port are running aut...

Page 241: ...r can I use You can use plain paper envelopes transparencies and labels that are made for laser machines For information on paper you can use see Printer operation keys on page 6 17 How can I clear paper jams See Paper jams on page 14 5 Print Quality Difficulties Printed pages are curled Thin or thick paper below the standard can cause this problem Make sure you select the Paper Type that suits th...

Page 242: ...14 29 Ghost Make sure you use paper that meets our specifications Rough surfaced paper or thick print media may cause this problem Make sure that you choose the appropriate media type in the printer driver See About paper on page 2 1 Try using a new drum unit See Replacing the drum unit on page 14 29 Toner specks Make sure that you use paper that meets our specifications Rough surfaced paper may c...

Page 243: ...r by hand while looking at the surface of the OPC drum Caution Be careful not to touch the photosensitive drum with your fingers 3 When you have located the mark on the drum that matches the print sample wipe the surface of the OPC drum with a cotton swab until the dust or paper powder on the surface comes off Caution Do not try to clean the surface of the photosensitive drum with a sharp object s...

Page 244: ...nit on page 14 29 Black lines down the page Printed pages have toner stains down the page Clean the primary corona wire of the drum unit Make sure the primary corona wire cleaner is at the home position The drum unit may be damaged Install a new drum unit See Replacing the drum unit on page 14 29 The toner cartridge may be damaged Put in a new toner cartridge See Replacing the toner cartridge on p...

Page 245: ...the paper tray Try printing using the straight through output path See How to load paper on page 2 5 Wrinkles or creases Make sure that paper is loaded properly Check the paper type and quality See About paper on page 2 1 Try printing using the straight through output path See How to load paper on page 2 5 Turn over the stack of paper in the tray or try rotating the paper 180 in the input tray The...

Page 246: ...orrectly you may void your warranty 1 Turn the DCP power switch off 2 Unplug the DCP from the AC outlet Lock the Scanner Lock 3 Push the Scanner Lock Lever up to lock the scanner This lever is located on the left of the scanner glass Caution Damage caused to your DCP by failure to lock the scanner before moving and shipping may void your warranty 4 Open the front cover Scanner Lock Lever ...

Page 247: ...the toner cartridge installed in the drum unit 6 Place the drum unit and toner cartridge assembly into the plastic bag and seal the bag 7 Close the front cover Fold down the face down output tray flap 8 Wrap the DCP in the plastic bag and place it in the original carton with the original packing material ...

Page 248: ...TROUBLESHOOTING AND ROUTINE MAINTENANCE 14 20 9 Pack the drum unit and toner cartridge assembly AC cord and printed materials in the original carton as shown below 10 Close the carton and tape it shut ...

Page 249: ...aintenance Cleaning the scanner Turn the DCP power switch off and lift the document cover Clean the scanner glass and glass strip with dry cloth and the white film with isopropyl alcohol on a lint free cloth White Film Document Cover Glass strip White film ...

Page 250: ...nger The drum unit contains toner so handle it carefully If toner scatters and your hands or clothes get dirty immediately wipe or wash it off with cold water 1 Turn the DCP power switch off and open the front cover 2 Remove the drum unit and toner cartridge assembly WARNING Just after you have used the DCP some internal parts of the machine are extremely HOT When you open the front cover of the D...

Page 251: ...nd scattering toner 1 Clean the primary corona wire inside the drum unit by gently sliding the blue tab from right to left several times 2 Return the blue tab and snap it into the Home position Caution If the blue tab is not at the Home position printed pages may have vertical stripes 3 Reinstall the drum unit and toner cartridge assembly into the DCP See Replacing the drum unit on page 14 29 4 Cl...

Page 252: ...hics Discard the used toner cartridge according to local regulations keeping it separate from domestic waste Be sure to seal the toner cartridge tightly so toner powder does not spill out of the cartridge If you have questions call your local waste disposal office We recommend that you clean the DCP when you replace the toner cartridge How to replace the toner cartridge WARNING Just after you use ...

Page 253: ...he front cover and pull out the drum unit Caution Place the drum unit on a drop cloth or large piece of disposable paper to avoid spilling and scattering the toner To prevent damage to the DCP from static electricity do not touch the electrodes shown below ...

Page 254: ...Brother multifunction machines are designed to work with toner of a particular specification and work to a level of optimum performance when used with genuine Brother toner cartridges Brother cannot guarantee this optimum performance if toner or toner cartridges of other specifications are used Brother does not therefore recommend the use of cartridges other than genuine Brother cartridges with th...

Page 255: ...om side to side five or six times to distribute the toner evenly inside the cartridge 5 Remove the protective cover 6 Insert the new toner cartridge in the drum unit until it clicks into place If you put it in properly the lock lever will lift automatically Toner Cartridge Drum Unit ...

Page 256: ... drum unit by gently sliding the blue tab from right to left several times Return the blue tab to the Home position before reinstalling the drum unit and toner cartridge assembly 8 Reinstall the drum unit and toner cartridge assembly and close the front cover Corona Wire Tab Home Position ...

Page 257: ...drum unit should be replaced You should clean the DCP when you replace the drum unit See Cleaning the drum unit on page 14 23 Caution When removing the drum unit handle it carefully because it contains toner If toner scatters and your hands or clothes get dirty immediately wipe or wash with cold water WARNING Just after you have used the DCP some internal parts of the DCP are extremely HOT So plea...

Page 258: ... Press the cover release button and then open the front cover 2 Remove the old drum unit and toner cartridge assembly Place it on a drop cloth or disposable paper to avoid scattering toner Caution To prevent damage to the printer from static electricity do not touch the electrodes shown below ...

Page 259: ...um unit See Replacing the toner cartridge on page 14 24 6 Reinstall the new drum unit keeping the front cover open 7 Press Clear Back 8 Press 1 and when the LCD shows Accepted and close the front cover Caution If toner scatters and your hands or clothes get dirty immediately wipe off or wash with cold water Discard the used drum unit according to local regulations keeping it separate from domestic...

Page 260: ...e Page Counter You can see number of total pages copy pages print pages and List total list print pages that your DCP has printed 1 DCP 8040 Press Menu 1 7 OR If you have the optional tray 2 press Menu 1 8 DCP 8045D Press Menu 1 8 2 The LCD shows number of pages for Total and Copy Press to see Print and List 3 Press Stop Exit Even if the remaining drum life is 0 you may continue to use the drum un...

Page 261: ... DCP 8040 32 MB Standard Memory 32MB TECHWORKS 12457 0001 DCP 8045D 32 MB Standard Memory 64MB TECHWORKS 12458 0001 128MB TECHWORKS 12459 0001 In general the DIMM must have the following specifications Type 100 pin and 32 bit output CAS Lantency 2 or 3 Clock Frequency 100MHz or more Capacity 32 64 128MB Height 35mm or less Parity NONE DRAM Type SDRAM 4 Bank Some DIMMs might not work with this DCP ...

Page 262: ...uch the surface of the main board within 15 minutes after turning off the power 1 Turn the DCP power switch off unplug the DCP power cord from the AC outlet and then disconnect the interface cable WARNING Turn the DCP power switch off before installing or removing the memory board ...

Page 263: ...icity Do not touch the memory chips or the board surface Wear an antistatic wrist strap when you install or remove the board If you do not have an antistatic wrist strap frequently touch the bare metal on the printer 4 Hold the DIMM with your fingers on the side edges and your thumb on the back edge Line up the notches on the DIMM with the DIMM slot Check that the locks on each side of the DIMM sl...

Page 264: ...ct any additional interface cables that you removed 9 Reconnect the power cable and then turn on the DCP power switch WARNING If the Status LED turns Red for a Service Error please call your dealer or Brother authorized service center To check that you have installed the DIMM correctly print the printer settings by using the selection in the driver and check the printout to make sure it shows the ...

Page 265: ... to use the Network Scanner Network Printer and Network Management operations WARNING DO NOT touch the surface of the main board within 15 minutes after turning off the power For more details about how to configure the Network board please see the NC 9100h Network User s Guide on the CD ROM supplied with the DCP NC 9100h Print Fax Server ...

Page 266: ...ist strap and a grounding mat if possible If you do not have an anti static wrist strap touch the bare metal surface on the back of the machine before handling the NC 9100h Avoid moving around the work area in order to eliminate static charge build up If possible do not work on a carpeted area Do not flex the board and do not touch the components on the card Tools Required Phillips Screwdriver Ste...

Page 267: ...urn the DCP power switch off before installing or removing the NC 9100h board 2 Remove the side cover Loosen the two screws and then remove the metal shield plate 3 Loosen the two screws and then remove the metal cover plate Cover Plate ...

Page 268: ...NC 9100h with the two screws 5 Put the metal shield plate back on and secure it with the two screws 6 Put the side cover back on 7 Reconnect any additional interface cables that you removed 8 Reconnect the power cable and then turn on the DCP power switch 9 Press the Test switch and print a network configuration page See TEST SWITCH on page 15 10 ...

Page 269: ...he other side must be connected to the 10BASE T or 100BASE TX connector an RJ45 Connector of the NC 9100h Verifying successful hardware Installation Plug in the AC power cord After initialization and warm up this may take several seconds the DCP will come to a Ready state LED No light If both of the two LEDs are off then the print server is not connected to the network Link Speed LED is orange Fas...

Page 270: ...k if the print server is receiving or transmitting data TEST SWITCH Short push Prints the network configuration page Long push more than 5 seconds Reset the network configuration back to the default settings If there is a valid connection to the network the LED will blink orange or green To set up the DCP on the Network see the NC 9100h Network User s Guide on the CD ROM LED LED Ethernet RJ 45 Tes...

Page 271: ...use as a third paper source Tray 2 holds up to 250 sheets of 80 g m2 paper Paper Tray 2 Holds approx 250 sheets of 80 g m2 Basis Weight 60 to 105 g m2 Moisture Content 4 to 6 by weight We Recommend Cut sheet Xerox Premier 80 g m2 Xerox Business 80 g m2 Mode DATACOPY 80 g m2 IGEPA X Press 80 g m2 ...

Page 272: ...he display screen on the DCP that shows interactive messages during On Screen Programming Menu mode Programming mode for changing your DCP s settings MFL Pro Suite Turns your DCP into a printer and a scanner using the DCP OCR optical character recognition The bundled ScanSoft OmniPage software application converts an image of text to text you can edit Photo resolution A resolution setting that use...

Page 273: ...ge to extend the life of the toner assembly This will make the receiving document significantly lighter True Type fonts The fonts that are used in the Windows operating systems If you install the Brother True Type fonts more types of fonts will be available for Windows applications ...

Page 274: ...ose Tray 50 Sheets 80 g m2 DCP 8045D only Manual Feed Tray Single sheet 80 g m2 DCP 8040 only Printer Type Laser Print Method Electrophotography by semiconductor laser beam scanning LCD Liquid Crystal Display 22 characters 5 lines Warm up Max 18 seconds at 23 C Power Source 220 240V AC 50 60Hz Power Consumption Average Operating Copying 450W or less 25 C Peak Sleep Standby 1090W or less 14W or les...

Page 275: ...ils see Paper specifications for each paper tray on page 2 4 Maximum paper tray capacity Approx 250 sheets of 80 g m2 plain paper Maximum multi purpose tray capacity Approx 50 sheets of 80 g m2 plain paper DCP 8045D only Manual Feed Tray Multi Purpose Tray Paper size Width 69 8 220 0 mm Hight 116 0 406 4 mm Weight 60 161 g m2 Paper Output Up to 150 sheets of plain paper Face down print delivery to...

Page 276: ...00 dpi optical Maximum 1200 x 1200 dpi scanning with Windows XP resolution up to 9600 x 9600 dpi can be selected by using the Brother scanner utility Document Size ADF Width 148 mm to 216 mm ADF Height 148 mm to 356 mm Scanner Glass Width Max 216 mm Scanner Glass Height Max 356 mm Scanning Width 212 mm Gray Scale 256 levels Scanning directly to a networked PC is available with Windows 98 98SE Me 2...

Page 277: ...ty Normal printing mode Economy printing mode saves toner usage Print Speed Up to 20 pages minute A4 size when loading paper from paper tray Duplex Printing Up to 8 5 pages minute DCP 8045D only 8 5 sides per minute 4 25 sheets per minute First Print Up to 12 seconds using A4 size paper in paper tray Interface Recommended Cable Parallel A bi directional shielded parallel cable that is IEEE 1284 co...

Page 278: ...128 MB XP Pentium 233MHz 128 MB 256 MB 180 MB Apple Macintosh Operating System MacOS 8 6 9 2 Printing and Scanning Only All base models meet minimum Requirements 32 MB 64 MB 50 MB 200 MB Mac OS X 10 1 10 2 1 or greater Printing and Scanning 2 Only 128 MB 160 MB NOTE USB is not supported under Windows NT WS 4 0 All registered trademarks referenced herein are the property of their respective compani...

Page 279: ... 6 700 pages when printing letter size or A4 paper at 5 print coverage Toner life expectancy will vary depending upon the type of average print job Drum Unit Life Expectancy Up to 20 000 pages drum unit DR 3000 There are many factors that determine the actual drum life such as temperature humidity type of paper toner you use and number of pages per print job ...

Page 280: ...ell NetWare 3 X 4 X 5 X Mac OS 8 6 9 2 X 10 0 10 2 1 or Greater Ethernet 10 100 BASE TX Auto Negotiation TCP IP IPX SPX AppleTalk DLC LLC NetBIOS RARP BOOTP DHCP APIPA WINS LPR LPD Port9100 SMTP POP3 SMB NetBIOS IP IPP SSDP Apple Rendezvous FTP SNMP MIBII as well as Brother private MIB TELNET HTTP TFTP Included Utilities BRAdmin Professional and Web Based Management Scanning directly to a networke...

Page 281: ...u to print and scan over a wireless network Network types IEEE802 11b wireless LAN Support for Windows 98 98SE Me 2000 XP and Windows NT Mac OS X 10 2 4 or greater Apple Rendezvous Protocols TCP IP ARP RARP BOOTP DHCP APIPA Auto IP WINS NetBIOS DNS LPR LPD Port9100 SMB Print IPP RawPort Apple Rendezvous TELNET SNMP HTTP Network Scanning are not available for Mac You can assign the scan key to one ...

Page 282: ...ys 5 6 multiple 5 4 paper 2 1 Quality type of document 5 9 scanner glass 5 4 single 5 3 5 4 Sort ADF only 5 9 temporary settings 5 2 5 6 Tray Select 5 11 tray use 4 7 using ADF 5 3 D Drivers printer 7 1 TWAIN Compliant 8 1 Windows printer 6 1 Drum unit checking remaining life 14 32 replacing 14 29 Duplex N in 1 key 5 12 Duplex 1 in 1 5 17 Duplex 2 in 1 5 19 Duplex 4 in 1 5 19 E Ecology Scanner lam...

Page 283: ...s 14 5 manual feed tray 6 5 multi purpose tray 6 6 on thick paper 6 8 reports and lists 6 19 resolution S 4 Secure key 6 17 specifications S 4 two sided duplex printing 6 3 Print media 2 1 Printer driver 7 17 PS printer driver 7 17 Q Quality key copying 5 6 R Reducing copies 5 7 Resolution print S 4 Scan 8 6 S 3 S Safety Instructions ii 13 4 Scanner Lamp 4 5 Scanner Lock 14 18 Scanning into PC 8 3...

Page 284: ...INDEX I 3 Tray use setting copy 4 7 Troubleshooting 14 1 error messages on LCD 14 1 if you are having difficulty paper handling 14 13 printer difficulties 14 11 V Volume setting beeper 4 4 ...

Page 285: ...UK IRE SAF PAN NORDIC ...

Reviews: