7-36
Confidential
4.17 Paper Feeding and Ejecting Test (Function code 67)
<Function>
This function allows you to check that a sheet of paper is fed and ejected correctly by printing
the grid pattern on a page, whose interval is 1cm.
<Operating Procedure>
(1) Press the [
6
] and [
7
] keys in this order in the initial stage of the maintenance mode.
(2) The “SLECT A4” will appear on the LCD. Select the paper size by using [
] [
] button.
Press the [
OK
] button.
(3) The “SELECT: TRAY1” will appear on the LCD. Select the paper tray by using [
] [
]
button. Press the [
OK
] button.
(4) The “PAPER DEED TEST” will appear on the LCD. The test printing is started, and the
grid pattern is printed.
(5) Press the
[Stop/Exit]
button so that machine stops printing. Then the machine returns to
the initial stage of the maintenance mode.
4.18 EEPROM Customizing (Function code 74)
<Function>
This function allows you to customize the EEPROM according to language, function settings,
and worker switch settings.
<Operating Procedure>
(1) Press the [
7
] and [
4
] keys in this order in the initial stage of the maintenance mode.
The current customizing code appears.
(2) Enter the desired customizing code (e.g., MFC-8890DW (US): 0401). The newly entered
code appears.
To enter letters “A” through “F”, press the [
1
] through [
6
] keys while holding down the [
#
]
key respectively.
(3) Press the [
Start
] button.
The machine saves the setting and displays the “PARAMETER INIT” on the LCD. The
machine beeps for one second and returns to the initial stage of the maintenance mode.
If you press the [
Stop/Exit
] button or no buttons are pressed for one minute in the above
procedure, the machine stops the procedure, beeps for one second and returns to the
initial stage of the maintenance mode.
The modification of the setting data is not saved in this case.
Note:
• In the case that the front cover is opened, or that there is no paper in the tray during
test printing, the test printing is stopped.
Note:
• If you replace the main PCB, be sure to carry out this procedure.
Note:
• The machine does not work properly when an incorrect code is entered.
Summary of Contents for DCP 8085DN
Page 13: ...CHAPTER 1 SPECIFICATIONS ...
Page 52: ...Confidential CHAPTER 2 THEORY OF OPERATION ...
Page 69: ...2 16 Confidential 3 3 Paper Feeding Fig 2 18 LT path DX path MP path Paper tray path ...
Page 89: ...CHAPTER 3 ERROR INDICATION AND TROUBLESHOOTING ...
Page 178: ...Confidential CHAPTER 4 PERIODICAL MAINTENANCE ...
Page 248: ...CHAPTER 5 DISASSEMBLY REASSEMBLY ...
Page 265: ...5 12 Confidential Fig 5 7 EM2 4 places Separation pad ASSY ...
Page 501: ...Confidential CHAPTER 6 ADJUSTMENTS AND UPDATING OF SETTINGS REQUIRED AFTER PARTS REPLACEMENT ...
Page 507: ...6 5 Confidential 8 Alert warning message of WHQL appears Click Continue Anyway to proceed ...
Page 516: ...CHAPTER 7 SERVICE MODE ...
Page 525: ...7 7 Confidential For color scanning Fig 7 2 ...
Page 527: ...7 9 Confidential For white and black scanning Fig 7 3 ...
Page 528: ...7 10 Confidential For color scanning Fig 7 4 ...
Page 567: ...Confidential CHAPTER 8 CIRCUIT DIAGRAMS WIRING DIAGRAM ...
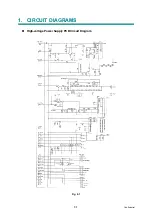
Page 569: ...8 1 Confidential 1 CIRCUIT DIAGRAMS High voltage Power Supply PCB Circuit Diagram Fig 8 1 ...
Page 570: ...8 2 Confidential LVPS PCB Circuit Diagram 230V Fig 8 2 ...
Page 571: ...8 3 Confidential LVPS PCB Circuit Diagram 115V Fig 8 3 ...


