Summary of Contents for DCP-9020CDN

Page 1: ...CE4 3 Brother Color FAX MFC SERVICE MANUAL MODEL DCP 9020CDN 9020CDW MFC 9130CW 9140CDN MFC 9330CDW 9340CDW Read this manual thoroughly before maintenance work Keep this manual in a convenient place for quick and easy reference at all times ...

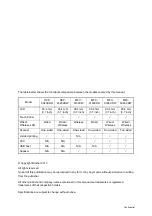
Page 2: ...rademarks or registered trademarks of their respective holders Specifications are subject to change without notice Model DCP 9020CDN DCP 9020CDW MFC 9130CW MFC 9140CDN MFC 9330CDW MFC 9340CDW LCD 93 4 mm 3 7 inch 93 4 mm 3 7 inch 93 4 mm 3 7 inch 93 4 mm 3 7 inch 93 4 mm 3 7 inch 93 4 mm 3 7 inch Touch Panel Wired Wireless LAN Wired Wired Wireless Wireless Wired Wired Wireless Wired Wireless Scann...

Page 3: ...d States and or other countries PowerPC is a registered trademark of IBM in the United States and or other countries AOSS is a trademark of Buffalo Inc Wi Fi Direct Wi Fi Protected Setup WPS WPA WPA2 and Wi Fi Protected Access are marks of the Wi Fi Alliance Wi Fi CERTIFIED Wi Fi and Wi Fi Alliance are registered marks of the Wi Fi Alliance Intel and Pentium are trademarks of Intel Corporation in ...

Page 4: ...ype and size of paper 1 11 1 6 Printable Scannable Area 1 12 1 7 Telephone 1 12 1 8 FAX Only for the models with FAX function 1 13 1 9 Copy 1 13 1 10 Scanner 1 14 1 11 USB Direct Interface 1 15 CHAPTER 2 ERROR INDICATION AND TROUBLESHOOTING 1 INTRODUCTION 2 1 1 1 Precautions 2 1 1 2 Initial Check 2 3 2 OVERVIEW 2 5 2 1 Cross section Drawing 2 5 2 1 1 Printer part 2 5 2 1 2 ADF unit Document scanne...

Page 5: ...8 4 3 1 Image defect examples 2 88 4 3 2 Troubleshooting image defect 2 89 4 4 Software Setting Problems 2 103 4 4 1 Cannot print data 2 103 4 5 Network Problems 2 104 4 5 1 Cannot make a print through network connection 2 104 4 6 Troubleshooting of the Control Panel 2 105 4 6 1 Nothing is displayed on the LCD 2 105 4 6 2 Unable to perform panel operation 2 105 4 6 3 Lamp malfunction 2 105 4 6 4 T...

Page 6: ...annot be correctly detected 2 115 4 12 Scanning Image Defect Troubleshooting 2 116 4 12 1 Image defect examples 2 116 4 12 2 Troubleshooting image defect 2 116 4 13 Troubleshooting of FAX Functions 2 120 4 13 1 FAX can t send it 2 120 4 13 2 FAX cannot be received 2 120 4 13 3 No bell ring 2 120 4 13 4 A communication error occurs 2 121 4 14 Others Problems 2 122 4 14 1 The machine is not turned O...

Page 7: ...ull Arm R Pull Arm Spring 3 45 8 13 Flat Cable Holder Cover 3 46 8 14 Hinge ASSY L ADF Unit 3 49 8 15 Hinge R Hinge R Support 3 52 8 16 Flat Cable Holder ASSY 3 53 8 17 Hinge Arm R 3 53 8 18 ADF Document Output Support Flap 3 54 8 19 ADF Document Support 3 54 8 20 ADF Cover ASSY 3 55 8 21 Gear Cover 3 56 8 22 Document Separate Roller ASSY 3 57 8 23 ADF Separation Pad Spring ADF Separation Pad Hold...

Page 8: ...9 8 45 LED Flat Cable 3 113 8 46 LED Control PCB ASSY 3 117 8 47 Back Cover Lower 3 118 8 48 Duplex Tray 2 sided Printing Model Only 3 119 8 49 External Temperature Humidity Sensor PCB ASSY 3 120 8 50 Wireless LAN Cap Wireless LAN PCB ASSY 3 121 8 51 Main PCB ASSY 3 123 8 52 Develop Release Clutch 3 124 8 53 Process Drive Unit 3 129 8 54 Fuser Drive Gear Z25 3 132 8 55 Registration Clutch 3 133 8 ...

Page 9: ...tinuous Adjustments of Density and Registration Sensor Function code 73 4 6 1 8 Acquisition of White Level Data Function code 55 4 6 1 9 Adjustment of Touch Panel Function code 61 4 6 2 IF YOU REPLACE THE REGISTRATION MARK L PCB ASSY AND REGISTRATION MARK R PCB ASSY 4 7 2 1 Continuous Adjustments of Density and Registration Sensor Function code 73 4 7 3 IF YOU REPLACE THE LOW VOLTAGE POWER SUPPLY ...

Page 10: ...n position for transportation Function code 06 5 11 1 4 4 ADF performance test Function code 08 5 11 1 4 5 Monochrome image quality test pattern Function code 09 5 12 1 4 6 Worker switch WSW setting and printout Function code 10 11 5 13 1 4 7 Operational check of LCD Function code 12 5 17 1 4 8 Operational check of control panel key Function code 13 5 18 1 4 9 Software version check Function code ...

Page 11: ...3 5 53 1 4 29 Setting by country Function code 74 5 54 1 4 30 Printout of maintenance information Function code 77 5 56 1 4 31 Operational check of fans Function code 78 5 59 1 4 32 Display of device log information Function code 80 5 60 1 4 33 Display of device error codes Function code 82 5 65 1 4 34 Developing bias voltage correction Function code 83 5 66 1 4 35 Sending of communication log inf...

Page 12: ...NS 7 1 2 PERIODICAL REPLACEMENT PARTS 7 2 2 1 Procedures to Replace Periodical Replacement Parts 7 2 2 1 1 PF Kit 1 7 3 APPENDIX 1 SERIAL NUMBERING SYSTEM APPENDIX 2 DELETION OF USER SETTING INFORMATION ETC APPENDIX 3 INSTALLING THE MAINTENANCE PRINTER DRIVER ...

Page 13: ... Conformity for R TTE Radio and Telecommunications Directive 1999 5 EC Europe only Applicable to models with telecommunications and or radio interfaces We Brother Industries Ltd 15 1 Naeshiro cho Mizuho ku Nagoya 467 8561 Japan declare that these products are in conformity with the provisions of the R TTE Directive 1999 5 EC A copy of the Declaration of Conformity can be downloaded by following th...

Page 14: ...w Earth Blue Neutral Brown Live LAN Connection Network models only Radio interference This product complies with EN55022 CISPR Publication 22 Class B Recycling information in accordance with the WEEE and Battery Directives The product battery is marked with one of the above recycling symbols It indicates that at the end of the life of the product battery you should dispose of it separately at an a...

Page 15: ...is equipment does cause harmful interference to radio or television reception which can be determined by turning the equipment off and on the user is encouraged to try to correct the interference by one or more of the following measures Reorient or relocate the receiving antenna Increase the separation between the equipment and receiver Connect the equipment into an outlet on a circuit different f...

Page 16: ... même si ce brouillage est susceptible de compromettre le fonctionnement du dispositif For use in the U S A or Canada only These products are made for use in the U S A and Canada only We cannot recommend using them overseas because it may violate the Telecommunications Regulations MFC models only of that country and the power requirements of your product may not be compatible with the power availa...

Page 17: ...NT indicates a potentially hazardous situation which if not avoided may result in damage to property or loss of product functionality Prohibition icons indicate actions that must not be performed Electrical Hazard icons alert you to possible electrical shock Fire hazard icons alert you to the possibility of fire Hot Surface icons warn you not to touch product parts that are hot Note Notes tell you...

Page 18: ...ng make sure you have unplugged the telephone line cord first MFC only and then the power cord from the AC power outlet as well as any telephone RJ 11 MFC only or Ethernet RJ 45 cables Network models only from the product Never push objects of any kind into this product through cabinet slots since they may touch dangerous voltage points or short out parts DO NOT handle the plug with wet hands DO N...

Page 19: ...n a position where the cord is stretched or where strain is otherwise put on the cord Doing so may cause the cord to become worn or frayed Brother strongly recommends that you DO NOT use any type of extension cord DO NOT put a toner cartridge a toner cartridge and drum unit assembly or waste toner box into a fire It could explode resulting in injuries DO NOT use flammable substances any type of sp...

Page 20: ...ore than 20 0 kg 44 1 lb To prevent possible injuries at least two people should lift the product One person should hold the front of the product and one person should hold the back as shown in the illustration below Be careful not to trap your fingers when you put the product down Some areas of the product can cause injury if covers shaded are closed with force Take care when placing your hand in...

Page 21: ...near water or locations that may become wet for example near a bath tub wash bowl kitchen sink or washing machine in a wet basement or near a swimming pool 2 Avoid using this product during an electrical storm There may be a remote risk of electric shock from lightning 3 DO NOT use this product to report a gas leak in the vicinity of the leak 4 Use only the power cord provided with the product Rea...

Page 22: ...icates of indebtedness Certificates of Deposit Armed forces service or draft papers Passports Postage stamps cancelled or uncanceled Immigration papers Welfare documents Cheques or drafts drawn by governmental agencies Identifying badges or insignias In addition driving licenses and or Certificates of Title to motor vehicles may not be copied under certain national laws Copyrighted works cannot be...

Page 23: ...ENs contact the local telephone company For products approved after July 23 2001 the REN for this product is part of the product identifier that has the format US AAAEQ TXXXX The digits represented by are the REN without a decimal point e g 06 is a REN of 0 6 For earlier products the REN is separately shown on the label If this equipment causes harm to the telephone network the telephone company w...

Page 24: ...ower outlet after checking the rating of the local power supply for the product to operate properly and safely Note This product meets the applicable Industry Canada technical specifications Le présent materiel est conforme aux specifications techniques applicables d fIndustrie Canada The Ringer Equivalence Number is an indication of the maximum number of devices allowed to be connected to a telep...

Page 25: ...for China When loading A4 or Letter size paper from the paper tray Two sided Monochrome Full Color 7 7 sides per minute 3 5 3 5 sheets per minute A4 Letter size When loading A4 or Letter size paper from the paper tray Warm up time From Sleep mode Less than 24 seconds at 73 4 F 23 C 50 FromPower OFF ON Less than 30 seconds at 73 4 F 23 C 50 First print time FromReady mode Monochrome Full Color Less...

Page 26: ...g LpAm 53 dB A Ready LpAm 33 dB A Sound power Printing Full Color LWAd 6 42 B A Monochrome LWAd 6 41 B A for the U S A Europe Full Color LWAd 6 39 B A Monochrome LWAd 6 42 B A for China Ready LWAd 4 38 B A for the U S A Europe LWAd 4 44 B A for China Environment Temperature Operating 10 to 32 5 C Storage 0 to 40 C Humidity Operating 20 to 80 without condensation Storage 10 to 90 without condensati...

Page 27: ...rom the paper tray Two sided N A Monochrome Full Color 7 7 sides per minute 3 5 3 5 sheets per minute A4 Letter size When loading A4 or Letter size paper from the paper tray Warm up time From Sleep mode Less than 24 seconds at 73 4 F 23 C 50 From Power OFF ON Less than 30 seconds at 73 4 F 23 C 50 First print time From Ready mode Monochrome Full Color Less than 16 16 seconds From Sleep mode Monoch...

Page 28: ...A Average Approximately 375 W Except for the U S A Copying Average Approximately 380 W Ready Average Approximately 70 W Sleep Average Approximately 7 5 W Deep sleep Average Approximately 1 8 W Power Off Average Approximately 0 03 W for the U S A Average Approximately 0 05 W Except for the U S A Noise Level Sound pressure Printing LpAm 53 dB A Ready LpAm 33 dB A Sound power Printing Full Color LWAd...

Page 29: ... Dimensions W x D x H Carton Size 602 x 534 x 565 mm 23 7 x 21 0 x 22 2 inch Except for China 612 x 554 x 575 mm 24 1 x 21 8 x 22 6 inch for China Machine Size 410 x 483 x 410 mm 16 1 x 19 0 x 16 1 inch Weights without Carton with toner drum 22 5 kg 49 6 lb 23 2 kg 51 1 lb for Europe China 23 6 kg 52 0 lb for Oceania Asia 23 2 kg 51 1 lb for the U S A 23 4 kg 51 6 lb for Europe 23 6 kg 52 0 lb for...

Page 30: ...rs For Applications Windows Operating System Windows XP Home Edition 1 3 32 bit x86 or 64 bit x64 processor 150 MB 310 MB USB 10Base T 100Base TX Ethernet Wireless IEEE 802 11 b g n Infrastructure Mode Ad hoc Mode IEEE 802 11 g n Wi Fi Direct Windows XP Professional 1 3 Windows XP Professional x64 Edition 1 3 64 bit x64 processor Windows Vista 1 3 32 bit x86 or 64 bit x64 processor 500 MB 500 MB W...

Page 31: ...PS HTTPS SMTP POP SNMP v3 802 1x EAP MD5 EAP FAST PEAP EAP TLS EAP TTLS Kerberos Wireless network Network node type N A NC 8100W Network type N A IEEE 802 11 b g n Infrastructure Mode Ad hoc Mode IEEE 802 11 g n Wi Fi Direct Communication mode N A Infrastructure Ad hoc Wi Fi Direct Network security N A APOP POP before SMTP SMTP AUTH SSL TLS IPPS HTTPS SMTP POP SNMP v3 802 1x LEAP EAP FAST PEAP EAP...

Page 32: ... Network type IEEE 802 11 b g n Infrastructure Mode Ad hocMode IEEE 802 11 g n Wi Fi Direct N A IEEE802 11b g n Infrastructure Mode Ad hoc Mode IEEE 802 11 g n Wi Fi Direct Communication mode Infrastructure Ad hoc Wi Fi Direct N A Infrastructure Ad hoc Wi Fi Direct Network security APOP POP before SMTP SMTP AUTH SSL TLS IPPS HTTPS SMTP POP SNMP v3 802 1x LEAP EAP FAST PEAP EAP TLS EAP TTLS Kerbero...

Page 33: ...without notice Model All models Machine life 100 000 pages A4 Letter size or 5 years Part life ADF Up to 50 000 pages or 5 years Part life Document scanner unit Up to 50 000 pages or 5 years MTBF 4 000 hours MTTR 0 5 hours Maximum monthly volume Up to 30 000 pages Periodical replacement parts Fuser unit 50 000 pages Service replacement PF kit 1 50 000 pages Service replacement ...

Page 34: ...years without opening 6 months after opening Drum unit Life expectancy Approximately 15 000 pages 1page job The life expectancy varies according to the use condition Shelf life 2 years The shelf life of toner cartridge and drum unit is guaranteed under the normal condition as below Temperature Normal condition 0 to 40 C Storage condition at the temperature of 40 to 50 C Up to 5 days Storage condit...

Page 35: ... 1 sheet Straight paper path 2 sided Yes N A Yes Model All models Media type Paper tray Plain Paper Thin Paper Recycled Paper Manual feed slot Plain Paper Thin Paper Thick Paper Thicker Paper Recycled Paper Bond paper Label Envelope Env Thin Env Thick Glossy Paper 1 2 sided Plain Paper Thin Paper Recycled Paper ADF Plain Paper Recycled Paper Media weight Paper tray 60 to 105 g m2 16 to 28 lb Manua...

Page 36: ...re subject to change without notice Usage Document Size Top 1 Bottom 3 Left 2 Right 4 FAX Sending Letter 3 mm 0 12 inch 4 mm 0 16 inch A4 3 mm 0 12 inch ADF 1 mm 0 04 inch Scanner Glass 3 mm 0 12 inch Legal 3 mm 0 12 inch 4 mm 0 16 inch Copy Letter 4 mm 0 16 inch 4 mm 0 16 inch A4 4 mm 0 16 inch 3 mm 0 12 inch Legal 4 mm 0 16 inch 4 mm 0 16 inch Scan Letter 3 mm 0 12 inch 3 mm 0 12 inch A4 3 mm 0 ...

Page 37: ...CDN DCP 9020CDW Copy Speed A4 Letter Monochrome Full Color Up to 18 19 ppm for the U S A Europe Monochrome Full Color Up to 22 23 ppm for China First copy out time From Ready mode and Paper tray Monochrome Full Color Less than 19 22 seconds From Sleep mode and Paper tray Monochrome Full Color Less than 35 38 seconds Resolution 600 x 600 dpi Auto duplex scanning copy N A Model MFC 9130CW MFC 9140CD...

Page 38: ... seconds Letter 2 32 seconds A4 Color 2 90 seconds Letter 3 09 seconds A4 Scanning speed Duplex Monochrome N A Color N A Model MFC 9130CW MFC 9140CDN MFC 9330CDW MFC 9340CDW Resolution Optical FB Maximum scanning 1 200 main scanning x 2 400 dpi sub scanning ADF Maximum scanning 1 200 main scanning x 600 dpi sub scanning Resolution Interpolated Maximum scanning 19 200 main scanning x 19 200 dpi sub...

Page 39: ...fications are subject to change without notice Model DCP 9020CDN DCP 9020CDW PictBridge N A Direct print N A Model MFC 9130CW MFC 9140CDN MFC 9330CDW MFC 9340CDW PictBridge N A Direct print N A PDF version1 7 JPEG Exif JPEG PRN created by own printer driver TIFF scanned by Brother model XPS version 1 0 ...

Page 40: ...g the machine and so on If you need to take voltage measurements with the power switched on take the greatest of care not to receive an electric shock 2 When connecting or disconnecting cable connectors make sure that you hold the connector body and not the cables 3 Static electricity charged in your body may damage electronic parts Before handling the PCBs touch a metal portion of the machine to ...

Page 41: ...during the repair work function properly when the repair is completed WARNING DO NOT use flammable substances any type of spray or any organic solvent liquids contains alcohol or ammonia to clean the inside or outside of the machine Doing this may cause a fire or electrical shock ...

Page 42: ...onsumable parts 1 The drum unit including the toner cartridge is installed correctly 2 The belt unit and waste toner box are installed correctly Others 1 Condensation When the machine is moved from a cold place into a warm room condensation may occur inside the machine causing various problems as listed below Condensation on the surface of optical devices such as the lens reflecting mirror and pro...

Page 43: ...ing too much load to drive each unit In this case increase the room temperature Cleaning Use a soft dry lint free cloth WARNING DO NOT use flammable substances any type of spray or any organic solvent liquids contains alcohol or ammonia to clean the inside or outside of the machine Doing this may cause a fire or electrical shock ...

Page 44: ...Separation pad Separation roller Pick up roller Plate Waste toner box Duplex paper feed roller Duplex paper feed roller Belt unit Density Eject roller 3 Heat roller Pressure roller Fuser unit Eject roller 2 Back cover Eject roller 1 Eject actuator Corona wire Front side Back side Manual feed slot rear actuator roller paper empty actuator front actuator cleaning roller actuator registration sensor ...

Page 45: ... above figure First side CIS unit Second side document Document detection Document ejection roller ADF document output support flap ADF document support Document guide Document pick up roller Document separate roller ADF separation pad Document feed Second side CIS unit Document feed roller ASSY2 roller ASSY1 actuator scanning position actuator Second side document hold First side document hold Do...

Page 46: ...2 7 Confidential 2 2 Paper Feeding 2 2 1 Printer part Fig 2 3 Front side Back side Manual feed slot path Duplex print path Normal print path ...

Page 47: ...2 8 Confidential 2 2 2 Scanning part Fig 2 4 ...

Page 48: ... ejected from the fuser unit Detect the rear edge of paper in 2 sided printing to adjust the timing of switching the rotation of the eject roller Detect paper jam at the rear of the machine Eject roller 1 Feed the paper ejected from the fuser unit to the eject roller 2 Eject roller 2 Feed the paper ejected from the eject roller1 to the output tray In 2 sided printing after some sheets of paper are...

Page 49: ...r feed clutch Internal temperature sensor Center thermistor Registration clutch Main fan Wireless LAN PCB Registration mark L PCB Registration mark R PCB LED ASSY K Side thermistor Low voltage power supply PCB Hight voltage power supply PCB LED control PCB Paper feed sensor PCB Process motor Drum Belt Develop Y M C and Belt cleaner Main motor Paper feed Fuser Eject Develop K Duplex and Develop rel...

Page 50: ...te toner box Fuser cover ASSY Back cover lower Registration mark Registration mark R PCB ASSY L PCB ASSY Main fan High voltage power supply PCB ASSY Develop release sensor PCB ASSY Wireless LAN PCB ASSY Wireless LAN cap Develop release clutch Paper feed clutch Registration clutch External temperature humidity sensor PCB ASSY Manual feed slot cover ASSY Paper tray Fuser unit Duplex tray LED ASSY Jo...

Page 51: ... after a set period of time 2 34 0203 0204 0205 0206 0207 0208 0209 0300 0401 0402 0501 The center thermistor of the fuser unit does not reach the specified temperature within the specified time 2 35 0502 The center thermistor of the fuser unit does not reach the specified temperature within the specified time 2 35 0503 The center thermistor of the fuser unit detected a temperature higher than the...

Page 52: ...ine is in operation 2 38 0B02 Error in the high voltage power supply PCB ASSY in the ready state 2 38 0C00 Error occurred in the density sensor 2 39 0D01 0D02 0D03 0D04 0E00 Error codes Problem Refer to 1001 1002 1003 The registration mark L PCB is dirty and cannot normally receive reflected light 2 39 1004 The registration mark R PCB is dirty and cannot normally receive reflected light 2 39 1100 ...

Page 53: ... 2404 2405 2408 2409 2501 2502 2503 2504 2601 2602 2603 2604 2605 2701 2702 2703 Error codes Problem Refer to 2801 2802 2803 2804 2805 2806 2901 2902 2903 2904 2905 2906 2A01 2A02 2A03 2B01 2B02 2C01 2C02 2D01 2E01 2E02 2E03 2E04 2E05 2E06 2E07 2E08 2E0A 2F01 2F02 2F03 Error codes Problem Refer to ...

Page 54: ...t soon 2 42 4004 Number of the drum unit Cyan rotations reaches the upper limit soon 2 42 4200 4201 Number of the drum unit Black rotations has reached the upper limit 2 43 4202 Number of the drum unit Yellow rotations has reached the upper limit 2 43 4203 Number of the drum unit Magenta rotations has reached the upper limit 2 43 4204 Number of the drum unit Cyan rotations has reached the upper li...

Page 55: ...s detected 2 46 4C03 Dot counter of the toner cartridge Magenta or develop roller counter has reached the upper limit was detected 2 46 4C04 Dot counter of the toner cartridge Cyan or develop roller counter has reached the upper limit was detected 2 46 4C05 During printing dot counter of color toner cartridge or develop roller counter has reached the upper limit was detected 2 46 Error codes Probl...

Page 56: ...o drum unit Color was set 2 51 Error codes Problem Refer to 6209 Immediately after power ON or the joint cover ASSY was closed GRID current error detected that one of the drum units Color was not set 2 51 620A Immediately after power ON or the joint cover ASSY was closed GRID current error detected that no drum unit Black was set 2 51 6300 BCLN terminal current value detected that no waste toner b...

Page 57: ...the joint cover ASSY was closed 2 57 6C01 6C02 6C03 6C04 6D00 6E00 The develop release sensor detected the develop roller disengagement or engagement failure 2 57 6F00 7000 After the registration rear sensor detects the end of paper pass the eject sensor does not detect paper pass 2 58 7001 Error codes Problem Refer to 7002 7003 7004 7100 After the registration rear sensor detected that paper has ...

Page 58: ...604 8701 8702 8703 8801 8802 8901 8902 8903 The back cover sensor detected the open state when 2 sided printing is started before the registration of printing in the engine 2 61 8904 The back cover sensor detected the open state during 2 sided printing after the registration of printing in the engine 2 61 8A01 The registration rear sensor detected that the fed paper was larger or smaller than the ...

Page 59: ... tray the paper feed sensor detected that no paper was in the paper tray 2 65 9303 9304 9305 9306 Error codes Problem Refer to 9307 Upon receiving a fax or printing a list or report the machine detected that paper tray empty of paper 2 65 9401 9402 9403 9404 9501 9502 9503 9504 9505 9601 9608 9701 For 2 sided printing the tray whose paper size was not supported by 2 sided printing was selected 2 6...

Page 60: ...er of pixels and image processing is not completed successfully 2 71 Error codes Problem Refer to A200 During document scanning the first side document scanning position sensor detected that the document length was 90 cm or more 2 72 A300 Though a document was fed and conveyed by the specified distance or longer the first side document scanning position sensor did not detect the passing of the pap...

Page 61: ...e first side document scanning position sensor detected that the document was 400 mm or more in length and could not be fed from the ADF in duplex feeding 2 76 C001 Timeout occurred with access request sent to server due to incorrect server address network disconnection or inactive server 2 77 C002 User authentication is unavailable due to incorrect user name incorrect password or asynchronous dat...

Page 62: ... Program error 2 80 E400 E500 Error occurred when DRAM on the main PCB ASSY was accessed 2 81 E600 Error occurred during writing to EEPROM on the main PCB ASSY 2 81 E700 EC00 Overcurrent was caused because a USB device that did not meet the specifications was inserted into the USB port 2 81 F900 Setting by country code is not entered 2 81 FA01 FA02 FA03 FB01 FB02 FB03 FB04 FB05 FB06 Error codes Pr...

Page 63: ... Black 4F01 2 47 Put the Yellow Toner Cartridge back in The new toner sensor could not detect a new cartridge properly Yellow 4F02 2 47 Put the Magenta Toner Cartridge back in The new toner sensor could not detect a new cartridge properly Magenta 4F03 2 47 Put the Cyan Toner Cartridge back in The new toner sensor could not detect a new cartridge properly Cyan 4F04 2 47 Cooling Down Wait for a whil...

Page 64: ...pon recovery from sleep mode 6901 2 54 Ignore Data Press Stop Key Undecodable data is found during printing Undecodable PS data is received 2 122 Jam 2 sided Pull the paper tray completely out of the machine Check inside the machine towards the rear Or open the Back Cover to remove the jammed paper After the first side is printed in 2 sided printing mode the registration front sensor does not dete...

Page 65: ...77 Wrong Date Time contact your administrator The current time necessary for user authentication is unavailable due to machine clock not being set and time not being obtained through SNTP C004 2 77 Manual Feed Load paper No paper is in the manual feed slot when printing from the manual feed slot 8C00 2 62 No Belt Unit Open the Top Cover pull out all 4 Drum Units completely and install the Belt Uni...

Page 66: ... registration failed 9901 2 68 Automatic color registration failed 9A01 9A03 2 70 Press OK and try again Color registration failed 9902 9903 2 68 2 69 Insufficient Toner for Registration During automatic color registration a color toner cartridge became empty 9A02 2 70 Replace Drum Number of the drum unit rotations has reached the upper limit 4201 4202 4203 4204 2 43 Replace Parts Belt Unit The nu...

Page 67: ...detected that the paper loaded in the paper tray was smaller than the specified size 8D01 2 63 Size Error 2 sided Specify the correct paper The registration rear sensor detected that the fed paper was larger or smaller than the specified size in 2 sided printing 8A01 2 62 Press Stop Key Specify the correct paper and load the same size paper as the Printer driver setting For 2 sided printing the tr...

Page 68: ...ridge or develop roller counter reaches the upper limit soon 4B01 4B02 4B03 4B04 2 45 Touchscreen initialization failed Remove any material which is on the touchscreen An error occurred during touch panel initialization D800 2 79 Unusable Device Remove the Device Turn the power off and back on again Overcurrent was caused because a USB device that did not meet the specifications was inserted into ...

Page 69: ...Equal to or more than 33 digits or nonnumeric characters 4 13 2 17 07 No response from the remote terminal in receiving 4 13 2 1C 01 Lack of access right detected in NGN line T38 403 Forbidden 4 13 4 1C 02 File or folder directory not found in NGN line T38 404 Not Found 4 13 4 1C 03 Context sensitive acceptance impossible in NGN line T38 488 Not Acceptable Here 4 13 4 1C 04 SIP Session Initiation ...

Page 70: ...re DCN reception T38 4 13 4 32 01 Remote terminal only with V 29 capability in 2 400 or 4 800 bps transmission 4 13 4 32 02 Remote terminal not ready for polling 4 13 4 32 10 Remote terminal not equipped with password function or its password switch OFF 4 13 4 32 11 Remote terminal not equipped with or not ready for confidential mailbox function 4 13 4 32 12 Remote terminal not equipped with or no...

Page 71: ...id resolution selected 4 13 4 40 20 Invalid full color mode selected 4 13 4 50 01 Vertical resolution capability changed after calibration of background color 4 13 4 63 01 Password plus lower 4 digits of telephone number not coincident 4 13 1 63 02 Password not correct 4 13 1 63 03 Polling ID not correct 4 13 1 63 04 Provided confidential ID and mailbox ID are different 4 13 1 63 05 Relay broadcas...

Page 72: ...ceive polling even during turn around transmission due to call reservation 4 13 2 B0 04 PC interface error 4 13 2 C0 01 No common modulation mode or failed to poll 4 13 4 C0 02 Unable to detect JM 4 13 4 C0 03 Unable to detect CM 4 13 4 C0 04 Unable to detect CJ 4 13 4 C0 10 Cannot finish V 34 negotiation or training 4 13 4 C0 11 Modem error detected during V 34 negotiation or training 4 13 4 C0 2...

Page 73: ...arness connection failure between the low voltage power supply PCB and main PCB Check the harness connection between the low voltage power supply PCB and main PCB and reconnect it 3 Main motor failure Replace the process drive unit 4 Low voltage power supply PCB failure Replace the low voltage power supply PCB ASSY 5 Main PCB failure Replace the main PCB ASSY Print Unable 02 Turn the power off and...

Page 74: ...hen back on again Print Unable 05 Turn the power off and then back on again Print Unable 05 Turn the power off and then back on again Print Unable 05 Turn the power off and then back on again Print Unable 05 Turn the power off and then back on again Print Unable 05 Turn the power off and then back on again Step Cause Remedy 1 Connection failure of the center or side thermistor harness of the fuser...

Page 75: ...rn the power off and then back on again Print Unable 05 Turn the power off and then back on again Step Cause Remedy 1 Connection failure of the center or side thermistor harness of the fuser unit Check the harness connection of the center or side thermistor of the fuser unit and reconnect them 2 Connection failure of the heater harness of the fuser unit Check the harness connection of the heater o...

Page 76: ...erature sensor 4 Eject sensor PCB failure Replace the eject sensor PCB ASSY 5 Main PCB failure Replace the main PCB ASSY Print Unable 09 Turn the power off and then back on again Step Cause Remedy 1 Low voltage power supply PCB failure Replace the low voltage power supply PCB ASSY Reset the irregular power supply detection counter after replacement Refer to 3 1 Reset of Irregular Power Supply Dete...

Page 77: ... the low voltage power supply PCB and main PCB Check the harness connection between the low voltage power supply PCB and main PCB and reconnect it 4 Main fan failure Replace the main fan 5 Low voltage power supply PCB failure Replace the low voltage power supply PCB ASSY 6 High voltage power supply PCB failure Replace the high voltage power supply PCB ASSY 7 Main PCB failure Replace the main PCB A...

Page 78: ...n Step Cause Remedy 1 Registration mark sensor L dirty Clean the registration mark sensor L 2 Registration mark L PCB harness connection failure Check the registration mark L PCB harness connection and reconnect it 3 Eject sensor PCB harness connection failure Check the eject sensor PCB harness connection and reconnect it 4 Registration mark L PCB ASSY failure Replace the registration mark L PCB A...

Page 79: ...f and then back on again Print Unable 1D Turn the power off and then back on again Print Unable 1D Turn the power off and then back on again Step Cause Remedy 1 Connection failure of the flat cable of each LED ASSY Check the flat cable connection of each LED ASSY and reconnect it 2 LED control PCB harness connection failure Check the LED control PCB harness connection and reconnect it 3 Flat cable...

Page 80: ...ontrol PCB harness connection failure Check the LED control PCB harness connection and reconnect it 2 LED control PCB failure Replace the LED control PCB ASSY 3 Main PCB failure Replace the main PCB ASSY Print Unable 38 Turn the power off and then back on again Step Cause Remedy 1 External temperature humidity sensor harness connection failure Check the external temperature humidity sensor harness...

Page 81: ...mber of the drum unit Magenta rotations reaches the upper limit soon Error code 4004 Number of the drum unit Cyan rotations reaches the upper limit soon User Check Prepare a new drum unit Drum End Soon BK Drum End Soon Y Drum End Soon M Drum End Soon C Step Cause Remedy 1 Main PCB failure if the error code remains after replacing with a new drum unit and resetting the drum counter Replace the main...

Page 82: ...eck Prepare a new drum unit Error code 4300 The belt unit will reach the end of life soon 90 Error code 4400 Number of pages printed with the belt unit has reached the upper limit Printing is not stopped User Check Prepare a new belt unit Replace Drum BK Replace Drum Y Replace Drum M Replace Drum C Step Cause Remedy 1 Main PCB failure if the error code remains after replacing with a new drum unit ...

Page 83: ... Fuser Unit Step Cause Remedy 1 Main PCB failure if the error code remains after replacing with a new fuser unit and resetting the fuser unit counter Replace the main PCB ASSY Replace Parts WT Box End Soon Replace WT Box Replace the Waste Toner Box inside the machine To get to it remove all the Drums Toners then remove the Belt Unit Step Cause Remedy 1 Dirt on the contact of waste toner sensor in ...

Page 84: ...p roller counter reaches the upper limit soon Error code 4B04 Dot counter of the toner cartridge Cyan or develop roller counter reaches the upper limit soon User Check Prepare a new toner cartridge Toner Low Prepare New Toner Cartridge Toner Low Prepare New Toner Cartridge Toner Low Prepare New Toner Cartridge Toner Low Prepare New Toner Cartridge Step Cause Remedy 1 Main PCB failure if the error ...

Page 85: ...ror code 4C05 During printing dot counter of color toner cartridge or develop roller counter has reached the upper limit was detected User Check Replace the toner cartridge whose counter reached the upper limit Replace Toner Open the Top Cover replace Toner Cartridge Replace Toner Open the Top Cover replace Toner Cartridge Replace Toner Open the Top Cover replace Toner Cartridge Replace Toner Open...

Page 86: ...r technician reset the toner manual Refer to 2 1 Toner Manual Reset Function in Chapter 5 Error code 5002 Printable pages set for the PF kit 1 has reached the upper limit Printing is not stopped Cartridge Error Put the Toner Cartridge back in Cartridge Error Put the Yellow Toner Cartridge back in Cartridge Error Put the Magenta Toner Cartridge back in Cartridge Error Put the Cyan Toner Cartridge b...

Page 87: ...nsor failure Replace the high voltage power supply PCB ASSY 3 Main PCB failure Replace the main PCB ASSY Cover is Open Close the Fuser Cover which can be found behind the Back Cover of the machine Step Cause Remedy 1 Paper jam at the eject actuator Remove the jammed paper 2 Eject actuator that has come off or that has been caught Re assemble the eject actuator 3 Eject sensor PCB harness connection...

Page 88: ...w toner detection terminal not being conducting caused the machine to detected that a toner cartridge Cyan is not set User Check Re insert the toner cartridge No Toner Open the Top Cover then install Toner Cartridge No Toner Open the Top Cover then install Toner Cartridge No Toner Open the Top Cover then install Toner Cartridge No Toner Open the Top Cover then install Toner Cartridge Step Cause Re...

Page 89: ...2 50 Confidential Electrodes location of main body Fig 2 7 ...

Page 90: ... figure below Clean the corona wire by sliding the green tab of each drum unit for all four colors several times Electrodes location of the toner cartridge and drum unit Fig 2 8 Drum Slide the Green tab on Drum Unit Drum Slide the Green tab on Drum Unit Drum Slide the Green tab on Drum Unit Step Cause Remedy 1 Dirt on the GRID terminals of the main body Clean the GRID terminals of the main body Re...

Page 91: ...r box Fig 2 9 No Waste Toner Install the Waste Toner Box Refer to the User s Guide for instructions Step Cause Remedy 1 Dirt on the BCLN terminals of the main body Clean the BCLN terminals of the main body Refer to fig 2 7 P2 50 2 Dirt on the terminal of the high voltage power supply PCB Clean the terminal of the high voltage power supply PCB 3 High voltage power supply PCB failure Replace the hig...

Page 92: ... install the Belt Unit Step Cause Remedy 1 Registration mark L PCB harness connection failure Check the registration mark L PCB harness connection and reconnect it 2 Eject sensor PCB harness connection failure Check the eject sensor PCB harness connection and reconnect it 3 Eject sensor PCB failure Replace the eject sensor PCB ASSY 4 Registration mark L failure Replace the Registration mark L PCB ...

Page 93: ...ct sensor PCB harness connection and reconnect it 3 Eject sensor PCB failure Replace the eject sensor PCB ASSY 4 Main PCB failure Replace the main PCB ASSY Fuser Error Turn the power off then on again Leave the machine for 15 min Self Diagnostic Will Automatically Restart within 15 minutes Step Cause Remedy 1 Each harness connection failure of the fuser unit Check each harnesses connection of the ...

Page 94: ... Refer to fig 2 8 P2 51 Replace the drum unit Drum Slide the Green tab on Drum Unit Step Cause Remedy 1 Dirt on the GRID terminals of the main body Clean the GRID terminals of the main body Refer to fig 2 7 P2 50 2 Dirt on the terminal of the high voltage power supply PCB Clean the terminal of the high voltage power supply PCB 3 High voltage power supply PCB failure Replace the high voltage power ...

Page 95: ...the upper limit User Check Replace the drum unit Drum Stop Replace the Drum Unit Refer to the instructions in the carton of the new drum Drum Stop Replace the Drum Unit Refer to the instructions in the carton of the new drum Drum Stop Replace the Drum Unit Refer to the instructions in the carton of the new drum Drum Stop Replace the Drum Unit Refer to the instructions in the carton of the new drum...

Page 96: ...of the high voltage power supply PCB 3 High voltage power supply PCB failure Replace the high voltage power supply PCB ASSY 4 Main PCB failure Replace the main PCB ASSY Toner Error One or more Toner Cartridges are not detected Pull out and reinsert all 4 Toner Cartridges Step Cause Remedy 1 Develop release sensor harness connection failure Check the develop release sensor harness connection and re...

Page 97: ... fuser cover 4 Eject sensor PCB harness connection failure Check the eject sensor PCB harness connection and reconnect it 5 Fuser cover failure Replace the fuser cover 6 Eject sensor failure Replace the eject sensor PCB ASSY 7 Fuser unit failure Replace the fuser unit 8 Main PCB failure Replace the main PCB ASSY Jam Rear Open the Back Cover and remove the jammed paper then press Start Step Cause R...

Page 98: ...ust cleaning roller 3 Registration front actuator that has come off or that has been caught Re assemble the registration front actuator 4 Registration rear actuator that has come off or that has been caught Re assemble the registration rear actuator 5 Registration front rear manual feed sensor PCB harness connection failure Check the registration front rear manual feed sensor PCB harness connectio...

Page 99: ...rear Or open the Back Cover to remove the jammed paper Step Cause Remedy 1 Foreign object inside the duplex path Remove foreign object 2 Fuser cover installation failure Re assemble the fuser cover 3 Back cover installation failure Re assemble the back cover 4 Main PCB failure Replace the main PCB ASSY Jam Manual Feed Pull out the jammed paper from Manual Feed and press Start Step Cause Remedy 1 F...

Page 100: ...nstall Tray1 Step Cause Remedy 1 Foreign object around the area from which paper tray is inserted Remove foreign object 2 Paper feed actuator that has come off or that has been caught Re assemble the paper feed actuator 3 Paper feed sensor PCB harness connection failure Check the paper feed sensor PCB harness connection and reconnect it 4 Paper feed sensor PCB failure Replace the paper feed unit 5...

Page 101: ... 1 Registration rear actuator catching on some position Re assemble the registration rear actuator 2 Registration rear sensor failure Replace the paper feed unit 3 Main PCB failure Replace the main PCB ASSY Manual Feed Load paper Step Cause Remedy 1 Registration front rear manual feed sensor PCB harness connection failure Check the registration front rear manual feed sensor PCB harness connection ...

Page 102: ...e 8E01 Upon fax reception the paper size setting is the one other than A4 Letter Legal and Folio User Check Set the paper size to A4 Letter Legal or Folio Short paper Open the Back Cover and then press Start Step Cause Remedy 1 Registration rear actuator catching on some position Re assemble the registration rear actuator 2 Registration rear sensor failure Replace the paper feed unit 3 Main PCB fa...

Page 103: ...he driver are not same when paper is fed from the paper tray User Check When specifying the paper in the driver set the paper size of the paper that is actually set Size mismatch Reload correct paper Size mismatch Reload correct paper Step Cause Remedy 1 Registration rear actuator catching on some position Re assemble the registration rear actuator 2 Registration rear sensor failure Replace the pa...

Page 104: ...nection and reconnect it 3 Paper feed actuator catching on some position Re assemble the paper feed actuator 4 Paper feed sensor failure Replace the paper feed unit 5 Gear failure inside of process drive unit Replace the process drive unit 6 Main PCB failure Replace the main PCB ASSY Size Mismatch Reload paper in Tray Step Cause Remedy 1 Registration front rear manual feed sensor PCB harness conne...

Page 105: ... Error 2 sided Press Stop Key Specify the correct paper and load the same size paper as the Printer driver setting Step Cause Remedy 1 Main PCB failure Replace the main PCB ASSY Calibration failed See Troubleshooting chapter in User s Guide Step Cause Remedy 1 Registration mark sensor L dirty Clean the registration mark sensor L 2 Failure in printed measurement pattern image If failure occurs when...

Page 106: ...and the belt unit has dirt replace the waste toner box Calibration failed Insufficient Toner for Calibration Step Cause Remedy 1 Main PCB failure Replace the main PCB ASSY Calibration failed Press OK and try again Calibration failed Press OK and try again Step Cause Remedy 1 Registration mark sensor L dirty Clean the registration mark sensor L 2 Failure in printed measurement pattern image If fail...

Page 107: ...ark sensor L registration mark sensor R dirty Clean the registration mark sensor L registration mark sensor R 2 Registration mark L PCB Registration mark R PCB harness connection failure Check the registration mark L PCB registration mark R PCB harness connection and reconnect it 3 Eject sensor PCB harness connection failure Check the eject sensor PCB harness connection and reconnect it 4 Failure ...

Page 108: ...he registration mark sensor L registration mark sensor R 2 Registration mark L PCB Registration mark R PCB harness connection failure Check the registration mark L PCB registration mark R PCB harness connection and reconnect it 3 Eject sensor PCB harness connection failure Check the eject sensor PCB harness connection and reconnect it 4 Failure in printed measurement pattern image If failure occur...

Page 109: ...y 1 Registration mark sensor L registration mark sensor R dirty Clean the registration mark sensor L registration mark sensor R 2 Registration mark L PCB Registration mark R PCB harness connection failure Check the registration mark L PCB registration mark R PCB harness connection and reconnect it 3 Eject sensor PCB harness connection failure Check the eject sensor PCB harness connection and recon...

Page 110: ...CB Registration mark R PCB harness connection failure Check the registration mark L PCB registration mark R PCB harness connection and reconnect it 3 Eject sensor PCB harness connection failure Check the eject sensor PCB harness connection and reconnect it 4 Failure in printed measurement pattern image If failure occurs when printing 2D3S YCMK_ _A in Function code 71 refer to 4 3 Image Defect Trou...

Page 111: ...t scanning position actuator 2 First side document scanning position sensor failure Replace the first side document scanning position sensor PCB 3 Main PCB failure Replace the main PCB ASSY Document Jam Clear the scanner jam then press the Stop Key Step Cause Remedy 1 Coming off of first side document scanning position actuator Re assemble the first side document scanning position actuator 2 First...

Page 112: ...e Remedy 1 First side second side CIS unit calibration data error Perform Function code 55 Refer to 1 4 18 Acquisition of white level data and setting of CIS scanning area in Chapter 5 2 First side CIS unit failure Replace the first side CIS unit 3 Second side CIS unit failure Replace the second side CIS unit 4 Main PCB failure Replace the main PCB ASSY Scan Unable A9 Step Cause Remedy 1 First sid...

Page 113: ...le AF Turn the power off and then back on again Step Cause Remedy 1 Dust adhered to CIS rail Remove the dust from the CIS rail 2 Coming off of CIS drive belt Re assemble the CIS drive belt 3 Document scanner motor harness connection failure Check the document scanner motor harness connection and reconnect it 4 First side CIS unit failure Replace the first side CIS unit 5 Document scanner motor fai...

Page 114: ...Scanner Error Scanner Error Scanner Error Scanner Error Step Cause Remedy 1 First side CIS unit failure Replace the first side CIS unit 2 Second side CIS unit failure Replace the second side CIS unit 3 Main PCB failure Replace the main PCB ASSY Scan Unable BC See Troubleshooting and routine maintenance chapter in User s Guide Step Cause Remedy 1 Second side CIS unit calibration data error Perform ...

Page 115: ... or Letter size document Scan Unable Document is too longfor 2 sided scanning Press Stop key Step Cause Remedy 1 First side document scanning position actuator catching on some position Re assemble the first side document scanning position actuator 2 First side document scanning position sensor failure Replace the first side document scanning position sensor PCB 3 Main PCB failure Replace the main...

Page 116: ... authentication is unavailable due to machine clock RTC not being set and time not being obtained through SNTP User Check Refer to User s guide and reconfigure network settings Check the wiring of the LAN cables Check the wireless LAN settings Log Access Error Server Timeout contact your administrator Log Access Error Authentication Error contact your administrator Log Access Error Authentication ...

Page 117: ...disconnected Out of Memory Press Stop Key Out of Memory Secure Print Data is full Press Stop Key and delete the previously stored data Step Cause Remedy 1 Main PCB failure Replace the main PCB ASSY Print Unable D1 See Troubleshooting and routine maintenance chapter in User s Guide Step Cause Remedy 1 Modem PCB failure Replace the modem PCB ASSY 2 Main PCB failure Replace the main PCB ASSY Machine ...

Page 118: ...nitialization failed Remove any material which is on the touchscreen Step Cause Remedy 1 Touch panel ASSY harness connection failure Check the touch panel ASSY harness connection and reconnect it 2 Touch panel ASSY failure Replace the touch panel ASSY 3 Main PCB failure Replace the main PCB ASSY Step Cause Remedy 1 Panel PCB harness connection failure Check the panel PCB harness connection and rec...

Page 119: ...power off and then back on again Step Cause Remedy 1 Panel PCB harness connection failure Check the panel PCB harness connection and reconnect it 2 Panel PCB failure Replace the panel cover ASSY 3 Main PCB failure Replace the main PCB ASSY Print Unable E0 Turn the power off and then back on again Step Cause Remedy 1 Main PCB failure Replace the main PCB ASSY Print Unable E1 Turn the power off and ...

Page 120: ... by country code is not entered Print Unable E5 Turn the power off and then back on again Print Unable E6 Turn the power off and then back on again Step Cause Remedy 1 Main PCB failure Replace the main PCB ASSY Unusable Device Remove the Device Turn the power off and back on again Step Cause Remedy 1 USB host PCB failure Replace the USB host PCB ASSY 2 Main PCB failure Replace the main PCB ASSY St...

Page 121: ... printer driver Shuffle the papers and reload them into the paper tray Clean the pick up roller Step Cause Remedy 1 Coming off of paper feed actuator Re assemble the paper feed actuator 2 Main motor harness connection failure Check the main motor harness connection and reconnect it 3 Paper feed clutch harness connection failure Check the paper feed clutch harness connection and reconnect it 4 Pape...

Page 122: ...he paper is 60 to 105 g m2 Shuffle the papers and reload them into the paper tray Step Cause Remedy 1 Coming off of manual feed actuator Re assemble the manual feed actuator 2 Main motor harness connection failure Check the main motor harness connection and reconnect it 3 Registration front rear manual feed sensor PCB harness connection failure Check the registration front rear manual feed sensor ...

Page 123: ...res to the fuser unit Check whether the paper type is appropriate 4 2 5 Paper inclines diagonally User Check Check if the paper is loaded into the each paper tray correctly Adjust the paper guide corresponding to the paper size Check if the thickness of the paper is 60 to 105 g m2 60 to 163 g m2 for manual feed slot Check if too much paper is loaded in the tray Step Cause Remedy 1 Fuser unit failu...

Page 124: ...cover Firmly install the paper tray Set driver to 2 sided printing Use the paper equal to or larger than Letter size or A4 size Use paper specified in each country setting Step Cause Remedy 1 Eject actuator catching on some position Re assemble the eject actuator 2 Back cover failure Replace the back cover 3 Duplex tray failure Replace the duplex tray 4 Back cover sensor failure Replace the back c...

Page 125: ...t 2 Paper dust cleaning roller installation failure Re assemble the paper dust cleaning roller 3 Registration front actuator that has come off or that has been caught Re assemble the registration front actuator 4 Registration front rear manual feed sensor PCB harness connection failure Check the registration front rear manual feed sensor PCB harness connection and reconnect it 5 Main motor failure...

Page 126: ...el sticks to the side or underside of a part 2 Eject actuator catching on some position Re assemble the eject actuator 3 Fuser cover installation failure Re assemble the fuser cover 4 Back cover installation failure Re assemble the back cover 5 Eject sensor PCB harness connection failure Check the eject sensor PCB harness connection and reconnect it 6 Back cover failure Replace the back cover 7 Ej...

Page 127: ...l one color 2 92 Dirt on back side of paper 2 93 Vertical streaks 2 94 Horizontal stripes 2 95 Light vertical steaks and bands on one color image 2 95 White horizontal stripes on one color image 2 96 Faint print 2 96 White spots on one color image 2 97 One color spots or dirt 2 98 One color band 2 99 Downward fogging of solid color 2 99 Horizontal lines 2 99 Ghost 2 100 Color misregistration 2 100...

Page 128: ...he toner save mode Adjust the color calibration from the control panel Replace the drum unit with a new one Replace the toner cartridge with a new one Replace the belt unit with a new one Step Cause Remedy 1 Dirt on the GRID electrodes of main body and drum unit Clean the GRID electrodes of the main body and the drum unit Refer to fig 2 7 P2 50 and fig 2 8 P2 51 2 Fuser unit failure Replace the fu...

Page 129: ...unit for all four colors Check if a used toner cartridge is set after new toner detection Adjust density with the density adjustment function Replace the drum unit or toner cartridge with a new one Replace the belt unit with a new one Step Cause Remedy 1 Dirt on the GRID electrodes of the main body or drum unit Clean the GRID electrodes of the main body or drum unit Refer to fig 2 7 P2 50 and fig ...

Page 130: ...ilure Replace the LED ASSY 5 Main PCB failure Replace the main PCB ASSY User Check Clean the corona wire of each drum unit for all four colors Replace the drum unit or toner cartridge with a new one Install the latest firmware Step Cause Remedy 1 Dirt on the GRID electrodes of the main body or drum unit Clean the GRID electrodes of the main body or drum unit Refer to fig 2 7 P2 50 and fig 2 8 P2 5...

Page 131: ...place the main PCB ASSY Step Cause Remedy 1 Dirt on the GRID electrodes of the main body or drum unit Clean the GRID electrodes of the main body or drum unit Refer to fig 2 7 P2 50 and fig 2 8 P2 51 2 Flat cable connection failure of the LED ASSY Reconnect the flat cable of LED ASSY correctly 3 LED flat cable failure Replace the LED flat cable 4 LED control PCB failure Replace the LED control PCB ...

Page 132: ...everal prints Replace the toner cartridge with a new one Replace the belt unit Replace the waste toner box Step Cause Remedy 1 Dirt in the paper feed system Wipe dirt off 2 Dirt in the fuser unit Replace the fuser unit 3 High voltage power supply PCB failure Replace the high voltage power supply PCB ASSY ...

Page 133: ...ger to draw moist air and prevent condensation Step Cause Remedy 1 Dirt in the paper feed system Wipe dirt off 2 FG wires and FG plate installation failure Grounding is not performed properly Retighten the screws that hold the FG wires and FG plate Repair the bend of the tray ground spring of the paper tray 3 LED ASSY failure Replace the LED ASSY 4 Scratch and dirt on fuser unit Replace the fuser ...

Page 134: ...rtridge with a new one Clean the LED ASSY User Check Clean the corona wire of each drum unit for all four colors This symptom might stop occurring after making several prints Refer to the User s guide and remove the dirt on the exposure drum using a cotton swab Replace the drum unit or toner cartridge with a new one Step Cause Remedy 1 Dirt on charged electrode Wipe dirt off 2 Scratch and dirt on ...

Page 135: ...ith a new one Faint print Step Cause Remedy 1 Dirt on charged electrode Wipe dirt off 2 Scratch and dirt on fuser unit Replace the fuser unit 3 High voltage power supply PCB failure Replace the high voltage power supply PCB ASSY User Check Check that the machine is set on a level surface Replace the drum unit or toner cartridge with a new one Clean the LED ASSY Step Cause Remedy 1 LED ASSY failure...

Page 136: ...ner cartridge with a new one Fig 2 14 Step Cause Remedy 1 Dirt in the paper dust cleaning roller Referring to the figure below remove paper dust attached on the paper dust cleaning roller 2 Scratch and dirt on fuser unit Replace the fuser unit 3 High voltage power supply PCB failure Replace the high voltage power supply PCB ASSY 4 Main PCB failure Replace the main PCB ASSY Paper dust Paper dust cl...

Page 137: ...power supply PCB failure Replace the high voltage power supply PCB ASSY 3 Main PCB failure Replace the main PCB ASSY Note Image defects which occur periodically may be caused by a failure of the rollers Use the diameters of the rollers or the pitches which appear in images shown in the table below to identify the cause of the problem No Part name Diameter The pitch which appears in the image 1 Dev...

Page 138: ...at cable correctly 2 LED flat cable failure Replace the LED flat cable 3 Bend of tray ground spring Replace the paper tray 4 LED ASSY failure Replace the LED ASSY User Check Replace the toner cartridge with a new one Step Cause Remedy 1 High voltage power supply PCB failure Replace the high voltage power supply PCB ASSY 2 Main PCB failure Replace the main PCB ASSY User Check This symptom might sto...

Page 139: ...ace the drum unit with a new one Replace the belt unit with a new one Replace the waste toner box with a new one Step Cause Remedy 1 Registration mark L failure Replace the registration mark L PCB ASSY 2 Registration mark R failure Replace the registration mark R PCB ASSY 3 Main PCB failure Replace the main PCB ASSY User Check Check the machine s environment High temperature and high humidity or l...

Page 140: ...e Clean the electrodes of the main body and belt unit Refer to fig 2 7 P2 50 and fig 2 10 P2 53 4 LED ASSY failure Replace the LED ASSY 5 High voltage power supply PCB failure Replace the high voltage power supply PCB ASSY 6 Main PCB failure Replace the main PCB ASSY User Check Check the machine s environment High temperature and high humidity or low temperature and low humidity conditions can cau...

Page 141: ...of the paper is properly set in the driver Perform printing with the envelope lever lowered to the position B Refer to fig 2 11 P2 85 Step Cause Remedy 1 Fuser unit failure Replace the fuser unit User Check Check the machine s environment High temperature and high humidity or low temperature and low humidity conditions can cause this problem Perform printing with the envelope lever lowered to the ...

Page 142: ...e software setting in the User s guide Check the driver setting Restore the settings at factory shipment Refer to User s guide Follow the procedures below to verify the product ID in Macintosh 1 Select About This Mac from the Apple menu 2 Click the More Info button in the About This Mac dialog box 3 Select USB under the Hardware in Contents on the left side 4 Select the machine MFC XXXX or DCP XXX...

Page 143: ... s guide Check the network connection Perform network reset Refer to User s guide Check the LAN cable Step Cause Remedy 1 Harness connection failure of the wireless LAN PCB Reconnect the harness of the wireless LAN PCB 2 Wireless LAN PCB failure Replace the wireless LAN PCB 3 LAN terminal pin deformation Main PCB failure Replace the main PCB ASSY ...

Page 144: ...onnect it 5 LCD failure Replace the LCD 6 Panel PCB failure Replace the panel PCB ASSY 7 Low voltage power supply PCB failure Replace the low voltage power supply PCB ASSY 8 Main PCB failure Replace the main PCB ASSY Step Cause Remedy 1 Panel cover ASSY attachment failure Re assemble the panel cover ASSY 2 Panel PCB harness connection failure Check the panel PCB harness connection and reconnect it...

Page 145: ...ignment Perform the fine adjustment of touch panel Function code 61 2 Panel PCB harness connection failure Check the panel PCB harness connection and reconnect it 3 Touch panel ASSY failure Replace the touch panel ASSY 4 Panel PCB failure Replace the panel cover ASSY 5 Main PCB failure Replace the main PCB ASSY ...

Page 146: ... the high voltage power supply PCB ASSY 3 Main PCB failure Replace the main PCB ASSY Step Cause Remedy 1 During new toner cartridge detection power is turned OFF or the joint cover ASSY is opened Perform toner manual reset Refer to 2 1 Toner Manual Reset Function in Chapter 5 2 High voltage power supply PCB failure Replace the high voltage power supply PCB ASSY 3 Main PCB failure Replace the main ...

Page 147: ...ean the GRID electrodes of the main body and the drum unit Refer to fig 2 7 P2 50 and fig 2 8 P2 51 2 High voltage power supply PCB failure Replace the high voltage power supply PCB ASSY 3 Main PCB failure Replace the main PCB ASSY Step Cause Remedy 1 Dirt on the GRID electrodes of the drum unit Clean the GRID electrodes of the main body and the drum unit Refer to fig 2 7 P2 50 and fig 2 8 P2 51 2...

Page 148: ...ck the harness connection of the eject sensor PCB and reconnect it 4 Eject sensor PCB failure Refer to 1 4 10 Operational check of sensors in Chapter 5 and check the operations of sensors If sensor operation failure occurs replace the eject sensor PCB ASSY 5 Low voltage power supply PCB failure Replace the low voltage power supply PCB ASSY 6 Fuser unit failure Replace the fuser unit 7 Main PCB fai...

Page 149: ...onnection failure of the LED ASSY Check the flat cable connection of the LED ASSY and reconnect it 2 Harness connection failure of the LED control PCB Check the harness connection of the LED control PCB ASSY and reconnect it 3 Flat cable failure of LED ASSY Replace the flat cable of the LED ASSY 4 LED ASSY failure Replace the LED ASSY 5 LED control PCB failure Replace the LED control PCB ASSY 6 Ma...

Page 150: ... PCB ASSY Step Cause Remedy 1 Main PCB failure Replace the main PCB ASSY Step Cause Remedy 1 Main PCB failure Replace the main PCB ASSY Step Cause Remedy 1 Harness connection failure between the high voltage power supply PCB and main PCB ASSY Check the harness connection between the high voltage power supply PCB and main PCB ASSY and reconnect it 2 Contact failure of electrode terminal s of high v...

Page 151: ...ace the main PCB ASSY Note The irregular power supply detection error Error code 0900 occurs when there is a large distortion of the power supply voltage supplied to the machine In this case if the same power supply is used the same error might occur again even if the low voltage power sup ply PCB ASSY is replaced For this reason be sure to ask the user to rearrange the instal lation environment S...

Page 152: ... off of ADF cover actuator Re assemble the ADF cover actuator 3 ADF motor harness connection failure Check the ADF motor harness connection and reconnect it 4 ADF cover document detection sensor PCB harness connection failure Check the ADF cover document detection sensor PCB harness connection and reconnect it 5 Document separate roller failure Replace the document separate roller ASSY 6 ADF cover...

Page 153: ...eplace the document feed roller ASSY2 6 First side document scanning position sensor failure Replace the first side document scanning position sensor PCB ASSY 7 Main PCB failure Replace the main PCB ASSY Step Cause Remedy 1 Foreign object inside ADF Remove foreign objects inside the ADF 2 Coming off of second side document scanning position actuator Re assemble the second side document scanning po...

Page 154: ...ment size is out of the specifications Step Cause Remedy 1 Document separate roller worn out Replace the document separate roller ASSY 2 Document feed roller worn out Replace the document feed roller ASSY2 Step Cause Remedy 1 Document scanning position actuator catching on some position Re assemble the document scanning position actuator 2 ADF motor failure Replace the ADF motor ASSY 3 Main PCB fa...

Page 155: ...glass or ADF glass Clean the CIS glass of the ADF Step Cause Remedy 1 White level calibration data failure Perform the acquisition of white level data Function code 55 2 First side or second side CIS unit failure Replace the first side or second side CIS unit 3 Main PCB failure Replace the main PCB ASSY Light on the page 2 116 Faulty registration 2 117 Dark 2 117 Completely blank 2 118 Vertical st...

Page 156: ...ion Re assemble the second side document scanning position actuator Step Cause Remedy 1 Fine adjustment of scan start position misalignment Perform the fine adjustment of scan start position Function code 54 2 First side CIS unit failure Replace the first side CIS unit User Check Check whether the setting of the contrast does not become dark Clean the document hold Step Cause Remedy 1 White level ...

Page 157: ...or second side CIS unit failure Replace the first side or second side CIS unit 3 Main PCB failure Replace the main PCB ASSY User Check Clean the ADF glass or document glass Clean the document hold Step Cause Remedy 1 First side or second side CIS unit failure Replace the first side or second side CIS unit User Check Clean the ADF glass or document glass Clean the document hold Step Cause Remedy 1 ...

Page 158: ... level data Function code 55 2 Firmware inconsistency Refer to 1 1 Installing the Firmware Sub firmware Panel firmware Main Firmware in Chapter 4 and install the latest main firmware 3 First side or second side CIS unit failure Replace the first side or second side CIS unit 4 Main PCB failure Replace the main PCB ASSY ...

Page 159: ...connection failure Check the modem PCB harness connection and reconnect it 2 Panel PCB failure Replace the panel cover ASSY 3 Modem PCB failure Replace the modem PCB ASSY 4 First side or second side CIS unit failure Replace the first side or second side CIS unit 5 Main PCB failure Replace the main PCB ASSY Step Cause Remedy 1 Modem PCB harness connection failure Check the modem PCB harness connect...

Page 160: ...eck Check whether the source of noise is around the machine Step Cause Remedy 1 Modem PCB harness connection failure Check the modem PCB harness connection and reconnect it 2 Modem PCB failure Replace the modem PCB ASSY 3 Main PCB failure Replace the main PCB ASSY ...

Page 161: ...nnection failure of the main fan Check the harness connection of the main fan and reconnect it 2 Harness connection failure of the high voltage power supply PCB Check the high voltage power supply PCB harness connection and reconnect it 3 Harness connection failure of the low voltage power supply PCB Check the harness connection of the low voltage power supply PCB and reconnect it 4 Main fan failu...

Page 162: ...the joint cover ASSY 3 Top cover sensor failure Replace the high voltage power supply PCB ASSY 4 Main PCB failure Replace the main PCB ASSY Step Cause Remedy 1 Harness connection failure of the back cover sensor Check the harness connection of the back cover sensor and reconnect it 2 The member inside the back cover that pushes the back cover sensor is broken Replace the back cover 3 Back cover se...

Page 163: ...vice Replace the device and check if the interface works Reduce the data in the USB flash memory Step Cause Remedy 1 Main PCB failure Replace the main PCB ASSY Step Cause Remedy 1 Main PCB failure Replace the main PCB ASSY Step Cause Remedy 1 USB host PCB harness connection failure Check the harness connection of the USB host PCB and reconnect it 2 USB host PCB failure Replace the USB host PCB ASS...

Page 164: ...ecting flat cables check that each cable is not damaged at its end or shortcircuited When connecting flat cables do not insert them at an angle After insertion check that the cables are not at an angle When connecting or disconnecting cable harness hold the connector body not the cables If the connector has a lock release the connector lock first to release it After a repair check not only the rep...

Page 165: ...al 2 PACKING Quick setup guide Product safety guide Bag Polystyrene pad ASSY Polystyrene pad ASSY AC cord Remove sheet ASSY Silica gel Cleaner lock Drum stopper ASSY Option carton Polystyrene pad ASSY Carton Machine ...

Page 166: ... B Taptite cup B Taptite bind B M4x12 Taptite bind B M3x10 Taptite cup B M3x10 Taptite cup S M3x12 Screw pan S P washer Screw pan S P washer M3 5x6 Screw pan S P washer M3x6 Taptite cup S M3x6 SR Taptite cup S M3x8 SR Taptite bind S Taptite pan washer B M4x12 DA Taptite bind S M3x5 ...

Page 167: ...8 0 1 8 1 Hinge R support Taptite cup B M3x10 1 0 5 0 05 5 0 5 Hinge arm R Taptite cup B M3x10 3 0 5 0 05 5 0 5 ADF unit Taptite cup B M3x10 1 0 5 0 05 5 0 5 Upper ADF chute Taptite cup B M3x10 5 0 5 0 05 5 0 5 Lower ADF chute Taptite cup B M3x10 3 0 5 0 05 5 0 5 ADF FG harness Taptite cup S M3x8 SR 1 0 7 0 1 7 1 Drive frame ASSY Taptite cup B M3x10 3 0 5 0 05 5 0 5 ADF motor Screw pan S P washer ...

Page 168: ...1 0 7 0 05 7 0 5 Main drive unit Taptite bind B M4x12 5 0 7 0 1 7 1 Inner front cover Taptite bind B M4x12 1 0 9 0 1 9 1 USB cover ASSY Taptite bind B M3x10 2 0 4 0 05 4 0 5 USB host PCB ASSY Taptite bind B M3x10 2 0 4 0 05 4 0 5 Paper feed unit Taptite bind B M4x12 4 0 8 0 1 8 1 Paper eject ASSY Taptite bind B M4x12 3 0 8 0 1 8 1 Back cover upper Taptite bind B M3x10 4 0 5 0 1 5 1 HVPS ground pla...

Page 169: ...m dia ball MOLYKOTE EM D110 Dow Corning Back cover ASSY 2 0 mm dia ball FLOIL GE 676 Kanto Kasei Document separate roller ASSY 1 5 to 2 0 mm dia ball Document feed roller ASSY1 1 5 to 2 0 mm dia ball Document feed roller ASSY2 1 5 to 2 0 mm dia ball Document ejection roller 1 5 to 2 0 mm dia ball BDX313 A Kanto Kasei Hinge ASSY L 2 0 to 2 5 mm dia ball BG1 5 BG1 5 BG1 5 BG1 0 BG1 0 EM2 0 GE1 5 to ...

Page 170: ...3 7 Confidential BG1 0 FLOIL BG 10KS 1 0 mm dia ball BG1 0 BG1 0 BG1 0 Paper eject ASSY Eject roller Exit roller bushing Exit roller bushing ...

Page 171: ...X313 A 2 0 to 2 5 mm dia ball GE1 5 to 2 0 GE1 5 to 2 0 GE1 5 to 2 0 GE1 5 to 2 0 BDX2 0 to 2 5 BDX2 0 to 2 5 Document separate Document feed roller Document feed Hinge ASSY L Upper ADF chute 3 mm 3 mm 3 mm 3 mm Document ejection roller roller ASSY2 ASSY1 Lower ADF chute roller ASSY ...

Page 172: ...3 9 Confidential EM2 0 MOLYKOTE EM D110 2 0 mm dia ball EM2 0 Back cover ASSY Back cover ASSY ...

Page 173: ...son 1 Joint Cover Unit Hook Hook Hook CN22 Main PCB ASSY LED flat cable LED flat LED flat cable LED control PCB ASSY Hook Joint cover ASSY LED flat cable Flat core LED control flat cable LED control flat cable Front cable C K M Y Sub frame ASSY Flat cable guide Flat cable guide ...

Page 174: ...Hook Hook CN21 CN6 CN5 CN1 Main PCB ASSY Line holder under Process drive unit Paper feed clutch Develop release clutch External temperature humidity sensor PCB ASSY Registration Front CN9 USB host PCB ASSY Line holder upper Slit Hook External temperature humidity harness RD BL WH Registration clutch harness WH clutch Develop release clutch harness BL Flat cable guide Paper feed clutch harness WH R...

Page 175: ...be changed for any reason 3 Process Drive Unit Hole Hook Main PCB ASSY CN12 Line holder under Process drive unit Process drive unit A A CN7 Process motor Front Front Hook Develop drive clutch K harness BL Develop drive clutch K harness BL ...

Page 176: ...feed unit A Hook Hook Hook Hook Main PCB ASSY CN20 CN13 Process drive unit Main drive unit A Front Front Hook Edge sensor harness RD BL WH Edge sensor harness RD BL WH Registration front rear manual feed sensor harness RD BL WH YL BK Registration front rear manual feed sensor harness RD BL WH YL BK ...

Page 177: ...t ASSY A A Front Front Hook Hook Back cover sensor harness WH Back cover sensor harness ASSY Back cover sensor harness WH Flat cable guide Flat cable guide Hook Hook Hook CN3 CN2 Registration mark R PCB ASSY Registration mark L PCB ASSY Eject sensor PCB ASSY Registration sensor ASSY Front Registration mark L harness RD BL WH Registration mark L harness RD BL WH Registration mark R harness RD BL WH...

Page 178: ...5 Confidential Harness colors may be changed for any reason 7 Main Fan CN2 Hook Hook Wire cap Wire cap Main fan High voltage power Front Main fan harness RD BK WH Main fan harness RD BK WH supply PCB ASSY ...

Page 179: ... Flat Cable A view Hook Hook Hook Hook CN3 Hole Hole CN1 A view Side frame R sub ASSY Side frame R sub ASSY Side frame L ASSY Side frame L ASSY Main PCB ASSY Process drive unit HVPS flat cable HVPS flat cable HVPS flat cable High voltage power supply PCB ASSY Front Front ...

Page 180: ...colors may be changed for any reason 9 Eject Sensor PCB ASSY CN1 CN10 Hook Hook A A Hook Hook Eject sensor PCB ASSY Eject sensor PCB ASSY Main PCB ASSY Line holder under Front Hook Eject sensor harness WH Eject sensor harness WH ...

Page 181: ...w Hook Hole Hook Hook Hook Hook Hook C view B view A view Fuser unit Side frame R sub ASSY Side frame R sub ASSY Inlet Front Low voltage power supply PCB ASSY Front Inlet Inlet harness Inlet FG harness Heater harness Inlet harness Heater harness Hook Heater harness Inlet FG harness Inlet FG harness Inlet harness Heater harness ...

Page 182: ...27 Front Hole Hole Hole Hole Document Hook CN25 Joint cover Second side CIS unit Second side CIS flat cable ADF harness ADF sensor harness RD WH Front ADF FG harness Second side CIS flat cable ADF motor harness BL Flat cable holder scanner unit ASSY Hole Hook Flat cable sponge 2 Upper ADF chute Lower ADF chute ...

Page 183: ...2 Modem PCB ASSY Hole Hook Main PCB ASSY CN28 Front Slit Hook Slit Hook Hook A view Joint cover ASSY Modem PCB ASSY Flat core Hook A view Modem PCB ASSY Joint cover ASSY Hook Main shield plate Modem flat cable Modem FG harness Modem FG harness Front Modem flat cable ...

Page 184: ...Harness colors may be changed for any reason A view A view B view B view A Hole Hole Hole A Front Joint cover ASSY Joint cover ASSY Modem PCB ASSY Hook Sub frame ASSY LED FG harness BK LED FG harness BK LED FG harness BK ...

Page 185: ... colors may be changed for any reason 13 Speaker Unit CN24 Hook Front A view A view Slit Hook Hook Joint cover ASSY Speaker unit Speaker unit Hook Main PCB ASSY Joint cover ASSY Speaker harness RD BK Front Speaker harness RD BK ...

Page 186: ...Main PCB ASSY CN8 CN23 Hook A view A view Joint cover Main shield plate Document scanner unit Hole Control panel ASSY FFC guide ASSY Panel harness WH Panel USB harness RD WH BK GR Panel FG harness Panel harness Panel USB harness RD WH BK GR Panel FG harness Panel harness WH Front Flat cable guide ...

Page 187: ...on 15 Document Scanner Unit Hole Hook Main PCB ASSY CN29 First side CIS unit Joint cover ASSY Flat core First side CIS flat cable Front Document scanner top cover ASSY Document scanner bottom cover ASSY First side CIS flat cable Flat cable guide Flat cable guide ...

Page 188: ... 25 Upper ADF Chute 60 60 8 27 First Side Document Scanning Position Sensor PCB ASSY Second Side Document Scanning Position Sensor PCB ASSY Duplex Scanning Models Only 15 20 8 28 Lower ADF Clute 40 40 8 28 Eject Film 35 40 8 29 Document Feed Roller ASSY2 15 15 8 31 Document Cover ASSY 10 10 8 30 ADF Motor 65 65 8 32 Pull Arm Guide Lock Claw 20 20 8 33 Flat Cable Cover Holder Hook LED ASSY 30 25 8 ...

Page 189: ...B ASSY HVPS Flat Cable 65 60 8 67 Main Fan 5 10 8 68 Develop Release Sensor PCB ASSY 5 5 8 40 Document Scanner Unit 30 40 8 41 Panel Control PCB ASSY 70 70 8 42 Touch Panel ASSY LCD 45 45 8 47 Back Cover Lower 5 5 8 69 Low voltage Power Supply PCB ASSY 30 30 8 64 Back Cover Sensor Harness ASSY 5 5 8 61 Paper Eject ASSY 10 15 8 62 Back Cover Upper 45 45 8 63 Exit Roller Bushing Eject Roller ASSY 10...

Page 190: ...ge the Drum unit the Belt unit the Waste toner box EXT cap and LAN port cap Backup of machine information When replacing the main PCB Before starting repair work back up the machine information and user setting information Refer to 1 4 12 Backup of machine information in Chapter 5 After replacing the PCB restore the backup data to a new PCB Toner cartridge Drum unit Belt unit Waste toner box Paper...

Page 191: ...up plate Release the Hook to remove the Lift gear 46 from the Plate up plate Fig 3 1 2 Remove the Gear Z23M10Z14M75 from the Paper tray 3 Remove the Gear Z19M10 from the Paper tray Fig 3 2 Hook Lift gear 46 Paper tray Plate up plate 1a 1b Paper tray Gear Z19M10 Gear Z23M10Z14M75 2 3 ...

Page 192: ...3 29 Confidential 8 2 Cord Hook 1 Rotate the Cord hook in the direction of the arrow to remove it from the Main body Fig 3 3 Cord hook Cord hook Cord hook Main body 1a 1b Back side ...

Page 193: ...er ASSY Fig 3 4 2 Remove the Boss and Bush of the Back cover ASSY from the Boss and Bush on the left side of the Main body Fig 3 5 Back side Main body Back cover ASSY Main body Back cover ASSY Boss Boss Bush Bush Back cover ASSY Boss Boss Bush Bush Back side ...

Page 194: ...3 31 Confidential 3 Remove the Boss and Bush of the Back cover ASSY from the Boss and Bush on the right side of the Main body Fig 3 6 Main body Back cover ASSY Boss Boss Bush Bush Back side ...

Page 195: ... left side Boss of the Fuser cover ASSY from the Bush of the Main body 3 Remove the right side Boss of the Fuser cover ASSY from the Bush of the Main body Fig 3 8 Fuser cover ASSY Lock lever L Lock lever R Back side 1a 1a 1b Fuser cover ASSY Main body Boss Bush Bush Fuser cover L Fuser cover ASSY Boss Boss Fuser cover L Back side ...

Page 196: ... L from the Main body Fig 3 9 3 Remove the Taptite bind B M3x10 screw to remove the Fuser cover R from the Main body Fig 3 10 Assembling Note After assembling the Fuser cover R make sure that the Heater harness is not visible Fuser cover L Pin Main body Back side Taptite bind B M3x10 Taptite bind B Fuser cover R Main body Back side M3x10 ...

Page 197: ...A screws Remove the Fuser unit from the Main body holding the A parts 6 Disconnect the Electrode terminal of the Fuser unit from the Electrode terminal of the Main body Fig 3 12 CN4 CN5 Eject sensor PCB ASSY Connector Connector Back side Taptite pan washer B M4x12 DA Main body Fuser unit Back side Electrode terminal Electrode terminal Hook 5 6 A A ...

Page 198: ...3 35 Confidential Fig 3 13 Note Do not apply a physical impact or vibration to the Fuser unit Do not touch the Roller to prevent breakage of the Fuser unit Fuser unit Roller ...

Page 199: ...ion Mark R PCB ASSY 1 Disconnect the two Connectors CN2 and CN3 from the Eject sensor PCB ASSY Fig 3 14 2 While pushing up the Lever open the Joint cover ASSY Fig 3 15 Eject sensor CN3 CN2 Connector Connector Back side PCB ASSY Joint cover ASSY Front side Lever ...

Page 200: ...on sensor ASSY Fig 3 16 4 Pull the left side of the Registration sensor ASSY in the direction of 4a and release the Hook on the right side to remove the Registration sensor ASSY Fig 3 17 Registration sensor ASSY Taptite bind S M3x5 Hook Main body Registration sensor ASSY 4b 4a ...

Page 201: ...the wiring of the Registration mark R PCB harness 8 As the Boss being removed slide the Registration mark R PCB ASSY in the direction of the arrow 8a to remove it from the Registration sensor ASSY Fig 3 19 Harness routing Refer to Registration Mark L PCB ASSY Registration Mark R PCB ASSY Hook Hook Registration sensor ASSY 6a 6b Boss Hook Hook Registration mark L PCB ASSY 6b Registration sensor ASS...

Page 202: ...e Side cover L Fig 3 20 2 Release the two Hooks and two Bosses on the upper side and three Hooks on the bottom to remove the Side cover L from the Main body Fig 3 21 Side cover L Taptite bind B M4x12 Taptite bind B M4x12 Left side Hook Hook Hook Main body Side cover L Boss Boss Left side ...

Page 203: ...3 40 Confidential Inside of Side cover L Fig 3 22 Hook Hook Hook Hook Side cover L Front side Back ...

Page 204: ... Side cover R Fig 3 23 2 Release the two Hooks and two Bosses on the upper side and three Hooks on the bottom to remove the Side cover R from the Main body Fig 3 24 Side cover R Taptite bind B M4x12 Taptite bind B M4x12 Right side Hook Hook Side cover R Boss Boss Main body Hook Right side ...

Page 205: ...25 8 9 Manual Feed Slot Cover ASSY 1 Remove the two Pins to remove the Manual feed slot cover ASSY from the Inner front cover Fig 3 26 Hook Hook Hook Side cover R Back Front side Manual feed slot cover ASSY Pin Pin Inner front cover Front side 1a 1b ...

Page 206: ...r ASSY 2 While pushing up the Lever open the Document scanner unit Fig 3 27 3 Remove the two Pins to remove the Support flap from the Joint cover ASSY Fig 3 28 Document scanner unit 2a 2b Lever Lever Front side Pin Pin Joint cover ASSY Support flap Front side ...

Page 207: ...over Side L 1 Remove the Taptite bind B M4x12 screw Release eleven Hooks to remove the Joint cover side L from the Joint cover ASSY Fig 3 29 Joint cover side L Hook Hook Hook Hook Hook Taptite bind B M4x12 Joint cover ASSY Left side ...

Page 208: ...2 Remove the Pull arm L and Pull arm spring from the Pull arm guide on the left side 3 Remove the Pull arm R and Pull arm spring from the Pull arm guide on the right side Fig 3 31 Document scanner unit Pull arm R Pull arm L Boss Boss Front side Boss Boss Rib Rib Rib Pull arm spring Pull arm spring Pull arm L Pull arm R Main body Pull arm guide Pull arm guide Front side ...

Page 209: ... 3 Remove the Taptite cup S 3x8 SR screw to remove the ADF FG harness from the Main body 4 Remove the Taptite cup S 3x8 SR screw to remove the Panel FG harness from the Main body Fig 3 33 Taptite cup S Taptite cup S M3x8 SR Side frame L ASSY Main shield cover plate Left side M3x8 SR Screw pan S P washer M3 5x6 Taptite cup S 3x8 SR Taptite cup S 3x8 SR Main shield plate Main shield plate ADF FG har...

Page 210: ...t cables CN29 and CN30 from the Main PCB ASSY Fig 3 34 6 Remove the all harnesses from the Hook Fig 3 35 CN30 CN22 CN19 CN15 CN11 CN4 CN3 CN2 CN1 CN6 CN5 CN29 CN28 CN26 CN23 CN8 CN21 CN27 CN20 CN14 CN25 CN24 CN16 CN9 CN13 CN12 CN10 CN7 CN17 Main PCB ASSY Hook Harness Side frame L ASSY Front side ...

Page 211: ...se the one Hook and two Bosses to remove the Flat cable holder cover from the Joint cover ASSY Fig 3 37 Harness routing Refer to ADF Unit Modem PCB ASSY Speaker Unit Control Panel ASSY Document Scanner Unit Joint cover ASSY Lever Front side Flat cable holder cover Hook Boss Joint cover ASSY ...

Page 212: ... 5 Pull out the Second side CIS flat cable from the Joint cover ASSY Fig 3 39 Joint cover ASSY Document scanner unit Lever Lever 2b 2a Front side Joint ADF Panel USB Document scanner unit First side CIS Second side CIS Document Panel harness flat cable flat cable cover ASSY harness ADF harness Document scanner unit harness scanner unit Panel harness Panel USB harness First side CIS Second side CIS...

Page 213: ...hown in the figure to remove it from the Main body Fig 3 40 7 Remove the Taptite bind B M4x12 screw from the Document scanner unit Fig 3 41 Document scanner unit Document scanner unit Boss Boss Boss Main body Front side Document scanner unit ADF unit Taptite bind B M4x12 ...

Page 214: ...hree Hooks to remove the Flat cable holder ASSY from the Document scanner unit Pull out the Second side CIS flat cable and Harness from the Document scanner unit Fig 3 43 ADF unit Hook Hinge R Document scanner unit Hinge ASSY L 8 9 ADF unit Document scanner unit Harness Hook Hook Flat cable holder ASSY Second side CIS flat cable Flat cable holder ASSY 10a 10b ...

Page 215: ...om the ADF unit Fig 3 44 Harness routing Refer to ADF Unit Document Scanner Unit 8 15 Hinge R Hinge R Support 1 Remove the Taitite cup B 3x10 screw to remove the Hinge R support and Hinge R from the ADF unit Fig 3 45 Hinge ASSY L ADF unit Taptite cup S 3x12 Taptite cup S 3x12 Hinge R Hinge R support ADF unit Taitite cup B 3x10 ...

Page 216: ...ble holder ASSY by removing the Double sided adhesive tape Fig 3 46 8 17 Hinge Arm R 1 Remove the three Taptite cup B 3x10 screws to remove the Hinge arm R from the ADF unit Fig 3 47 Flat cable holde ASSY Flat cable 1a 1b Double sided adhesive tape Taptite cup B 3x10 Hinge arm R ADF unit ...

Page 217: ...he two Pins to remove the ADF document output support flap from the ADF unit Fig 3 48 8 19 ADF Document Support 1 Open the ADF document support 2 Remove the two Pins to remove the ADF document support from the ADF unit Fig 3 49 Pin Pin ADF unit ADF document output support flap ADF unit Pin Pin ADF document support ...

Page 218: ...3 55 Confidential 8 20 ADF Cover ASSY 1 Open the ADF cover ASSY 2 Remove the two Pins to remove the ADF cover ASSY from the ADF unit Fig 3 50 ADF cover ASSY Pin Pin ADF unit ...

Page 219: ...ential 8 21 Gear Cover 1 Release the two Hooks of the ADF unit Fig 3 51 2 Remove the Gear cover from the ADF unit Fig 3 52 ADF unit Hook Hook Hook Hook ADF unit Gear cover Gear cover ADF unit Hook Gear cover 2b 2a ...

Page 220: ...53 2 Remove the Document separate roller ASSY from the ADF unit Fig 3 54 Note When removing the Document separate roller ASSY be careful not to damage the Flap ADF Conductive bushing ADF unit Document separate roller ASSY 1a 1b Conductive bushing 1a Document separate roller ASSY ADF unit Flap ADF Flap ADF 2b 2a ...

Page 221: ...sembling Note When assembling the Document separate roller ASSY be sure to assemble it in a way that the Flap ADF comes under the Document feed roller ASSY1 Document separate Flap ADF Flap ADF Document feed roller ASSY1 roller ASSY ...

Page 222: ...wo Pins to remove the ADF separation pad holder ASSY from the Upper ADF chute Fig 3 56 2 Remove the ADF separation pad spring from the Upper ADF chute Fig 3 57 Pin Pin Upper ADF chute ADF separation pad ADF separation pad holder ASSY 1a 1a 1b holder ASSY Upper ADF chute ADF separation pad spring ...

Page 223: ...y 1 Rotate the Conductive bushing to release the lock Fig 3 58 2 Remove the Document feed roller ASSY1 from the ADF unit Fig 3 59 Note Disassemble it in a place without dust ADF unit Conductive bushing 1a 1b 1a Conductive bushing Document feed roller ASSY1 ADF unit 2a 2b Document feed roller ASSY1 ...

Page 224: ...1 Confidential 3 Release the two Hooks to remove the CIS glass stopper from the ADF unit Fig 3 60 4 Remove the CIS glass from the ADF unit Fig 3 61 ADF unit Hook CIS glass stopper CIS glass ADF unit 4a 4b ...

Page 225: ...ve the Double sided adhesive tape of the Scanning CIS flat cable from the ADF unit 7 Lift the Second side CIS unit to remove the Second side CIS flat cable Fig 3 63 CIS spacer Second side CIS unit CIS spacer ADF unit ADF unit Second side CIS unit Second side CIS flat cable 7a 7b Double sided adhesive tape ...

Page 226: ...move the Second side CIS flat cable from the ADF unit 10 Remove the Flat cable sponge 2 from the Second side CIS flat cable Fig 3 65 ADF unit CIS spring CIS spring ADF unit Second side CIS flat cable Second side CIS flat cable Flat cable sponge 2 Flat cable sponge 2 A view A view ...

Page 227: ...nd side CIS flat cable might be broken when you remove it from the Flat cable holder ASSY be sure to replace it with a new Second side CIS flat cable When assembling a new Second side CIS flat cable be sure to assemble it in accordance with the following procedure Fold up FFC along with the dotted line Fold down FFC along with the solid line Supporting plate 45 Second side CIS flat cable 90 mm Tap...

Page 228: ...adhesive tape to the Flat cable holder ASSY as shown in the figure below If the Double sided adhesive tape has already been affixed be sure to remove it and then affix new Double sided adhesive tape Fig 3 69 Upper ADF chute ADF unit Second side CIS flat cable Double sided adhesive tape Flat cable holder ASSY ...

Page 229: ...r ASSY as shown in the figure below and then affix it to the double sided adhesive tape affixed to the Flat cable holder ASSY Fig 3 71 208 2 mm Fold up FFC along with the dotted line Supporting tape Supporting plate Second side CIS flat cable Pass the harness through here Second side CIS flat cable Affix it to the double sided Rib Align the folded area to this part Second side Flat cable holder AS...

Page 230: ...econd side CIS flat cable at the Main PCB ASSY side to the Main PCB ASSY ADF unit Flat cable holder ASSY Document scanner unit Second side CIS flat cable Second side Fold up FFC along with the dotted line Fold down FFC along with the solid line 175 2 mm Main PCB ASSY side 45 200 2 mm 45 45 15 1 5 mm Supporting plate 65 2 mm CIS flat cable Flat cable sponge 2 Second side CIS flat cable ...

Page 231: ... 3x10 screw from the ADF unit Fig 3 74 3 Return the ADF unit to the original position 4 Remove the five Taptite cup B 3x10 screws from the Upper ADF chute 5 Remove the Upper ADF chute from the ADF unit Fig 3 75 Taptite cup B 3x10 ADF unit Taptite cup B 3x10 Taptite cup B 3x10 Upper ADF chute ADF unit ...

Page 232: ...Upper ADF chute 8 Remove the other Paper stack lever in the same way Fig 3 76 Fig 3 77 Assembling Note When assembling the Paper stack lever be sure to assemble the Paper stack lever spring as shown in the figure below Paper stack lever Paper stack lever Upper ADF chute 7a 8a 7a 8a 7b 8b Pin Pin Paper stack lever Paper stack lever spring ...

Page 233: ... detection sensor PCB ASSY from the Lower ADF chute Fig 3 78 2 Disconnect the Connector from the ADF cover document detection sensor PCB ASSY Fig 3 79 Rib Lower ADF chute Lower ADF chute 1a 1b 1c ADF cover document detection sensor PCB ASSY ADF cover document detection sensor PCB ASSY Connector ADF cover document detection sensor PCB ASSY ...

Page 234: ...r PCB ASSY from the Lower ADF chute Fig 3 80 2 Disconnect the Connector from the Second side document scanning position sensor PCB ASSY Fig 3 81 3 Remove the First side document scanning position sensor PCB ASSY in the same way Rib Lower ADF chute Film 1d 1b 1a 1c Second side document scanning position sensor PCB ASSY First side document scanning position sensor PCB ASSY Second side document scann...

Page 235: ...k to remove the Lower ADF chute from the Document cover ASSY Fig 3 82 3 Release the two Hooks to remove the Document ejection roller bushing from the Document ejection roller Fig 3 83 Taptite cup B 3x10 Lower ADF chute Hook Document cover ASSY Document ejection roller Hook Lower ADF chute Document ejection roller bushing ...

Page 236: ...to release the lock Fig 3 84 5 Remove the Document ejection roller from the Lower ADF chute Fig 3 85 Conductive bushing Conductive bushing Lower ADF chute 4a 4b Conductive bushing Document ejection roller Lower ADF chute 5a 5b Document ejection roller ...

Page 237: ...3 74 Confidential 6 Remove the Eject film from the Lower ADF chute Fig 3 86 Eject film Lower ADF chute ...

Page 238: ...tive bushing and rotate it to the position shown in the figure Fig 3 87 2 Remove the Document feed roller ASSY2 from the Lower ADF chute Fig 3 88 Pin Conductive bushing ADF unit Document feed roller ASSY2 1a 1b 1a Conductive bushing Lower ADF chute Document feed roller ASSY2 2a 2b ...

Page 239: ... 3x8 SR screw from the Lower ADF chute Fig 3 89 2 Remove the three Taptite cup B 3x10 screws to remove the Drive frame ASSY from the Lower ADF chute Fig 3 90 Lower ADF chute Taptite cup S 3x8 SR ADF FG harness Taptite cup B 3x10 Lower ADF chute Drive frame ASSY ...

Page 240: ...he Connector from the ADF motor Fig 3 92 Assembling Note When asembling the Drive frame ASSY ensure that the Arm ASSY L2 are placed in the positions as shown in the figure below Drive frame ASSY Arm ASSY L2 Drive frame ASSY ADF motor Connector ...

Page 241: ... the Gear43 from the Drive frame ASSY Fig 3 93 5 Remove the Screw pan S P washer M3x6 screw to remove the ADF motor from the Drive frame ASSY Fig 3 94 Hook Drive frame ASSY Gear43 Drive frame ASSY Screw pan S P washer M3x6 ADF motor ADF motor 5a 5b ...

Page 242: ...e the Pull arm guide from the Joint cover ASSY Fig 3 96 2 Remove the other Lock claw and Pull arm guide in the same way Document feed pinch roller Document feed pinch roller Document feed pinch Document feed pinch roller spring shaft Document feed pinch roller Document cover ASSY roller spring shaft Document feed pinch roller spring shaft Lock claw Joint cover ASSY Pull arm guide Pull arm guide Lo...

Page 243: ...ig 3 97 2 Remove the Taptite pan washer B M4x12 DA screw to remove the LED FG harness from the Side frame R ASSY Fig 3 98 CN30 CN22 CN19 CN15 CN11 CN4 CN3 CN2 CN1 CN6 CN5 CN29 CN28 CN26 CN23 CN8 CN21 CN27 CN20 CN14 CN25 CN24 CN16 CN9 CN13 CN12 CN10 CN7 CN17 Main PCB ASSY Lock Taptite pan washer B M4x12 DA LED FG harness Side frame R ASSY Right side ...

Page 244: ...ver ASSY Fig 3 99 4 Remove the Double sided adhesive tape and disconnect the wiring of the LED flat cable 5 Disconnect the wiring of the Modem flat cable Fig 3 100 Lever Joint cover ASSY Front side Double sided LED flat cable Modem flat cable adhesive tape Left side ...

Page 245: ...move the two Pins to remove the Joint arm R from the right side of the Joint cover ASSY Fig 3 101 8 Release the two Hooks to remove the Arm R from the Boss of the Joint cover ASSY Fig 3 102 Pin Pin Joint cover ASSY Joint arm R Joint arm L Joint arm L R 6a 7a 7b 6b Hook Hook Boss Joint cover ASSY Arm R Arm R 8b 8a ...

Page 246: ... Note If the LED ASSY is laid down slide the Push arm of the Sub frame ASSY in the direction of the arrow a to raise the LED ASSY before performing this step Main body Boss Boss Boss Joint cover ASSY Joint cover ASSY 9a 9b Front side LED ASSY Sub frame ASSY Sub frame ASSY Push arm A view A view LED ASSY a ...

Page 247: ...er from the back side of the LED ASSY 12 Release the Hook of the upper side to remove the Holder hook on the left side from the left side of the LED ASSY 13 Remove the Holder hook on the right side in the same way Fig 3 106 Hook Hook Flat cable cover LED ASSY LED ASSY LED ASSY Hook Hook Hook Hook LED ASSY LED ASSY Holder hook Holder hook 12a 12b 11a 11b ...

Page 248: ... the Holder hook into the A of the LED ASSY first and then assemble the Hook B of the Holder hook to the Holder After assembling make sure to check that the Hook A is firmly engaged to the Holder If it is not engaged to the Holder firmly it might cause an image failure LED ASSY Hook A LED ASSY Hook B Holder hook Holder hook A LED ASSY LED ASSY LED ASSY LED holder ...

Page 249: ...he LED parts of the LED ASSY for replacement are covered with protection tapes Make sure not to remove the protection tapes until assembling of the LED ASSY is completed After it is assembled make sure to remove the protection tapes If the LED parts get smeared make sure to wipe smears on the LED parts with a clean and soft cloth LED flat cable LED ASSY Connector LED ASSY Protection tape Protectio...

Page 250: ...Modem PCB ASSY Assembling Note When assembling the LED flat cable to the LED ASSY K fold up flat cable along with the dotted line as shown in the figure below and assemble it to the LED ASSY K LED ASSY K 45 1 mm LED flat cable Fold up flat cable along with the dotted line ...

Page 251: ...ooks to remove the Z spring L from the Boss of the LED holder Fig 3 112 2 Remove the other Z springs L in the same way Note When removing the Z spring L be careful not to damage the Boss of the LED holder Hook Hook Boss of LED holder Z spring L Z spring L ...

Page 252: ...o remove the Joint cover open button holder from the Joint cover ASSY Fig 3 113 2 Remove the Joint cover open button from the Joint cover ASSY Fig 3 114 Taptite bind B M4x12 Taptite bind B M4x12 Joint cover ASSY Joint cover open button holder Joint cover ASSY 2a 2b Joint cover open button ...

Page 253: ...ig 3 116 Assembling Note When attaching the Joint cover open button make sure that the Spring is placed as shown in the figure Spring Spring Joint cover ASSY Joint cover Joint cover ASSY Joint cover open button open button Taptite bind B M4x12 Taptite bind B M4x12 Taptite bind B M4x12 Joint cover ASSY Taptite bind B M4x12 Taptite cup S M3x8 SR LED FG harness Sub frame ASSY Taptite bind B M4x12 ...

Page 254: ...t cover ASSY Fig 3 117 6 Disconnect the wiring of the FG harness from the Joint cover ASSY 7 Remove the two Flat cores of the Modem flat cable from the Joint cover ASSY Fig 3 118 Joint cover ASSY Hook Sub frame ASSY Modem flat cable Flat core small Flat core large Joint cover ASSY ...

Page 255: ...Modem PCB ASSY Remove the two Taptite bind B M4x12 screws to remove the Modem PCB ASSY from the Joint cover ASSY 9 Disconnect the wiring of the LED FG harness Fig 3 119 Harness routing Refer to Modem PCB ASSY Joint cover ASSY Taptite bind B M4x12 Modem PCB ASSY LED FG harness Screw pan S P washer M3 5x6 ...

Page 256: ...om the Flat cable Fig 3 121 Modem PCB ASSY CN1 Flat cable Modem shield plate Flat cable Flat core large Flat core small Fold up FFC along with the dotted line 45 45 15 1 mm 68 1 mm 90 2 mm 192 1 mm 167 1 mm 5 1 mm 63 1 mm 28 1 mm 16 mm Main PCB ASSY side Modem PCB ASSY side Flat cable sponge 3 Flat cable sponge 2 Attach it to the side of the terminal Attach it to the back side of the terminal Term...

Page 257: ... shield cover from the Modem shield plate Fig 3 122 5 Remove the two Taptite cup S M3x6 SR screws to remove the Modem PCB ASSY from the Modem shield plate Fig 3 123 Modem shield plate Screw pan S P washer M3 5x6 Modem shield cover Modem shield plate Modem PCB ASSY Taptite cup S M3x6 SR ...

Page 258: ...7 Paper Stack Lever 1 Remove the two Pins to remove the Paper stack lever on the left side 2 Remove the other Paper stack lever in the same way Fig 3 124 Pin Pin Pin Pin Paper stack lever Paper stack lever Joint cover ASSY ...

Page 259: ...r ASSY 2 Remove the Taptite bind B M4x12 screw Release the eleven Hooks to remove the Joint cover side R from the Joint cover ASSY Fig 3 125 3 Remove the Speaker hold spring from the Joint cover side R Fig 3 126 Hook Hook Hook Hook Joint cover ASSY Joint cover side R Taptite bind B M4x12 Joint cover side R Speaker hold spring ...

Page 260: ...er to Speaker Unit 8 39 Joint Cover Back 1 Remove the two Taptite bind B M4x12 screws Release the six Hooks and two Bosses to remove the Joint cover back from the Joint cover ASSY Fig 3 128 Speaker unit Hook Joint cover side R Boss Hook Hook Hook Joint cover ASSY Joint cover back Taptite bind B M4x12 Taptite bind B M4x12 ...

Page 261: ...e the four hooks of the Control panel ASSY and slide it in the direction of the arrow by 1 to 2 mm Fig 3 130 Note If you slide the Control panel ASSY in the direction of the arrow until you see the fixing hole the Key PCB flat cable may get caught in the ground spring and may be damaged To avoid that the amount by which you slide the ASSY must be 1 to 2 mm Document scanner unit Taptite cup B 3x10 ...

Page 262: ...6 Disconnect the two Connectors CN2 and CN3 from the Panel control PCB ASSY Fig 3 131 7 Check that the Key PCB flat cable is not damaged Fig 3 132 CN2 CN3 Control panel ASSY Document scanner unit Connector Connector Panel control PCB ASSY 6 5 Control panel ASSY Key PCB flat cable ...

Page 263: ...Y 2 Remove the Key PCB flat cable from the Control panel ASSY Fig 3 133 3 Remove the Taptite bind S M3x5 screw Release the three Hooks to remove the Key PCB hold from the Control panel ASSY Fig 3 134 Panel control PCB ASSY Control panel ASSY CN5 Key PCB flat cable Control panel ASSY Key PCB hold Taptite bind S M3x5 Hook Hook Hook ...

Page 264: ...rom the Panel control PCB ASSY Fig 3 135 5 Release the Lock to disconnect the Flat cable from the Connector CN4 of the Panel control PCB ASSY Fig 3 136 Control panel ASSY Panel control PCB ASSY Taptite cup B 3x10 Taptite cup B 3x10 Panel control PCB shield plate cover Flat cable Panel control PCB ASSY CN4 Lock Lock ...

Page 265: ...3 102 Confidential 6 Remove the Panel control PCB ASSY from the Control panel ASSY Fig 3 137 Panel control PCB ASSY Control panel ASSY ...

Page 266: ... Control panel ASSY Fig 3 138 2 Remove the LCD from the Control panel ASSY 3 Disconnect the Flat cable from the Connector CN1 of the Key PCB ASSY Remove the Touch panel ASSY Fig 3 139 Control panel ASSY Taptite cup B 3x10 Taptite cup B 3x10 Hook Hook Hook Hook Hook Hook LCD hold plate Control panel ASSY LCD Touch panel ASSY CN1 Key PCB ASSY Flat cable ...

Page 267: ... the Scanner top cover ASSY from the Document scanner bottom cover ASSY Fig 3 140 2 Remove the CIS guide L and CIS guide R from the First side CIS unit Fig 3 141 Taptite bind B M4x12 Scanner top cover ASSY Taptite bind B M4x12 Taptite bind B M4x12 Document scanner bottom cover ASSY First side CIS unit CIS guide R CIS guide L ...

Page 268: ...e sided adhesive tape from the First side CIS flat cable Fig 3 143 CIS drive belt CIS drive belt Guide shaft Guide shaft First side CIS unit First side CIS unit First side CIS unit Double sided adhesive tape First side CIS flat cable Double sided adhesive tape First side CIS First side CIS flat cable unit ...

Page 269: ...irst side CIS flat cable from the Connector CN1 of the First side CIS unit Fig 3 144 6 Release the two Pins to remove the First side CIS unit from the CIS carriage Fig 3 145 First side CIS unit 5b 5a CN1 First side CIS flat cable First side CIS unit Pin Pin CIS carriage ...

Page 270: ... the Document scanner bottom cover ASSY 9 Remove the Flat core from the First side CIS flat cable Fig 3 147 Double sided adhesive tape Double sided adhesive tape Double sided adhesive tape Flat core First side CIS flat cable Document scanner bottom cover ASSY Hole Flat core First side CIS flat cable Document scanner bottom cover ASSY ...

Page 271: ...it are replaced be sure to fold and assemble the Document scanner unit flat cable as shown in the figure 45 15 1 5 45 45 45 728 250 2 200 2 65 2 119 2 265 2 27 1 10 1 5 1 1 1 1 Fold down FFC along with the solid line Fold up FFC along with the dotted line mm mm mm mm mm mm mm mm mm mm mm Supporting plate Supporting plate ...

Page 272: ...ain body Fig 3 149 2 Assemble the Joint arm L into the two Pins of the Sub frame ASSY 3 Assemble the Arm R into the Boss of the Sub frame ASSY Fig 3 150 Sub frame ASSY Sub frame ASSY Main body Boss Boss Boss Front side Sub frame ASSY Arm R Pin Pin Joint arm L Joint arm L Boss Arm R Hook Hook 2a 2b 3a 3b ...

Page 273: ...3 151 5 Remove the three Taptite cup S M3x8 SR screws to remove the LED PCB cover from the LED control PCB ASSY Fig 3 152 Sub frame ASSY Front side LED PCB cover Sub frame ASSY LED control PCB ASSY Taptite cup S M3x8 SR Taptite cup S M3x8 SR Left side ...

Page 274: ...nge 1 from the LED control flat cable Fig 3 154 Assembling Note When attaching the Flat cable sponge 1 to the LED control flat cable be careful not to let the Flat cable sponge 1 extend from the LED control flat cable Lock LED control flat cable LED control PCB ASSY LED control flat cable Flat core 6a 6b Flat cable sponge 1 LED control flat cable ...

Page 275: ...dotted line Fold down flat cable along with the solid line Conductor 100 5 mm 45 90 1 mm 119 1 mm 0 to 1 mm 20 1 45 1 mm 78 1 mm 112 1 mm 140 1 mm 1 1 mm Double sided adhesive tape How to fold flat cable of the LED control flat cable Supporting tape To be connected to main PCB ASSY To be connected to LED control PCB ASSY 8 to 9 mm 45 ...

Page 276: ...ock of the LED flat cable connector CN4 Disconnect the LED flat cable Y from the LED control PCB ASSY Fig 3 156 2 Remove the Flat core from the two LED flat cables Y and M of the LED flat cable holder Fig 3 157 CN5 K CN3 C CN1 CN4 Y CN2 M Lock LED flat cable LED control PCB ASSY Flat core LED flat cable holder LED flat cable M LED flat cable Y LED flat cable Flat core ...

Page 277: ...5 Release the Lock of the LED flat cable connector CN3 Disconnect the LED flat cable C from the LED control PCB ASSY Release the Lock of the LED flat cable connector CN5 Disconnect the LED flat cable K from the LED control PCB ASSY Fig 3 159 LED flat cable Y LED flat cable M Flat core Flat core LED flat cable holder 3 4 CN5 K CN3 C CN1 CN4 Y CN2 M Lock LED flat cable LED control PCB ASSY ...

Page 278: ...ull out the LED flat cable K from the LED flat cable holder by removing the Double sided adhesive tape Fig 3 161 Flat core LED flat cable K LED flat cable holder LED flat cable C LED flat cable K Flat core LED flat cable C LED flat cable K LED flat cable C Double sided adhesive tape 8 7 LED flat cable holder Location where double sided adhesive tape is attached Flat core ...

Page 279: ...at cable along with the dotted line Fold down flat cable along with the solid line End of supporting tape End of supporting tape End of supporting tape End of supporting tape Conductor Conductor Conductor Conductor 45 45 45 45 75 1 mm LED flat cable M LED flat cable C LED flat cable K LED ASSY side LED control PCB ASSY side LED ASSY side LED control PCB ASSY side LED ASSY side LED control PCB ASSY...

Page 280: ...nfidential 8 46 LED Control PCB ASSY 1 Remove the two Taptite cup S M3x8 SR screws to remove the LED control PCB ASSY from the Sub frame ASSY Fig 3 163 Tpatite cup S M3x8 SR Sub frame ASSY LED control PCB ASSY ...

Page 281: ...er 1 Place the Main body upright as shown in the figure below Fig 3 164 2 Release the four Hooks to remove the Back cover lower from the Main body Fig 3 165 Main body Front side Hook Hook Hook Hook Back cover lower Main body Back side 2a 2b ...

Page 282: ...48 Duplex Tray 2 sided Printing Model Only 1 Remove the two Taptite bind B M4x12 screws Release the two Bosses to remove the Duplex tray from the Main body Fig 3 166 Duplex tray Taptite bind B M4x12 Main body Boss Back side ...

Page 283: ...xternal temperature humidity sensor PCB ASSY from the Main PCB ASSY Fig 3 168 Harness routing Refer to External Temperature Humidity Sensor PCB ASSY Develop Release Clutch Registration Clutch Paper Feed Clutch USB Host PCB ASSY CN30 CN22 CN19 CN15 CN11 CN4 CN3 CN2 CN1 CN6 CN5 CN29 CN28 CN26 CN23 CN8 CN21 CN27 CN20 CN14 CN25 CN24 CN16 CN9 CN13 CN12 CN10 CN7 CN17 Main PCB ASSY Hook Main PCB ASSY Ext...

Page 284: ...m the Line holder upper Fig 3 169 2 Remove the Wireless LAN PCB ASSY from the Connector CN17 of the Main PCB ASSY 3 Remove the Spacer sponge from the Wireless LAN PCB ASSY Fig 3 170 Hook Hook Wireless LAN cap Line holder upper Left side Hook Main PCB ASSY Main PCB ASSY Wireless LAN PCB ASSY CN17 Left side Spacer sponge 2 3 ...

Page 285: ...e When attaching the Spacer sponge to the Wireless LAN PCB ASSY attach it to the position shown below At the same time the Double sided adhesive tape needs to be replaced with a new one Wireless LAN PCB ASSY Spacer sponge 0 to 1 5 mm 0 to 0 5 mm ...

Page 286: ... 172 2 Remove the three Taptite cup S M3x8 SR screws to remove the Main PCB ASSY from the Side frame L ASSY Fig 3 173 CN30 CN22 CN19 CN15 CN11 CN4 CN3 CN2 CN1 CN6 CN5 CN29 CN28 CN26 CN23 CN8 CN21 CN27 CN20 CN14 CN25 CN24 CN16 CN9 CN13 CN12 CN10 CN7 CN17 Main PCB ASSY Side frame L ASSY Taptite cup S M3x8 SR Taptite cup S M3x8 SR Taptite cup S M3x8 SR Main PCB ASSY Left side 2a 2b 2a 2b ...

Page 287: ...elease the three Hooks to remove the Develop clutch gear cover from the Side frame L ASSY Fig 3 174 3 Remove the Develop release drive gear Z33 from the Side frame L ASSY Fig 3 175 Taptite cup S M3x8 SR Hook Hook Side frame L ASSY Develop clutch Left side gear cover drive gear Z33 Left side Side frame L ASSY Develop release Develop release gear Z34 ...

Page 288: ...move the Develop release clutch from the Side frame L ASSY Fig 3 176 Assembling Note When assembling the Develop release clutch attach the Rotation preventing hook to the Rib of the Main body Left side Develop release clutch Side frame L ASSY Shaft gear Z23 Rib Rotation preventing hook ...

Page 289: ... When assembling the Develop release link be sure to assemble that the positional relationship between A of the Develop release cam and Develop release link is as shown in the figure A Develop release link Develop release cam Front side Back side ...

Page 290: ...to assemble that the positional relationship between A of the Develop release link and Develop release link spring is as shown in the figure Make sure that the portion A is not at the front of the spring Develop release link spring Develop release link A Develop release link holder Front side Back side ...

Page 291: ...release cam and Develop release link are misaligned When assembling the Develop release clutch align the end of the Develop clutch cam with the reference line of the Develop clutch cam cover when viewed from the hole of the Develop clutch cam cover as shown in the figure below If the Process drive unit is not removed adjust the position of the Develop clutch cam while the Joint cover ASSY is opene...

Page 292: ... two Taptite cup S M3x8 SR screws to remove the Flat cable guide Fig 3 180 3 Release the two Hooks to remove the Main PCB insulation sheet from the Side frame L ASSY Fig 3 181 Main PCB insulation sheet Left side Flat cable guide Taptite cup S M3x8 SR Main PCB insulation sheet Left side Side frame L ASSY Hook Hook ...

Page 293: ...CB harness Registration clutch harness Paper feed clutch harness Registration front rear manual feed sensor harness Paper feed harness and Eject sensor PCB harness 6 Release the three Hooks to remove the Line holder upper from the Process drive unit Fig 3 183 Side frame L ASSY Hook Taptite cup S M3x8 SR Left side Main shield plate Hook Left side Hook Hook Process drive unit Line holder upper ...

Page 294: ... L ASSY Fig 3 185 Harness routing Refer to External Temperature Humidity Sensor PCB ASSY Develop Release Clutch Registration Clutch Paper Feed Clutch USB Host PCB ASSY Process Drive Unit Paper Feed Unit Back Cover Sensor Harness ASSY Eject Sensor PCB ASSY Process drive unit Left side Screw pan S P washer M3 5x6 LVPS FG harness Process drive unit Side frame L ASSY Taptite cup S M3x8 SR Taptite cup ...

Page 295: ...3 132 Confidential 8 54 Fuser Drive Gear Z25 1 Release the Hook to remove the Fuser drive gear Z25 from the Process drive unit Fig 3 186 Hook Process drive unit Fuser drive gear Z25 ...

Page 296: ...utch attach the Rotation preventing hook to the Rib of the Main body Registration clutch and Paper feed clutch are both clutch parts and they are identified with connector colors The connector of the Registration clutch is red Be careful not to install an incorrect clutch Hook Registration clutch Left side Side frame L ASSY PF registration drive joint Red connector Rib Rotation preventing hook ...

Page 297: ...istration Clutch Paper Feed Clutch USB Host PCB ASSY Assembling Note When assembling the Paper feed clutch attach the Rotation preventing hook to the Rib of the Main body Registration clutch and Paper feed clutch are both clutch parts and they are identified with connector colors The connector of the Paper feed clutch is blue Be careful not to install an incorrect clutch Hook Paper feed clutch Lef...

Page 298: ...gistration drive joint Fig 3 189 2 Remove the PF registration drive joint from the Side frame L ASSY Fig 3 190 Hook PF registration Collar 6 drive joint Hook PF registration drive joint Side frame L ASSY Left side PF registration drive joint Side frame L ASSY Left side PF registration drive joint ...

Page 299: ...he Separation roller drive joint Fig 3 191 4 Remove the Separation roller drive joint from the Side frame L ASSY Fig 3 192 T1 bushing Side frame L ASSY Left side 3b 3a Separation roller T1 bushing drive joint Side frame L ASSY Separation roller drive joint Left side Separation roller drive joint ...

Page 300: ...he Feed roller drive shaft Fig 3 193 6 Remove the Feed roller drive shaft from the Side frame L ASSY Fig 3 194 Hook PF bushing Feed roller Side frame L ASSY Left side Hook drive shaft PF bushing Side frame L ASSY Feed roller drive shaft Left side Feed roller drive shaft ...

Page 301: ...L ASSY Fig 3 195 Fig 3 196 Note As the two gears DX gear Z21 and PP gear Z14 51 shown in the figure tend to come off Be careful not to lose them Taptite bind B M4x12 Taptite bind B M4x12 Taptite bind B M4x12 Main drive unit Side frame L ASSY Left side Side frame L ASSY DX gear Z21 PP gear Z14 51 Back side Front side ...

Page 302: ... the Roller holder ASSY in the direction of the arrow 2 to remove it from the C of the Paper feed unit 3 Slide the Roller holder ASSY in the direction of the arrow 3a and 3b in this order to remove it from the Paper feed unit Fig 3 198 Lift arm Roller holder ASSY 1a 1b 1a 1b B A Lift arm A Paper feed unit Paper feed unit B Roller holder ASSY Front side 2 C Paper feed unit 3b Roller holder ASSY Rol...

Page 303: ... Confidential Fig 3 199 Assembling Note Align the Hole of the Paper feed unit to the Shaft of the Roller holder ASSY and insert it into the Hole Roller holder ASSY Shaft Hole Paper feed unit Paper feed unit ...

Page 304: ...osses to remove the Inner front cover from the Main body Fig 3 200 2 Remove the two Taptite bind B 3x10 screws Release the Boss to remove the USB printed ASSY from the Inner front cover Fig 3 201 Hook Hook Inner front cover Boss Boss Main body Front side Taptite bind B M4x12 Boss Inner front cover USB cover ASSY Taptite bind B 3x10 ...

Page 305: ...Y 4 Release the two Bosses to remove the USB host PCB ASSY from the USB cover ASSY Fig 3 202 5 Disconnect the Connector from the USB host PCB ASSY Fig 3 203 4a USB cover ASSY USB host PCB ASSY Boss Boss Taptite cup B 3x10 Taptite cup B 3x10 4b USB ground plate USB host PCB ASSY Connector ...

Page 306: ...f the Registration front rear manual feed sensor harness and Paper feed harness 3 Remove the four Taptite bind B M4x12 screws to remove the Paper feed unit from the Main body Fig 3 205 Harness routing Refer to Paper Feed Unit Assembling Note Tighten the four Taptite bind B M4x12 screws in the order of 1 to 4 Paper feed unit Boss 1b Lift arm Main body 1a Front Taptite bind B M4x12 Taptite bind B M4...

Page 307: ... 2 sided printing model only Fig 3 206 2 Raise the Arm R as shown in the figure and then remove it from the Boss of the Paper eject ASSY Fig 3 207 Hook Paper eject Cooling roller spring L Hook Paper eject ASSY Cooling roller ASSY 2 sided printing spring L Front side model only Arm R Paper eject ASSY Boss Boss Arm R 2a 2b 2b ...

Page 308: ...M4x12 screws from the Paper eject ASSY Fig 3 208 4 Remove the two Bosses to remove the Paper eject ASSY from the Main body Fig 3 209 Taptite bind B M4x12 Taptite bind B M4x12 Paper eject ASSY Left side Paper eject ASSY Main body Boss Boss Left side 4a 4b ...

Page 309: ... to remove the Back cover upper from the Paper eject ASSY Fig 3 210 2 Release the two Hooks to remove the Exit roller bushing C from the Back cover upper Fig 3 211 Taptite bind B M3x10 Taptite bind B M3x10 Paper eject ASSY Back cover upper Hook Hook Exit roller bushing C Back cover upper ...

Page 310: ... roller bushing from the left side of the Paper eject ASSY Fig 3 212 2 Remove the other Exit roller bushing in the same way 3 Remove the Eject roller ASSY from the Paper eject ASSY Fig 3 213 Pin Paper eject ASSY Exit roller bushing Exit roller bushing 1b 1a Paper eject ASSY Eject roller ASSY 3a 3b ...

Page 311: ...48 Confidential 8 64 Back Cover Sensor Harness ASSY 1 Release the Hook to remove the Back cover sensor harness ASSY from the Paper eject ASSY Fig 3 214 Hook Paper eject ASSY Back cover sensor harness ASSY ...

Page 312: ...onnectors CN1 and CN3 from the Eject sensor PCB ASSY Fig 3 215 2 Release the Hook to remove the Eject sensor PCB ASSY from the Side frame L ASSY Fig 3 216 Eject sensor PCB ASSY CN1 CN3 Connector Connector Back side Hook Side frame L ASSY Eject sensor PCB ASSY Back side ...

Page 313: ...t from the Side frame R Fig 3 217 2 Remove the Taptite pan washer B M4x12 DA screw to remove the HVPS ground plate rear from the Side frame R Fig 3 218 Taptite cup S M3x8 SR Side frame R High voltage power supply PCB ASSY Taptite pan washer B M4x12 DA HVPS ground plate front Front side Taptite pan washer B M4x12 DA Side frame R High voltage power supply PCB ASSY HVPS ground plate rear Left side ...

Page 314: ... 3a as holding down the cover and remove it from the Main body Fig 3 219 4 Unhook the HVPS flat cable from the two Hooks of the Main body and smooth out the crease Fig 3 220 Hook Main body 3b 3a HVPS flat cable cover Front side HVPS flat cable Hook Hook Main body 4a 4b 4a Front side ...

Page 315: ...n body Fig 3 221 Assembling Note Be careful that the Harness of the Main fan and Harness of the Develop release sensor PCB ASSY are connected Be careful not to damage the Wire cap Taptite bind B M4x12 Hook Hook Hook Hook Hook High voltage power supply PCB ASSY Main body Right side Harness of Develop Harness of Main fan release sensor PCB ASSY ...

Page 316: ...g and CHG 1 coil spring tend to come out of the Side frame R be careful not to lose them When assembling the High voltage power supply PCB ASSY make sure that the CHG 1 coil spring and CHG 2 coil spring properly come into contact with the electrodes If not Drum Error will occur High voltage power supply PCB ASSY CN2 CN3 CN1 HVPS flat cable Connector Connector 6 6 7 Right side Side frame R DCLN coi...

Page 317: ...Confidential 8 Pull out the HVPS flat cable from the Hole of the Side frame R Fig 3 224 Assembling Note Assembling the HVPS flat cable with its crease smoothed out Side frame R Hole HVPS flat cable Right side ...

Page 318: ...Harness routing Refer to HVPS Flat Cable Center Conductor 244 1 193 1 63 1 mm mm mm 45 45 45 840 mm 2 mm 45 301 1 mm 26 1 mm 56 1 mm 89 1 mm 131 1 mm 376 1 mm 2 mm Fold up flat cable along with the dotted line Fold down flat cable along with the solid line Supporting tape ...

Page 319: ... fan in the direction of the arrow 1a Fig 3 226 Harness routing Refer to Main Fan 8 68 Develop Release Sensor PCB ASSY 1 Release the Hook to remove the Develop release sensor PCB ASSY from the Side frame R Fig 3 227 Hook Side frame R Main fan Main fan 1b 1a Hook Hook Right side Hook Side frame R Develop release sensor PCB ASSY ...

Page 320: ... the two Taptite bind B M4x12 screws one Taptite bind S M3x5 screw one Taptite pan washer B M4x12 DA screw Release the Boss to remove the Cover plate from the Side frame R Fig 3 229 Main body Taptite bind B M4x12 Taptite bind B M4x12 Taptite pan washer M4x12 DA Taptite bind S M3x5 Boss Side frame R Cover plate ...

Page 321: ...e the two Hooks to remove the Wire cap from the Side frame R Fig 3 230 4 Pull out the Heater harness and Inlet harness ASSY from the Main body Fig 3 231 Hook Hook Side frame R Wire cap Inlet harness ASSY Heater harness Main body ...

Page 322: ... 8 Remove the six Taptite pan washer B M4x12 DA screws and two Taptite cup S M3x8 SR screws to remove the LVPS plate lower from the Main body Fig 3 233 Hook Hook Hook Hook Hook Side cover L Wire cover Wire cover Hook Hook Hook Hook Side cover R Wire cover Wire cover Taptite pan washer B M4x12 DA Main body LVPS FG harness Screw pan S P washer M3 5x6 LVPS plate lower Taptite cup S M3x8 SR Taptite pa...

Page 323: ...es to remove the Low voltage power supply PCB ASSY from the Main body 11 Disconnect the Connector CN101 from the Low voltage power supply PCB ASSY Fig 3 235 Harness routing Refer to Low voltage Power Supply PCB ASSY Low voltage power supply LVPS insulation sheet lower Boss Main body PCB ASSY Boss Main body Low voltage power supply PCB ASSY CN101 Connector 10 11 ...

Page 324: ...n exe file by double clicking it 4 The download utility FILEDG32 EXE Copy it into the temporary folder that has been created in the C drive 5 The Brother maintenance USB printer driver MaintenanceDriver zip If the maintenance printer driver is not installed copy it into the temporary folder created in the C drive and decompress and expand the file Refer to APPENDIX 3 INSTALLING THE MAINTENANCE PRI...

Page 325: ... the latest versions there is no need to install the firmware If one or both of them are not the latest versions make sure to install the latest firmware in the PCB s in accordance with 1 1 2 Installing the firmware using USB flash memory or 1 1 3 Installing the firmware using computer How to check firmware version 1 Hold down the Home key for about 5 seconds while the machine is in the ready stat...

Page 326: ...ng is displayed on the LCD press the OK key on the LCD Program updating Do not turn off is displayed on the LCD and installation is started During installation do not turn off the power of the machine 5 When the install is finished the machine automatically restarts 6 Repeat steps 3 to 5 to install necessary firmware 7 When all firmware installation has been completed remove the USB flash memory f...

Page 327: ...flash ROM is started 5 The backlight of the LCD is turned ON and OFF repeatedly during installation When the installation is completed the machine reboots and returns to the ready state Do not remove the USB cable nor turn OFF the power of the computer until the installation is completed 6 Turn OFF the power of the machine and repeat steps 4 to 5 to install necessary firmware 7 Turn OFF the power ...

Page 328: ...n Chapter 5 1 4 Setting the Serial Number Function code 80 Referring to 1 4 32 Display of device log information in Chapter 5 set the serial number The serial number can be also set using the service setting tool BrUsbSn exe The procedures are described below Procedures 1 Connect the computer to the machine with the USB cable 2 Double click the BrUsbsn exe file copied into the temporary folder to ...

Page 329: ...sections 1 6 to 1 9 in this chapter 1 6 Motor Reset Function code 57 Following the instructions provided in 1 4 19 Motor reset in Chapter 5 perform motor reset 1 7 Continuous Adjustments of Density and Registration Sensor Function code 73 Perform continuous adjustments of density and registration sensor in accordance with 1 4 28 Continuous adjustments of density and registration sensor in Chapter ...

Page 330: ...n code 73 Perform continuous adjustments of density and registration sensor in accordance with 1 4 28 Continuous adjustments of density and registration sensor in Chapter 5 Memo In the Continuous adjustments of density and registration sensor Function code 73 Sensitivity adjustment of density sensor Function code 72 Developing bias voltage correction Function code 83 and Adjustment of color regist...

Page 331: ...et of Irregular Power Supply Detection Counter The irregular power supply detection counter is counted up when the machine detects irregular power supply When the counter reaches the limit and the irregular power supply detection error is displayed replace the low voltage power supply PCB ASSY which may have been damaged by repeated irregular power supply and reset the irregular power supply detec...

Page 332: ...PLACE THE PROCESS DRIVE UNIT What to do when replacing the process drive unit Motor Reset Function code 57 4 1 Motor Reset Function code 57 Following the instructions provided in 1 4 19 Motor reset in Chapter 5 perform motor reset ...

Page 333: ...ustments of density and registration sensor in accordance with 1 4 28 Continuous adjustments of density and registration sensor in Chapter 5 Memo In the Continuous adjustments of density and registration sensor Function code 73 Sensitivity adjustment of density sensor Function code 72 Developing bias voltage correction Function code 83 and Adjustment of color registration Adjustment of inter color...

Page 334: ...sion Refer to 1 1 1 Checking firmware version in this chapter and check the version of the main firmware If the main firmware is not the latest version install the firmware 6 2 Acquisition of White Level Data Function code 55 Perform the acquisition of white level data in accordance with 1 4 18 Acquisition of white level data and setting of CIS scanning area in Chapter 5 Note If the firmware is no...

Page 335: ... Extract the copied file and execute BrUsbsn exe file by double clicking it 4 The download utility FILEDG32 EXE Copy it into the temporary folder that has been created in the C drive 5 The Brother maintenance USB printer driver MaintenanceDriver zip If the maintenance printer driver is not installed copy it into the temporary folder created in the C drive and decompress and expand the file Refer t...

Page 336: ...ready state connect the USB flash memory drive to the USB port on the front of the machine 3 When the machine recognizes the USB flash memory Select a Function is displayed on the LCD Press the Direct Print key on the LCD The files in the USB flash memory are displayed on the LCD 4 Select and press the file name you want to install When Press OK to start printing is displayed on the LCD press the ...

Page 337: ... machine reboots and returns to the ready state Do not remove the USB cable nor turn OFF the power of the computer until the installation is completed 6 Turn OFF the power of the machine and remove the USB cable 7 2 Adjustment of Touch Panel Function code 61 Perform adjustment of touch panel in accordance with 1 4 20 Adjustment of touch panel in Chapter 5 7 3 Operation Check of LCD Function code 1...

Page 338: ...ed periodical replacement parts Periodical replacement parts whose counter can be reset Function code 88 Fuser unit PF Kit 1 8 1 Counter Reset after Fuser Unit PF Kit 1 Replacement Function code 88 Following 1 4 36 Counter reset after fuser unit PF kit 1 replacement in Chapter 5 reset the counter of the desired periodical replacement parts ...

Page 339: ... space at the bottom of the LCD for about 2 seconds The following screen is displayed on the LCD 3 Press the 2 8 6 and 4 keys on the LCD in this order The following screen appears on the LCD and the machine enters the maintenance mode 4 To select one of the maintenance mode functions shown in P5 3 directly enter the function code that you want to use with the ten key pad Note To exit from the main...

Page 340: ... 72 77 80 82 87 88 and 91 Operating procedure 1 Hold down the Home key for about 5 seconds while the machine is in the ready state The following screen is displayed on the LCD 2 Hold down the blank space at the bottom of the LCD for about 2 seconds The following screen is displayed on the LCD 3 Press the 0 and keys on the LCD in this order The machine gets ready for the input of a function code En...

Page 341: ...t Color mode Improve Gray Color Switching of timing to execute Auto Registration Adjusting left end print start position on second side in duplex printing 2 sided printing model only 1 4 14 5 29 52 Set country language 1 4 15 5 32 53 Transfer of received fax data and log information 1 4 16 5 33 54 Fine adjustment of scan positions 1 4 17 5 35 55 Acquisition of white level data and setting of CIS s...

Page 342: ...play of device error codes 1 4 33 5 65 83 Developing bias voltage correction 1 4 34 5 66 87 Sending of communication log information to telephone line 1 4 35 5 67 88 Counter reset after fuser unit PF kit 1 replacement 1 4 36 5 68 91 EEPROM parameter initialization 1 4 1 5 5 95 Function unnecessary for maintenance work 99 Exit from the maintenance mode 1 4 37 5 68 ...

Page 343: ...unction code 91 Printer switch Counter information These will not be initialized These will not be initialized Error History MAC address Operation lock of the control panel password These will be initialized Secure Function Lock Telephone function registration Telephone book Worker switch These will be initialized User switches Items to be initialized when resetting to the factory default settings...

Page 344: ...g scanning the document the correct data for compensation cannot be printed out even if this operation is implemented without scanning the document The print result varies depending on whether implementing color scanning or black and white scanning immediately before this operating procedure Make sure the brightness level data you want to print and implement the operation below Note If there is no...

Page 345: ...5 7 Confidential Black and white scanning First side Front Fig 5 1 ...

Page 346: ...5 8 Confidential Black and white scanning Second side Back Fig 5 2 ...

Page 347: ...5 9 Confidential Color scanning First side Front Fig 5 3 ...

Page 348: ...5 10 Confidential Color scanning Second side Back Fig 5 4 ...

Page 349: ... 2 Press the 0 and 8 keys in this order in the initial state of the maintenance mode The machine displays ADF CHECK P on the LCD and ejects documents while counting the number of scanned pages indicates the current count of scanned pages 3 Press the Stop key to return the machine to the initial state of the maintenance mode Note Please instruct end users to perform this function if possible before...

Page 350: ...age loss Operating procedure 1 Press the 0 and 9 keys in this order in the initial state of the maintenance mode MAINTENANCE 09 is displayed on the LCD Printing of a monochrome image quality test pattern see the figure below is started If there is no paper in the paper tray the print job is canceled 2 When printing is finished the machine returns to the initial state of the maintenance mode Fig 5 ...

Page 351: ...05 1st dial tone and busy tone detection WSW06 Redial Pause key setting and 2nd dial tone detection WSW07 Dial tone setting 1 WSW08 Dial tone setting 2 WSW09 Protocol definition 1 WSW10 Protocol definition 2 WSW11 Busy tone setting WSW12 Signal detection condition setting WSW13 Modem setting WSW14 AUTO ANS facility setting WSW15 Redial facility setting WSW16 Function setting 1 WSW17 Function setti...

Page 352: ...ion setting 18 WSW53 Function setting 19 WSW54 Function setting 20 WSW55 Interval of time required for the developing bias voltage correction WSW56 Function setting 21 WSW57 Function setting 22 WSW58 Function setting 23 WSW59 Function setting 24 WSW60 Function setting 25 WSW61 Scanning light intensity to judge to be stable 1 WSW62 Scanning light intensity to judge to be stable 2 WSW63 Function set...

Page 353: ...de WSW73 Reserved Change of the setting is prohibited WSW74 ADF stop control WSW75 Paper ejecting distance of the switch back WSW76 The limited number of the documents in reverse for paper ejection of the one sided scanning from ADF WSW77 The limited number of the documents in reverse for paper ejection of the two sided from ADF WSW78 Recording stop function when the drum reaches the end of life W...

Page 354: ... the set details Operating procedure 1 Press the 1 key twice in the initial state of the maintenance mode PRINTING appears on the LCD and the CONFIGURATION LIST shown below is printed If there is no paper in the paper tray the print job is canceled 2 When printing is finished the machine returns to the initial state of the maintenance mode Fig 5 6 ...

Page 355: ...intenance mode 2 Each time you press the key the LCD cycles through the displays as shown below When you press the key the display on the LCD returns to the preceding one When you press the key with Display 7 shown on the LCD Display 1 appears 3 When the Cancel key is pressed the machine returns to the initial state of the maintenance mode regardless of the display status Fig 5 7 Display 1 Display...

Page 356: ...low The LCD shows the corresponding number in decimal notation each time a key is pressed Check that the displayed number is correct by referring to the figure below If the keys are pressed in the incorrect order the machine displays the INVALID OPERATE on the LCD Press the Stop key and then press the correct keys 3 After the last number key is pressed the machine returns to the initial state of t...

Page 357: ...is function This function checks if these two types of check sum information are matched each other When you press the SET key while ROM Check Sum is displayed check is automatically conducted for each ROM of each software part When the check sum is matched OK is displayed on the LCD When all ROMs result in OK ROM Check Sum OK is displayed at the end and the operation is finished When the check su...

Page 358: ...anual feed paper empty sensor Paper not detected detected TC Joint cover sensor Joint cover ASSY closed open RC Back cover sensor Back cover closed open PO Eject sensor Paper not detected detected RM Registration front sensor Paper not detected detected RA Registration rear sensor Paper not detected detected Note The appears on the LCD if the sensor is OFF The appears on the LCD if the parts are n...

Page 359: ...e maintenance mode Location of sensors Fig 5 10 Fig 5 11 Paper eject ASSY Paper feed unit Paper feed sensor Top cover sensor Back cover sensor Eject sensor Registration Registration Internal temperature sensor External temperature sensor External humidity sensor front sensor rear sensor Manual feed paper empty sensor Registration front rear manual feed sensor PCB High voltage power supply PCB ASSY...

Page 360: ... Press the 3 key twice in the initial state of the maintenance mode The wired LAN connection status described in the table below is displayed on the LCD 2 Press the Stop key to return the machine to the initial state of the maintenance mode LCD LAN connection status Active 100B FD 100B FD Active 100B HD 100B HD Active 10B FD 10B FD Active 10B HD 10B HD Inactive Not connected ...

Page 361: ...ars on the LCD 5 Press the Mono Start key The message Please wait appears on the LCD and back up operation of the machine information and user setting information etc is executed Note The backup and restore procedures refer to next page can also be used with the maintenance mode operation by end users However end uses are allowed to restore the user setting information Import PI only and not allow...

Page 362: ...d restore operation of the machine data user settings etc is executed 7 When the machine returns to the ready state and the message Select a Function appears on the LCD remove the USB flash memory and keep it in a safe place Note If any of the error messages listed below appears press the Stop key and the machine returns to the initial state of the maintenance mode Error Message Cause USB Mem used...

Page 363: ...esolution Resolution to print 300 600 1 200 dpi 600 Toner Save Switching of the Toner Save On Off Off Density Switching of the Density level 6 to 6 0 JB Can Time Setting of the time until the host time out at the Job Cancel 0 to 225 seconds 4 Sleep Time Setting of the time until enter the Sleep Mode 0 to 99 minutes 5 Page Protection Switching of the protection of the page memory Off Letter A4 Lega...

Page 364: ...RAP Switching of the auto CRLF at the print width On Off Off Auto Skip Switching of the Skip at the backend tip of the paper On Off On Left Margin Switching of the margin at the left end 0 to 145 columus 0 Right Margin Switching of the margin at the right end 10 to 155 columus 80 Top Margin Switching of the margin at the upper end 0 to 2 00 inches 0 5 Bottom Margin Switching of the margin at the b...

Page 365: ...t Set in the PCL Core There is not the influence of the memory management problem of the machine Emulation Configure the setting for the Emulation Change the setting of the Function Menu When the data includes the ENTER LANGUAGE the setting becomes effective And this setting is ignored Auto I F Time Configure the setting for the interface open time The function is in the PC Print When the PC Scan ...

Page 366: ...e Copy Fax cannot be turned ON OFF in this setting Auto LF Configure the setting for the auto line feed Auto CR Configure the setting for the auto Carriage Return Auto WRAP Configure the setting for the auto CRLF at the print width Auto Skip Configure the setting for the skip at the back end tip of the paper and add the blank space Left Margin Configure the setting for the column space at the left...

Page 367: ...ry time the device is connected to the computer To avoid this problem you can fix the return value of the USB No to 0 by setting USBNo ON is displayed at the end of the currently specified function in the LCD display Operating procedure 1 Press the 4 and 5 keys in this order in the initial state of the maintenance mode USBNo is displayed on the LCD 2 Press the Mono Start key When you press the or ...

Page 368: ...color or the gray color is uneven upon printing is displayed at the end of the currently specified function in the LCD display Operating procedure 1 Press the 4 and 5 keys in this order in the initial state of the maintenance mode USBNo is displayed on the LCD 2 Press the or key to display DP ImpGray and then press the Mono Start key 3 Press the or key to select DP ImpGray ON or DP ImpGray OFF 4 P...

Page 369: ...nction is to adjust the left end print start position on the second side in the left and right direction if it is displaced in duplex printing The adjustable range is 100 to 750 unit 300 dpi The minus direction means the left direction Operating procedure 1 Press the 4 and 5 keys in this order in the initial state of the maintenance mode USBNo is displayed on the LCD 2 Press the or key to display ...

Page 370: ...d country is displayed in its language for confirmation 3 Press Yes if the displayed country is correct The EEPROM is now customized and the machine returns to the ready state Note This function is applicable to France and surrounding countries Pan Nordic East Europe Oceania Iberia South Africa Turkey and Gulf areas only Note The country name indicated on the LCD varies depending on the area code ...

Page 371: ...he 4 key 4 COM LIST NEW is displayed on the LCD To transfer the communication list for last three errors press the 5 key 5 COM LIST ERR3 is displayed on the LCD To transfer the maintenance information the list in Function code 77 press the 6 key 6 MNT77 LIST is displayed on the LCD 2 With the 2 ACTIVITY 3 DOCUMENTS 4 COM LIST NEW 5 COM LIST ERR3 or 6 MNT77 LIST being displayed press the SET key EN...

Page 372: ...nder equipment FAX number of the sender equipment Telephone number of the sender equipment Transfer start date Model code Boot ROM info ROM info Serial number 8CE 417 12 2013 Job number Total number of pages transferred Station ID registered in the sender equipment FAX number of the sender equipment Telephone number of the sender equipment Error codes ...

Page 373: ...of the ADF press key and if you want to adjust that of the document glass press key 3 Duplex scanning models The FRONT BACK will appear on the LCD after two seconds Select one of them that you want to adjust the start position Press the key for the first side and press the key for the second side Single side scanning models Go to step 4 4 The current correction value for the scanning position will...

Page 374: ... Mono Start key SCANNER AREA SET is displayed on the LCD and the white level data is acquired 3 After a few seconds the machine saves the correction of the white level data scanning width in the EEPROM and returns to the initial state of the maintenance mode If an error is detected during this operation SCANNER ERROR appears on the LCD For single side scanning model the message SCANNER ERROR appea...

Page 375: ...eds to be reset This function allows you to reset the motor identification result Operating procedure 1 Press the 5 and 7 keys in this order in the initial state of the maintenance mode RESET MOTOR is displayed on the LCD 2 When you press the Mono Start key the motor identification result is reset and PLZ POWER OFF ON is displayed on the LCD 3 Turn OFF the power switch of the machine Note When the...

Page 376: ...ustment procedure requires a stylus with a thin tip A commercially available stylus designed for electronic dictionaries or personal digital assistance PDA can be used If you do not have it on hand order the STYLUS from the Brother s parts list Note Do not use tools other than a pen designed for touch panels Especially never use a pointed one e g a screwdriver Using such a tool damages the touch p...

Page 377: ...e maintenance mode Note If an error occurs after executing Maintenance mode 66 upgrade the firmware to the latest one Refer to 1 1 Installing the Firmware in Chapter 4 After upgrading the firmware execute Maintenance mode 66 again Function Description LCD Adjustment of inter color position alignment without registration sensor calibration auto Automatically correct misregistration between colors t...

Page 378: ...or key to display the identified numeric value 4 Press the SET key and enter each numeric value of the patterns 2 to 9 in the same way 5 When you enter the numeric value of the pattern 9 Yellow Right COMPLETED is displayed on the LCD 6 Press the Cancel key to return the machine to the initial state of the maintenance mode Adjustment of inter color position alignment including registration sensor c...

Page 379: ...he Adjustment of inter color position alignment auto again If the error recurs clean the belt unit and the drum units of all four colors and then perform the adjustment again If the error still recurs replace the belt unit and the drum units of all four colors TONER EMPTY Replace the empty toner cartridge and press the Mono Start key to clear the error Perform the Adjustment of inter color positio...

Page 380: ...ss the or key to select the desired number of pages to be printed 11 Press the SET key SELECT 1P JOB is displayed on the LCD Intermittent pattern printing only 12 Referring to the table on the next page Number of pages per job press the or key to select the desired number of pages per job Intermittent pattern printing only 13 Press the SET key PAPER FEED TEST is displayed on the LCD and the test p...

Page 381: ...Letter size LCD Description SELECT PLAIN Plain paper Except for China Plain paper Thick for China SELECT THICK Thick paper SELECT THIN Plain paper Thin Except for China Plain paper for China LCD Description SELECT TRAY1 SX One sided printing from paper tray SELECT MF SX One sided printing from manual feed slot SELECT TRAY1 DX Two sided printing from paper tray SELECT MF DX Two sided printing from ...

Page 382: ...tern Fig 5 16 SELECT K 100 SELECT C 100 SELECT M 100 SELECT Y 100 SELECT W 100 SELECT R 100 SELECT G 100 SELECT B 100 SELECT KCMY1 SELECT KCMY5 SELECT Lattice SELECT Total When Print type is SX SELECT Total When Print type is DX ...

Page 383: ...n the table below and press the Mono Start key indicates the toner color Y M or C of which cartridge became empty Memo You can check the LED for scratches and dirt by performing print test Refer to 1 4 22 Print test in this chapter Note When printing fails a relevant error is displayed on the LCD When the error factors are removed and the Mono Start key is pressed the machine automatically recover...

Page 384: ...5 46 Confidential LED test pattern M68_L Fig 5 17 ...

Page 385: ... the Mono Start key 4 Press the Stop key to return the machine to the initial state of the maintenance mode indicates the toner color Y M or C of which cartridge became empty Fig 5 18 Note If printing fails the following error indications are displayed and printing is cancelled To print again refer to the measures in the table below and remove the cause of the error Then press the Mono Start key W...

Page 386: ...maintenance mode indicates the toner color Y M or C of which cartridge became empty Fig 5 19 Note If printing fails the following error indications are displayed and printing is cancelled To print again refer to the measures in the table below and remove the cause of the error Then press the Mono Start key WAKU DX is displayed on the LCD and press the Mono Start key PRINTING is displayed on the LC...

Page 387: ...SET key SELECT SX is displayed on the LCD 8 Referring to the table on the next page Print type press the or key to select the desired print type 9 Press the SET key SELECT 1PAGE is displayed on the LCD 10 Referring to the table on the next page Number of pages to be printed press the or key to select the desired number of pages to be printed 11 Press the SET key PRINTING is displayed on the LCD an...

Page 388: ...na Plain paper Thick for China SELECT THICK Thick paper SELECT THIN Plain paper Thin Except for China Plain paper for China LCD Description SELECT SX One sided printing from paper tray SELECT DX Two sided printing from paper tray LCD Description SELECT 1PAGE One page printing SELECT CONTINUE Continuous printing LCD Description TONER EMPTY Replace the empty toner cartridge Cover is Open Close the j...

Page 389: ...5 51 Confidential Color test pattern Fig 5 20 2D3S YCMK__A 2D3S M 2D3S K 2D3S C 2D3S Y 2D3S MCYK ...

Page 390: ...ption dens_l_drk_err Check the harness connection of the eject sensor PCB and reconnect it Replace the registration mark L PCB ASSY Replace the main PCB ASSY belt_err Replace the belt unit Replace the waste toner box Replace the registration mark L PCB ASSY Replace the main PCB ASSY dens_pat_err dens_calc_err Check if the toner cartridges and drum units are set in the correct order of colors Repla...

Page 391: ...justment of color registration Adjustment of inter color position alignment including registration sensor calibration Function code 66 LCD PLS WAIT 66 1 4 When all operations are completed COMP is displayed on the LCD Pressing the key and Stop key in this order and the machine returns to the initial state of the maintenance mode Note If each adjustment fails ERROR is displayed on the LCD and the a...

Page 392: ... returns to the initial state of the maintenance mode without saving the country code Setting by country code list Note If there is a pause of more than one minute the machine will automatically return to the initial state of the maintenance mode Country DCP 9020CDN DCP 9020CDW MFC 9130CW MFC 9140CDN MFC 9330CDW MFC 9340CDW U S A 0201 0401 0501 Canada 0202 0402 0502 Brazil 0042 0442 Argentina 0036...

Page 393: ... 1104 0388 0382 0588 0582 Croatia 1104 0388 0381 0588 0581 Others 1104 0388 0350 0588 0550 Gulf South Africa 0374 0324 0474 0424 Turkey 0374 0325 0474 0425 Others 0374 0341 0474 0441 Singapore 0340 0440 Philippines 0321 0421 Taiwan 0423 Korea 0340 India 0340 Oceania Australia 0356 0306 0406 0556 0506 New Zealand 0356 0327 0556 0527 China 0020 0120 0220 Note The above information is as of May 2013 ...

Page 394: ...of all maintenance information including machine coverage information Operating procedure 1 Press the 7 key twice in the initial state of the maintenance mode Maintenance information starts to be printed 2 When printing is finished the machine returns to the initial state of the maintenance mode Maintenance information Fig 5 21 ...

Page 395: ... printed PC pages 40 Total printed list fax pages 41 Accumulated average coverage 42 Average coverage Current toner 43 Average coverage Previous used toner 20 Main PCB inspection log High voltage inspection log Number of electric discharge errors Number of fuser unit errors Process execution state Function code 1 to 64 44 Drum page count Rotations of the drum 45 Rotations of the developer roller C...

Page 396: ...ep mode 54 Developing bias voltage value 4 58 Temperature and humidity under which Function code 77 is executed Maximum and minimum temperature and humidity 5 55 Engine sensor log Not necessary for maintenance work 56 Status log Not necessary for maintenance work 59 Number of times that the power is turned ON Total power distribution time 57 Detailed code of machine error AF home position detectio...

Page 397: ... at the rotating speed of 100 If the main fan is faulty NG is displayed on the LCD 2 Press the Mono Start key F 50 is displayed on the LCD and the main fan operates at the rotating speed of 50 3 Press the Mono Start key F0 is displayed on the LCD and the main fan stops 4 Press the Mono Start key F 100 is displayed on the LCD and the machine returns to the state described in step 1 Every time the M...

Page 398: ...om the number of developer rotations YTN_ERM 78 Amount of remaining yellow toner estimated from coverage YTN_RRM 67 Amount of remaining yellow toner estimated from the number of developer rotations KTN_ERM 87 Amount of remaining black toner estimated from coverage KTN_RRM 67 Amount of remaining black toner estimated from the number of developer rotations CDRM_PG 00000000 Number of pages printed wi...

Page 399: ...DRUM 00000000 Number of magenta drum rotations YDRUM 00000000 Number of yellow drum rotations KDRUM 00000000 Number of black drum rotations CTN_RND 00000000 Number of cyan developer roller rotations MTN_RND 00000000 Number of magenta developer roller rotations YTN_RND 00000000 Number of yellow developer roller rotations KTN_RND 00000000 Number of black developer roller rotations MN_PG 00000000 Num...

Page 400: ...that the magenta drum unit has been replaced YDRM_CH 0000 4 Number of times that the yellow drum unit has been replaced KDRM_CH 0000 4 Number of times that the black drum unit has been replaced WTNR_CH 0000 4 Number of times that the waste toner box has been replaced BELT_CH 0000 Number of times that the belt unit has been replaced FUSR_CH 0000 4 Number of times that the fuser unit has been replac...

Page 401: ...f pages scanned in one sided scanning with the ADF ADDX_PG 00000000 Number of pages scanned in two sided scanning with the ADF FB_PG 000000 Number of pages scanned with the document glass ADSX_JAM 000000 Number of jams that occurred at one sided scanning with the ADF ADDX_JAM 000000 Number of jams that occurred at two sided scanning with the ADF COMERR Last communication error code Past 3 error hi...

Page 402: ...ys the number of times that each part has been replaced the indication changes to DATE_XX XX represents the shortened characters for each part and represents the date on which the last replacement was made 5 If you press the SET key while the engine error is displayed the indication on the LCD changes into TM BT TM represents the period of time minute that has passed after the last occurrence of e...

Page 403: ... on the LCD Operating procedure 1 Press the 8 and 2 keys in this order in the initial state of the maintenance mode MACHINE ERR XXXX is displayed on the LCD 2 Press the Stop key to return the machine to the initial state of the maintenance mode Note If multiple errors occur error display changes each time when you press the Mono Start key ...

Page 404: ... density sensor Function Code 72 in this chapter has been done more than once When performing this maintenance mode 83 after replacing the main PCB ASSY make sure to perform the 1 4 27 Sensitivity adjustment of density sensor Function Code 72 first Error message Measure FAILED DEVBIAS Remove the error factors with the following operations and press the Mono Start key to clear the error Re insert t...

Page 405: ...lyze the problem current on a user s machine Operating procedure Service side 1 Make a call from the machine on the service side to the user s machine User side 1 Hold down the Home key in the ready state until the display on the LCD changes 2 Hold down the blank box at the bottom on the LCD until the display on the LCD changes 3 Press the 0 8 and 7 keys in this order SENDING P 01 is displayed on ...

Page 406: ...et Fuser Unit Reset PF Kit T1 3 Press the SET key and OK is displayed on the LCD indicates the selected consumable part 4 Pressing the SET key causes the counter of the selected consumable part to be reset and Reset is displayed on the LCD indicates the consumable part whose counter is reset 5 Press the Stop key to return the machine to the initial state of the maintenance mode 1 4 37 Exit from th...

Page 407: ...d on the LCD Referring to the following list select the toner cartridge you want to reset 5 When Reset Yes No appears on the LCD press Yes key Accepted appears on the LCD and the manual reset of the toner cartridge is performed When the machine finishes resetting the toner cartridge it returns to Reset Menu 6 Press the Home key to return the machine to the ready state 7 Close the joint cover ASSY ...

Page 408: ...the LCD 4 Press Parts Life on the LCD 5 When the list of consumable parts appears on the LCD touch any key about 4 cm from the Home key on the right side that have stayed OFF on the control panel to illuminate the key Hold it down for 5 seconds or longer 6 Reset Menu is displayed on the LCD Select the consumable part you want to reset Consumable parts are displayed on the LCD Drum Black BK Drum Cy...

Page 409: ...1 Press Menu on the LCD in the ready state 2 Press All Settings on the LCD 3 Press Initial Setup on the LCD 4 Press Reset on the LCD 5 Press All Settings on the LCD 6 Once Reset All Settings Yes No appears on the LCD press the Yes key 7 Reboot OK Press Yes for 2 sedonds to confirm will appear on the LCD Press Yes for 2 seconds or longer the user settings are cleared and the machine returns to the ...

Page 410: ...maintenance mode Function code 99 in the maintenance mode WARNING First of all turn OFF the power of the machine to cool the fuser unit When clearing an error be sure that the fuser unit is cooled down sufficiently If an error is cleared while the fuser unit is not cooled down there is a possibility that the unit might be unable to be repaired ...

Page 411: ...ut from an external device like print data from a computer or when a key on the control panel is pressed joint cover ASSY is opened closed or paper is loaded into the manual feed slot Setting of ON OFF of the deep sleep function Operating procedure 1 Press Menu on the LCD in the ready state 2 Press ALL Settings on the LCD 3 Press General Setup on the LCD 4 Press Ecology on the LCD 5 When the Sleep...

Page 412: ...about 5 seconds while the machine is in the ready state The following screen is displayed on the LCD 2 Press the ROM Version The following screen is displayed on the LCD The main firmware version is shown on the second line and the panel firmware version on the third line 3 Press the Cancel key twice to return the machine to the ready state ...

Page 413: ...8 9 12 THM_FUSER_E CN10 13 10 7 6 5 4 3 2 1 Eject sensor PCB RESETN GND VDOCLK_P VDOCLK_N GND VDODATA0_P VDODATA0_N GND VDODATA1_P VDODATA1_N GND VDODATA2_P 11 8 9 12 13 VDODATA2_N CN22 36 14 GND 15 VDODATA3_P 16 VDODATA3_N 17 GND 18 VSYNCN 19 GND 20 REQDATA0 21 GND 22 REQDATA1 23 GND 24 REQDATA2 25 GND 26 REQDATA3 27 GND 28 KSCL 29 GND 30 KSDA 31 GND 32 HEADEN 33 PGND 34 PGND 35 24V 24V 10 7 6 5 ...

Page 414: ...at cables check that each cable is not damaged at its end or shortcircuited When connecting flat cables do not insert them at an angle After insertion check that the cables are not at an angle When connecting or disconnecting cable harness hold the connector body not the cables If the connector has a lock release the connector lock first to release it After a repair check not only the repaired por...

Page 415: ...NT PARTS 2 1 Procedures to Replace Periodical Replacement Parts Preparation Prior to proceeding with the disassembly procedure 1 Unplug the AC cord the USB cable if connected and the LAN cable if connected 2 Remove the Paper tray Paper tray ...

Page 416: ...1 1 Release the two Hooks of the Separation pad holder ASSY from the Paper tray 2 Remove the two Pins to remove the Separation pad holder ASSY from the Paper tray Fig 7 1 Hook Hook Paper tray Separation pad holder ASSY Pin Pin 2a 2b ...

Page 417: ...fit A of the Separation pad spring into the Boss of the Paper tray Fit the two Pins and two Hooks of the Separation pad holder ASSY into the Paper tray Note Be careful not to lose the Separation pad spring Separation pad holder ASSY Hook Hook Paper tray Pin Pin A Separation pad spring Boss Separation pad holder ASSY Boss Separation pad spring ...

Page 418: ...older ASSY in the direction of the arrow 5 to remove it from the C of the Paper feed unit 6 Slide the Roller holder ASSY in the direction of the arrow 6a and 6b in this order to remove it from the Paper feed unit Fig 7 5 B 4b A Lift arm A Lift arm Paper feed unit Roller holder ASSY 4a B 4a Paper feed unit Front side 4b Roller holder ASSY 5 C Paper feed unit 6b Roller holder ASSY Roller holder ASSY...

Page 419: ... Confidential Fig 7 6 Assembling Note Align the Hole of the Paper feed unit to the Shaft of the Roller holder ASSY and insert it into the Hole Roller holder ASSY Paper feed unit Hole Paper feed unit Shaft ...

Page 420: ... Fig App 1 1 Fig App 1 2 Serial number Product identification code Serial number 6 digit Manufacturing factory No Year of manufacture 3 2013 4 2014 Month of manufacture A January B February C March D April E May F June G July H August J September K October L November M December Serial number label ...

Page 421: ...ocedure 1 Press Menu on the LCD in the ready state 2 Press ALL Settings on the LCD 3 Press Initial Setup on the LCD 4 Press Reset on the LCD 5 Press ALL Settings on the LCD 6 The message Reset All Settings Yes No displayed on the LCD Press Yes 7 The message Reboot OK Press Yes for 2 seconds to confirm is displayed on the LCD Hold down Yes for two seconds or longer to clear the user settings and re...

Page 422: ...that connects the machine with your computer 2 Turn on your computer 3 Turn on the power switch of the machine 4 Enter the maintenance mode Refer to 1 1 How to Enter the Maintenance Mode in Chapter 5 5 Connect the machine to your computer using a USB cable The following window appears 6 The following screen appears indicating the detection of new hardware device by the system Select No not this ti...

Page 423: ...App 3 2 Confidential 7 Select Install the software automatically Recommended and click Next 8 Alert warning message of WHQL appears Click Continue Anyway to proceed ...

Page 424: ... Confidential 9 Repeat steps 6 to 8 three times Installation is completed 10 If the Brother Maintenance USB Printer driver is successfully installed the following message screen appears Click Finish to return ...

Page 425: ...nfidential Note In order to check whether the printer driver is successfully installed click Start Settings Printers to select the Printers window Then check that the Brother Maintenance USB Printer icon is shown ...

Page 426: ...ctrical outlet Disconnect the USB cable that connects the machine with your computer 2 Turn on your computer 3 Double click Setup exe inside the Brother Maintenance USB Printer folder that was saved in a temporary folder The following screen appears Click the Next button The following screen is displayed during installation ...

Page 427: ...ine into an electrical outlet 6 Enter the maintenance mode Refer to 1 1 How to Enter the Maintenance Mode in Chapter 5 7 Connect the machine to your computer using a USB cable Windows Vista Windows 7 The following window is displayed during installation If the following window appears the installation is completed ...

Page 428: ...tings Control Panel Select Update Driver Software from the pull down menu of Brother BHL2 Maintenance in Other devices When the following screen appears click Search automatically for updated driver software Select Brother Maintenance USB Printer and click Next ...

Page 429: ...App 3 8 Confidential When the following screen appears click Close to close the screen ...

Reviews: