4-6
Confidential
(5) In "Port" on the BrUsbSn screen, select the port assigned to Brother Maintenance USB
Printer.
If the port number is unknown, follow steps below.
1) Click "Start" "Settings" "Printers". The Printers screen appears.
2) Right-click the Brother Maintenance USB Printer icon.
3) Click "Properties". The Brother Maintenance USB Printer Properties screen appears.
4) Click the Ports tab. The port for Brother Maintenance USB Printer is displayed.
(6) Enter the serial number (the fifteen digits) of the machine into the box on the "Serial No".
(7) Click the
OK
button, then confirmation screen appears. Check that the serial number and
click the
Yes
button.
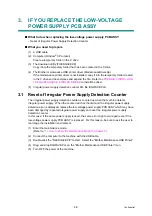
1.5 Restore Machine Information (Function code 41)
"1.4.12 Backup of machine information" in Chapter 5
, restore the backup data of
the machine information. If the data is successfully restored, the operations described in
sections 1.6 to 1.9 in this chapter are not necessary. If backup data is unavailable or you fail to
restore backup data, proceed to the operations described in sections 1.6 to 1.9 in this chapter.
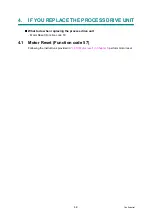
1.6 Motor Reset (Function code 57)
Following the instructions provided in
"1.4.19 Motor reset" in Chapter 5
, perform motor reset.
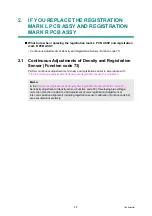
1.7 Continuous Adjustments of Density and Registration
Sensor (Function code 73)
Perform continuous adjustments of density and registration sensor in accordance with
"1.4.28 Continuous adjustments of density and registration sensor" in Chapter 5
.
1.8 Acquisition of White Level Data (Function code 55)
Perform the acquisition of white level data in accordance with
"1.4.18 Acquisition of white level
data and setting of CIS scanning area" in Chapter 5
1.9 Adjustment of Touch Panel (Function code 61)
Perform adjustment of touch panel in accordance with
"1.4.20 Adjustment of touch panel" in
Memo:
APPENDIX 1 SERIAL NUMBERING SYSTEM
to know how to read the serial
number label of the machine.
Memo:
Continuous adjustments of density and registration sensor (Function code 73)
Sensitivity adjustment of density sensor (Function code 72), Developing bias voltage
correction (Function code 83), and Adjustment of color registration (Adjustment of
inter-color position alignment) including registration sensor calibration (Function code 66)
are executed consecutively.
Summary of Contents for DCP-9020CDN
Page 47: ...2 8 Confidential 2 2 2 Scanning part Fig 2 4 ...
Page 89: ...2 50 Confidential Electrodes location of main body Fig 2 7 ...
Page 172: ...3 9 Confidential EM2 0 MOLYKOTE EM D110 2 0 mm dia ball EM2 0 Back cover ASSY Back cover ASSY ...
Page 345: ...5 7 Confidential Black and white scanning First side Front Fig 5 1 ...
Page 346: ...5 8 Confidential Black and white scanning Second side Back Fig 5 2 ...
Page 347: ...5 9 Confidential Color scanning First side Front Fig 5 3 ...
Page 348: ...5 10 Confidential Color scanning Second side Back Fig 5 4 ...
Page 384: ...5 46 Confidential LED test pattern M68_L Fig 5 17 ...
Page 429: ...App 3 8 Confidential When the following screen appears click Close to close the screen ...

