5-66
Confidential
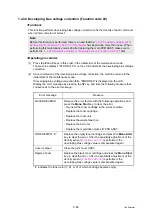
1.4.34 Developing bias voltage correction (Function code 83)
<Function>
This function performs developing bias voltage correction to fix the density of each color toner
when printed color is not correct.
<Operating procedure>
(1) Press the
8
and
3
keys in this order in the initial state of the maintenance mode.
The machine displays "PLS WAIT 83" on the LCD and starts the developing bias voltage
correction.
(2) Upon completion of the developing bias voltage correction, the machine returns to the
initial state of the maintenance mode.
If developing bias voltage correction fails, "ERROR 83" is displayed on the LCD.
Display the error message by pressing the
key, and take the following measure that
corresponds to the error message.
* # indicates the toner color (Y, M, or C) of which cartridge became empty.
Note:
Before this function is performed, there is a need that the
"1.4.27 Sensitivity adjustment of
density sensor (Function Code 72)" in this chapter
has been done more than once. When
performing this maintenance mode 83 after replacing the main PCB ASSY, make sure to
perform the
"1.4.27 Sensitivity adjustment of density sensor (Function Code 72)"
first.
Error message
Measure
FAILED DEVBIAS
Remove the error factors with the following operations and
press the
Mono Start
key to clear the error.
- Re-insert the toner cartridge in the correct position.
- Replace the toner cartridge.
- Replace the drum unit.
- Replace the waste toner box.
- Replace the belt unit.
- Replace the registration mark L/R PCB ASSY.
TONER EMPTY #
*
Replace the empty toner cartridge and press the
Mono Start
key to clear the error. After the sensitivity adjustment of the
density sensor (
) is performed, the
developing bias voltage value is compensated again.
Cover is Open
Close the joint cover ASSY.
Replace Toner
Replace the black toner cartridge and press the
Mono Start
key to clear the error. After the sensitivity adjustment of the
density sensor (
) is performed, the
developing bias voltage value is compensated again.
Summary of Contents for DCP-9020CDN
Page 47: ...2 8 Confidential 2 2 2 Scanning part Fig 2 4 ...
Page 89: ...2 50 Confidential Electrodes location of main body Fig 2 7 ...
Page 172: ...3 9 Confidential EM2 0 MOLYKOTE EM D110 2 0 mm dia ball EM2 0 Back cover ASSY Back cover ASSY ...
Page 345: ...5 7 Confidential Black and white scanning First side Front Fig 5 1 ...
Page 346: ...5 8 Confidential Black and white scanning Second side Back Fig 5 2 ...
Page 347: ...5 9 Confidential Color scanning First side Front Fig 5 3 ...
Page 348: ...5 10 Confidential Color scanning Second side Back Fig 5 4 ...
Page 384: ...5 46 Confidential LED test pattern M68_L Fig 5 17 ...
Page 429: ...App 3 8 Confidential When the following screen appears click Close to close the screen ...


