4-8
Confidential
3.
IF YOU REPLACE THE LOW-VOLTAGE
POWER SUPPLY PCB ASSY
■
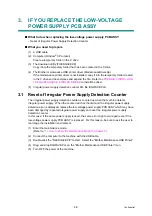
What to do when replacing the low-voltage power supply PCB ASSY
- Reset of Irregular Power Supply Detection Counter
■
What you need to prepare
(1) A USB cable
(2) Computer (Window
®
XP or later)
Create a temporary folder in the C drive.
(3) The download utility (FILEDG32.EXE)
Copy it into the temporary folder that has been created in the C drive.
(4) The Brother maintenance USB printer driver (MaintenanceDriver.zip)
If the maintenance printer driver is not installed, copy it into the temporary folder created
in the C drive and decompress and expand the file. Refer to
THE MAINTENANCE PRINTER DRIVER
to install the driver.
(5) Irregular power supply detection counter PJL file (SQWAVE.PJL).
3.1 Reset of Irregular Power Supply Detection Counter
The irregular power supply detection counter is counted up when the machine detects
irregular power supply. When the counter reaches the limit and the irregular power supply
detection error is displayed, replace the low-voltage power supply PCB ASSY which may have
been damaged by repeated irregular power supply and reset the irregular power supply
detection counter.
In this case, if the same power supply is used, the same error might occur again even if the
low-voltage power supply PCB ASSY is replaced. For this reason, be sure to ask the user to
rearrange the installation environment.
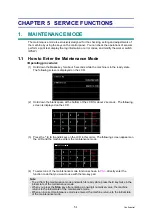
(1) Enter the maintenance mode.
(Refer to
"1.1 How to Enter the Maintenance Mode" in chapter 5
(2) Connect the computer to the machine with the USB cable.
(3) Double-click the "FILEDG32.EXE" to start. Select the "Brother Maintenance USB Printer".
(4) Drag and drop SQWAVE.PJL on the "Brother Maintenance USB Printer" icon.
(5) Turn OFF the power of the machine.
Summary of Contents for DCP-9020CDN
Page 47: ...2 8 Confidential 2 2 2 Scanning part Fig 2 4 ...
Page 89: ...2 50 Confidential Electrodes location of main body Fig 2 7 ...
Page 172: ...3 9 Confidential EM2 0 MOLYKOTE EM D110 2 0 mm dia ball EM2 0 Back cover ASSY Back cover ASSY ...
Page 345: ...5 7 Confidential Black and white scanning First side Front Fig 5 1 ...
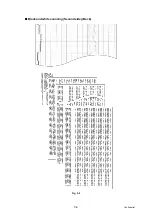
Page 346: ...5 8 Confidential Black and white scanning Second side Back Fig 5 2 ...
Page 347: ...5 9 Confidential Color scanning First side Front Fig 5 3 ...
Page 348: ...5 10 Confidential Color scanning Second side Back Fig 5 4 ...
Page 384: ...5 46 Confidential LED test pattern M68_L Fig 5 17 ...
Page 429: ...App 3 8 Confidential When the following screen appears click Close to close the screen ...


