Confidential
App. 2-1
APPENDIX 2 DELETION OF PERSONAL INFORMATION
The personal information in the machine is recorded in the EEPROM on the main PCB. It
cannot be deleted all by a single operation. Use Function code 01 in the maintenance mode,
unplug the AC cord from the electrical outlet, and disconnect the backup battery.
Operating Procedure
[ 1 ] Using Function code 01
Using Function code 01 (EEPROM Parameter Initialization) in the maintenance mode
deletes the following data that have been recorded in the EEPROM on the main PCB:
- Activity report
- Station ID data
- Outside line number
- One-touch dialing
- Speed dialing
- Group dialing
- Call transfer data
<Operating Procedure>
(1) Press
the
Menu
and
Black Start
buttons in this order. Next press the button
four times to make the machine enter the maintenance mode.
TIP:
FAX models equipped with a numerical keypad can enter the maintenance mode
in the same way as conventional models; that is, by pressing the
Menu
,
*
,
2
,
8
,
6
and
4
buttons in this order.
(2) Press
the
0
and
1
buttons in this order in the initial stage of the maintenance
mode.
Parameter initialization starts and the “PARAMETER INIT” appears on the LCD.
(3) Upon completion of parameter initialization, the machine beeps for one second
and returns to the initial stage of the maintenance mode.
[ 2 ] Unplugging the AC cord from the electrical outlet and disconnecting the backup
battery
Unplugging the AC cord from the electrical outlet and disconnecting the backup battery
deletes the Caller ID list, fax data received into memory, transmission verification report
(for image), broadcasting report and batch transmission data (in the memory).
<Operating Procedure>
(1) Unplug the AC cord from the electrical outlet.
(2) For models with backup battery, disconnect the backup battery harness from the
main PCB.
(3) Leave the machine for approx. 24 hours.
Summary of Contents for DCP-9040CN
Page 309: ...Confidential 4 5 8 Alert warning message of WHQL appears Click Continue Anyway to proceed ...
Page 325: ...Confidential 5 6 Color scanning Fig 5 2 ...
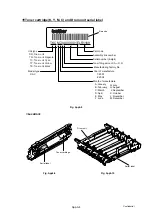
Page 342: ...Confidential 5 23 Cover page sample Fig 5 13 End page sample Fig 5 14 ...
Page 365: ...Confidential 6 2 Charge High voltage Power Supply PCB Circuit Diagram 2 4 ...
Page 366: ...Confidential 6 3 Charge High voltage Power Supply PCB Circuit Diagram 3 4 ...
Page 367: ...Confidential 6 4 Charge High voltage Power Supply PCB Circuit Diagram 4 4 ...
Page 368: ...Confidential 6 5 Transfer High voltage Power Supply PCB Circuit Diagram 1 2 ...
Page 369: ...Confidential 6 6 Transfer High voltage Power Supply PCB Circuit Diagram 2 2 ...
Page 370: ...Confidential 6 7 Low voltage Power Supply PCB Circuit Diagram 100V ...
Page 371: ...Confidential 6 8 Low voltage Power Supply PCB Circuit Diagram 200V ...
Page 373: ...Confidential 6 10 Filter PCB Circuit Diagram ...

