


Telephone and External devices
41
7
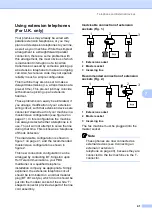
Using extension telephones
(For U.K. only)
7
Your premises may already be wired with
parallel extension telephones, or you may
plan to add extension telephones to your line,
as well as your machine. While the simplest
arrangement is a straightforward parallel
connection, there are some problems with
this arrangement, the most obvious of which
is inadvertent interruption of a facsimile
transmission caused by someone picking up
an extension telephone to make an outgoing
call. Also, fax receive code may not operate
reliably in such a simple configuration.
This machine may also be set to make a
delayed transmission (i.e. a transmission at a
pre-set time). This pre-set job may coincide
with someone picking up an extension
handset.
These problems can easily be eliminated, if
you arrange modification of your extension
wiring circuit, such that extension devices are
connected ‘downstream’ of your machine in a
master/slave configuration (see figure 2 on
page 41). In this configuration the machine
can always detect whether a telephone is in
use. Thus it will not attempt to seize the line
during that time. This is known as ‘telephone
off-hook detection.’
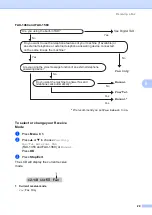
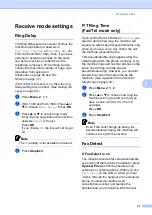
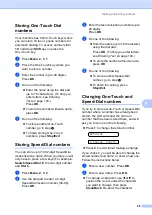
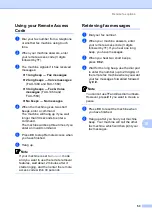
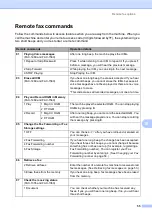
The inadvisable configuration is shown in
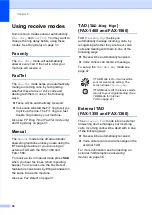
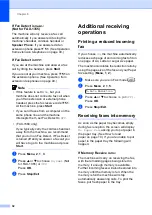
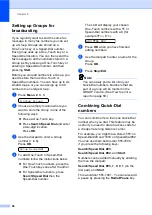
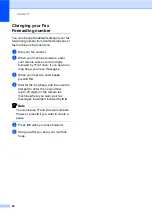
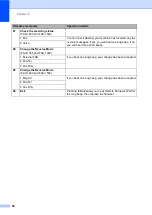
figure 1 on page 41, and the recommended
master/slave configuration is shown in
figure 2.
This new connection configuration can be
arranged by contacting BT, Kingston upon
Hull Telecommunications, your PBX
maintainer or a qualified telephone
installation company as appropriate. Simply
explained, the extension telephone circuit
should be terminated on a normal modular
plug (BT 431A style), which in turn should be
put into the modular socket of the white ‘T’-
shaped connector provided as part of the line
cord assembly.
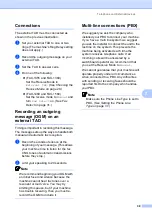
Inadvisable connection of extension
sockets (Fig. 1.)
7
1 Extension socket
2 Master socket
3 Incoming line
Recommended connection of extension
sockets (Fig. 2.)
7
1 Extension socket
2 Master socket
3 Incoming line
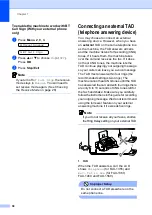
The fax machine must be plugged into the
master socket.
Note
These phones are now connected as
external devices (see
external or extension
telephone
on page 40), because they are
connected to the fax machine via the T-
connector.
1
1
2
3
1
1
2
3
Summary of Contents for FAX-1355
Page 1: ...USER S GUIDE FAX 1355 FAX 1360 FAX 1460 FAX 1560 ...
Page 4: ...ii EC Declaration of Conformity under the R TTE Directive ...
Page 14: ...Chapter 1 4 FAX 1460 1 FAX 1560 1 2 10 6 1 7 8 9 11 13 12 3 5 4 2 10 6 1 7 8 9 11 13 12 3 5 4 ...
Page 30: ...Chapter 4 20 ...
Page 72: ...Chapter 12 62 ...


