
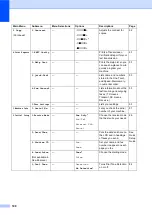

102
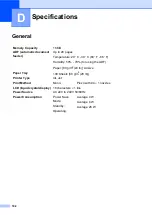
D
General
D
Specifications
D
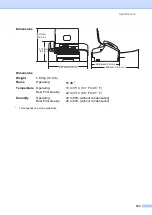
Memory Capacity
16 MB
ADF (automatic document
feeder)
Up to 20 pages
Temperature: 20
°
C - 30
°
C (68
°
F - 86
°
F)
Humidity: 50% - 70% (for using the ADF)
Paper: [80 g/m
2
(20 lb)] A4 size
Paper Tray
100 Sheets [80 g/m
2
(20 lb)]
Printer Type
Ink Jet
Print Method
Mono:
Piezo with 94
×
1 nozzles
LCD (liquid crystal display)
16 characters
×
1 line
Power Source
AC 220 to 240V 50/60Hz
Power Consumption
Power Save
Mode:
Standby:
Operating:
Average 4 W
Average 6 W
Average 26 W
Summary of Contents for FAX-1360
Page 1: ...USER S GUIDE FAX 1360 ...
Page 22: ......
Page 26: ...Chapter 4 18 ...
Page 37: ...Receiving a Fax 29 6 Note ...
Page 65: ...Section III Copy III Making copies 58 ...
Page 81: ......
Page 87: ......
Page 118: ...110 User Settings A printed report that shows the current settings of the machine ...


