5-45
Confidential
1.3.22 Continuous adjustments of density and registration sensor
(Function code 73)
<Function>
This function is used to perform the following functions consecutively:
Sensitivity adjustment of density sensor (Function code 72), Developing bias voltage
correction (Function code 83), and Adjustment of color registration (Adjustment of inter-color
position alignment) including registration sensor calibration (Function code 66).
<Operating procedure>
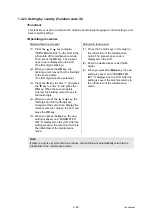
Model without touch panel
Model with touch panel
(1) Press the
or
key to display
“MAINTENANCE 73” on the LCD in the
initial state of the maintenance mode.
Then, press the
OK
key. “72/83/66-1” is
displayed on the LCD.
(2) Press the
OK
key. “PLS WAIT 72” is
displayed on the LCD and each
adjustment is performed in the following
order.
1) Sensitivity adjustment of density
sensor (Function code 72)
LCD: PLS WAIT 72
2) Developing bias voltage correction
(Function code 83)
LCD: PLS WAIT 83
3) Adjustment of color registration
(Adjustment of inter-color position
alignment) including registration
sensor calibration (Function code 66)
LCD: PLS WAIT 66-1
(3) When all operations are completed,
“COMP” is displayed on the LCD.
Pressing the
key and
Cancel
key in
this order and the machine returns to
the initial state of the maintenance
mode.
(1) Press the
7
and
3
keys in this order in
the initial state of the maintenance
mode. “72/83/66-1” is displayed on the
LCD.
(2) Press the
SET
key. “PLS WAIT 72” is
displayed on the LCD and each
adjustment is performed in the following
order.
1) Sensitivity adjustment of density
sensor (Function code 72)
LCD: PLS WAIT 72
2) Developing bias voltage correction
(Function code 83)
LCD: PLS WAIT 83
3) Adjustment of color registration
(Adjustment of inter-color position
alignment) including registration
sensor calibration (Function code 66)
LCD: PLS WAIT 66-1
(3) When all operations are completed,
“COMP” is displayed on the LCD.
Pressing the
key and
X
key in this
order and the machine returns to the
initial state of the maintenance mode.
Note:
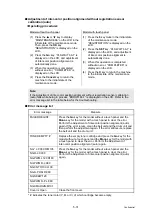
If each adjustment fails, “ERROR**” is displayed on the LCD and the adjustment is stopped.
If you press the
key with “ERROR**” displayed, the details of the error are shown. “**” in
“ERROR **” displayed on the LCD indicates corresponding function code number. Make
sure to take an appropriate measure after checking the measures provided in each function
code.

