3 - 5
Main parts
Main unit
Assembly
5
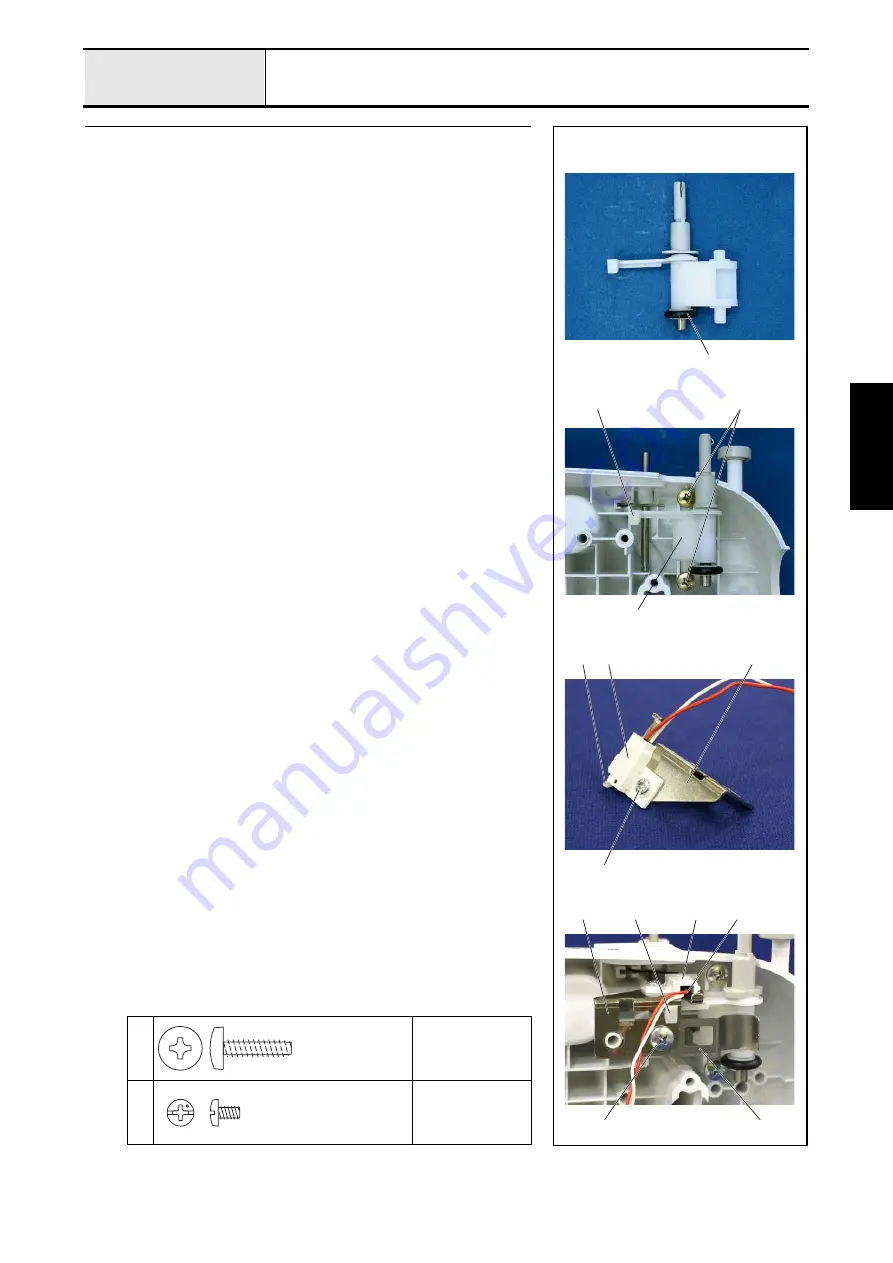
Bobbin winder assy. attachment
1. Attach the rubber ring
1
to the bobbin winder pulley.
2. Insert the bobbin winder shaft
2
into the groove on the rear cover assy.,
and secure the shaft with the 2 screws
1
.
3. Attach the SW assy : BW-F
3
and the sensor holder
4
to the bobbin
winder shaft stopper
5
with the screw
2
4. Insert the BW switch lever
6
into the bobbin winder shaft stopper
5
.
5. Set the bobbin winder spring
7
and then the bobbin winder shaft stopper
5
to the stopper attachment section of the rear cover assy., and secure
them with the screw
3
.
*Key point
• Check that the bobbin winder spindle base passes over the
bobbin winder spring when the bobbin winder is switched.
• Check that the bobbin winder spring returns to the original
position when the bobbin winder is switched.
1
3
Torque
1.18 — 1.57 N
·
m
2
Torque
0.78 — 1.18 N
·
m
3
5
6
3
7
4
1
1
3
2
2
3 4
5
Giza Tite
5X16
Screw, Bind
M
3X5
Summary of Contents for HS-3000
Page 1: ......
Page 2: ......
Page 3: ......
Page 9: ...vi ...
Page 16: ...2 1 2 Disassembly Main parts 2 2 Feed unit 2 22 Needle presser unit 2 30 ...
Page 17: ...2 2 Main parts Main parts location diagram Main unit ...
Page 37: ...2 22 Feed unit location diagram Main unit ...
Page 45: ...2 30 Needle presser unit location diagram Main unit ...
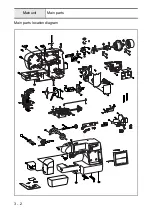
Page 55: ...3 2 Main parts Main parts location diagram Main unit ...
Page 77: ...3 24 Main unit Main parts 36 Accessory table attachment 1 Attach the accessory table 1 1 ...
Page 78: ...3 25 Assembly Feed unit Feed unit location diagram Main unit ...
Page 90: ...3 37 Assembly Needle presser unit Needle presser unit location diagram Main unit ...
Page 163: ...7 12 ...
Page 164: ......

