SEWING THE STITCHES
106
c
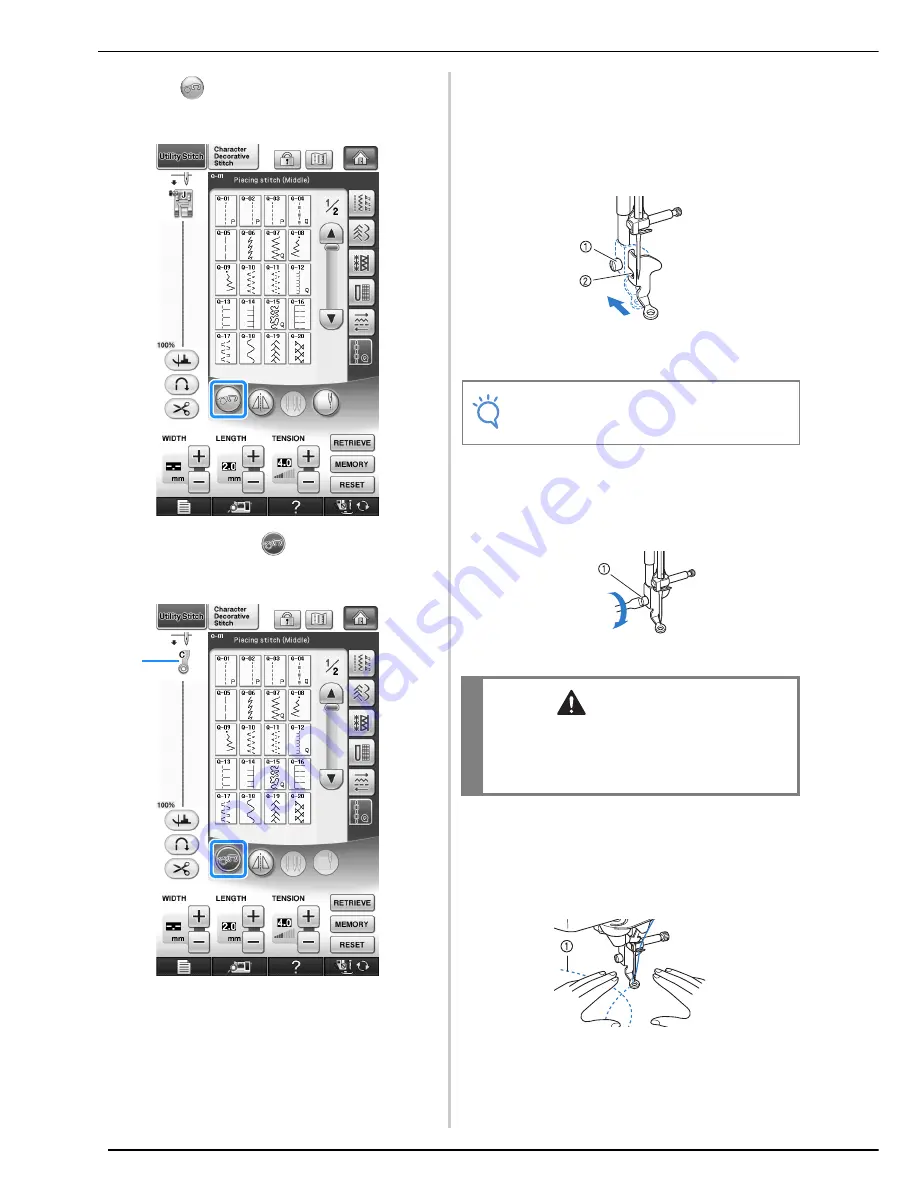
Press
to set the machine to free motion
sewing mode.
→
The key appears as
, the quilting foot is raised
to the necessary height, and then the feed dogs are
lowered for free motion sewing.
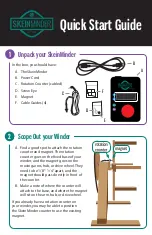
a
Free motion quilting foot “C”
→
When stitch Q-01 or 1-31 is selected, free motion
quilting foot “C” is indicated in the upper-left corner
of the screen.
d
Remove the presser foot holder (see page
55).
e
Attach free motion quilting foot “C” at the
front with the presser foot holder screw
aligned with the notch in the quilting foot.
a
Presser foot holder screw
b
Notch
f
Hold the quilting foot in place with your
right hand, and tighten the presser foot
holder screw using the screwdriver with
your left hand.
a
Presser foot holder screw
g
Use both hands to stretch the fabric taut,
and then move the fabric at a consistent
pace in order to sew uniform stitches
roughly 2.0-2.5 mm (approx. 1/16 - 3/32
inch) in length.
a
Stitch
a
Note
• Make sure that the quilting foot is attached
properly and not slanted.
CAUTION
• Be sure to securely tighten the screws with the
included screwdriver. Otherwise, the needle
may touch the quilting foot, causing it to bend
or break.
Summary of Contents for Innov-is NV6000D
Page 1: ...Computerized Embroidery and Sewing Machine ...
Page 14: ...CONTENTS xii ...
Page 35: ...LCD SCREEN Getting Ready 21 1 ...
Page 90: ...USEFUL FUNCTIONS 76 ...
Page 269: ...USING THE MEMORY FUNCTION Embroidery 255 5 f Press o The sewing screen is displayed ...
Page 302: ...EDITING PATTERNS 288 ...
Page 326: ...PRINT AND STITCH COMBINING EMBROIDERY PATTERNS AND PRINTED DESIGNS 312 ...
Page 338: ...USING STORED CUSTOM STITCHES 324 ...
Page 373: ......
Page 374: ......
Page 375: ......


