SEWING THE STITCHES
132
■
Attaching 4 Hole Buttons
Sew the two holes closest to you. Then raise the
presser foot and move the fabric so that the needle
goes into the next two holes, and sew them in the
same way.
■
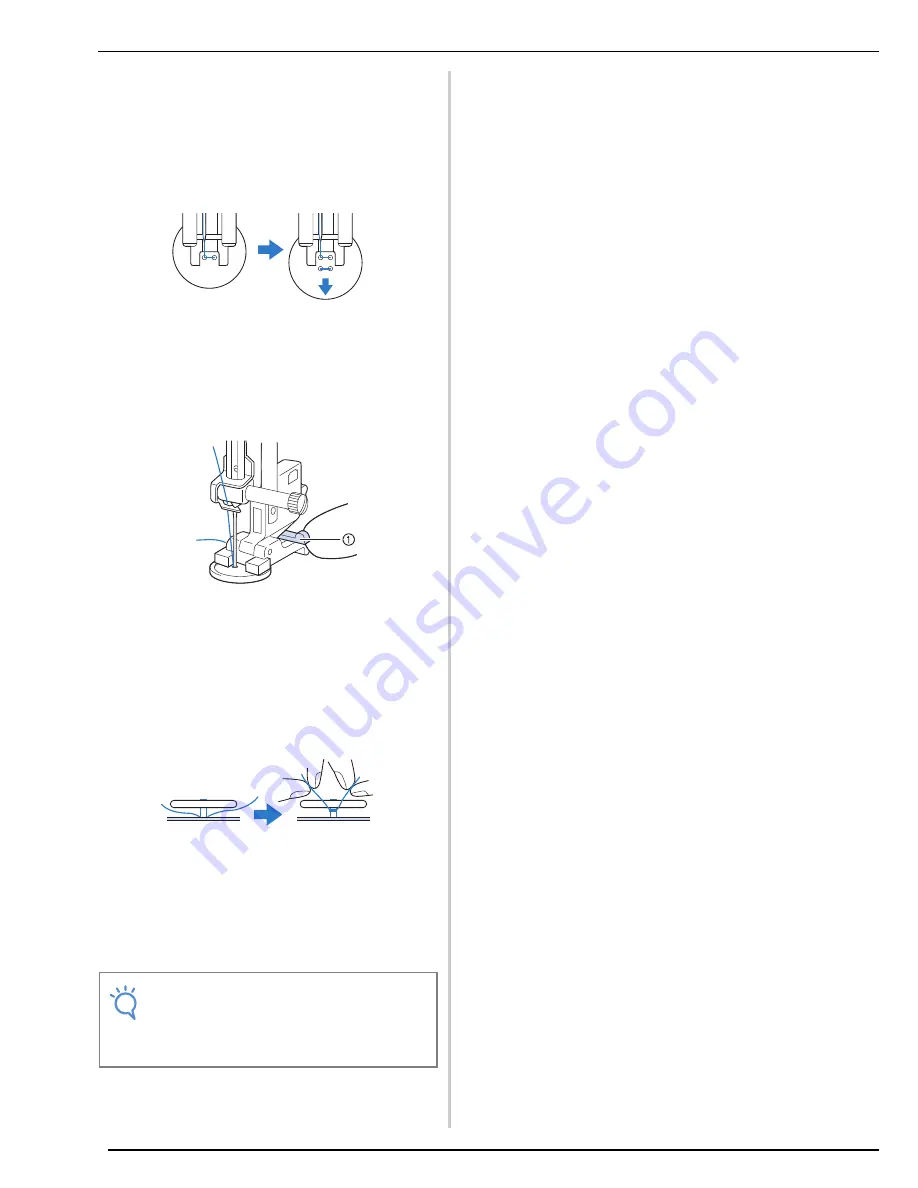
Attaching a Shank to the Button
a
Pull the shank lever toward you before
sewing.
a
Shank lever
b
Pull the two ends of the upper thread
between the button and the fabric, wind
them around the shank, and then tie them
firmly together.
c
Tie the ends of the bobbin thread from the
beginning and end of sewing together on
the wrong side of the fabric.
d
Cut off any excess thread.
Note
• When sewing is completed, be sure to select
the other stitch and rotate the handwheel
toward you (counterclockwise) to raise the
feed dogs.
Summary of Contents for Innov-is NV6000D
Page 1: ...Computerized Embroidery and Sewing Machine ...
Page 14: ...CONTENTS xii ...
Page 35: ...LCD SCREEN Getting Ready 21 1 ...
Page 90: ...USEFUL FUNCTIONS 76 ...
Page 269: ...USING THE MEMORY FUNCTION Embroidery 255 5 f Press o The sewing screen is displayed ...
Page 302: ...EDITING PATTERNS 288 ...
Page 326: ...PRINT AND STITCH COMBINING EMBROIDERY PATTERNS AND PRINTED DESIGNS 312 ...
Page 338: ...USING STORED CUSTOM STITCHES 324 ...
Page 373: ......
Page 374: ......
Page 375: ......


