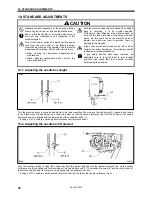


10. STANDARD ADJUSTMENTS
49
KE-434C,435C
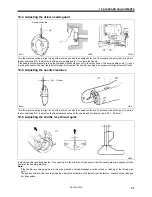
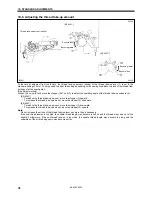
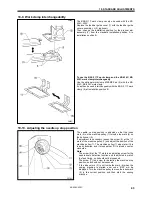
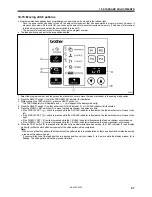
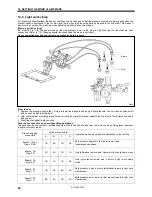
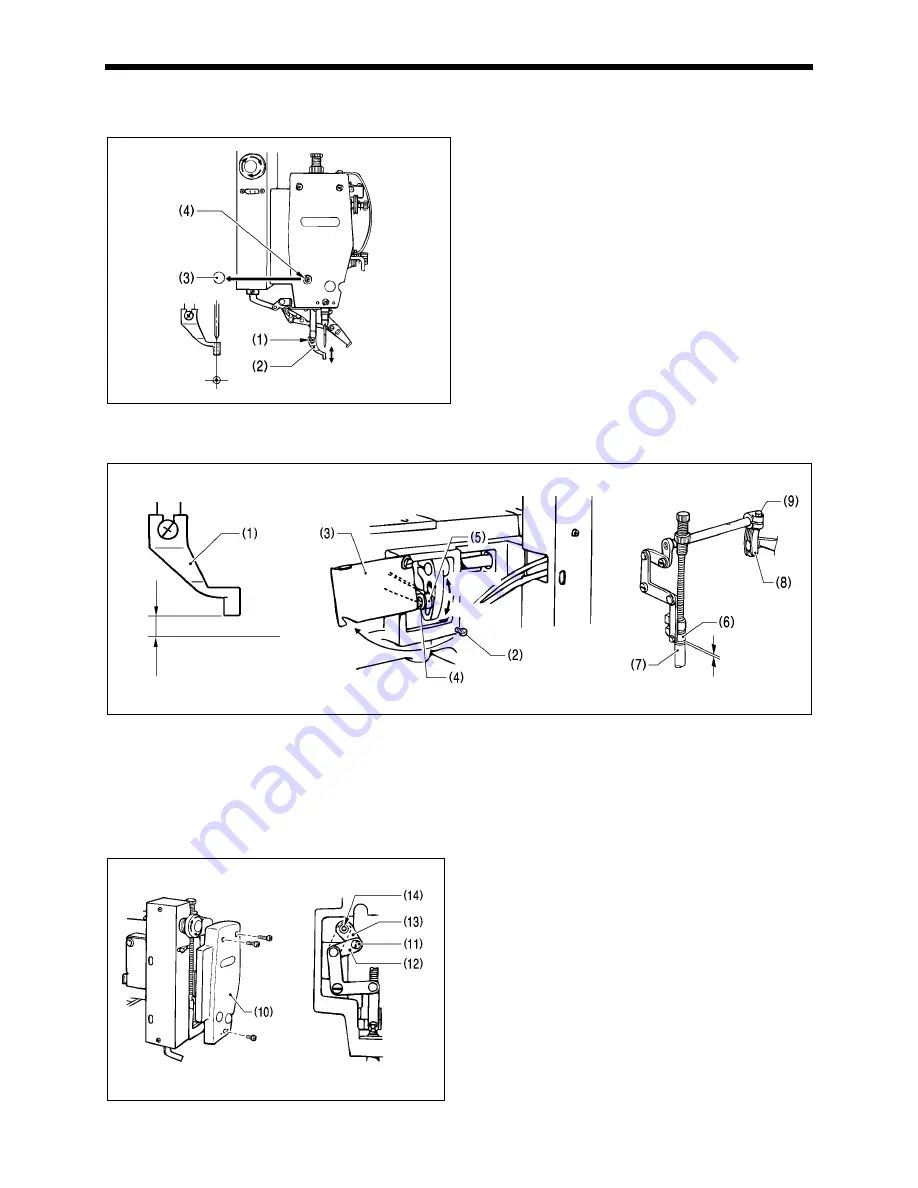
10-18. Work clamp adjustment (KE-435C)
Turn the pulley to hand to lower the work clamp to the down position, and then proceed with the steps below.
1. Loosen screw (1), set the bottom of the work clamp (2) lightly
against the work piece, and then tighten screw (1).
Note:
If the work clamp is lowered too far, the work piece will shift
when sewing. Also, if the work clamp is too high, skipped
stitches may occur.
2. Turn the pulley by hand, and make sure the needle enters the
center of the needle hole in the work clamp (2). If the needle is
not aligned with the center of the needle hole, remove cap (3),
loosen screw (4), and turn the work camp (presser bar) to
adjust.
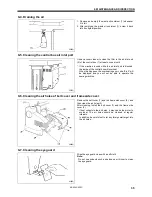
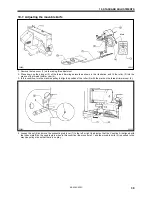
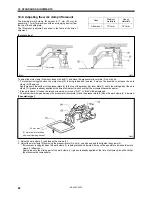
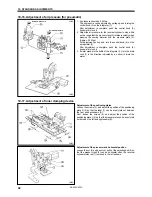
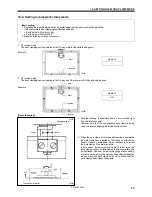
10-19. Changing the work clamp lift (KE-435C)
Standard work clamp (1) lift is 3 mm (max. 8 mm).
Adjusting work clamp lift to 3 - 5 mm
1. Loosen the screw (2) and open the stepping cover (3).
2. Loosen the nut (4) and adjust the stepping work clamp connecting rod (5) position.
* When the stepping work clamp connecting rod is raised, the lift will increase. When lowered, the lift will decrease.
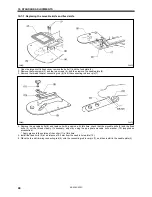
Adjusting work clamp lift to 5 - 8 mm
1. Turn the upper shaft to set the work clamp to its lowest point. Loosen the screw (9) of stepping work clamp arm (R) (8). Adjust the
clearance between the presser bar lifter (6) and the presser ber bush (7) to 0.5 - 1 mm.
2. Loosen the nut (4) and adjust the stepping work clamp connecting rod (5) position.
* When the stepping work clamp connecting rod is raised, the lift will increase. When lowered, the lift will decrease.
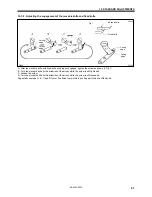
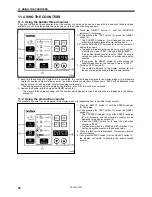
If vertical movement of the work clamp is not required
1. Remove the face plate (10).
2. Remove the stud screw (11) and re-attach the stepping
connecting rod (12) to the upper screw hole (14) of the
stepping work clamp arm (F) (13).
2625Q
2628Q
2629Q
2626Q
2483Q
2627Q
3 - 5mm
0.5 - 1mm
Increase
Decrease