background image

3 - 1

      P A P E R

3

BHLMFC-US-MFC3100C-FM5.5

3

Paper

The quality of your document can be affected by the kind of paper you use in 
the MFC. You can use plain paper, inkjet paper (coated paper), glossy paper, 
transparencies and envelopes.  We recommend testing various papers before 
purchasing large quantities.  For best results, use the recommended paper. 
To ensure the best print quality for the settings you’ve chosen, always set the 
Paper Type to match the type of paper you load.

About Paper

Handling and Using Special Paper

Store paper in the original bag, and keep it sealed. Keep the paper flat and away 
from moisture, direct sunlight and heat.

The coated side of glossy paper is shiny. Do not touch the shiny (coated) side. 
Load glossy paper with the shiny side facing up toward you.

Do not touch either side of transparencies, because they absorb water and 
perspiration easily and may cause decreased output quality. Transparencies 
designed for laser printers/copiers may stain your next document. Use only 
recommended transparencies.

Recommended Paper for the MFC-3100C

Plain Paper:

Xerox 4200

Inkjet Paper:

KODAK

®

 Premium Inkjet Paper (Matte)

Glossy Paper:

JETPRINT PHOTO

®

Graphic image paper — Gloss Finish

Transparencies:

3M Transparency Film (CG3410)

Note

When you print on inkjet paper, glossy paper and transparencies, be sure to 
select the correct media in the “Quality/Color” tab of the printer driver. When 
using inkjet paper, glossy paper or transparencies, avoid stacking by removing 
each page after copying or printing.

Note

The output quality depends on the paper type and paper brand. 
Visit us at 

http://solutions.brother.com

 and check the latest recommendations 

for paper that can be used with the MFC-3100C.

Summary of Contents for MFC 3100C - Inkjet Multifunction

Page 1: ... OWNER S MANUAL MFC 3100C version D ...

Page 2: ...erence Model Number MFC 3100C Serial Number Date of Purchase Place of Purchase The serial number is on the back of the unit Retain this Owner s Manual with your sales receipt as a permanent record of your purchase in the event of a theft fire or warranty service 1996 2001 Brother Industries Ltd ...

Page 3: ...is our one stop resource for all your Fax Machine Multi Function Center needs You can download the latest software and utilities read FAQs and troubleshooting tips and go to the Solutions section to learn how to get the most from your Brother product Visit us at For Customer Service Dealers Service Centers For USA Only For the name of a Brother authorized dealer or service center call 1 800 284 43...

Page 4: ... purchased the MFC Calls must be made from within that country In USA 1 888 879 3232 voice 1 800 947 1445 fax http www brothermall com In Canada 1 877 BROTHER voice Description Item Ink Cartridge black LC21BK Ink Cartridge cyan blue LC21C Ink Cartridge magenta red LC21M Ink Cartridge yellow LC21Y Power Protector for A C Power and Phone Line QPD120 Telephone Line Cord LG3077001 Paper Wire Extension...

Page 5: ... OUT OF THE USE OR INABILITY TO USE THE SOFTWARE EVEN IF BROTHER S LICENSOR HAS BEEN ADVISED OF THE POSSIBILITY OF SUCH DAMAGES BECAUSE SOME STATES IN THE USA AND SOME PROVINCES IN CANADA DO NOT ALLOW THE EXCLUSION OR LIMITATION OF LIABILITY FOR CONSEQUENTIAL OR INCIDENTAL DAMAGES THE ABOVE LIMITATIONS MAY NOT APPLY TO YOU IN ANY EVENT BROTHER S LICENSOR S LIABILITY TO YOU FOR ACTUAL DAMAGES FROM ...

Page 6: ...p in this Product you can report it to a Brother Authorized Service Center During the Warranty Period supply Brother s representative with a copy of your dated bill of sale showing that this Product was purchased within the United States For the name of your Brother Authorized Service Center call 1 800 521 2846 After contacting the Brother Authorized Service Center you may be required to deliver o...

Page 7: ... FITNESS FOR A PARTICULAR PURPOSE ARE HEREBY DISCLAIMED This Limited Warranty is the only warranty that Brother is giving for this Product It is the final expression and the exclusive and only statement of Brother s obligations to you It replaces all other agreements and under standings that you may have with Brother or its representatives This Limited Warranty and Brother s obligation to you may ...

Page 8: ...print head resulting from packing without the ink cartridges will VOID your warranty Refer to your Operation Manual for proper packaging BROTHER DISCLAIMS ALL OTHER WARRANTIES EXPRESSED OR IMPLIED INCLUDING WITHOUT LIMITATION ANY IMPLIED WARRANTIES OF MERCHANTABILITY OR FITNESS FOR A PARTICULAR PURPOSE EXCEPT TO THE EXTENT THAT ANY WARRANTIES IMPLIED BY LAW CANNOT BE VALIDLY WAIVED No oral or writ...

Page 9: ...to fax 6 Enter the fax number 7 Press Black Fax Start Receiving Faxes Select Receive Mode Press Receive Mode to select FAX ONLY EXT TEL TAD or MANUAL Storing Numbers Storing Speed Dial Numbers 1 Press Menu Set 2 3 1 2 Enter a two digit Speed Dial number and then press Menu Set 3 Enter a number up to 20 digits and then press Menu Set 4 Enter a name or leave it blank and then press Menu Set 5 Press ...

Page 10: ...al face down in the ADF 2 Use the dial pad to enter the number of copies you want up to 99 3 Press Black Copy Brother fax back system In USA 1 800 521 2846 Brother Global Web Site http www brother com Frequently Asked Questions FAQs and Product Support http solutions brother com Brother Accessories Supplies In USA 1 888 879 3232 voice 1 800 947 1445 fax http www brothermall com In Canada 1 877 BRO...

Page 11: ...1 5 ECM Error Correction Mode 1 6 2 Assembly and Connections 2 1 Packing List 2 1 Choosing a Location 2 2 Assembly 2 3 Removing the Protective Yellow Bar 2 3 Setting Up the MFC 2 4 Loading Paper in the Multi Purpose Sheet Feeder Paper Cassette 2 7 Installing the Ink Cartridges 2 8 Important 2 9 Connecting the MFC 2 11 Connecting an External Telephone 2 11 Connecting an External Telephone Answering...

Page 12: ... Selection Table 4 1 Alternating Displays 4 1 Navigation Keys 4 2 5 Initial Setup 5 1 Getting Started 5 1 Setting Paper Type 5 1 Setting Paper Size 5 1 Setting Date and Time 5 2 Setting Station ID 5 2 Entering Text 5 3 Inserting Spaces 5 3 Making Corrections 5 3 Repeating Letters 5 3 Special Characters and Symbols 5 3 Setting the Ring Volume 5 4 Setting the Beeper Volume 5 4 Turning On Automatic D...

Page 13: ... 6 8 Before You Choose the Ring Pattern to Register 6 8 VERY IMPORTANT 6 9 Registering the Distinctive Ring Pattern 6 9 7 Setup Send 7 1 Before You Begin 7 1 Using the ADF Automatic Document Feeder 7 1 Sending Faxes with Multiple Settings 7 2 Basic Sending Operations 7 2 Contrast 7 2 Fax Resolution 7 3 Manual Transmission with an External Telephone 7 3 Automatic Transmission 7 3 Color Fax Transmis...

Page 14: ...8 6 9 Remote Fax Options Not Available for Color Fax 9 1 Fax Forwarding Paging 9 1 Programming a Fax Forwarding Number 9 1 Programming Paging Number 9 1 Setting Fax Storage 9 2 Backup Print 9 2 Changing Remote Retrieval Access Code 9 3 Remote Retrieval 9 3 Using Remote Retrieval Access Code 9 3 Remote Commands 9 4 Retrieving Fax Messages 9 5 Changing Fax Forwarding Number 9 5 10 Printing Reports 1...

Page 15: ...t 11 8 Legal Limitations 11 9 12 Using the MFC as a Printer 12 1 Features 12 1 Printer Driver 12 1 Choosing the Right Kind of Paper 12 2 Multi purpose Sheet Feeder 12 2 Simultaneous Printing Fax 12 3 Printer Operation Key 12 3 Ink Key 12 3 Stop Exit Key 12 3 Checking the Print Quality 12 3 13 Printer Driver Settings For Windows Only 13 1 Using the Brother MFC 3100C Printer Driver 13 1 Features in ...

Page 16: ...n background 13 10 Watermark Style 13 10 Watermark Text 13 10 Watermark Bitmap 13 10 Position 13 10 Device Options 13 11 Print Date Time 13 11 Support 13 12 Web Update 13 12 Brother Solutions Center 13 12 Features in the Printer Driver For Windows XP 13 13 Layout Tab 13 13 1 Orientation 13 13 2 Pages Per Sheet 13 14 Paper Quality Tab 13 14 1 Tray Selection 13 15 2 Quality Settings 13 15 3 Color 13...

Page 17: ...gs for Scan Copy and PC Fax Buttons 14 5 Global Settings 14 5 Setting Up the Scanner Configurations 14 6 To Access the Scanner Configurations Screen 14 6 Perform an Operation from the Control Center Screen 14 6 Scan to File 14 7 Scanner Settings 14 7 Destination Folder 14 8 Scan to E mail 14 8 Scanner Settings 14 9 E mail Application 14 9 File Attachments 14 9 Conversion Options 14 10 Format 14 10...

Page 18: ...xporting Items in Other Formats 15 4 Exporting an Image File 15 4 Scanning a Document 15 4 TWAIN Compliant 15 4 Accessing the Scanner 15 5 Scanning a Document into the PC 15 5 Settings in the Scanner Window 15 6 Resolution 15 6 Scan Type 15 6 Brightness 15 6 Contrast 15 7 Size 15 7 Custom 15 7 PreScanning an Image 15 8 How to Use PreScan to Adjust an Image 15 8 16 Setting Up and Using PC FAX For W...

Page 19: ...edial 16 15 Sending a File as a PC FAX Using the Simple Style 16 15 17 Using Automatic E Mail Printing 17 1 For Windows 95 98 98SE Me only 17 1 Main Features 17 1 To Access the On Line Documentation 17 1 To Install Automatic E mail Printing Optional Application 17 1 18 Using the Brother MFC with a New Power Macintosh G3 G4 or iMac iBook 18 1 Set Up Your USB Equipped Apple Macintosh G3 G4 or iMac o...

Page 20: ...ustry Canada Compliance Statement For Canada Only 19 3 International ENERGY STAR Compliance Statement 19 3 Important Safety Instructions 19 4 Trademarks 19 5 20 Troubleshooting and Routine Maintenance 20 1 Troubleshooting 20 1 Error Messages 20 1 Document Jam 20 3 Printer Jam or Paper Jam 20 4 If You Are Having Difficulty with Your MFC 20 7 How to Improve Print Quality 20 10 Cleaning the Print Hea...

Page 21: ...M5 5 21 Specifications S 1 Product Description S 1 Fax S 1 Printer S 2 Printing S 2 Controller S 2 Computer Requirements S 3 Print Media S 3 Consumable Items S 4 22 Glossary G 1 23 Index I 1 24 Remote Retrieval Access Card R 1 ...

Page 22: ...warnings and actions to perform For clarification and to help you choose the correct key presses we ve added illustrations of some of the LCD messages boldface Bold typeface identifies a specific key on the MFC control panel italics Italics typeface emphasize an important point or refer you to related topic bubble dot Bubble Dot typeface identifies the messages on the LCD of the MFC Additionally y...

Page 23: ...ify that your MFC is properly installed To receive a response be sure to set up your Station ID Setting Station ID page 5 2 When your TEST SHEET is received a Confirmation Sheet and Product Registration form will be sent back to your machine Please fill out the form and return it to complete your registration To Complete Your Registration On Line 1 Insert the MFL Pro Suite CD ROM into your CD ROM ...

Page 24: ... set up and operate your MFC Cleans the ink print heads and replaces an ink cartridge 5 1 2 4 Redial Pause Redials the last number called Also inserts a pause in auto dial numbers 6 Ink Lets you scan the next original into your computer and select the type of destination word processing glaphics or E mail application 3 Scan to Copy Keys For the Next Copy Only You can quickly and easily select temp...

Page 25: ...ion when you send a fax Fax Resolution Search Speed Dial Lets you look up numbers stored in the dialing memory Also lets you dial stored phone numbers by pressing and a two digit number 8 Volume Press to scroll through the menus and options When the machine is idle you can press these keys to adjust the ring volume or or Press to scroll forward or backward while setting a menu selection Also you c...

Page 26: ... call back to the other after the call has been answered How Can You Avoid Possible Problems A very good way to avoid problems like the one mentioned previously is to get a second phone number on your present phone line Many people with Voice Mail opt for this choice which is called Distinctive Ring and they are very satisfied with it For details about this type of custom service please see Distin...

Page 27: ...iving the fax The handshake cannot begin until the call is answered and the CNG tones only last for about 60 seconds after the number is dialed Therefore it s important for the receiving machine to answer the call in as few rings as possible ECM Error Correction Mode The Error Correction Mode ECM is a way for the MFC to check the integrity of a fax transmission while it is in progress ECM transmis...

Page 28: ...ll Brother Customer Service at 1 800 284 4329 in USA 1 877 BROTHER in Canada or 1 514 685 6464 in Montreal See Ordering Accessories and Supplies on page ii for the correct item numbers Whenever you transport the MFC use the packing materials that came with your MFC If you do not pack the MFC correctly you may void your warranty Ink Cartridges Telephone Line Cord Document Wire Extension Paper Tray ...

Page 29: ...telephone lines Avoid using a telephone other than a cordless type during an electrical storm There may be a remote risk of electric shock from lightning Do not use the telephone to report a gas leak in the vicinity of the leak For PLUG CABLE EQUIPMENT the socket outlet should be installed near the equipment and should be easily accessible To reduce the risk of shock or fire use only a No 26 AWG o...

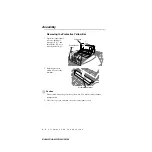
Page 30: ...el cover by pulling it toward you 1 and then lift the top cover toward the back 2 2 Pull the protective yellow bar out of the machine Caution Do not throw away the protective yellow bar You will need it for future transportation 3 Close the top cover and then close the control panel cover Top Cover Control Panel Cover ProtectiveYellow Bar ...

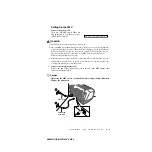
Page 31: ...onnect it to a telephone line Similarly you can protect yourself when you want to move your MFC by disconnecting first the telephone line and then the power cord Lightning and power surges can damage this product We recommend that you use a quality surge protection device on the AC power line as well as on the telephone line or unplug the lines during a lightning storm 2 Connect the telephone line...

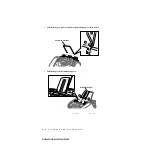
Page 32: ... S E M B L Y A N D C O N N E C T I O N S BHLMFC US MFC3100C FM5 5 3 Attach the paper wire extension to the multi purpose sheet feeder 4 Attach the plastic document support Paper Wire Extension Document Support ...

Page 33: ...M5 5 5 Attach the plastic paper tray to the paper output slot and then pull out the extension Caution Please attach the paper tray to prevent paper jams and maintain print quality 6 Attach the document wire extension Plastic Paper Tray Extension Document Wire Extension ...

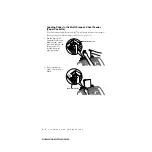
Page 34: ...d up to 100 sheets of 20 lb 75 g m2 paper if you use the cut sheet See Paper Capacity of Multi Purpose Sheet Feeder page 3 2 1 Fan the paper well Gentlyinsertthepaper Make sure the print side is toward you and the paper level is stacked below the paper guide line 2 Press and slide the guide to fit the paper width Paper Guide Line Paper Width Guide ...

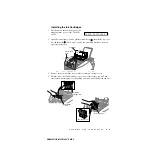
Page 35: ...ack After a few seconds the print head will move left to its replacement position 3 Remove the protective blue tape over the colored ink cartridge covers 4 Push the four colored ink cartridge covers one at a time so they pop up Then remove the white shipping cover by pulling it toward you and lifting it up and out CHECK CARTRIDGE 1 2 Top Cover Control Panel Cover PUSH PUSH PUSH PUSH Ink Cartridge ...

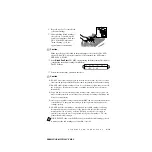
Page 36: ... right in this order Black Cyan Yellow Magenta 5 Open the Black ink cartridge bag and take out the ink cartridge 6 Carefully remove the sealing tape from the bottom of the ink cartridge Be sure to peel the tape in the direction away from you Important To prevent spilling ink and staining your hands and clothing peel the sealing tape gently and slowly Do not touch the ink opening on the cartridge o...

Page 37: ...T shake the ink cartridges If you do so the ink may spill when you take off the sealing tape If ink stains your body or clothing wash with soap or detergent immediately If you mix the colors by installing an ink cartridge in the wrong color position you must clean the print head several times after correcting the cartridge installation and before you start printing Once you open an ink cartridge i...

Page 38: ... cannot hear CNG tones until the TAD has answered the call and with five rings there are only 8 10 seconds of CNG tones left for the fax handshake Make sure you carefully follow instructions in this manual for recording your outgoing message We do not recommend using the toll saver feature on your external answering machine if it exceeds five rings If you do not receive all your faxes you must res...

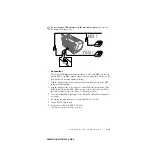
Page 39: ...2 Plug the telephone line cord from your external TAD into the back side of the MFC in the jack labeled EXT Make sure this cord is connected to the TAD at the TAD s telephone line jack and not its telephone set jack 3 Set your external TAD to four rings or less The MFC s Ring Delay setting does not apply 4 Record the outgoing message on your external TAD see below 5 Set the TAD to answer calls 6 S...

Page 40: ...k in a roll over system as long as it is the last number in the sequence so the call cannot roll away Do not put the MFC on any of the other numbers when the other lines are busy and a second fax call would be received the fax call is transferred to a line that does not have a fax machine Your MFC will work best on a dedicated line Two Line Phone System A two line phone system is nothing more than...

Page 41: ...ne When you are installing an external two line telephone answering device TAD and a two line telephone your MFC must be isolated on one line at both the wall jack and at the TAD The most common connection is to put the MFC on Line 2 The two line TAD must have two telephone jacks one labeled L1 or L1 L2 and the other labeled L2 which is explained in the following Steps You will need at least three...

Page 42: ...visable to have a separate line for the MFC You can then leave the MFC in FAX ONLY mode to receive faxes any time of day or night If the MFC is to be connected to a multi line system ask your installer to connect the unit to the last line on the system This prevents the unit from being activated each time a telephone call is received If You are Installing the MFC to Work with a PBX 1 It is not gua...

Page 43: ...tures on Your Phone Line If you have Voice Mail Caller ID Call Waiting Call Waiting Caller ID RingMaster an answering service an alarm system or other custom feature on one phone line it may create a problem with the operation of your MFC See Custom Features on a Single Line page 20 8 ...

Page 44: ...side facing up toward you Do not touch either side of transparencies because they absorb water and perspiration easily and may cause decreased output quality Transparencies designed for laser printers copiers may stain your next document Use only recommended transparencies Recommended Paper for the MFC 3100C Plain Paper Xerox 4200 Inkjet Paper KODAK Premium Inkjet Paper Matte Glossy Paper JETPRINT...

Page 45: ...nvelopes DL COM 10 C5 Monarch 10 Postcard 4 6 30 Index Card 5 8 30 Cut Sheet Paper Weight Plain Paper 17 to 32 lb 64 to 120 g m2 Inkjet Paper Up to 32 lb 120 g m2 Glossy Paper Up to 40 lb 150 g m2 Postcard Up to 45 lb 170 g m2 Index card Up to 32 lb 120 g m2 Thickness Plain Paper 0 003 to 0 006 inches 0 08 to 0 15 mm Inkjet Paper Up to 0 006 inches 0 15 mm Glossy Paper Up to 0 007 inches 0 18 mm E...

Page 46: ...driver The above figures are approximate and the print area may vary depending on the kind of paper you are using Do not use the following types of paper and envelopes Damaged curled wrinkled or irregularly shaped paper and envelopes Extremely shiny or highly textured paper and envelopes Envelopes with clasps Envelopes of baggy construction Envelopes not sharply creased Embossed envelopes Paper an...

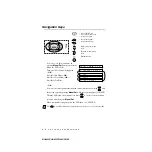
Page 47: ...the dial pad Menu Selection Table You can probably perform most of these programming operations without the Owner s Manual To help you understand the menu selections and options that are found in the MFC programs use the Menu Selection Table on page 4 3 Alternating Displays Sometimes the LCD alternates between the active setting and a help message giving brief instructions about how to proceed The...

Page 48: ... pressing and then set an option by pressing Menu Set when that option appears on the LCD Then the LCD shows next menu level Press to scroll to your next menu selection and then press Menu Set When you finish setting an option the LCD shows ACCEPTED Access the Menu Go to next menu level Accept an option Scroll through the current menu level Back to previous menu level Forward to next menu level Ex...

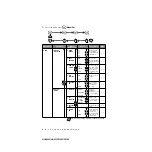
Page 49: ... time for the LCD display and heading on fax transmissions 5 2 4 STATION ID Program your name fax number to appear on each transmitted page 5 2 5 VOLUME 1 RING OFF LOW HIGH Adjusts ring volume 5 4 2 BEEPER OFF LOW HIGH Adjusts volume level of beeper 5 4 6 AUTO DAYLIGHT ON OFF Changes for Daylight Savings Time automatically 5 5 7 TONE PULSE Canada Only TONE PULSE Selects dialing mode 5 5 8 LOCAL LA...

Page 50: ... remote location You can also personalize these codes 6 4 4 AUTO REDUCTION ON OFF Reduces size of image 6 3 5 POLLING RX ON OFF Sets up your MFC to poll another fax machine 6 5 2 SETUP SEND 1 CONTRAST AUTO S LIGHT S DARK Changes lightness or darkness of a fax you are sending 7 2 2 FAX RESOLUTION STANDARD FINE S FINE PHOTO Changes the default setting of fax resolution 7 3 3 DELAYED FAX Sendsdocumen...

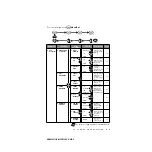
Page 51: ...TO DIAL 1 SPEED DIAL Store Speed Dial numbers so you can dial by pressingonlyfive keys 8 1 2 SETUP GROUPS Sets up a Group number for broadcasting 8 3 4 SETUP REPORTS 1 TRANS MISSION ON ON IMAGE OFF OFF IMAGE Initial setup for Transmission Verification Report and Fax Activity Report 10 1 2 ACT INTERVAL 6 12 24 Hours 2 4 7 Days OFF 10 1 5 REMOTE FAX OPT 1 FAX FWD PAGING OFF FAX FORWARD PAGING Sets M...

Page 52: ...IVE ON OFF SET Uses the phone company Distinctive Ring subscriber service to register the ring pattern with the MFC 6 7 3 COPY 1 QUALITY NORMAL BEST FAST Select copy quality 11 7 2 COLOR ADJUST 1 RED R R R R R Adjust the amount of Red in copies 11 8 2 GREEN G G G G G Adjust the amount of Green in copies 11 8 3 BLUE B B B B B Adjust the amount of Blue in copies 11 8 3 CONTRAST Adjust the contrast 1...

Page 53: ...aded in the MFC you will need to change the setting for Paper Size so your MFC can fit the incoming fax on the page 1 Press Menu Set 1 2 2 Press to select LETTER LEGAL or A4 and then press Menu Set 3 Press Stop Exit Note The print quality of black ink varies depending on the kind of glossy paper you are using Black ink is used when you select GLOSSY 4 COLOR If the glossy paper you are using repels...

Page 54: ...our format for example enter 15 25 for 3 25 P M and then press Menu Set 6 Press Stop Exit The LCD now displays the date and time you set whenever the MFC is in Standby mode Setting Station ID You should store your name and fax number to be printed on all fax pages that you send 1 Press Menu Set 1 4 2 Enter your fax number up to 20 digits and then press Menu Set You must enter a fax number to proce...

Page 55: ...rectly and want to change it press to move the cursor after the last correct letter Then press Stop Exit all letters above and to the right of the cursor will be deleted Re enter the correct characters You can also back up and type over incorrect letters Repeating Letters If you need to enter a character that is assigned to the same key as the previous character press to move the cursor to the rig...

Page 56: ... and when fax sending or receiving is finished 1 Press Menu Set 1 5 2 2 Press to select your option 3 When the LCD shows the option you want press Menu Set Press Stop Exit If you do not enter a fax number no additional information can be entered NOTICE The Telephone Consumer Protection Act of 1991 makes it unlawful for any person to use a computer or electronic device to send any message via a tel...

Page 57: ...Press Stop Exit Setting Tone Pulse Dialing Mode For Canada Only Your MFC comes set to accommodate tone dialing service multi frequency If you have pulse dialing service rotary you need to change the dialing mode 1 Press Menu Set 1 7 2 Press to select PULSE or TONE and then press Menu Set 3 Press Stop Exit Memory Storage In the event of a power failure all settings in the GENERAL SETUP SETUP RECEIV...

Page 58: ...ernal telephone External Telephone Answering Device If an external telephone is connected to the EXT jack you control the phone line and must answer every call yourself If an external TAD telephone answering device is connected to the EXT jack the TAD automatically answers every call Voice messages are stored in the external TAD Fax messages are printed Use this mode if you receive very few faxes ...

Page 59: ... s Distinctive Ring service keep the Ring Delay default setting of 4 You can try setting the Ring Delay to 5 rings however if you do not receive all your faxes you must reset it to 4 rings See Easy Receive page 6 3 and Operation from Extension Telephone page 6 4 1 Press Menu Set 2 1 1 2 Press to select how many times the line rings before the MFC answers 00 05 and then press Menu Set If you select...

Page 60: ...on from Extension Telephone page 6 4 1 Press Menu Set 2 1 2 2 Use to select ON or OFF and then press Menu Set 3 Press Stop Exit Printing a Reduced Incoming Document Auto Reduction You can always reduce the size of an incoming fax to a fixed percentage regardless of the size of the paper in your MFC ON lets your MFC choose the level of reduction for you 1 Press Menu Set 2 1 4 2 Use to select ON or ...

Page 61: ...cted the LCD shows RECEIVING before you hang up Your caller will have to press Black Fax Start to send the fax Changing the Fax Receive Code The preset Fax Receive Code 5 1 might not work with some telephone systems 1 Press Menu Set 2 1 3 2 Press to select ON or OFF and then press Menu Set 3 If you want to enter a new Fax Receive Code and then press Menu Set 4 Press Stop Exit Printing a Fax in Mem...

Page 62: ...m it 1 Press Menu Set 2 1 5 2 Press to select POLLING RX ON and then press Menu Set 3 Enter the fax number you are polling 4 Press Black Fax Start The LCD shows DIALING Setting Up Sequential Polling Receive Your MFC can request documents from several fax units in a single operation Afterward a Sequential Polling Report will be printed 1 Press Menu Set 2 1 5 2 Press to select POLLING RX ON and then...

Page 63: ...Press Menu Set 2 6 Any waiting jobs appear on the LCD If no job is waiting the LCD shows NO JOB WAITING 2 If you have more than two jobs waiting press to select the job you want to cancel and then press Menu Set OR If you have only one job waiting go to Step 3 3 Press 1 to cancel OR Press 2 to exit without canceling To cancel another job return to Step 2 4 Press Stop Exit 6 REMAINING JOBS or ...

Page 64: ...tive ring pattern so you will know which phone number is ringing This is one way you can have a separate phone number for your MFC What Does Brother s Distinctive Ring Do The Brother machine has a Distinctive Ring feature that allows you to use your MFC machine to take full advantage of the telephone company s Distinctive Ring service You can dedicate the new phone number on your line to receiving...

Page 65: ...istered Please refer to some popular ring pattern examples that will be provided from the phone company in the USA and Canada that are shown in the Brother compatibility table below The MFC will answer only calls to its registered number The first two rings are silent on the fax machine This is because the fax must listen to the ring pattern compare it to the pattern that was registered If you pro...

Page 66: ...inctive Ring Feature can be activated The Distinctive Ring feature is actually an answering mode So do not activate FAX ONLY mode while using Distinctive Ring otherwise the fax machine will answer calls for all the numbers Registering the Distinctive Ring Pattern 1 Set the MFC to MANUAL mode 2 Press Menu Set 2 0 1 3 Press to select DISTINCTIVE SET and then press Menu Set 4 Press to select the pres...

Page 67: ...ginals face down top edge first Adjust the paper guides to fit the width of your document The automatic document feeder ADF can hold up to 20 pages feeding each one individually through the MFC Use standard 20 lb 75g m2 paper when using the ADF Fan the paper and then stagger the pages in the ADF as shown DO NOT use curled wrinkled folded or ripped paper or paper with staples paper clips paste or t...

Page 68: ...if you are finished choosing settings and then go to the next step Basic Sending Operations Contrast If your document is very light or very dark you might want to set the contrast Use S LIGHT to send a very light document Use S DARK to send a very dark document 1 Place the original face down in the ADF 2 Press Menu Set 2 2 1 3 Press to select AUTO S LIGHT or S DARK and then press Menu Set 4 Press ...

Page 69: ...black and white only PHOTO Use when original has varying shades of gray this is the slowest transmission time black and white only Manual Transmission with an External Telephone Manual transmission lets you hear the dial tone ringing and fax receiving tones while sending a fax 1 Place the original face down in the ADF 2 Pick up the handset of the external phone and listen for a dial tone 3 Dial th...

Page 70: ...cept Polling If you try to scan and store a 51st fax the MFC will send it immediately without storing it in memory 1 Place the original face down in the ADF 2 Enter the fax number 3 Press Black Fax Start The MFC scans the original and the LCD shows the job number XXX of the fax and how much memory is available Then the MFC starts dialing You can immediately repeat Steps 1 to 3 for the next fax Whe...

Page 71: ... press Menu Set Go to Step 5 OR For the next fax transmission only press to select NEXT FAX ONLY and then press Menu Set 4 For the next fax only press to select ON or OFF and then press Menu Set 5 Press 1 if you want to select additional settings The LCD returns to the SETUP SEND menu OR Press 2 if you are finished choosing settings and then go to Step 6 6 Enter fax number and then press Black Fax...

Page 72: ... 7 5 1 Press Menu Set 2 6 Any waiting jobs appear on the LCD If no jobs are waiting the LCD shows NO JOB WAITING 2 If you have more than two jobs waiting press to select the job you want to cancel and then press Menu Set OR If you have only one job waiting go to Step 3 3 Press 1 to cancel OR Press 2 to exit without canceling To cancel another job return to Step 2 4 Press Stop Exit 6 REMAINING JOBS...

Page 73: ... documents will begin at the time of day you enter in Step 3 which shows the time you entered last Press Menu Set to accept it or enter another time for this fax 1 Place the original face down in the ADF 2 Press Menu Set 2 2 3 3 Enter the time you want the fax to be sent in 24 hour format and then press Menu Set For example enter 19 45 for 7 45 PM 4 Press 1 to leave the originals waiting in the AD...

Page 74: ...ou set up your MFC to wait with a document so another fax machine can retrieve it 1 Place the original to be retrieved face down in the ADF 2 Press Menu Set 2 2 6 3 Press to choose ON or OFF and then press Menu Set 4 Press 1 to leave the originals waiting in the ADF OR Press 2 to scan the original into memory 5 Press 1 if you want to select additional settings The LCD returns to the SETUP SEND men...

Page 75: ... 1 Press Menu Set 2 3 1 2 Use the dial pad to enter a two digit location 01 40 and then press Menu Set 3 Enter the number up to 20 digits and then press Menu Set 4 Use the dial pad to enter the name up to 15 characters and then press Menu Set You can use the chart on page 5 3 to help you enter letters OR Press Menu Set and then go to Step 5 to store the number without a name 5 Return to Step 2 to ...

Page 76: ...1 to change the stored number OR Press 2 to exit without making a change 2 Enter a new number and then press Menu Set If you want to erase the whole number press Stop Exit when the cursor is to the left of the digits The letters above and to the right of the cursor will be deleted If you want to change a digit use or to position the cursor under the digit you want to change and then type over it 3...

Page 77: ...Dial and then enter the two digit location where you wish to store the Group number and then press Menu Set For example press Search Speed Dial 07 3 Use the dial pad to enter the Group number and then press Menu Set For example press 1 for Group 1 4 To include Speed Dial numbers in the Group enter them as if you were dialing For example for Speed Dial locations 05 and 09 press Search Speed Dial 05...

Page 78: ... of low rates you can store the access codes or long distance carriers as Speed Dial numbers You can store these long dialing sequences by dividing them and setting them up on separate keys in any combination You can even include manual dialing using the dial pad The combined number will be dialed in the order you entered it as soon as you press Black Fax Start See Storing Speed Dial Numbers page ...

Page 79: ...ily See Setting Up Groups for Broadcasting page 8 3 After the broadcast is finished a Broadcast Report will be printed automatically to let you know the results To stop the broadcast in progress press Stop Exit The LCD asks if you want to cancel the location that is being sent Enter the long dialing sequence numbers as you normally would but keep in mind that each key counts as one location so the...

Page 80: ...u want to make a second call to the last number dialed press Redial Pause to save time If you re sending a fax automatically and the line is busy the MFC will redial automatically up to three times at 5 minute intervals Tone Pulse For Canada Only If you have pulse dialing service but need to send tone signals for example for telephone banking follow the directions below If you have touch tone serv...

Page 81: ...g number up to 20 digits and then press Menu Set 4 Press Stop Exit Programming Paging Number When Paging is selected your MFC dials the pager number you ve programmed and then dials your Personal Identification Number PIN this activates your pager so you will know that you have a fax message in the memory 1 Press Menu Set 2 5 1 2 Press until the LCD shows PAGING and then press Menu Set 3 Enter you...

Page 82: ...rwarding Paging or Remote Retrieval functions The LCD will indicate when you have a fax stored in memory 1 Press Menu Set 2 5 2 The LCD prompts you to choose a fax setting 2 Press to select ON or OFF and then press Menu Set 3 Press Stop Exit Backup Print If you ve set FAX STORAGE to ON your MFC automatically prints faxes as they are received into memory This is a safety feature in case the power g...

Page 83: ...te Retrieval Access Code and other button presses to retrieve fax messages Cut out the Remote Retrieval Access Card on the last page and keep it in your wallet as an aid Using Remote Retrieval Access Code 1 Dial your fax number from a fax machine using touch tone 2 When your MFC answers immediately enter your Remote Retrieval Access Code 1 5 9 3 The MFC signals the kinds of messages received 1 lon...

Page 84: ...ing 4 FAX FWD NO see page 9 5 Once you have registered the number the MFC will change automatically to FAX FWD ON mode 2 Fax Forwarding 3 Paging 4 FAX FWD No 6 Fax Storage ON You can turn FAX STORAGE to ON or OFF 7 Fax Storage OFF 96 Retrieve a fax 2 Retrieve all faxes Enter the number of a remote fax machine to receive stored fax message s See page 9 5 3 Erase fax from the memory If you hear one ...

Page 85: ...MFC calls the remote fax machine The remote fax machine prints your fax messages Changing Fax Forwarding Number You can change the default setting of your fax forwarding number from a remote fax machine 1 Dial your fax number 2 When you hear the beep immediately enter your Remote Retrieval Access Code 1 5 9 3 When you hear two short beeps use the dial pad to press 9 5 4 4 Enter the new number of t...

Page 86: ...you typically send multiple faxes to the same destinations you may need more than the job numbers to know which faxes you must send again Selecting OFF IMAGE will print a portion of the fax s first page on the report to help you remember 1 Press Menu Set 2 4 1 2 Press to select OFF OFF IMAGE ON or ON IMAGE and then press Menu Set 3 Press Stop Exit Setting the Fax Activity Report Interval You can s...

Page 87: ...ction and key operations Lists names and numbers stored in Speed Dial memory in numerical order Lists information about the last 200 incoming and outgoing faxes TX means Transmit RX means Receive Prints a Transmission Verification Report for your last transmission Lists settings for GENERAL SETUP SETUP RECEIVE SETUP SEND SETUP REPORTS and TEL SERVICE The settings for REMOTE FAX OPT are included To...

Page 88: ...ing a Single Copy 1 Place the original face down in the ADF 2 Press Black Copy or Color Copy Do NOT pull on the paper while copying is in progress Making Multiple Copies You can make multiple copies in black and white 1 Place the original face down in the ADF 2 Using the dial pad enter the number of copies you want up to 99 For example press 3 8 for 38 copies 3 Press Black Copy Incoming faxes cann...

Page 89: ...el Temporary Copy Settings You can improve your copies by using the Copy keys Quality and Options These setting are temporary and the MFC returns to its default settings when you finish copying Copying Using Multiple Settings You can try different combinations of settings for the best results After you finish your settings using the Quality or Options keys the LCD shows Press if you want to select...

Page 90: ...opying now press Black Copy or Color Copy If you would like to choose additional copy options press Options and then select each setting Press Quality and FAST Fast copy speed and lowest ink consumption Use FAST to save time documents to be proof read large documents or many copies NORMAL Recommended mode for ordinary printouts Good copy quality with adequate copy speed BEST Use this mode to copy ...

Page 91: ...s Menu Set 5 If you selected GLOSSY press to select 4 COLOR or 3 COLOR and then press Menu Set 6 Press Black Copy or Color Copy OR Press for additional settings Press Options Menu Selections Options Factory Setting OPT OF COPIES01 NO OF COPIES XX 01 OPT PAPER TYPE PLAIN INK JET GLOSSY 4 COLOR or 3 COLOR TRANSPARENCY PLAIN OPT PAPER SIZE LETTER LEGAL A4 POST CARD 4 6 LETTER OPT BRIGHTNESS OPT ELG R...

Page 92: ...ss Options and press to select OPT BRIGHTNESS and then press Menu Set 4 Press to make a lighter copy OR press to make a darker copy and then press Set 5 Press Black Copy or Color Copy OR Press for additional settings Reducing and Enlarging Copies 1 Place the original face down in the ADF 2 Use the dial pad to enter the number of copies you want up to 99 3 Press Options and press to select OPT ELG ...

Page 93: ...the number of copies you want up to 99 3 Press Options and to select OPT SPECIAL and then press Menu Set 4 Press to select 2 IN 1 or OFF and then press Menu Set 5 Press Black Copy OR Press for additional settings 2 in 1 Note If you want to make a copy the same size as the original you should choose a reduction of 93 For example if you want to copy from letter to letter you should choose a reductio...

Page 94: ...in the following chart Press to scroll through the options for each setting and then press Menu Set to save your selection Press Stop Exit OR Press to select the next setting you want to change Press Menu Set and 3 Copy Quality 1 Press Menu Set 3 1 2 Press to select the copy quality and then press Menu Set 3 Press Stop Exit or QUALITY BEST QUALITY FAST 1 RED 2 GREEN 3 BLUE R 1 QUALITY 2 COLOR ADJU...

Page 95: ...r copy or press to make a lighter copy and then press Menu Set 4 Return to Step 2 to select the next color OR Press Stop Exit Copy Contrast You can change the contrast to help an image look sharper and more vivid 1 Press Menu Set 3 3 2 Press to increase the contrast or press to decrease the contrast and then press Menu Set 3 Press Stop Exit 2 COLOR ADJUST or R Light Dark B G ...

Page 96: ...y not be copied Paper money Bonds or other certificates of indebtedness Certificates of Deposit Internal Revenue Stamps canceled or uncanceled Selective Service or draft papers Passports United States Canadian Postage Stamps canceled or uncanceled Food Stamps Immigration Papers Checks or drafts drawn by Governmental agencies Identifying badges or insignias Copyrighted works cannot be copied howeve...

Page 97: ... Whenever you run out of a particular color ink you ll replace only the cartridge that s empty Bi directional Parallel Interface The parallel interface allows bi directional IEEE 1284 compliant communication with your computer USB Universal Serial Bus Interface allows for fast comunication with your computer Straight Paper Path The MFC can use various types of paper plain paper Ink Jet Paper gloss...

Page 98: ...ves data from your computer it begins the print process by loading paper from the multi purpose sheet feeder 1 Select the print command from your PC 2 Your PC sends a print command and data to the MFC The LCD shows RECEIVING DATA 3 If there are more pages the MFC begins to print the next page automatically 4 When the MFC finishes printing all data it returns to display the date and time Note You c...

Page 99: ...printing Printer Operation Key Ink Key When you press Ink the LCD shows If you are having trouble with one of the ink colors you may need to clean the print head See page 20 10 If you got an error message NEAR EMPTY or INK EMPTY you will need to replace the ink cartridge for the appropriate color See Error Messages page 20 1 Stop Exit Key If the LCD shows REMAINED DATA you can clear data remaining...

Page 100: ...ing a printer command language or page description language The printer drivers are on the supplied CD ROM The latest printer driver can also be downloaded from the Brother Solutions Center at http solutions brother com Features in the Printer Driver For Windows 95 98 98SE Me 2000 Professional and Windows NT 4 0 For more detailed information please see the on line Help in the printer driver Note T...

Page 101: ...t Click the Properties button The Brother MFC 3100C on BRMFC Properties dialog box will appear Select the Apply button to apply your selected settings To return to the default settings click the Default button then click the Apply button 1 Select the Paper Size and Orientation 2 Select number of Copies and Page Order 3 Select Paper Thickness Scaling and Paper Source Paper Size The paper size selec...

Page 102: ...ction sets the number of copies that will be printed 1 to 50 Collate With the collate check box selected one complete copy of your document will be printed and then repeated for the number of copies you selected If the collate check box is not selected then each page will be printed for all the copies selected before the next page in the document is printed Reverse Order Reverse Order prints the p...

Page 103: ...in the Paper Thickness selection to achieve the best paper handling and improved output for that paper type Regular Thin Thick Thicker Scaling The Scaling feature reduces or enlarges your document from 50 to 200 From the pull down box you can select from the preset settings or a free setting You can also select 2 in 1 printing for printing two pages on one sheet of paper Paper Source The Paper Sou...

Page 104: ...he quality selection allows you to choose the print resolution you want your document Print quality and speed are related The higher the quality the longer it will take to print the document The quality selections available vary depending on the media selection Draft The fastest print mode and the lowest ink consumption Use this mode to print large volume documents or a document for proofing Norma...

Page 105: ...ment type Photo Select this mode for photographic images Graphics Select this mode for documents that contain text or business graphics charts or clip art Custom If you want to select the color matching method and halftone method manually select this mode Paper Type Recommended Print Quality Selection Plain Paper Normal Inkjet Paper Fine Glossy Paper 4 color Super Fine Glossy Paper 3 color Super F...

Page 106: ... For Windows 95 98 98SE Me user s For Windows 2000 Professional Windows NT 4 0 user s Custom Setting You can customize your settings by selecting the type of Halftone or Color Enhance True2Life Halftone Pattern The MFC can use several methods to arrange where to place dots to express halftones There are some predefined patterns used to place dots and you can select which one is used for your docum...

Page 107: ...image You can increase or decrease the amount of color in an image to improve a picture which may appear washed out or weak White Balance This adjusts the hue of the white sections of an image Lighting camera settings and other influences will effect the appearance of white The white parts of a picture may appear to be slightly pink yellow or some other color By using this adjustment you can corre...

Page 108: ... direction only and provides higher print quality Fast Draft Mode You can print much more quickly than mono draft mode by using both black and cyan ink Advanced Tab Select the Apply button to apply your selected settings To return to the default settings click the Default button then click the Apply button Change the tab settings by selecting one of the following icons Watermark Device Options Wat...

Page 109: ...ocument Watermark Style You can change the Watermark s size and the position on the page by selecting the Watermark and then clicking the Edit button If you want to add a new Watermark click the New button and then select Text or Bitmap in the Watermark Style Watermark Text Enter your Watermark text into the Text Box and then select the Font Size Color and Style Watermark Bitmap Enter the file nam...

Page 110: ...r s system clock on your document Click the Setting button to change the Date and Time Format Position and Font To include a background with the Date and Time select Opaque When Opaque is selected you can click on the Color button to change the color of the Date and Time background Note The Date and Time indicated in the selection box shows the format that will be printed The actual Date and Time ...

Page 111: ...the following screen Select the Apply button to apply your selected settings To return to the default settings click the Default button then click the Apply button Web Update Web Update checks the Brother web site for updated drivers and then it automatically downloads and updates the printer driver on your computer Brother Solutions Center The Brother Solutions Center is a Web site offering infor...

Page 112: ...ections available for Windows XP Layout Tab 1 Orientation Select the Orientation which is how your document will be positioned on the paper Portrait or Landscape You can also install a Brother Native Driver as per the instructions of the Windows XP Quick Setup Guide For descriptions on the Printer Driver features refer to the Features in the Printer Driver For Windows 95 98 98SE Me 2000 Profession...

Page 113: ...W I N D O W S O N L Y 13 14 BHLMFC US MFC3100C FM5 5 2 Pages Per Sheet You can select 1 2 4 6 9 or 16 pages to be printed on one sheet of paper The image of each page will be reduced as needed to fit on the paper Paper Quality Tab 2 in 1 4 in 1 1 2 3 ...

Page 114: ...ment If you want to check or access additional selections for the print quality refer to the Print Quality in the Advanced Options 3 Color This selection allows a color document to be printed in Black White only Paper Type Recommended Print Quality Selection Plain Paper Normal Inkjet Paper Fine Glossy Paper 4 color Super Fine Glossy Paper 3 color Super Fine Transparencies Fine Transparencies mirro...

Page 115: ...ns Click the Advanced button in the Layout tab or Paper Quality tab to access the screen below 1 Paper Output Paper Size Select the paper size of the document you are printing This size should be the same as the paper size that is set in your application software Copy Count Type the number of copies you want 1 2 3 4 ...

Page 116: ...e Super Fine Inkjet Paper Normal Fine Super Fine Glossy Paper 4 color Fine Super Fine Glossy Paper 3 color Fine Super Fine Transparency Fine Super Fine Transparency mirror Fine Super Fine 3 Document Options Halftone Pattern The MFC can use several methods of arranging where dots are placed on the paper to express halftones You can select what predefined pattern is used for your document Photo This...

Page 117: ...ides higher print quality If you selected Plain Paper Auto works in Bi Directional Print mode Paper Thickness Depending on the thickness of the paper you are using you can improve the quality of your output by selecting the correct thickness This setting provides the best positioning of the paper for printing For example if you were printing on thin paper you would select Thin in the Paper Thickne...

Page 118: ...cific applications The Brother Control Center provides three categories of functions 1 Scan directly to a file E mail word processor or graphic application of choice 2 Copy operations 3 PC Faxing using the Brother MFL Pro PC Fax software MFC 3100C AutoLoad the Brother Control Center The Control Center is initially configured to automatically load each time Windows is started When the Control Cente...

Page 119: ...s or E mail applications The advantage of using the Scan to key is that you avoid the mouse clicks required to scan from your PC Before you can use the Scan to key on the control panel you must have connected the MFC to your Windows based PC and loaded the appropriate Brother Drivers for your version of Windows When you are ready to use the Scan to key make sure the Brother Control Center applicat...

Page 120: ...ginal create a file attachment and launch your E mail application displaying the new message waiting to be addressed Scan Image You can scan a color picture into your graphics application for viewing and editing 1 Place your original face down in the ADF 2 Press Scan to 3 Press to select SCAN IMAGE and then press Menu Set Scan OCR If your original is text you can have it automatically converted by...

Page 121: ...ation that is listed for the Word Processor Scanning Operations Scan to File allows you to scan directly to a disk file with two mouse clicks You can change the file type destination directory and file name as needed Scan to E mail enables you with just two mouse clicks to scan a picture or text document directly into an E mail application as a standard attachment You have the option of selecting ...

Page 122: ...rinter driver installed on the PC PC Fax Operation Send a Fax allows you to scan a picture or text original and automatically send the image as a fax from the PC using the Brother MFL Pro fax software Scanner Settings for Scan Copy and PC Fax Buttons When the Pop Up screen is displayed you can access the Scanner Settings window Click the Smart Click icon at the top right of the Brother Control Cen...

Page 123: ...ss Slide the adjuster from 0 to 100 Contrast Slide the adjuster from 0 to 100 Click OK to save your changes If you make a mistake or later decide to return to the original default setting just click the Restore Defaults button when the scanning mode is displayed To Access the Scanner Configurations Screen 1 Place the original in the ADF 2 Right click the appropriate Control Center button to displa...

Page 124: ...FM5 5 Scan to File Scanner Settings From the pull down list select the scanning mode that is appropriate for the type of file Faxing Filing and Copying Text for OCR Photos Photos High Quality Photos Quick Scan Custom Draft Copy or Fine Copy To change any of the settings for that mode click the Modify Settings button ...

Page 125: ...e pull down list select the type of file PaperPort Files MAX Self Viewing Files EXE PaperPort 5 0 Files MAX PaperPort 4 0 Files MAX PaperPort 3 0 Files MAX Windows Bitmap BMP PC Paintbrush PCX Multi page PCX DCX JPEG Image Files JPG TIFF Uncompressed TIF TIFF Group 4 TIF TIFF Class F TIF Multi Page TIFF Uncompressed TIF Multi Page TIFF Group 4 TIF Multi Page TIFF Class F TIF PDF Files PDF Portable...

Page 126: ...Modify Settings button E mail Application E mail Package From the pull down list select your E mail application E mail Settings Click the EMail Settings button to set up links The Links Preferences window will appear File Attachments Do not convert files Click this checkbox if you do not want to change the file type of attachments The Conversion Options will not be available grayed Convert MAX fil...

Page 127: ...ient window to be displayed when you choose Scan to E mail This feature works only with MAPI type E mail applications such as Microsoft Exchange Microsoft Outlook and Eudora QuickSend List You can create a list of Email names and addresses for quick selection Click the New button to add a name s to your QuickSend list Your Email phone book listing is displayed so you can select stored names or cre...

Page 128: ...5 Scan to Word Processor Scanner Settings From the pull down list select the scanning mode that is appropriate for the type of file Faxing Filing and Copying Text for OCR Photos Photos High Quality Photos Quick Scan Custom Draft Copy or Fine Copy To change any of the settings for that mode click the Modify Settings button ...

Page 129: ... use the OCR package that was installed with the Brother software Click the OCR Settings button to choose how the OCR application will read the pages you scan into your word processor application The Preferences window will appear Select your setting and click OK Auto Orientation Check this checkbox if you want your word processor application to read the page as it is set up Decolumnized Output Ch...

Page 130: ...iate for the type of file Faxing Filing and Copying Text for OCR Photos Photos High Quality Photos Quick Scan Custom Draft Copy or Fine Copy To change any of the settings for that mode click the Modify Settings button Target Application Application From the pull down list select the application you want to add to this Pop Up screen Click the Custom Link Settings button to set up links for your use...

Page 131: ...of the settings for that mode click the Modify Settings button Copy Settings Brother MFC 3100C Copies Enter the number of copies you want to print To change the copy options click the Copy Options button Click the OK button to save your Copy settings Send a Fax Scanner Settings From the pull down list select the scanning mode that is appropriate for the type of file Faxing Filing and Copying Text ...

Page 132: ...o Fax FAX Resolution Fine 200 200 To change the fax options click the FAX Options button Click the OK button when you are ready to save your FAX settings The MFL Pro Fax on COM1 Properties screen appears Select the Paper Size and Orientation Portrait or Landscape and click OK To return to the factory default settings click the Restore Defaults button ...

Page 133: ...g ScanSoft PaperPort can be accessed through the ScanSoft PaperPort program group See On Line Documentation for Multi Function Link Pro on the CD ROM The complete ScanSoft PaperPort Owner s Manual including ScanSoft TextBridge OCR is in the On Line Documentation on the CD ROM This chapter is only an introduction to the basic operations When you install Multi Function Link Pro ScanSoft PaperPort fo...

Page 134: ...g as you have the appropriate application on your computer to display it you can also double click a non PaperPort item to open it Organizing Your Items in Folders PaperPort has an easy to use filing system for organizing your items The filing system consists of folders and items that you select to view in Desktop View An item can be a PaperPort item or a non PaperPort item Folders are arranged in...

Page 135: ...ommand See PaperPort in the On Line Documentation on the CD ROM for more information about creating new links Using ScanSoft TextBridge OCR Converting Image Text to Text You Can Edit Software by ScanSoft TextBridge OCR is installed automatically with PaperPort when you install Multi Function Link Pro on your computer ScanSoft PaperPort can quickly convert the text on a ScanSoft PaperPort item whic...

Page 136: ...nd from the File pull down menu in the PaperPort window The Export XXXXX As dialog box will be displayed 2 Select the drive and directory where you want to store the file 3 Enter the new file name and choose the file type or select a name from the File Name text box You can scroll through the Directories and File Name listing for prompting 4 Select the OK button to save your file or Cancel to retu...

Page 137: ...cquire from the File drop down menu or select the TWAIN or Scan button The TWAIN 32 Brother MFL Pro Color Setup dialog box will appear Scanning a Document into the PC 1 Place the original face down in the ADF 2 Adjust the following settings if needed in the Scanner window Resolution Scan Type Black White Gray Error Diffusion True Gray 256 Color or 24 bit color Brightness Contrast Size 3 Select the...

Page 138: ...et the Scan Type to Gray Error Diffusion or True Gray Colors Choose either 256 Color which scans up to 256 colors 24 bit color which scans up to 16 8 million colors Although using 24 bit color creates an image with the most accurate colors the image file will be approximately three times larger than a file created with 256 Color Brightness Brightness Adjusting the brightness settings to obtain the...

Page 139: ...257 mm Executive 7 1 4 10 1 2 in Business Card 90 60 mm Custom User adjustable from 0 35 0 35 in to 8 5 14 in After you select a custom size you can adjust the scanning area further by using the left mouse button to drag the dotted outline of the scanning area This is required when you want to crop an image when scanning To scan business cards select the Business Card 90 60 mm size setting and pla...

Page 140: ... 2 In the Twain 32 Brother MFLPro Color Setup dialog box click the PreScan button The entire original will be scanned into the PC and will appear in the Scanning Area 3 To crop a portion of the original to be scanned drag any side or corner of the dotted outline in the Scanning Area with the left mouse button Adjust the dotted outline until it surrounds only the portion of the original you wish to...

Page 141: ...t TextBridge See Chapter 15 Scanner and Using ScanSoft PaperPort and TextBridge OCR For Windows Only Brother Resource Manager The Brother Resource Manager application must be running for you to use your MFC with your Windows computer Multi Function Link Pro software and the MFL Pro Printer Driver automatically load the Resource Manager as needed The Resource Manager allows the single bi directiona...

Page 142: ... the process of uploading the data to the MFC and exiting the remote setup program If an error message is displayed enter the correct data again then click OK Cancel This exits the remote setup application without uploading the data to the MFC Apply This uploads the data to the MFC but does not exit the remote setup application Print This command prints the selected items on the MFC You can not pr...

Page 143: ... Then you can use the Address Book Search feature to quickly find them to address your fax Setting Up User Information 1 From the Start menu select Programs Brother Brother MFL Pro Suite and then select PC FAX Setting The Brother PC Fax Setup dialog box will appear 2 Enter the required User information This information is required to create the Fax Header and Cover Page 3 To save the User Informat...

Page 144: ...ss Enter the number needed to access an outside line This is sometimes required by the local PBX telephone system Include header To add header information to the top of the fax pages being sent check the Header box Address Book file You can select different database files for use with the Address Book You must enter the path and file name of the database file or use the Browse button to view the f...

Page 145: ... S I N G P C F A X F O R W I N D O W S O N L Y 16 5 BHLMFC US MFC3100C FM5 5 User interface Select the User Interface in the Sending tab You have a choice of the Simple Style or the Facsimile Style Simple Style Facsimile Style ...

Page 146: ... you must select the Facsimile Style user interface You can register any address or group on one of the ten Speed Dial buttons To register an address in a Speed Dial location 1 Click the Speed Dial location you want to program 2 Click the address or group you wish to assign to the Speed Dial location 3 Click Add to program the Speed Dial location To clear a Speed Dial location 1 Click the Speed Di...

Page 147: ... N G P C F A X F O R W I N D O W S O N L Y 16 7 BHLMFC US MFC3100C FM5 5 The Address Book From the Start menu select Programs Brother Brother MFL Pro Suite and then click Address Book The Brother Address Book dialog box will appear ...

Page 148: ...ook dialog box you can add edit and delete stored information for members and groups 1 In the Address Book dialog box click the icon to add a member The Brother Address Book Member Setup dialog box will appear 2 In the Brother Address Book Member Setup dialog box type the member s information Name and Fax are required fields Click OK to save the member s information ...

Page 149: ...te a group The Brother Address Book Group Setup dialog box appears 2 Type the name of the new group in the Group Name field 3 In the Available Names box select each member to be included in the Group and then click Add Members you add to the group will be listed in the Group Members box 4 After all the members have been added click OK Editing Member Information 1 Select the Member or Group you wan...

Page 150: ...oing e mail a Vcard is an electronic business card that contains the sender s contact information To export the current telephone book 1 From the Address Book select File point to Export and then click Text OR Click Vcard and go to Step 5 2 Select the data fields you wish to Export from the Available Items column and then click Add 3 If you are exporting to an ASCII file select Divide Character Ta...

Page 151: ...rt an ASCII text file 1 From the Address Book select File point to Import and then click Text OR Click Vcard and go to Step 5 2 Select the data fields you wish to Import from the Available Items column and then click Add 3 Select Divide Character Tab or Comma based on what file format you are importing Note If you selected Vcard in Step 1 the Save as type will be Vcard vcf Note Select the fields f...

Page 152: ...f the file and then select Open Setting Up a Cover Page Access the Brother PC FAX Cover Page Setup from the FAX Sending dialog box by clicking See Sending a File as a PC FAX Using the Facsimile Style page 16 14 The Brother PC FAX Cover Page Setup dialog box will appear Note If you selected a text file in Step 1 the Files of type will be Text file csv ...

Page 153: ...ver page form you want Import BMP file You can insert a bitmap file such as your company logo in the cover page Select the BMP file by using the browse button and then select the alignment style Count Cover Page When the Count Cover Page box is checked the Cover Page will be included in the page numbering When this box is not checked the Cover Page will not be included Note If you are sending a fa...

Page 154: ...FM5 5 Sending a File as a PC FAX Using the Facsimile Style 1 Create a file in Word Excel Paint Draw or any other application on your PC 2 From the File menu select Print The Print dialog box will appear 3 Select Brother PC FAX as your printer and then click OK The FAX Sending dialog box will appear ...

Page 155: ...click Cover Page On and then click the Cover Page icon to enter or edit the cover page information 6 Click Start to send the fax Redial If you want to redial a number click Redial to scroll through the last five fax numbers and then click Start Sending a File as a PC FAX Using the Simple Style 1 Create a file in Word Excel Paint Draw or any other application on your PC 2 From the File menu select ...

Page 156: ...e fax number of the receiving party You can also use the Address Book to select destination fax numbers If you made a mistake entering a number click the Clear button to clear all entries 5 To send a Cover Page and note check the Cover Page On check box 6 When you are ready to send your fax click the Send icon 7 If you wish to cancel the fax click the icon Note You can also click the to create or ...

Page 157: ... You can receive and print e mail data at the same time by searching for a specified character string in the mail header It allows you to see the sender subject and relevant part of the mail content To Access the On Line Documentation To Install Automatic E mail Printing Optional Application 1 Insert MFL Pro CD ROM into your CD ROM drive 2 Click on Install Software from the main CD ROM screen 3 Cl...

Page 158: ...USB Equipped Apple Macintosh must be set up with Mac OS 8 5 9 2 The Brother Scanner Driver works only with Mac OS 8 6 9 2 Using Brother Printer Driver with Your Apple Macintosh To select the Printer 1 From the Apple menu open the Chooser 2 Click the MFL Pro Color icon On the right side of the Chooser click the printer to which you want to print Close the Chooser Note Before you can connect the MFC...

Page 159: ... You can change the settings for Paper Size Paper Thickness Paper Source Orientation and Scaling then click OK 4 From application software such as PaperPort click File menu and select Print Click Print to start printing Note If you want to change Copies Pages Quality Media Type and Color Mono select your settings before clicking Print Option Setup allows you to change Document and Printing Options...

Page 160: ...on using the following steps 1 Create a document in a Macintosh application 2 To begin the fax transmission select Print from the File menu The Printer dialog box appears When Printer is selected the top button shows Print and the Address button is grayed 3 From the Output pull down menu select Facsimile When Facsimile is selected the top button shows Send Fax and the Address button is available ...

Page 161: ...ck Your recipient will appear in the Destination Fax Numbers box 6 If you want to you can add your new recipients to the Stored Fax Number at this time by clicking New See Adding a New Member page 18 5 OR You can add a new group by clicking Group See Adding a New Group page 18 6 7 If you are finished addressing your fax click Send Fax Click OK to return to the Send Fax dialog box Note You can sele...

Page 162: ...en while you are addressing a fax Adding a New Member 1 To add a new member to the Address Book in the Facsimile dialog box click Address The Address Book dialog box appears 2 Click New The following dialog box appears 3 Type the name and fax number 4 If you want to you can store a comment in the Memo field if you wish up to 15 characters 5 Click OK to return to the Address Book dialog box ...

Page 163: ...ars 2 In the Group Name field type a name for your Group 3 From the Stored Fax Numbers box select the recipients for your Group and then click Your selection will appear in the box under the Group Name field 4 Click OK The Address Book dialog box reappears 5 Click OK The Print Facsimile dialog box reappears 6 If you are ready to send your fax click Send Fax Follow the steps on page 18 3 for sendin...

Page 164: ...US MFC3100C FM5 5 Using Brother TWAIN Scanner Driver with Your Apple Macintosh The Brother MFC software includes a TWAIN Scanner driver for Macintosh This Macintosh TWAIN Scanner driver can be used with application that supports the TWAIN specification You can use PaperPort for scanning ...

Page 165: ...lt by choosing the Select Source then click the PaperPort icon Afterward for each original you scan choose Acquire Image by clicking the PaperPort icon The Scanner setup dialog box will appear Scanning a Document into Your Macintosh G3 G4 or iMac 1 Place the original in the ADF 2 Adjust the following settings if needed in the scanner setup dialog box Resolution Color Type Brightness Contrast Scann...

Page 166: ...or True Gray Gray Error Diffusion is used for documents that contain photographic images or graphics Error Diffusion is a method for creating simulated gray images by placing black dots in a specific matrix instead of true gray dots True Gray also is used for documents containing photographic images or graphics This mode is more exact because it uses up to 256 shades of gray It requires the most m...

Page 167: ...st the scanning area Click and hold the mouse button as you drag the mouse to crop the image Business Card Size To scan business cards select the Business Card size setting 90 60 mm and place the business card at the top center of a carrier sheet When scanning photographs or other images for use in a word processor or other graphics application it is a good idea to try different settings for the c...

Page 168: ...tting Click OK If the scanned image is too light set a lower brightness value and scan the document again If the image is too dark set a higher brightness value and scan the document again Contrast The contrast setting is adjustable only when you have selected one of the gray scale settings but it is not available when Black White is selected as the Gray Scale Increasing the contrast level by drag...

Page 169: ...the actual color displayed is less important than its vividness Relative Colorimetric Matching The colors that fall within the gamuts of both devices are left unchanged Some colors in both images will be exactly the same a useful outcome when colors must match quantitatively What that means is that if the color is inside the gamut it will stay the same color However if the color is outside the gam...

Page 170: ...view click Start to scan the image 1 Insert the original face down in the ADF 2 Click PreScan The entire original will be scanned into your Macintosh G3 or iMac and will appear in the Scanning Area of the Scanner dialog box 3 To scan a portion of the prescanned image click and drag the mouse to crop it 4 Insert original in the ADF of the Brother MFC again 5 Adjust the settings for Resolution Color...

Page 171: ...nected to the telephone line or premises wiring using a compatible modular jack that is Part 68 compliant See the Installation section of this manual for details The REN is useful to determine the quantity of devices you may connect to your telephone line and still have those devices ring when your telephone number is called In most but not all areas the sum of the RENs of all devices connected to...

Page 172: ...your use of this information including direct special or consequential damages There are no warranties extended or granted by this document WARNING Important About the Interface Cable This machine has been certified to comply with FCC standards which are applied to the USA only The filter core supplied with your MFC should be attached to the shielded interface cable according to FCC 15 27 a In add...

Page 173: ...ning the equipment off and on the user is encouraged to try to correct the interference by one or more of the following measures Reorient or relocate the receiving antenna Increase the separation between the equipment and receiver Connect the equipment into an outlet on a circuit different from that to which the receiver is connected Consult the dealer or an experienced radio TV technician for hel...

Page 174: ...hat the total of all products plugged into the wall outlet does not exceed 15 amperes USA only 12 Do not place anything in front of the machine that will block received faxes Do not place anything in the path of received faxes 13 Wait until pages have exited the machine before picking them up 14 Never push objects of any kind into this product through cabinet slots since they may touch dangerous v...

Page 175: ...in the U S and other countries Macintosh and QuickDraw are a registered trademarks and iMac and iBook are trademarks of Apple Computer Inc PaperPort and TextBridge are registered trademarks of ScanSoft Inc IBM IBM PC and Proprinter are registered trademarks of International Business Machines Corporation Hammermill and JetPrint PHOTO are a registered trademark of International Paper Each company wh...

Page 176: ...cartridge is not installed properly Re install the ink seating it properly See page 20 17 CHECK DOCUMENT Original was not inserted or fed properly or document was longer than about 40 inches 90cm See page 20 3 CHECK PAPER SIZE Your paper is not correct size Reload the correct paper and then press Black Fax Start CHECK PAPER MFC is out of paper Add paper and then press Black Fax Start COMM ERROR Po...

Page 177: ...can cause the ink to run out Replace the ink cartridges See page 20 17 LOW TEMPERATURE The print head detects low temperature Use the MFC at the warm room or warm your room MACHINE ERROR XX MFC has a mechanical problem Call Brother Customer Service In USA 1 800 284 4329 In Canada 1 877 BROTHER In Montreal 1 514 685 6464 NEAR EMPTY One or more of the ink cartridges are running out of ink The MFC wi...

Page 178: ... front of control panel 1 Remove any paper from the ADF that is not jammed 2 Pull the jammed original out toward the front of the MFC 3 Press Stop Exit Original is jammed inside back of control panel 1 Remove any paper from the ADF that is not jammed 2 Open the control panel cover 3 Pull the jammed original out toward the back of the MFC 4 Close the control panel cover Control Panel Cover ...

Page 179: ...icult to pull the jammed paper try to pull it while pushing downthePaperRelease Lever Note To improve the reliability of paper feeding turn on Secure Feed mode by pressing the Ink and Scan to keys simultaneously The MFC will then feed paper more securely but paper feeding will take a longer time To turn off the Secure Feed mode simultaneously press Ink and Scan to again Note If PAPER JAM occurs fr...

Page 180: ...rol panel cover by lifting it toward you and then lift the top cover toward the back 2 Remove the jammed paper 3 Close the control panel cover and top cover Paper is jammed inside the front of the MFC 1 Pull the paper toward you Note If the jammed paper is under the Print Head unplug the MFC and then you can move the Print Head to remove the paper ...

Page 181: ...rips the pieces of paper may get stuck inside the back of the machine 1 Remove any paper from the multi purpose sheet feeder that is not jammed 2 Open the Paper Jam Cover 3 To loosen the paper slide the Paper Width Guide to the widest position 4 Use tweezers to pull out the ripped pieces of paper 5 Close the Paper Jam Cover Paper Jam Cover Paper Width Guide ...

Page 182: ...e Chapter 3 The recommended environment for your MFC is between 68 F to 91 F Printing Appears Dirty or Ink Seems to Run Make sure you are using the recommended paper See Chapter 3 Don t handle the paper until the ink is dry The recommended environment for your MFC is between 68 F to 91 F White Lines in Text or Graphics Clean the print head See Cleaning the Print Head page 20 10 Stains Appear on th...

Page 183: ...x message while a custom feature signal comes through on the line the signal can temporarily interrupt or disrupt the fax data Brother s ECM feature should help overcome this problem This condition is related to the telephone system industry and is common to all devices that send and receive information on a single shared line with custom features If avoiding a slight interruption is crucial to yo...

Page 184: ...Make sure the MFC is not displaying an error message on the LCD 3 Make sure no other device drivers which also communicate through the parallel port are running automatically when you boot up the computer such as drivers for Zip Drivers External CD ROM Drive etc Suggested areas to check Load Run command lines in the win ini file or the Startup Group 4 Check with you computer manufacturer to confir...

Page 185: ... The MFC will clean the print head automatically When cleaning is finished the MFC will go back online automatically Print Quality Check If the print quality is not satisfactory you can print a Print Quality Check Sheet to help you identify settings you may need to change 1 Press Menu Set 4 2 Press Black Fax Start The MFC begins printing the Print Quality Check Sheet The LCD shows 3 Check the shee...

Page 186: ...eaning the colors After cleaning is finished press Black Fax Start The MFC will start printing the Print Quality Check Sheet again and then return to STEP A If STEP A is OK press 1 to proceed to STEP B STEP B Alignment Check The LCD shows Check the 600 DPI and 1200 DPI test prints to see if number 5 most closely matches number 0 If the number 5 sample of both the 600 DPI and 1200 DPI are the best ...

Page 187: ...r the clogged color Perhaps the ink cartridge was in your MFC over six months or the expiration date written on the cartridge package has passed Or the ink may not have been stored properly before use After replacing the ink cartridge check it by printing another Print Quality Check Sheet If the problem still exists repeat the cleaning and test print procedures at least five times for the new ink ...

Page 188: ...ee Replacing the Ink Cartridges page 20 17 2 Attach the protective yellow bar 3 Unplug the MFC from the telephone wall socket 4 Unplug the MFC from the AC outlet 5 Unplug the Parallel cable or USB cable from the MFC Caution Do not unplug the MFC after a print job until you hear the final click 6 Remove the paper wire extension paper tray document support document wire extension and keep them If yo...

Page 189: ...ranty 7 Wrap the MFC in the plastic bag and place it in the original carton with the original packing material 8 Pack the printed materials in the original carton as shown below Do not pack the used ink cartridges in the carton Keep all separate parts and printed materials to use with your Exchange machine Note If you are returning your machine to Brother as part of the Exchange Service pack only ...

Page 190: ...20 15 T R O U B L E S H O O T I N G A N D R O U T I N E M A I N T E N A N C E BHLMFC US MFC3100C FM5 5 9 Close the carton ...

Page 191: ...ip under the bar with isopropyl alcohol on a lint free cloth Cleaning the MFC Printer Platen WARNING Be sure to unplug the MFC from the AC power outlet before cleaning the printer platen Be careful not to touch the paper feed star wheels flat cable and encode film When you want to clean your MFC printer platen wipe it with a lint free cloth that is dry Do NOT Touch Do NOT Touch Flat Cable Clean He...

Page 192: ...mpts so you replace the color cartridges in the appropriate order When the ink cartridges are running low you must use the Ink key to begin the cartridge replacement Steps 1 to 3 If the ink is empty skip to Step 4 1 Press Ink 2 Press 2 to choose 2 REPLACE INK If one or more ink cartridges are empty for example Black the LCD showsINK EMPTY BLACK and PLS OPEN COVER 3 Open the control panel cover and...

Page 193: ...ed Example DID YOU CHANGE BLCK 1 YES 2 NO If the ink cartridge you installed is not a brand new one please make sure to select 2 9 For each new cartridge press 1 on the dial pad to reset the ink dot counter for that color automatically The ink dot counter enables the MFC to notify you when a color is running low The MFC will enter a cleaning cycle for approximately 3 minutes for each replaced cart...

Page 194: ...installation because the colors were mixed Once you open an ink cartridge install it in the MFC and use it up within six months of installation Use unopened ink cartridges by the expiration date written on the cartridge package DO NOT refill the ink cartridges Attempting to use refilled cartridges and using incompatible inks may cause damage to the print head in this machine and such damage will n...

Page 195: ...0 2400 Automatic Fallback Cut Sheet Size Min 3 5 W 5 0 L Max 8 5 W 14 0 L Scanning Width 8 2 inches 208 mm Printing Width 8 inches 203 2 mm Automatic Document Feeder ADF up to 20 sheets 20 lbs Multi purpose Sheet Feeder 100 Sheets 20 lbs Printer Type Ink Jet Gray Scale 256 levels Error Diffusion Display LCD 16 characters Polling Types Standard Sequential Contrast Control Automatic Super Light Supe...

Page 196: ... 217 mm Weight 14 3 lb 6 5 kg Print Method Piezo with 75 4 nozzles Resolution 2400 1200 dots per inch DPI 1200 1200 dots per inch DPI 600 600 dots per inch DPI 600 300 dots per inch DPI 600 150 dots per inch DPI Print Speed up to 10 pages minute Mono up to 8 pages minute Color Print Width 8 inches 203 2 mm Disk Based Fonts 35 Parallel Interface A bi directional shielded IEEE 1284 Compliant paralle...

Page 197: ...int delivery to the paper output tray We recommend that you remove printed sheets from the paper output tray immediately after printing Processor Minimum Speed Minimum RAM Recommended RAM Available Hard Disk Space Minimum System Requirements Computer Platform Operating System Version 95 98 98SE Me NT Workstation 4 0 2000 Professional XP OS 8 5 8 51 Printing Only OS 8 6 9 2 Printing and Scanning Ma...

Page 198: ...tely 950 page Black cartridge at 5 coverage with 600 150 dpi resolution Draft Approximately 450 page Color cartridge at 5 coverage with 600 150 dpi resolution Draft Note These numbers are based on consecutive printing the numbers will vary based on print frequency and number of pages The MFC periodically cleans the print head to maintain print quality This process consumes a small amount of ink ...

Page 199: ...ion Cancel Job Cancels a programmed job like Delayed Fax or Polling CNG tones The special tones beeps sent by fax machines during automatic transmission to tell the receiving machine that they are a from fax machine communication error or Comm Error An error during fax sending or receiving usually caused by line noise or static Coding Method Method of coding the information contained in a document...

Page 200: ... Dial key for Broadcasting Ink button Cleans the print head and or resets the ink dot counter after replacing an ink cartridge Interval The preprogrammed time period between automatically printed Activity Reports You can print Activity Reports on demand without interrupting this cycle LCD liquid crystal display The display screen on the MFC that shows interactive messages during On Screen Programm...

Page 201: ...C answers in FAX mode Ring Volume Volume setting for the MFC s ring scanning The process of sending an electronic image of an original paper document into your computer ScanSoft PaperPort for Brother A document management application that enables you to view incoming faxes and scanned documents Speed Dial A preprogrammed number for easy dialing You must press the Search Speed Dial button and then ...

Page 202: ... 2 Brother Control Center using and configurating 14 1 to 14 15 C canceling Fax Forwarding 9 4 fax jobs in memory 6 6 jobs awaiting redial 7 6 Paging 9 4 scheduled jobs 6 6 cleaning cycle 2 10 print head 20 10 printer platen 20 16 scanner 20 16 CNG tones 1 5 connecting 2 1 control panel cover 2 8 20 3 control panel overview 1 3 copy brightness 11 5 color adjustment 11 8 contrast 11 8 default setti...

Page 203: ...y 20 7 erasing from the memory 9 4 forwarding 9 1 9 4 polling 6 5 reducing to fit on paper 6 3 retrieving from a remote site 9 5 ring delay setting 6 2 sending automatic fax redial 7 4 automatic transmission 7 3 canceling from memory 7 6 color Fax 7 4 contrast 7 2 delayed 7 7 from memory dual access 7 4 manual transmission 7 3 overseas 7 7 polling 7 8 Real Time Transmission 7 5 resolution 7 3 FCC ...

Page 204: ...e style 16 15 phone line difficulties 20 7 Polling 6 5 7 8 power 2 2 2 4 failure 5 5 outlet 2 4 print area 3 3 difficulty 20 7 fax from memory 6 4 jam 20 4 resolution S 2 size 3 2 specifications S 2 Q Quality key 11 2 11 3 R receive mode EXT TEL TAD 6 1 FAX ONLY 6 1 MANUAL 6 1 Redial Pause 7 4 8 6 Remote Fax Options 9 1 Reports 10 1 resolution fax standard Fine SuperFine Photo color fax S 1 settin...

Page 205: ... signals on Pulse line Canada only 8 6 Transmission Verification Report 10 2 troubleshooting 20 1 error messages on LCD 20 1 if you are having difficulty with 20 7 incoming Calls 20 8 phone line 20 7 printer 20 8 printing or receiving faxes 20 7 sending faxes 20 7 two line phone system 2 13 2 14 2 15 V Volume setting beeper 5 4 ring 5 4 W Warranties iii Canada vi Notice Disclaimer iii USA iv World...

Page 206: ...I 5 I N D E X BHLMFC 3100C FM5 5 ...

Page 207: ...ing paging and remote retrieval features Using Remote Retrieval Access Code 1 Dial your fax number from a fax machine using touch tone 2 When your MFC answers immediately enter your Remote Retrieval Access Code 159 3 Your MFC signals the kinds of messages received 1 long beep Fax message s No beeps No messages 4 After 2 short beeps enter a command 5 Press 9 0 to reset your MFC when you finish 6 Ha...

Page 208: ...EVE A F AX Press 9 6 then to Retrieve all faxes press 2 then enter the number of remote fax machine followed by After the beep hang up and wait Erase all fax messages press 3 Changing Remote Retrieval Access Code 1 2 Enter a three digit number from 000 to 999 The cannot be changed 3 Press Menu Set 4 Press Stop Exit Remote Commands C HANGE P AGING F AX F ORWARDING S ETTING Press 9 5 then to Turn fe...

Page 209: ... a representative designated by the supplier Any repairs or alterations made by the user to this equipment or equipment malfunctions may give the telecommunications company cause to request the user to disconnect the equipment Users should ensure for their own protection that the electrical ground connections of the power utility telephone lines and internal metallic water pipe system if present a...

Page 210: ...center may not be compatible with the power available in foreign countries Using USA or CANADA models overseas is at your own risk and will void your warranty Brother International Corporation 100 Somerset Corporate Boulevard P O Box 6911 Bridgewater NJ 08807 0911 USA Brother International Corporation Canada Ltd 1 rue Hôtel de Ville Dollard des Ormeaux QC CANADA H9B 3H6 Visit us on the World Wide ...

Reviews: